Skoda amundsen Owner's Manual
Hide thumbs
Also See for amundsen:
- Owner's manual (84 pages) ,
- Operating instructions manual (76 pages) ,
- Manual (40 pages)

Related Manuals for Skoda amundsen


Summary of Contents for Skoda amundsen
- Page 1 SIMPLY CLEVER OWNER'S MANUAL OWNER'S MANUAL Amundsen and Bolero infotainment systems...
- Page 2 3V0012720ED...
- Page 3 Preface This Owner's Manual is intended for the Amundsen and Bolero infotainment systems. Please read these Owner's Manual carefully, because the operation in ac- cordance with these instructions is a prerequisite for proper use of the unit.
-
Page 4: Table Of Contents
Table of Contents Telephone Introductory information Important information about this Owner's Manual Pair and connect Explanations and further information Telephone functions Abbreviations Text messages (SMS) Hotspot (WLAN) and data connection Introductory information Hotspot (WLAN) Important notes Data connection Device overview SmartLink Device operation and settings Introductory information... -
Page 5: Important Information About This Owner's Manual
ŠKODA AUTO hereby declares that the ŠKODA Infotainment systems meet the basic requirements and additional provisions of the 1999/5/EC Directive with This Owner's Manual is valid for all types of Amundsen and Bolero infotain- reference to radio equipment and telecommunications devices. -
Page 6: Explanations And Further Information
Explanations and further information Structure of these Owner's Manual The Owner's Manual are hierarchically divided into the following areas. Main chapters (e.g. Introductory information) - the title of the main chapter is ■ always shown on the lower right side of the page ■... -
Page 7: Abbreviations
Abbreviation Definition Abbreviations Identification of a traffic information station Abbreviation Definition Network protocol for establishing a wireless connection of UPnP planar map display an external device with the device spatial map display Vehicle identification number ® a Bluetooth profile for the one-sided audio data transmis- Audio format A2DP sion... -
Page 8: Introductory Information Important Notes
High volumes can cause hearing damage. ■ http://go.skoda.eu/compatibility WARNING Due to the large number of mobile phones as well as the ongoing develop- Never leave a communication device, e.g. mobile phone, audio sources, in ■... -
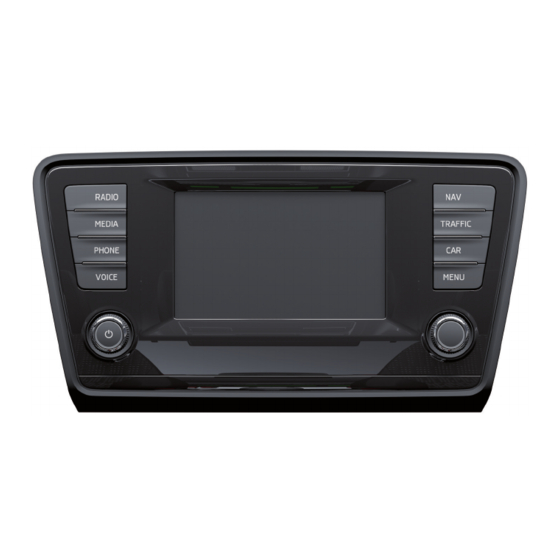
Page 9: Device Overview
Device Description - Amundsen (not applicable to Yeti) Applications The device may differ depending on the vehicle model, in which it is installed Applications can be installed in external devices (e.g. - Page 10 Device Description - Amundsen (applies to Yeti) Device Description - Bolero (not applicable to Yeti) The device may differ depending on the vehicle model, in which it is installed in both its appearance and in the arrangement of the controls.
- Page 11 Device Description - Bolero (applies to Yeti) External module (not applicable to Fabia) Fig. 6 External infotainment module: Bolero / Amundsen The external module is located in the storage compartment on the front pas- senger side. Fig. 5 Equipment overview SD1 card slot Left control dial for switching the device on and off;...
- Page 12 Device on / off Unit set-up » page 15 - Setting the vehicle systems (dos not apply to Yeti) » page 62 › To power on/off the device, press Navigation » page 46menu (Applies to Amundsen) Introductory information...
-
Page 13: Device Operation And Settings
Menu Telephone » page 31 Device operation and settings Target-oriented traffic information (TMC) (applies to Amundsen) » page 58 Device operation Media Command menu » page 29 Operating principles Menu SmartLink » page 41 When connecting a supported external device instead of the symbol ... - Page 14 Scroll symbol - positioning and moving in the menu is possible by moving Note fingers on the scroll symbol up or down Depending on the equipment fitted, the device can be operated using the but- Menu item with “Checkbox” tons on the multifunction steering wheel. Additional information »...
-
Page 15: Voice Control
Voice commands that can be issued, are indicated during voice control in “quo- Operating using an application in the external device tation marks”. Applies to Amundsen (not applicable to Yeti). WARNING Several device functions can be operated using an application in the supported do not use the function of the phone voice control in an emergency . - Page 16 not recognizing a voice command Operation principle If a voice command is not detected three times in succession from the device, then the voice control is stopped. Fig. 14 Screen areas and screen display Note The display of the Voice mode symbols are dependent of the equipment fitted also on the display of the instrument cluster.
-
Page 17: Device Settings
Stop/restore voice command input Pairing and connecting a phone to the device Stop Home address (applies to Amundsen) This allows you more time for the voice command input. The selected menu item is with the symbol provided. - Page 18 ■ Switch off screen (in 10 seconds) - Enable / disable the automatic power off func- Sound settings tion The scope of the following menu is dependent on the vehicle equipment with Brightness: - Adjusts the brightness of the screen ■...
- Page 19 ■ When a language is selected which does not support voice control, the de- ■ ternal device (applies to Amundsen) vice will indicate with a message on the screen . ■ Deactivate - Prohibition of device operation through an external device The messages are generated by the device.
-
Page 20: Radio
Wireless settings To perform a Software Update (Z. B. Bluetooth or radio station logo) Tap the functional surface Update software. Applies to Amundsen (does not apply to Yeti). Displaying system information. › Press the button, then tap on the function surface Tap on→ WLAN. -
Page 21: Radio Operation
Information symbol in the status line Radio Symbol Meaning Operation Traffic signal is available Traffic signal is not available Introduction to the subject RDS function is switched off (FM) The device allows analogue radio reception of FM and AM frequency ranges as AF Alternative frequency is switched off (FM) ... - Page 22 List of available stations Station buttons for your favourite stations Fig. 18 Station buttons For each field of broadcasting, there are station buttons available to store Fig. 17 Example, the list of available stations: FM / DAB each station That are split into groups of three »...
-
Page 23: Settings
Advanced Settings (FM) Note › Select the FM band in the Radio main menu and tap on the function surface The following image formats are supported: jpg, gif, png, bmp. ■ Tap on→ Advanced settings. We recommend a resolution of up to 500 x 500 pixels. -
Page 24: Media Operation
If a DAB station is also not available in the FM band due to poor reception, the Media device will be switched to mute. Operation L-band For the DAB radio reception in different countries, different broadcasting rang- Main menu es are used. In some countries the DAB radio reception is only possible in the so called L-band. - Page 25 Function Action Select audio source Tap Play the next title Fig. 20 Finger movement to the left of the Display examples of audio source screen area » Fig. 19 on page 22 selection Switch on/off the random playback Tap from the current album or folder Switch on/off the repeat playback Tap ...
-
Page 26: Audio Sources
® Currently playing title / track playback stopped ■ Bluetooth - Settings for the Bluetooth function Remove safely: - safe removal of the audio source ■ The title cannot be played (tapping on the function surface shows the ... - Page 27 The SD card slot/s is/are located in an external module in the glove compart- CAUTION ment on the passenger side. USB extension cords, or reducers may impair the function of the connected au- dio source. Insert SD card (Does not apply to Fabia) ›...
- Page 28 , then it cannot be connected using Bluetooth iPod, iPad) WLAN Applies to Amundsen (Does not apply to Yeti). The device allows you to play audio files from one of the external devices con- nected to the device WLAN. ›...
-
Page 29: Pictures Image Viewer
Rotate the image 90° clockwise Display the initial image size while retaining the aspect ratio Guidance to GPS coordinates (Amundsen; the display only occurs if the im- age contains GPS coordinates) (applies to Amundsen) » page 51... - Page 30 Operation Action Supported image file formats and sources Finger motion across the screen to the right (with starting representation) Go to previous image Supported image sources Tap Source Type Specification file system Touch screen using two fingers and pull SD card Standard size SD, SDHC, SDXC...
-
Page 31: Media Command
Introduction to the subject Playback Control Increase / decrease the tablet volume Applies to Amundsen (Does not apply to Yeti). Selection of the playback source The Media Commandfunction allows playback of audio files or videos in up to Wireless settings ... - Page 32 WLAN settings Note Initiation of Tablet-operation Some Tablet types allow playback of audio files or videos by an inserted SD card in the tablet. Playback of these tracks may be limited. Return to main menu Supported file formats Select source and control playback operating system operating system...
-
Page 33: Telephone
™ If the device to is connected to an external device via Apple CarPlay , then the Telephone ® use of the Bluetooth Connection is not possible and the phone menu is not available. Introductory information ™ If the device is connected to an external device via Android Auto then the ®... -
Page 34: Pair And Connect
Enter the telephone number Pair and connect Display the phone contact list, depending on the connection type » page 31, Possible connection types Introduction to the subject Display a collection of text messages (SMS) (with new messages the ... - Page 35 ® available for Bluetooth device can be displayed. Fig. 30 List of paired external devices / Bluetooth ® profiles http://go.skoda.eu/compatibility › In the Telephone main menu, tap on the function surface, Tap on → Blue- Pairing and connection process tooth →...
-
Page 36: Telephone Functions
Delete the paired external device Delete the last number entered ▶ To delete, tap on one of the following function surfaces. Display of function surfaces / for the movement of the cursor in the input line »... - Page 37 Connecting to a favourite Processing the telephone number of the contact before dialling The functional surfaces of preferred contacts allow for an immediate dial of Start route guidance to the contact address (applies to Amundsen) the contact telephone number. Import list The favourites are available in two storage groups.
- Page 38 Call list Telephone call Fig. 34 Call history / Contact details Fig. 35 Incoming call / Current conversation › In the Telephone main menu, tap on the function surface, a call list is dis- played » Fig. 34 - . The call list can also be displayed during a telephone call.
-
Page 39: Text Messages (Sms)
Switch on/off hands-free (call to the telephone / switch to device) End conference call ▶ To switch off the hands-free system, in the Telephone main menu, tap on Conference call details the function surface Tap on hands-freeduring a call. Conference details ▶... - Page 40 Viewing the text message New text message After opening the view message function » Fig. 39 - the following functions can be executed. The text can be read out by the device's generated voice The text can be stored as a draft ...
-
Page 41: Hotspot (Wlan) And Data Connection
Introduction to the subject ▶ Reply with template - Reply using a template Applies to Amundsen (does not apply to Yeti). ▶ Display numbers - Recognition of telephone numbers in the message in- cluding the contact number (recognized numbers can be dialled directly... -
Page 42: Data Connection
establish secure connection using WPS Connect ▶ ▶ WLAN in device on. WLAN in device on. ▶ ▶ Press the button, then tap on the function Tap on→ WLAN → WLAN → Show the list of available hotspots, if necessary, update the list by tapping ... -
Page 43: Smartlink
SmartLink communication system. functioning of the SmartLink function“”. http://go.skoda.eu/connectivity-smartlink Main menu SmartLink offers the ability to display certified applications on an external de- vice equipped with a USB device on the device screen and to operate them. -
Page 44: Android Auto
Disconnection (appears with active connections) ™ Android Auto Settings for the menu SmartLink » page 42 Introduction to the subject Connection set-up ▶ Connect the external device via a connecting cable to the USB input » Own- ™ The Android Auto connection can be set up under the following conditions. -
Page 45: Apple Carplay
Main menu - functional areas and information in the area Main menu Navigation applications Telephone applications Fig. 45 Overview regarding current applications, telephone calls, accepted text Apple CarPlay™: Main menu messages, tasks in the working directory, weather or similar Music applications ... - Page 46 Mirrorlink applications. ® ▶ In the main menu of Mirrorlink connection select the desired application in http://go.skoda.eu/connectivity the field » Fig. 47 on page 44. The application starts and the following function surfaces are displayed. Main menu Display of functional surfaces below / above ...
- Page 47 function issues ® If problems occur with the MirrorLink connection, then one of the following messages may occur on the screen. Fault: Transfer- Disconnect the external device and reconnect. ■ MirrorLink® audio is not available. - Disconnect the external device and reconnect ■...
-
Page 48: Navigation
» page 24, SD card. Applies to Amundsen. If the original SD card should be damaged or lost, a new original SD card can be Route guidance is started as follows. -
Page 49: Search For Destination And Enter
▶ Route details - Displays the route details » page 57 ■ Manoeuvre - Display graphical driving recommendations (if route guidance is ▶ Congestion ahead - Manual adjusts traffic conditions » page 59 enabled) ▶ Call destination - Search / enter a new destination / stopover »... - Page 50 Description of the function surfaces » Fig. 51 Enter destination using the address Choice of search - Searching for a destination or POI (point of interest) by name - Search for a point along the route (only works with active route guid- ance) ...
- Page 51 › If several places were found, then the list can be scrolled through by turning Set the desired value and the destination input by pressing the function sur- the controller or sliding the slider. face confirm. If information is available about the point entered in the navigation data, then Note these will be displayed instead of the GPS coordinates (e.g.
- Page 52 “Flagged destination” Save (current vehicle position) Destination memory (manually saved destinations) ▶ In the Navigation main menu, tap on the functional surface → Store posi- tion. ▶ By then pressing the functional surface Rename the flagged destination can be renamed and stored as a destination in the destination memory. By storing the next flagged destination, the last flagged destination will be overwritten.
-
Page 53: Import My Destinations
› played. In the Navigation main menu, tap on the functional surface Tap on→ Man- age memory → Delete my POIs → Delete. http://go.skoda.eu/my-destination › Tap the function surfaceDelete and confirm the deletion. Custom destination in vCard-format Image with GPS coordinates... -
Page 54: Map
› Tap on the function Surface in the image, a menu opens with the option to Tap map point start route guidance. Fig. 57 Menu after tapping the map point Map description Fig. 56 Card description By tapping the map in the Main Menu Navigation the symbol and a menu with the following menu items appear (depending on the context) »... - Page 55 Size of the manually set map scale Options for map display Size of the automatically set map scale Turn on / off the automatic change of scale Fig. 58 Map options Map view in reduced scale Current elevation ...
-
Page 56: Route Guidance
› The map is in the 2D display. To switch on/off the road sign display in the main menu Navigation, tap on the function surface Tap→ map → Show traffic signs. The map is centred (the functional surface / is hidden). ... - Page 57 Area with functional surfaces Calculate the most economical route with shortest travelling time and distance travelled – the route is highlighted green Detailed destination information Calculate the fastest route to the destination, even if a detour is nec- ...
- Page 58 The timing of the navigation message is dependent on the road being used Graphical driving recommendations and travel speed (e.g. on motorways the first announcement will sound for about 2000 m / 6000 ft before the manoeuvre). The type of navigation announcements can be set: → Nav. announcements. Most common routes The unit automatically stores up to three of the most commonly travelled routes.
-
Page 59: Route
▶ Within 15 min. - route guidance is continued taking into account the calcula- Chosen route type (economic, fastest, shortest) ted route. Current vehicle position (address / GPS coordinates) ▶ Between 15 min and 120 min - the screen displays the message Continue route The display of the arrival time or the remaining driving time can be adjusted as guidance?, after you confirm the message, the route guidance continues using follows. -
Page 60: Traffic Reports
Store route The device allows you to receive TMC traffic reports (Traffic Message Channel), ▶ In the area , tap the functional surface Save. which contain information regarding traffic obstructions. ▶ Save the edited route as a new route or replace the existing saved route. ›... -
Page 61: Settings
Detail of the traffic report Dynamic route The device allows an evaluation of the traffic reports received during the route Fig. 64 guidance. In fulfilling the following conditions a bypass route is calculated, and Detail of the traffic report the appropriate announcement is issued. The dynamic route function is turned on. - Page 62 ■ Suggest 3 alternative routes - Switch on/off the menu for alternative routes (eco- ■ Update My POIs (SD / USB) - Import / update your own POI categories (Personal nomical, fast, short) POI) Route: - Setting the preferred route Import objectives (SD / USB) - Import destinations in vCard format ■...
- Page 63 Advanced settings › In the Navigation main menu, tap on the functional surface → Advanced set- tings. Time display: - Select the time display in the status line ■ ■ - Estimated arrival time at destination - Travelling time - Estimated travelling time to the destination ■...
-
Page 64: Vehicle Systems
Vehicle systems Driving data CAR - vehicle setting Fig. 66 Driving data Introduction to the subject In the menu CAR travel data and information displayed on the vehicle and some vehicle systems can be set. Description of the individual systems »... - Page 65 ■ Winter tyres - Setting an alarm on reaching the speed limit for winter tyres Vehicle condition Speed warning - Switching the function Winter tyres on and off ■ Warning at - Setting the speed for the warning ■ Fig. 67 Vehicle condition Light ›...
- Page 66 ■ Medium - Medium distance ■ Central locking - Settings for opening and closing of doors Far - Large distance Door unlocking: - Set the door unlocking feature ■ ■ Very far - Very large distance All doors - All doors ■...
- Page 67 Reset to factory settings › Press the button, then tap on the function surface → Factory settings. In this menu you have the possibility to reset the menu items in the settings of the vehicle systems to factory settings. Reset all settings and data ■...
-
Page 68: Index
Restart Audio Conditions for coupling Device Media Conference call connect to the telephone Radio Software update Configuration wizard Audio source Device Description - Amundsen 7, 8 Custom destination Automatic driving lights when raining Device Hotspot Automatic locking Device language Index... - Page 69 Device menu Emergency call Enter destination Images Media Command address Display Media (Audio) Destination on the map Main menu Navigation Equalizer safe removal of the data source Radio ESC system Select Image Source Sound external device data transfer service Device Menu External devices Settings Pictures...
- Page 70 List of paired external devices media Multimedia Compatible sources List of traffic reports file formats Multimedia database Longitude Requirements and Restrictions Mute Media My destinations Audio source My POIs main menu Apple CarPlay™ Bluetooth Audio Main menu Browser navigation Foreword Images Destination on the map List...
- Page 71 Principles of device operation Map alignment Pairing process Map scale Park Assist Most common routes radio My destinations Parking Select station Navigation announcements Parking spot Radio Navigation data ParkPilot Broadcasting Nav. announcements Personal POIs DAB settings Options for map display Petrol station logo FM - settings Preferred type of route...
- Page 72 Route Configuration Wizard New route Route import Device Operation Route memory Device language received Device screen Route calculation Software update Equalizer Trailer towing Software Update external device data transfer Route import Sound Route information Sound system Images Route memory Speed limitations Manage favourites Route options Speedlimit for winter tyres...
- Page 73 Dialling the telephone number Traffic reports (TMC) Emergency call Detail of the traffic report Waiter Enter telephone number List of traffic reports Voice control Functions Requirements Warning messages Information service Trailer towing Main menu Windscreen navigation Operation Automatic wiping with rain Turning off the device pair Windshield wipers...
- Page 74 Reprinting, duplicating, translating and any other use, either in whole or in Issued by: ŠKODA AUTO a.s. part, is not permitted without the written consent of ŠKODA AUTO a.s. © ŠKODA AUTO a.s. 2016 ŠKODA AUTO a.s. expressly reserves all rights relating to copyright laws. Subject to change.
- Page 76 Amundsen and Bolero: Fabia, Rapid, Rapid Spaceback, Yeti anglicky 11.2016 S00.5614.41.20 3V0012720ED 3V0012720ED...
Need help?
Do you have a question about the amundsen and is the answer not in the manual?
Questions and answers