Advertisement
Quick Links
Authorized Exclusive Distributor
Z1-Proud
3-axis handheld stabilizing
gimbal for GOPRO
Instruction Manual
Manufactured by Zhiyun Tech
Note:
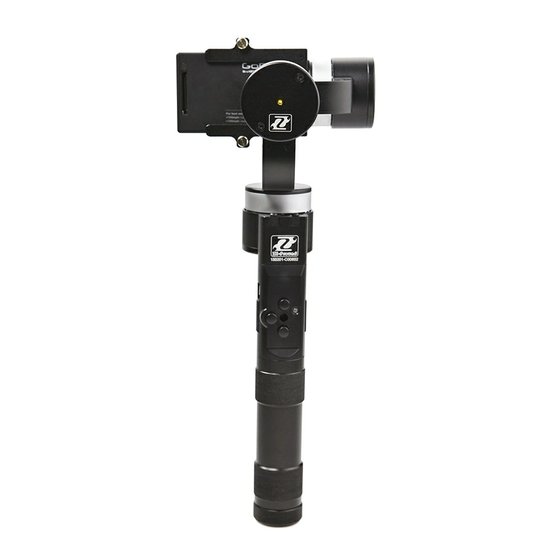
Install the GOPRO
before connecting power.
Camera Holder
Gopro3
To use the M2.5x9mm Thumb
Screw for GOPRO only.
Camera Holder
Gopro3
Gopro LCD BacPac
Camera Charging port
To use the M2.5x19mm
Thumb Screw for GOPRO
with LCD BacPac.
V1.00
Power Button
①
Package Content
3-axis handheld camera stabilizer
Camera Holder
M2.5x 9mm Thumb Screw
M2.5x19mm Thumb Screw
Gopro Charging Wire
18650 Lithium-ion Battery Charger
18650 Lithium-ion Battery
Micro USB Charger Cable
Warranty Card
Certificate
User's Manual
Mode Status Indicator
Micro USB port – for
setting and firmware
upgrade
18650
Lithium-ion
battery x2
Different Rotation Angle
270°
1
1
2
2
1
1
2
1
1
1
1
UP
Battery
indicator
DOWN
MODE
45°
270°
②
Advertisement

Subscribe to Our Youtube Channel
Related Manuals for Zhiyun Z1-Proud


Summary of Contents for Zhiyun Z1-Proud
- Page 1 18650 Lithium-ion Battery gimbal for GOPRO Micro USB Charger Cable Instruction Manual Warranty Card Certificate User's Manual V1.00 Manufactured by Zhiyun Tech Note: Mode Status Indicator Install the GOPRO before connecting power. Micro USB port – for setting and firmware Camera Holder...
- Page 2 Operation Temperature -20℃ 25℃ 45℃ without battery Weight 335g and camera Note: ⑤ ⑥ Please don’t operate the handheld gimbal over working range; the handheld gimbal would be in self-protection mode, Manufactured by Zhiyun Tech and the operation would be effected.
- Page 3 The calibration is applicable to Z1-Pro(GY-3DH), Z1-Rider, Z1-Proud, Z1-Smooth. Before the first operation, please calibrate the gimbal. Calibration is needed if the gimbal: • is not leveled while activating • is not activated after a long time • is transported under different temperature.
- Page 4 After the six orientations steps, the screen will show a V mark. The calibration is done. Please disconnect the USB cable and power off the gimbal. Restart the gimbal, wait for 10 second, and check if camera is leveled. If failed, please calibrate again. If the screen show a X mark, please calibrate again.
-
Page 5: Firmware Upgrade
Firmware upgrade Click Open Serial Port button. Select the corresponding product type in Product. Select Firmware Upgrade. Click Connect button. After successful connection, the software will show the used firmware version of product. - Page 6 Click Update button to start firmware update. When the update is complete, click Close Serial Port button to close the update software and pull out USB cable. By now your product is already completed firmware upgrade. Links: http://www.zhiyun-tech.com http://www.standard-tec.com/ http://www.infinity-hobby.com...
Need help?
Do you have a question about the Z1-Proud and is the answer not in the manual?
Questions and answers