Table of Contents
Advertisement
Quick Links
Advertisement
Table of Contents

Related Manuals for eove EO-150


Summary of Contents for eove EO-150
- Page 1 EO-150 Ventilator User Guide 100-23 rev B...
-
Page 2: Table Of Contents
Rear view of ventilator without housing ................... 8 Menu Bar / Keyboard .......................... 9 Symbols Table ............................. 9 Chapter Two – Operating Instructions for the EO-150 ventilator ............11 Set Up Test ............................11 Turning on the device ........................12 Turning off the device ........................ - Page 3 Prepare the battery for long-term storage: ..................35 Connecting to an external DC power source ..................36 Travelling with the EOVE Ventilator, the Click-and-Go system ............36 Using the Nomad Bag (no docking station) ..................37 Using the Transport bag ........................38 Chapter 4: Alarms ..........................
- Page 4 Standards compliance: ........................54 Training and support ......................... 55 Limited warranty ..........................55 Appendix A: Definitions ........................56 Ventilation Setting Definitions: ......................56 Measured and calculated parameter definitions: ................57...
-
Page 5: Introduction
EO-150 ventilator in direct contact with the patient for extended periods of time. The EO-150 should be kept out of reach of children and domestic animals to ensure their safety and the safety of the patient and to avoid damage to the ventilator and the accessories. - Page 6 The EO-150 ventilator is not intended for use as an emergency transport ventilator. Do not expose the EO-150 ventilator to excessive force, do not shake or drop. If the ventilator or its power supply are dropped or mishandled, immediately discontinue use and contact your EOVE representative.
-
Page 7: Chapter One - Description Of The Eo-150 Ventilator
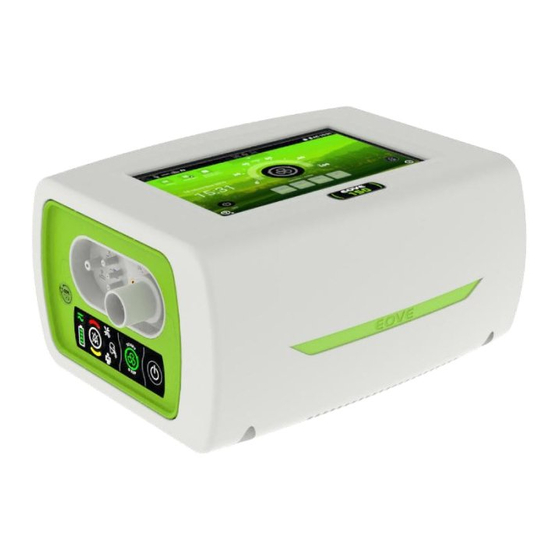
Chapter One – Description of the EO-150 ventilator Front Panel 1. Display screen 4. EO device housing unit 2. Ventilation module 5. Inspiratory / Circuit Port 3. Proximal pressure, valve, and proximal flow connectors 6. Menu bar / keyboard Rear Panel... -
Page 8: Rear View Of Ventilator Without Housing
1. Air inlet and hypoallergenic filter 4. O input 2. DC Power connector 5 FiO / SpO connector 3. STANDBY Button 6. Remote Alarm connector Rear view of ventilator without housing 1. USB port 2. DC Car charger connection 3. Connection to outer housing... -
Page 9: Menu Bar / Keyboard
Menu Bar / Keyboard 1. Power source indicator 6. ON / OFF switch 2. High priority alarm indicator 7. Physiological alarm indicator 3. Technical alarm indicator 8. Medium priority alarm indicator 4. Circuit alarm indicator 9. Alarm reset 5. Ventilation start / stop 10.Battery life indicator Symbols Table The following symbols may appear either on your product or its packaging. - Page 10 Alarm indicator (keyboard) Adult Patient Clinical Mode locked Pediatric Patient Clinical mode unlocked Battery level indicator (on keyboard) Calibration start Battery power indicator (on Touch Screen) Return to Home Screen Anti-bacterial or HME filter Battery charging Leak circuit Valve circuit Exhalation Valve port Active humidifier Proximal Pressure Port...
-
Page 11: Chapter Two - Operating Instructions For The Eo-150 Ventilator
If alarms do not sound during the Set Up test, do not use the ventilator. CAUTION Contact your healthcare provider or EOVE for assistance if any of the checks in the set up test fail. If the EO-150 has been returned after servicing, ensure it is clearly labelled as disinfected before starting the set up test or installing. -
Page 12: Turning On The Device
Turning on the device Ensure the device has been charged prior to use or connect to AC power or DC connector inlet. 1. Insert AC connector into power inlet. 2. Turn the screw lock clockwise to secure. 3. Press on front panel keyboard to power on the ventilator. The Home Screen will be displayed. -
Page 13: Switching The Touch Screen On And Off And Using Screen Saver Mode
CAUTION The EO-150 ventilator cannot be powered off during ventilation Unplugging from mains power does not power off the device. It will continue to run on the internal battery. The device must be turned off manually before disconnecting from AC power for any extended period of time. -
Page 14: The Home Screen
The Home Screen On the home screen, there is important information about the alarms, the pressure of ventilation, the preset modes set up by your clinician, the manual breath button and the button for choosing your preferences and options and calibrating the ventilator. The Home Screen is accessible from all other screens by pressing 1. -
Page 15: Navigating The Patient Screen And Menu
whether the device is operating on mains from the Patient Preferences Menu. power (AC) or DC power. 9. Clinical mode: Indicates whether the clinical menu is locked or unlocked. Navigating the Patient Screen and Menu From this screen the patient can change preferences and calibrate the ventilator. Calibration should be performed at every circuit configuration change and is explained in Chapter 4 of this manual. -
Page 16: Alarms Log
Alarms log To access the reports of alarms for the ventilator, from the Home Screen, touch or swipe down to access alarm log. On the screen you will see the list of alarms in chronological order. See Chapter 4 for more detailed information on alarms and how to respond to them. Accessing and using the Clinical Menu Do not access clinical mode (unlocked mode ) unless directed by a physician. -
Page 17: Presets
Presets The EO-Series ventilator can store up to four different ventilation presets. Presets can be configured by your clinician to provide personalized alternative treatment options. These preset configurations allow for different treatments according to the time of day or the activity being undertaken by the patient. -
Page 18: Patient Configuration Menu
From the Presets screen below, you can activate or name the presets and save the active mode. Patient Configuration Menu NOTE: The Clinician Screen can only be accessed when the Clinical menu is unlocked. This should only be unlocked by a doctor or health care provider or at their request. Access the Patient/ Circuit configuration menu by pressing... -
Page 19: Changing Ventilation Mode
From this screen, you can change the settings shown below and perform a calibration. Simply press on the square of the setting you wish to change and it will be outlined in green. 1. Pathology: BPCO, SOHV, Steinert, 5.Add accessories: Humidifier and Bacterial NeuroMuscular. -
Page 20: Other Screens
Validate your choice of mode, and ventilation will start on your device. Other screens: Events Log Screen This screen shows all alarms, setting changes, configuration changes and any power on/off events. Up to 5000 events can be saved and consulted. Monitorings Screen This screen shows patient physiological data... - Page 21 Wave Forms Screens 1. Flow rate in red 4.Screen selection: Pressure and volume screen 2.Pressure rate in blue 5.Screen selection: Real time loop screen 3.Screen selection: Pressure and flow screen This screen reports the patient data and is updated with every breath. The time scale adapts to the patient’s respiration rate every minute.
- Page 22 Alarms Settings Screen This screen allows your caregiver or doctor to set the parameters for the alarms. This screen shows the Patient Monitoring values which correspond to the Alarms. Select the value you wish to change. On this screen, adjust the value with the Plus and Minus signs (N°1 ) or slide the selector (No. 2) to turn ON (it will become green) or OFF.
-
Page 23: Chapter 3: Installing Patient Circuit Configurations
Pediatric patient circuits should be used when tidal volume is lower than 300 ml. Patient Circuit options The EO-150 ventilator can be used with four different circuits, as seen below. All circuits require proximal pressure tubing. Breathing circuits may be 10, 15 or 22 mm in diameter. -
Page 24: Calibration
> 300 ml Adult 15 mm or 22 mm The four types of circuits used by the EOVE ventilator can be found in the following table: Single Limb with valve Single limb circuit with expiratory valve (expiratory valve integrated into the circuit) - Page 25 4. Seal the circuit at the patient connection port when prompted, either manually or with a cap. 5. Choose OK when prompted. ress OK. Unseal the circuit when prompted. P...
-
Page 26: Connecting Circuit Configurations
7. If the calibration has failed, an error bar will appear with the reason for the failure. NOTE: If a caution or warning appears on the touch screen after a calibration, ventilation can proceed. Contact your caregiver to report the event. Connecting circuit configurations Single limb circuit with valve: 1. - Page 27 Single limb circuit with proximal flow: 1. Follow steps 1-3 of the single limb with valve (see above) 2. Add the proximal flow sensor to the patient circuit end 3. Connect the proximal flow tubes to the proximal flow connectors (blue tube to upper connector) 4.
- Page 28 Double limb circuit with adapter: 1. Plug the adapter (see image below) into the front of the EO 150 ventilator and screw tightly to ensure the connection. 2. Attach any required accessories (see image below). 3. Connect the inspiratory tubing to the inspiratory port and the exhalation tube to the exhalation port.
-
Page 29: Accessories Compatible With Eo-150
Before using any accessory, always carefully read the accompanying Quick User Guide and User Manual. The EO-150 Ventilator should only be used with accessories recommended by EOVE. Connection of other accessories could result in patient injury or damage to the device. -
Page 30: Attaching An Antibacterial Filter
The antibacterial filter must be used and replaced according to the manufacturer's specifications. To attach an antibacterial filter to the EO-150: 1. Attach the antibacterial filter to the inspiratory port of the device. 2. Connect the breathing tube to the other side of the filter. -
Page 31: Attaching Oxygen
Always turn off the oxygen supply when ventilation is stopped for any reason. The EO-150 Ventilator is not designed for use with anesthetic gases. Oxygen can be added up to a maximum flow of 20l/min. However, the ventilator is not adapted to provide Fi02 concentrations above 50%. -
Page 32: Attaching An Fio Sensor
FiO sensor WARNING The EO-150 Ventilator can be used with an optional Fi02 sensor with minimum and maximum concentration alarms. This sensor should always be used in order to ensure that the prescribed oxygen concentration is delivered to the patient. -
Page 33: Attaching A Remote Alarm
Patient/Circuit configuration menu. Attaching a remote alarm A remote alarm can be connected to the EO-150 ventilator with the Remote Alarm Cable Accessory. This alarm alerts you to an event that requires immediate attention. An audible and visual alarm is triggered when an alarm is activated on the ventilator. -
Page 34: Running The Ventilator On Internal Battery
Find an alternate supply or alternative means of ventilation e.g. back-up ventilator or manual ventilation means. If the EOVE device is left in storage for an extended period of time the internal battery will become depleted. If storing your device, recharge the internal battery once every six months. -
Page 35: Battery Run Time
The internal battery takes 2 hours to fully charge from empty without ventilation and 6 hours when ventilating. Battery run time When the internal battery is being used to power the device, the amount of charge remaining in the battery is displayed as shown in the following table. Touch Screen Keyboard... -
Page 36: Connecting To An External Dc Power Source
This could result in damage to the touch screen. Type of Bag Recommended Use Transport Use for storing the EOVE device with its docking station. Use whenever the device is not in use to prevent damage. Use to store cables and patient circuits. Travel Use for travelling and using the device while it is in its docking station. -
Page 37: Using The Nomad Bag (No Docking Station)
Using the Nomad Bag (no docking station) The Nomad Bag 1. Remove the ventilator from the docking station by pressing the release button. Place the device in the bag with the front face of the ventilator to the top opening of the bag. -
Page 38: Using The Transport Bag
Alarms may deactivate if the alarms are set to extreme values. This could put the patient at risk. The EOVE 150 is equipped with alarms to ensure the safety of the patient and to alert the user to certain conditions that require a response. When an alarm is activated, it is both audible and visible. -
Page 39: Viewing Active Alarms
Viewing active alarms 1. Press to access the alarms Log screen from the Home Screen. 2. Hold to temporarily mute the alarm. The alarm sound will be temporarily muted for two minutes. If after two minutes the conditions of the alarm are still present, the alarm sound will be set off again. -
Page 40: Alarm Priority
NOTE: The red arrow in the touch screen display is visible from all screens and indicates that there are one or more active alarms. Alarm priority Alarms are classified into relative priority (High and Medium) according to the severity and urgency of the alarm condition. - Page 41 Expi. Flow Fail Alarm activates after 1 second Contact your service provider High Priority End of Battery The battery is depleted. Alarm activates after 1 second. Reconnect to mains power High Priority Guaranteed ventilation time after alarm is triggered : 10 min. Speed Fault Turbine speed too low and temperature too high.
-
Page 42: Data Management
Remote Vision App for Smart phone and tablet The EO-150 stores data monitoring every minute. Data is stocked in the module. The software created by EOVE can be used to analyse this data. Pressure and flow data is stored at the rate of 20 hz. - Page 43 Test the alarm sounds See Set Up Test, Chapter 1 Weekly Check the condition of the air Check for dirt or dust particles. Monthly filter Check the charge level of the 1.Unplug the device from Monthly internal battery external power and operate the device on internal battery for a minimum of 10 minutes.
-
Page 44: Servicing
NOTE: Retain the original packaging to use when shipping to/from service agent. Maintenance Timetable The EO-150 should be regularly serviced by an authorized EOVE technician according to the following schedule. The ventilator will provide safe and reliable ventilation for 10 years provided that it is operated and maintained in accordance with the instructions given in this manual. -
Page 45: Chapter 6: Device Information
Size: 25x21x13 cm Ventilation Module Specifications Weight: 1.8 kg Size: 24.5x14.5x10 cm Ventilation Specifications The EO-150 can be used in the following ventilation modes: (A)VCV : Volume Assisted Controlled (with expiration valve) (A)PCV : Pressure assisted/Controlled (with expiration valve) ... - Page 46 (A)VCV mode Volume Assisted Controlled ventilation (Valve). This mode delivers breaths according to the set volume (VT), based on a flow control (Rectangle or Decelerated Flow Ramp). Inspiration lasts a set constant time (I. Time). Exhalation controls the set exhalation pressure (PEEP). Breaths are guaranteed at a set minimum rate (Rate).Patient can increase rate by inspiration triggering (I.
- Page 47 PSV VT : Pressure Support Ventilation with VT Target (Valve). This mode delivers breaths according to the set target volume (VT), based on pressure control adapting breath by breath, between the set total pressure limits (P. Sup. Min. and P Sup Max) added to the set exhalation pressure (PEEP).
- Page 48 PSIMV : Pressure Synchronized Intermitent Ventilation (Valve). This mode delivers mandatory breaths according to the set total pressure (Pres. Contr.) added to the set exhalation pressure (PEEP) at set minimum rate (Rate) at a set constant inspiration time (I. Time). Patient can trigger additional spontaneous breaths (I Trig.) according to the set total pressure (Pres.
- Page 49 ST : Synchronized Timed mode (Leak). This mode delivers breaths according to the set inspiration pressure (IPAP) and set exhalation pressure (EPAP). Inspiration time is variable adapting to patient flow (Exh. Trig). Breaths are guaranteed at a set minimum rate (Rate). Patient can increase rate by inspiration triggering (I. Trig.). Settings Adult Pediatric...
-
Page 50: Monitored Parameter Specifications
IPAP Max (mb) 6-50 6-50 IPAP Max > IPAP Min EPAP (mb) 4-25 4-20 IPAP Min > EPAP + 2 Pres. Ramp 1-5 (100-500ms) 1 -5(5-250ms) None Rate (c/min) 5-60 5-80 Rate < 30 / I Time min (I/E < 1/1) I Time Min <= I Time Max Apnea Auto/ 2-30... -
Page 51: Power Specifications
Power specifications : WARNING This device is intended to function with external power supply PMP105F-15 from Protek, never use any other power supply unless recommended by Eove To disconnect the device from the mains, unplug power supply. AC Inlet Voltage... -
Page 52: Environmental Specifications
Environmental Specifications Storage and transport conditions: Ambient temperature From -20°C à +60°C. Relative humidity From 10% à 95%, (non-condensing) Operating conditions Ambient temperature From +5°C to +40°C (after conditioning at 23° for 20 minutes) Relative humidity From 10% à 95%, (non-condensing). Atmospheric pressure From 600 hPa à... - Page 53 It is important to note that local laws take priority over the above mentioned requirements. If in doubt, consult an EOVE representative or the technical service department. Interference may occur in the vicinity of equipment marked with the following symbol: EO150 is designed for use in the electromagnetic environment described below.
-
Page 54: Standards Compliance
CEI 60601-1-11:2011: General requirements for basic safety and essential performance -- Collateral standard: Requirements for medical electrical equipment and medical electrical systems used in the home healthcare environment. The EO-150 ventilator conforms to the drop test standards in paragraph 10.1.3... -
Page 55: Training And Support
Training and support Training and support are available on the EOVE website, www.eove.fr or by calling our helpline at 05 59 21 86 84 Limited warranty The seller guarantees that the Product delivered complies with the use for which it is intended, and guarantees the Purchaser in this respect from defects in materials and workmanship. -
Page 56: Appendix A: Definitions
Appendix A: Definitions Ventilation Setting Definitions: Apnea (s) Sets the delay (in sec) required to trigger an apnea alarm with backup ventilation. (A)PCV Pressure assisted/Controlled (with expiration valve) (A)VCV Volume Assisted Controlled (with expiration valve) Circuit Type Sets the type of circuit configuration and interface in use with Valve (Non Vented) or No Valve (Vented) CPAP (mb) Continuous positive airway pressure maintained during a spontaneous... -
Page 57: Measured And Calculated Parameter Definitions
Pressure Support Ventilation mode (spontaneous breaths). Pres. Sup. Max (mb) Sets the maximum pressure support above PEEP allowed to achieve safe tidal volume in PSV VT mode. Pres. Control. Sets the pressure control above PEEP delivered during inspiration for (Pressure Controlled - pressure controlled breaths (with constant I Time). - Page 58 Volume) Pressure The measured airway pressure at the patient inlet port. The measured Pressure is displayed in the monitoring menu during ventilation PEEP(Positive End The airway pressure measured 100 ms at the end of the last expiration. The Expiratory pressure - measured PEEP is displayed in the monitoring menu during ventilation.
- Page 59 2015 EOVE. All rights reserved. Made in France. EOVE 4 rue Jules Ferry, 64000 Pau France www.eove.fr T +33 05 59 21 86 84 Part number 10015001 Rev X1...
Need help?
Do you have a question about the EO-150 and is the answer not in the manual?
Questions and answers