Table of Contents

Advertisement

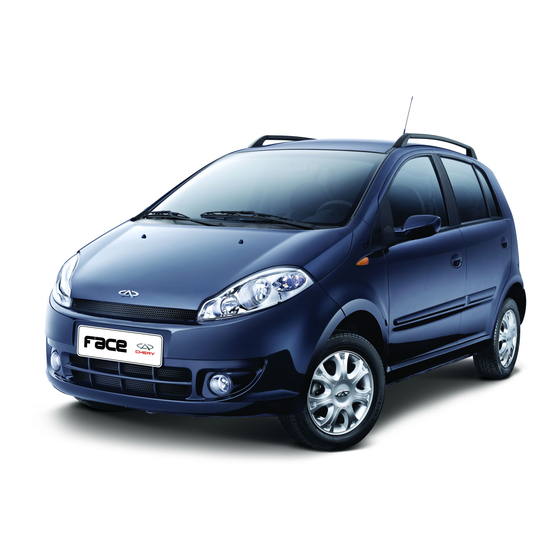
Operating Instruction Manual for Chery A1 Series
We cordially congratulate on your having a Chery A1 car! Meanwhile, we heartily thank you for your deep love and concern to our company and our products!
You will receive wholehearted quality services from the Chery Authorized Service Station, of which all the employees have been trained well and specially.
Chery A1 car has advanced technologies and superexcellent performance. Choosing Chery A1 car indicates that your have superior demands to performance and design
of a car.
This manual aims at introducing technical characteristics, usage and relevant notices of Chery A1 car.
Please carefully read this manual so that you can get familiar with features of this vehicle as soon as possible, properly use and maintain your lovely vehicle, make the
best of its superior characteristics, ensure traveling safety and maintain superior performance of your lovely vehicle, and obtain greatest driving enjoyment.
This manual applies to Chery A1 car.
ADVICE
This Operating Instruction Manual specifies the agreements
between Chery Automobile Co., Ltd. and its customers concerning
setting and termination of guaranty liability of product quality and
rights and obligations in connection with after service. Be sure to
carefully read this Operating Instruction Manual before using any
product of our company.
Foreword
Chery Automobile Co., LTD.
Jan. 08, 2008
1

Advertisement

Table of Contents
loading
Need help?

Need help?

Do you have a question about the A1 2008 and is the answer not in the manual?

Questions and answers

Ahmed talal
January 22, 2025

ما هو وأين يوجد hydraulic return circuit؟ ترجمتها إلى اللغة الإنجليزية: What is the hydraulic return circuit and where is it located?

Subscribe to Our Youtube Channel

Summary of Contents for Chery A1 2008

  • Page 1 Operating Instruction Manual for Chery A1 Series We cordially congratulate on your having a Chery A1 car! Meanwhile, we heartily thank you for your deep love and concern to our company and our products! You will receive wholehearted quality services from the Chery Authorized Service Station, of which all the employees have been trained well and specially.
  • Page 2: Important Declaration

    Chery authorized service station, and explanation of this manual and reserves Chery Automobile Co., Ltd. (hereinafter referred to as “The Company” or “Chery during the overhauling and maintenance the right of changing products without Company”) has set technical maintenance the Chery authorized service station has further notice.
  • Page 3 CONTENT 此处加目录...
  • Page 4 CONTENT...
  • Page 5: Chapter One Brief Introduction

    BRIEF INTRODUCTION CHAPTER ONE BRIEF INTRODUCTION...
  • Page 6: Warning Symbols In The Manual

    Thank you for your purchasing of Chery having many service experts, you can be to your vehicle. automobile. To operate your automobile provided with services at any time.
  • Page 7: Running In Of New Vehicle

    Chery has performed inspections assembling, at the initial period of certain markets. to the vehicle as required by Chery operation the frictional resistance between In the event that this symbol is Automobile Co., Ltd. The dealer should...
  • Page 8 BRIEF INTRODUCTION prohibited. maximum revolution of engine is 6,000 when first used. Therefore, a new tire  Driving at the speed in excess of 100 r/min in a short time. While shifting gear requires running-in; when traveling in first km/h is usually not allowed. manually, the vehicle must be shifted to 100 kilometers, drive slowly and take ...
  • Page 9 800 km. Person-to-person service In order to provide you with better service and vehicle, the dealer of Chery will designate a service consultant to serve you. If you have any problem during use of the vehicle, please contact your service consultant and he/she will provide you with top-quality service.
  • Page 10 (organization) charge This vehicle has passed the delivery inspections in accordance with the provisions of Chery Automobile Co., Ltd. This is to certify that the quality of the vehicle complies with the technical specifications of Chery Automobile Co., Ltd.
  • Page 11 BRIEF INTRODUCTION Documentation of the vehicle Date of Delivery: Seal of the dealer Vehicle Type VIN code on body Engine No. Transmission No.
  • Page 12 BRIEF INTRODUCTION Sales delivery card of Chery vehicle Passed inspections and Category Item made clear? □ □ Engine □ □ Engine oil, brake fluid, steering fluid, coolant, electrolyte, windshield washer fluid □ □ Identification of VIN Code, engine No., nameplate etc.
  • Page 13 BRIEF INTRODUCTION □ □ No.93 gasoline. □ □ Normal operation in run-in period. □ □ Operation of complete set of vehicle lights. □ □ Meanings of warning light. General □ □ Correct maintenance time and mileage. knowledge □ □ Items of vehicle maintenance in winter/summer. of use □...
  • Page 14 □ Have informed the importance of maintaining and servicing □ Acceptance of complaint □ Follow-up visit reminder of scheduled maintenance vehicle at the Chery authorized service station. □ Have delivered the user’s manual and reminded the customer to □ Solutions to consultations in service/maintenance...
  • Page 15 BRIEF INTRODUCTION □ Regular greeting follow-up visit □ Acceptance of reserve of service/maintenance □ Follow-up visit reminder of service activity □ Reminder/acceptance of yearly audit □ Greeting on important festival □ Other affairs the customer demands IV. Relationship establishment of “Person-to-Person” advisory service Business car of the service consultant Signature of the customer/date:...
  • Page 16 □ Reception of maintenance service □ Have informed the importance of maintaining and servicing □ Acceptance of complaint vehicle at the Chery authorized service station. □ Follow-up visit reminder of scheduled maintenance □ Have delivered the user’s manual and reminded the customer to...
  • Page 17 BRIEF INTRODUCTION □ Regular greeting follow-up visit □ Acceptance of reserve of service/maintenance □ Follow-up visit reminder of service activity □ Reminder/acceptance of yearly audit □ Greeting on important festival □ Other affairs the customer demands IV. Relationship establishment of “Person-to-Person” advisory service Business car of the service consultant Signature of the customer/date:...
  • Page 18 BRIEF INTRODUCTION Descriptions of common symbols on the vehicle Code Definition Code Definition Code Definition Engine failure ABS trouble warning Indicator light warning light light position lamp Disabled button of Transmission trouble pressure window regulator warning light warning light switch Over-high coolant Indicator light of rear...
  • Page 19 BRIEF INTRODUCTION Code Definition Code Definition Code Definition Battery charging Seat belt reminder Windshield washing indicator light warning light Indicator light Hazard warning light Mark of horn button high beam Indicator light of low Distance display of Battery positive beam reversing radar trouble Windshield...
  • Page 20 BRIEF INTRODUCTION Code Definition Code Definition Code Definition Unlock Interior lamp switch Inside air circulation Door closing reminder warning Air Bag light Vehicle maintenance Right turn indicator warning light light...
  • Page 21 INTRODUCTION OF DRIVING CHAPTER TWO INTRODUCTION OF DRIVING...
  • Page 22: Preparation Before Starting

    Deliver the car to Chery Authorized When starting an electronic injection Service Station for repair if the idle speed engine, do not push down the accelerator The tail gas exhausted from pedal before and during the starting.
  • Page 23 If not, wait 10 seconds before another try.  Be sure that the headlight and other deliver the car to Chery Authorized If the temperature is below -12C electrical accessories are OFF. Service Station for repair.
  • Page 24 Open the car’s windows with a gap more exhaust fume inside the car, ask the range, other abnormal situations may than 2.5cm when parking long in idle personnel from Chery Authorized appear). speed in an open area. Or use the Service Station to repair the car. Do ventilation function of the car’s air...
  • Page 25: Engine Stall

    INTRODUCTION OF DRIVING Do not turn off the engine immediately CONFINING when parking after a long time high-speed ENGINE’S RPM Clear away snow, fallen running, and leave the engine continue to leaves and other foreign materials run two minutes at a RPM higher than the To protect the engine, its RPM is confined blocking at air inlet to ensure idle speed RPM so that the engine’s...
  • Page 26: Braking System

    If brake fluid level is found too the two circuits fails, the other circuit can still maintain effective operation. low, immediately add brake fluid to maintain its level between MAX and MIN and send your vehicle to Chery Authorized Service Station inspection of brake system.
  • Page 27: Brake Booster

    Be sure to make air flow to replaced. Now, deliver the car to Chery sure to send your vehicle to a Chery the front brake unblocked if the front Authorized Service Station for repair.
  • Page 28: Anti-Lock Brake System (Abs)

    INTRODUCTION OF DRIVING ANTILOCK BRAKE UTILIZING BRAKE SYSTEM ABS( ) Keep pushing down the brake pedal in full ABS can avoid the wheel sticking. It can force in emergency may start ABS even make the car hold turning ability immediately, which allow you to control during emergency braking, which allows the turning and avoid the obstructions you to avoid the obstructions.
  • Page 29 INTRODUCTION OF DRIVING Important principle in utilizing ABS to brake 1. Push down brake pedal at full tilt and hold. SELF-CHECKING ABS will perform self-checking after the 2. Turn steering wheel to round the obstacle. vehicle starts. It is normal that you can No matter how violent the braking is, you can hear some mechanical noises during this...
  • Page 30: Hand Brake

    INTRODUCTION OF DRIVING To release hand brake, slightly pull its low gear and it is not allowed that HAND BRAKE handle, press down the release button vehicle coasts under Handle of hand brake under the handle and just push the button condition that the clutch is released.
  • Page 31: Driving Through Water

    INTRODUCTION OF DRIVING difficult to control the shift lever, etc. down or the engine stalls. You can still allowed during its use, you shall immediately turn the steering wheel, but larger force is disconnect the high voltage lead from stop and check the vehicle. You can required.
  • Page 32 INTRODUCTION OF DRIVING car’s traction and braking performance THREE will fall and the car also may flameout. CATALYTIC If the water enters the intake pipe of the CONVERTER engine, it will cause great damages to the If the engine keep running, engine.
  • Page 33 Start the car whose engine is still in CHASSIS Drive the car at a lower speed the working temperature by pushing Your car is equipped with a heat shield. to the nearest Chery Authorized or towing. Do not apply any painting dressing on the Service Station engine ...
  • Page 34 INTRODUCTION OF DRIVING TRAFFIC AND ROAD FUEL STATUS CONSUMPTION Traffic jam, upgrade, many bends and FUEL rough surface will all throw adverse CONSUMPTION Driving speed impact on the fuel consumption. DEPENDS ON THE The above chart indicates how the fuel GOOD DRIVING FOLLOWING...
  • Page 35: Radiator Fan

    DRIVING preferably ask the professionals from Even so, the fan may start suddenly ENVIRONMENTAL Chery Authorized Service Station do due to temperature rise of the engine PROTECTING: it for you. compartment caused by temperature ...
  • Page 36 INTRODUCTION OF DRIVING fuse if necessary. If this does not work, gear when the engine runs smoothly and Explanation: find out other causes. its speed does not fall obviously when If the fan fails to run after the temperature The RPM of the fan is independent to that climbing.
  • Page 37: Chapter Three Introduction Of

    INTRODUCTION OF FUNCTIONS AND DESCRIPTION OF INDICATIONS OF THE VEHICLE CHAPTER THREE INTRODUCTION OF FUNCTIONS AND DESCRIPTION OF INDICATIONS OF THE VEHICLE...
  • Page 38 INTRODUCTION OF FUNCTIONS AND DESCRIPTION OF INDICATIONS OF THE VEHICLE...
  • Page 39: The Vehicle

    INTRODUCTION OF FUNCTIONS AND DESCRIPTION OF INDICATIONS OF THE VEHICLE following: steering wheel can be slightly turned back “B”-ignition switch is turned off and and forth, thus the steering wheel locking I. INTRODUCTION steering wheel is locked. mechanism can be unlocked. OF FUNCTIONS OF “II”-ignition circuit is turned on and all When pulling key out of ignition switch,...
  • Page 40: Adjust Steering Wheel

    INTRODUCTION OF FUNCTIONS AND DESCRIPTION OF INDICATIONS OF THE VEHICLE If fail to start, the ignition key must be Horn turned to position “B” before restart, and then turn it to this position. After the engine starts, release your hand and the key will spring back to the “II”...
  • Page 41: Intermittent Wipe

    INTRODUCTION OF FUNCTIONS AND DESCRIPTION OF INDICATIONS OF THE VEHICLE REGULAR WIPE In cold season, be sure to Only by placing the ignition switch at ON check if wiper blade is frozen to windshield before using wiper. If position can the wiper motor operate. The so, be sure to thaw it first be using, front wiper has four positions;...
  • Page 42: Interior Rearview Mirror

    INTRODUCTION OF FUNCTIONS AND DESCRIPTION OF INDICATIONS OF THE VEHICLE then the rear wiper ejection nozzles will INTERIOR also spray water and the wiper will act REARVIEW consecutively; at this time, let go of the MIRROR Pull switch lever towards the steering wiper switch, the ejection nozzles will wheel and let it stay there;...
  • Page 43: Sun Visor

    INTRODUCTION OF FUNCTIONS AND DESCRIPTION OF INDICATIONS OF THE VEHICLE certain angle up. CONTROL SWITCH ON DOOR Sun visor The sun visor can be unfastened by The window control switches on left front loosening the retaining clip and be turned door are respectively the switches for left to the side window.
  • Page 44: Exterior Rear View Mirror

    INTRODUCTION OF FUNCTIONS AND DESCRIPTION OF INDICATIONS OF THE VEHICLE switch should be turned to the mid position once more after the proper REAR SEAT POWER The power rear view mirror can be adjustment. WINDOW SWITCH regulated through the adjusting switch at driver side.
  • Page 45: Power Window

    INTRODUCTION OF FUNCTIONS AND DESCRIPTION OF INDICATIONS OF THE VEHICLE the ignition switch is at ON position. All windows can be operated through the The object image in exterior window regulator control switches on their rear view mirror looks a little smaller respective door interior trim panels.
  • Page 46 INTRODUCTION OF FUNCTIONS AND DESCRIPTION OF INDICATIONS OF THE VEHICLE panel at the driver’s side besides the Now, only the switch at the driver’s side auxiliary instrument desk. control switch of the window at the can control the opening and closing of its The cigarette lighter is located exactly driver’s side.
  • Page 47: Cup Holder

    INTRODUCTION OF FUNCTIONS AND DESCRIPTION OF INDICATIONS OF THE VEHICLE To open the cup holder, press it down and When headlamp switch on combination switch is turned to the “I” position, i.e. the “Small The rear row ashtray can be directly taken then release;...
  • Page 48 INTRODUCTION OF FUNCTIONS AND DESCRIPTION OF INDICATIONS OF THE VEHICLE through the adjusting knob, height of light Switch between High FLASHING beam of low beam light can be controlled. Beam/Low Beam HEADLAMP There are four figures-“0, 1, 2, 3” on the Headlamp knob;...
  • Page 49 INTRODUCTION OF FUNCTIONS AND DESCRIPTION OF INDICATIONS OF THE VEHICLE headlamp switch first (at the “I” position Turning Signal Lamp or the “II” position). Front fog lamp must be turned on first before turning on rear fog lamp. When front fog lamp lights, the indicator light “...
  • Page 50: Trunk Lamp

    INTRODUCTION OF FUNCTIONS AND DESCRIPTION OF INDICATIONS OF THE VEHICLE the lamp has delay function and it will go out after 8 seconds. When any of doors of the vehicle is opened, this lamp will constantly light. When the door is properly The triangle in the figure represents the closed, the lamp will go out after 8 hazard warning light switch.
  • Page 51: Braking Lamp

    INTRODUCTION OF FUNCTIONS AND DESCRIPTION OF INDICATIONS OF THE VEHICLE direction indicator lamps lamp. Reversing Radar Set combination instrument will also light. When shifting in reverse gear, the reversing radar will automatically start up The vertical detection distance of Braking Lamp to detect obstacles.
  • Page 52 INTRODUCTION OF FUNCTIONS AND DESCRIPTION OF INDICATIONS OF THE VEHICLE 0.9m, the continuous alarm sound similar to a whistle will be heard. When the distance is between 0.8 and 0.6m, a pressing alarm sound will be heard; when the distance is between 0.6 and 0.4m, the Due to modifications in specifications, the Sound alarm alarm sound will be more pressing than...
  • Page 53 INTRODUCTION OF FUNCTIONS AND DESCRIPTION OF INDICATIONS OF THE VEHICLE If the above points are not available, please drive the car to the authorized The high pressure water flow CHERY service station for check and from a hydraulic giant or similar or repair. larger external force may result in failure.
  • Page 54 INTRODUCTION OF FUNCTIONS AND DESCRIPTION OF INDICATIONS OF THE VEHICLE  Thin objects like steel wire, rope, is covered. fence and etc.  Frozen water drops existed on the surface of radar probe. In the case of the following instances, ...
  • Page 55 INTRODUCTION OF FUNCTIONS AND DESCRIPTION OF INDICATIONS OF THE VEHICLE motorcycle engine, brake air sound Not give off alarm sound to etc. adjacent to the radar probe. objects without the sensing range. When there are several obstacles, the Stud probe of the reversing radar only Thin tree reports the closest one.
  • Page 56: Audio Panel

    INTRODUCTION OF FUNCTIONS AND DESCRIPTION OF INDICATIONS OF THE VEHICLE  Audio Panel ( Note: if the audio system equipped on this vehicle is none of the following ones, please carefully read the operating instruction manual for the audio system that comes with the vehicle.
  • Page 57: Description Of Panel

    INTRODUCTION OF FUNCTIONS AND DESCRIPTION OF INDICATIONS OF THE VEHICLE 9. DVD/radio system switch pressing briefly enables normal Description of Panel 10. AM/FM band switch brightness/shutting screen switch 11. Searching stations and automatic function. 1. In-and-out cartridge key save/pre-play key 3.
  • Page 58 INTRODUCTION OF FUNCTIONS AND DESCRIPTION OF INDICATIONS OF THE VEHICLE Turn it counter-clockwise to decrease station to the first preset station. station to the first preset station. volume and clockwise to increase volume. Under DVD state, pressing it briefly Under DVD state, pressing it briefly Press the button down to turn on or turn enables the function of stop.
  • Page 59 INTRODUCTION OF FUNCTIONS AND DESCRIPTION OF INDICATIONS OF THE VEHICLE FM1→FM2→FM3→AM1→AM2. Under DVD state, pressing it briefly enables the function of fast reverse/fast enables the function of caption switch. forward; under other states, this enables AS/PS: Searching stations 6.7 DISP: Clock display key the function of left/right direction key.
  • Page 60 INTRODUCTION OF FUNCTIONS AND DESCRIPTION OF INDICATIONS OF THE VEHICLE play for 5 seconds and then continue to search for other stations. The customers who are using play function can select to save the station to corresponding position in save list; after the station has been saved, scanning will stop.
  • Page 61: Air Conditioner System

    INTRODUCTION OF FUNCTIONS AND DESCRIPTION OF INDICATIONS OF THE VEHICLE Air Conditioner System VENTILATION The outside air enters inside of the vehicle via the air inlet at lower right of front windshield. Please keep the air inlet at lower right of front windshield clear of snow deposit and leaves so as to ensure normal and effective working of heating system and ventilation system.
  • Page 62 INTRODUCTION OF FUNCTIONS AND DESCRIPTION OF INDICATIONS OF THE VEHICLE Front windshield defrosting vent Side defrosting vent Side defrosting vent Vents on instrument desk Vents on floor...
  • Page 63: Maximum Airflow

    INTRODUCTION OF FUNCTIONS AND DESCRIPTION OF INDICATIONS OF THE VEHICLE wind direction together; customers can CENTRAL AIRFLOW adjust opening and wind direction at each VENTILATOR vent as required. DISTRIBUTION SIDE VENTILATOR MAXIMUM AIRFLOW The air flow and direction can be adjusted by means of the button on the air Adjusting A/C mode knob to Blow Foot or conditioner control panel and the control...
  • Page 64 INTRODUCTION OF FUNCTIONS AND DESCRIPTION OF INDICATIONS OF THE VEHICLE A/C System Control Panel 1. Cold air/warm air adjusting switch; 2. Blower switch; 3. Airflow distributing switch; 4. Internal/external circulation switch; 5. A/C switch; 6. Rear windshield defroster switch.
  • Page 65: Blower Switch

    INTRODUCTION OF FUNCTIONS AND DESCRIPTION OF INDICATIONS OF THE VEHICLE Blower switch Internal/external Cold air/warm Recirculation Switch The blower switch is used to control speed adjusting switch of the blower (4 positions in total). Wind It is used to select the fresh air outside the speed is adjusted using the blower.
  • Page 66 INTRODUCTION OF FUNCTIONS AND DESCRIPTION OF INDICATIONS OF THE VEHICLE Position of “Blow Foot and Defrost” working indicator light lights) This switch is used to select direction of The air inside the vehicle will recycle airflow. inside. This mode is used in dusty It has following 5 positions: Air will flow out of the air outlets at environment or when you want to avoid...
  • Page 67 INTRODUCTION OF FUNCTIONS AND DESCRIPTION OF INDICATIONS OF THE VEHICLE pollen etc. in it. Airflow distributing switch: ( When vehicle Cold air/warm air adjusting switch: turn it climbing a long slope or in traffic A/C switch counter-clockwise to bottom (blue). jam, turning on A/C may make Blower switch: maximum revolution engine...
  • Page 68 INTRODUCTION OF FUNCTIONS AND DESCRIPTION OF INDICATIONS OF THE VEHICLE indicator light lights) Head and foot Ventilation Airflow distributing switch: ( Cold air/warm air adjusting switch: turn it This mode is used in transition stage when The air outside the vehicle will flow in clockwise to bottom.
  • Page 69 INTRODUCTION OF FUNCTIONS AND DESCRIPTION OF INDICATIONS OF THE VEHICLE Internal/external recirculation switch: Note: Airflow distributing knob: ( With air conditioner turned on, defrosting external recirculation ( working Cold air/warm air adjusting switch: in red efficiency can be improved. When indicator light goes out) zone refrigerating, if it is very humid, do not...
  • Page 70: Cooling System

    INTRODUCTION OF FUNCTIONS AND DESCRIPTION OF INDICATIONS OF THE VEHICLE due to frequent stop and crawling. If the A/C system is out of use for one month or longer, even if it is in winter, be sure to let engine run at idle speed with A/C turned on for several minutes at least once per month, so as to maintain proper Tips on operations of...
  • Page 71: Description Of Indications

    INTRODUCTION OF FUNCTIONS AND DESCRIPTION OF INDICATIONS OF THE VEHICLE II. DESCRIPTION OF INDICATIONS Instrument panel ( 21. Front and rear wiper switches 1. Combination instrument panel 6. Hood opening handle 11. Cigarette lighter 16. Vent 22. Steering wheel 2. Switches of turn light and position 7.
  • Page 72: Warning Device

    With the ignition switch on, most warning lights will light for a short time to perform the system self-checking. If certain warning light is not on, or it still lights or flickers incessantly after the engine has been started, please drive your vehicle to the Chery authorized service...
  • Page 73: Low Fuel Level Warning Light

    ABS system. In such a case, the vehicle still has the capability of ordinary brake without the function of ABS, unless the brake system warning light is lighten. At this time, please drive your vehicle to the Chery authorized service station for overhauling as...
  • Page 74: Parking Brake Indicator Lamp

    When this light constantly lights, check if brake fluid level is too low. If the brake fluid level is too low, you should fill the brake fluid instantly with the level between mark MIN and MAX, and this system should be inspected by the Chery Authorized Service Station.
  • Page 75 Before continuing your trip, that one of the dual circuit brake is in please drive to a Chery Authorized trouble. In this case, you should drive Service Station to have brake system...
  • Page 76 Safety PARKING/POSITION INDICATOR LIGHT When position lamp is turned on, this indicator light constantly lights.
  • Page 77: Seat Belt Reminder Warning Light

    If no failure exists in this system, this warning light will go out after engine starts; if it always lights, be sure to check the engine. During driving, if this warning light is on, it indicates that the engine electronic control system is failure. Please drive your vehicle to the Chery authorized service station for overhauling as soon as possible. Application scope...
  • Page 78 Safety The models equipped with SQR473F engine plus EOBD system (“National III” standard compliant). Indicator light of high beam When the high beam light is on or the headlight flickers, this light will be turned on. Indicator light of front fog lamp When front fog lamp switch is turned on, this light will light;...
  • Page 79: Turn Signal Indicator Light

    Safety After rear fog lamp switch is turned on, this light will light; when the switch is turned off, it will go out. TURN SIGNAL INDICATOR LIGHT There are one left turn signal indicator light and one right turn signal indicator light. When the left/right turn light is tuned on, the corresponding turn signal indicator light also flickers slowly along with it.
  • Page 80: Low Engine Oil Pressure Warning Light

    Chery Authorized Service In case this light lights during traveling, it indicates a failure. You should have a Chery Authorized Service Station check this system. Station for inspection.
  • Page 81 If this light lights during traveling, immediately stop, shut off engine, and then check generator belt If the generator belt is in normal condition, please drive your vehicle to the nearest Chery authorized service station immediately for overhauling. But in consideration of the fact that the battery will discharge continuously during driving, all the unnecessary electrical equipment should be turned off, including A/C system.
  • Page 82 Safety Coolant temperature/level warning light With the ignition switch on, this warning light is lighten for a few seconds and then goes out. If it doesn’t go out in a few seconds, or it keeps flickering and the buzzer sounds an alarm due to the extreme high temperature and low level of coolant, you should stop the vehicle immediately and shut down the engine to inspect the level of coolant as well as fill the coolant according to relative regulation.
  • Page 83 If this warning light lights during traveling, it indicates a failure in the electronic throttle, please drive to a Chery Authorized Service Station for service as soon as possible.
  • Page 84 If this warning light lights during traveling, it indicates a failure in the engine electric control system, please drive to a Chery Authorized Service Station for service as soon as possible.
  • Page 85 If the needle of thermometer stays in this zone for a long time, please drive your vehicle to the Chery authorized service station for overhauling.
  • Page 86 If the needle of thermometer goes into this red zone, that is to say, the engine is overheating. Please stop your vehicle safely in an instant and shut down the ignition switch and determine the reason after the cooling of engine, meanwhile, call a Chery Authorized Service Station for assistance and wait for instructions from it.
  • Page 87: Fuel Gauge

    Safety FUEL GAUGE Capacity of Fuel Tank: 43 Liters When the needle of fuel gauge moves to the position of “E” (the position which the arrow points at in the figure.), which means that the fuel tank is empty, there are still about 5 liters of fuel left in the fuel tank. After the vehicle is driven for a stretch with the full fuel tank, the needle of fuel gauge can just leave the position of “F”, which means that the fuel tank is full.
  • Page 88: Lcd Display Screen

    It is used to display the driving speed of vehicle at present. LCD display screen ( ) The speedometer will be affected by the size of the tire used on the vehicle. Please use the tire of original size of Chery; otherwise, the speedometer will not display correct driving speed.
  • Page 89 Safety The first row of figures on LCD display screen are indications of gear positions which displays current gear of a vehicle with automatic transmission; the gear positions displayed are P, R, N, D, 1, 2, 3, 4. For a vehicle with manual transmission, this function is unavailable. The second row of figures on LCD display screen is used to display symbols of time and clock and subtotal of kilometrage.
  • Page 90 Safety Display switch method among subtotal of kilometrage/instantaneous fuel consumption/average fuel consumption/clock By inching (<0.3s) the clock mode lever on instrument of the vehicle, you can switch display among subtotal of kilometrage/instantaneous fuel consumption/average fuel consumption/clock; under the state of subtotal of kilometrage, pressing the lever and hold long (>2s) can clear the subtotal of kilometrage.
  • Page 91: Engine Tachometer

    Safety ENGINE TACHOMETER This meter is used to display the engine rev (RPM). The red zone on the right of the dial indicates the range of allowable maximum rev within a short time under the operational temperature for the engine which has running-in. However it is suggested that you should push the gear-shift lever to the next higher gear or remove your foot from the accelerator pedal at latest before the needle goes into this zone.
  • Page 92 Safety  Driving at the maximum speed for each gear should be avoided. REGULATION OF RUNNING IN WITHIN THE RANGE OF 1,000-1,500 KM:  Driving speed can be gradually increased to the maximum, or engine operates at its allowable highest revolution. Attentions should be paid after the period of running in: The permissible maximum speed for short time running of the engine is 6000r/m.
  • Page 93 Safety...
  • Page 94 Safety CHAPTER FOUR SAFETY...
  • Page 95: Door Lock

    Safety Door Lock Theft-Proof Key Door Lock The doors can be locked or unlocked from The two keys provided with this vehicle inside through the button on the safety apply to all lock holes on the vehicle; one Left front door and back door can be handle located on edge of window.
  • Page 96: Central Control Lock

    Safety To lock rear door, press down the safety handle. handle and then close the door before Press down the lock tongue below door leaving your vehicle. In consideration of lock of each leaf of rear door and the door security, you had better lock doors by will then can not be opened from inside using remote controller.
  • Page 97 Safety only available on the two rear doors. In dog days, the inside Before leaving your vehicle, if temperature will rise rapidly after no one will take care of it, lock left engine stops. If any people or animal Opening Luggage Boot stays inside the vehicle, though for a front door.
  • Page 98: Opening Engine Hood

    Safety OPENING ENGINE HOOD As shown in the figure, the tank cap screwed off can be put on the fuel filler Exhaust gas is harmful; after The pull handle of engine hood, cap. luggage boot lid is opened, please shut which is on the left bottom of the off the engine to avoid exhaust gas dashboard, is pulled backward to...
  • Page 99 Safety the engine hood. Pull up the release the doors, trunk lid and engine hood. During the driving, the handle and unlock the engine hood The remote controller functions well engine hood must be firmly locked lock. within the range of 6 m. If the distance up.
  • Page 100 light. Safety Warning If any people without authorization attempts to forcibly open door, engine LOCK & UNLOCK OF hood, left and right turn signals will DOOR continuously flash for 28 seconds and guard horn will also alarm for 28 seconds. Press down the locking button remote controller once, all doors will be REPLACE CELL OF...
  • Page 101: Electronic Anti-Theft System

    Chery service station to make environmental protection new key matchable with your car as early discard the used cells. as possible. The service station can make...
  • Page 102: Correct Seated Position

    Safety II. Seats and Safety Protection Devices Seat Correct Seated Position Seat, head rest, seat belt and air bag can help protect passengers. Making the most of these devices can provide you with more protections. Front row seat Rear row seat Therefore, please observe the following points:...
  • Page 103: Service And Maintenance

    Service and Maintenance  Use upright seated position; lower end of your back should lean back as far as possible and inclination of seat back should not exceed 25º .  Properly adjust head rest to make its top flush with upper end of your head. ...
  • Page 104 Service and Maintenance Adjusting the seat during Sundries box traveling may cause the vehicle to be out of control and lead to traffic accident, so, for your safety, please adjust the seat when the vehicle stops. A sundries box is installed below driver side seat;...
  • Page 105 Service and Maintenance First lean your body upon the seat back, then pull the seat back adjusting handle at right side of the seat to adjust the seat back to the angle you desire by changing inclination of your body. (the seat back adjusting handle for driver seat is at left side)
  • Page 106 Service and Maintenance Sliding Seat backward and forward to Adjust As shown in the figure, pull up the adjusting lever at outer front edge of the seat to move it backward and forward. After the seat is adjusted in place, release the adjusting lever, and then rock the seat backward and forward to make sure it has been locked on its slide rail. Longitudinal adjusting lever of seat...
  • Page 107: Adjusting Method Of Headrest

    Service and Maintenance Front Headrest Retainer clip A height adjustable headrest is equipped on each front row seat. The passenger can adjust the seat headrest to an appropriate height according to his/her own stature, so that the headrest can play the role of effective protection. Adjusting Method of Headrest 1.
  • Page 108: Rear Headrest

    Service and Maintenance During traveling, do not take off the headrest or adjust it to a too while rear seat headrest is a little smaller), and then push pin of the headrest into the guiding low position so as to avoid injury to piece until the retainer clip on the guiding piece correctly engages with the pin.
  • Page 109 Service and Maintenance Pull button...
  • Page 110: Carrying Luggage

    Service and Maintenance Restoring Rear Row Seat Simply raise the seat back in the direction shown in the figure; when raising it, do not apply too large force so as to avoid damage to angle modulator of the seat back. Carrying Luggage By folding rear row seat, the rear of the vehicle will have enough space to place luggage.
  • Page 111 Service and Maintenance In the luggage boot, luggage and other loaded articles should be placed in it as forward as possible. Driving the vehicle with tail gate open extremely dangerous; excessive exhaust gas may be sucked into the vehicle from the opened luggage boot door.
  • Page 112 Service and Maintenance When stacking such objects as luggage etc., do not let its height exceed the height of front row seat. During traveling, do not let any passenger sit on the folded seat back. Because, in case of a sudden stop or an accident, the luggage on the folded seat back that has not been bound and the passenger without protective...
  • Page 113 Service and Maintenance During traveling, both driver and passenger at front seat should properly fasten seat belt. Avoid wearing too wide and thick clothes. For optimal protection effect, the seat belt should be snug on your body.
  • Page 114: Seat Belt Warning Light

    Service and Maintenance Seat Belt Be sure to use seat belt or child safety seat at any moment. One seat belt can not be shared by more than one people. Make sure the seat belt has been properly fastened without slackness, twist and obstacle. SEAT BELT WARNING LIGHT This light should light when ignition switch is turned on, and then it should keep lighting to remind passengers to fasten seat belts.
  • Page 115 Service and Maintenance If the seat belt can not be drawn out, pull it once at full tilt and let go of it, and then the seat belt can be smoothly drawn out. The Two Point Type Seat Belt at Center of Rear Row Seat...
  • Page 116 Service and Maintenance Length of this seat belt can not be automatically adjusted. When using, insert the tongue plate into the clip until a clatter is heard, and then manually adjust its length to make the seat belt snug on your hip. Maintenance of Seat Belt Checking Seat Belt...
  • Page 117 Service and Maintenance Regularly check seat belt for damage or wear. Please have the seat belt that has been stretched ever (for example, after a traffic accident) immediately replaced and relevant components checked by a Chery Authorized Service Station.
  • Page 118 Do not attempt to repair or lubricate seat belt retractor or buckle mechanism and do not modify the seat belt by any means; otherwise, Chery Automobile Co., Ltd. will not be responsible for any problem resulting from such case.
  • Page 119: Air Bag

    Service and Maintenance chemical cleanser, boiling water, bleaching powder or dye. Do not let moisture seep into the seat belt retractor mechanism. Air Bag ( ) Using air bag together with seat belt can help reduce the risk of incurring serious injury during a bad crash accident. will sound loudly...
  • Page 120: Front Air Bag

    Service and Maintenance The front row passenger should take the seated position shown at right side of above figure to get best protection. Front Air Bag Seat and seat back must be properly located to cooperate with the air bag for optimal protection effect. Use an upright seated position and lower end of your back should fit the seat back as snug as possible with camber angle of the seat back not exceeding 25º...
  • Page 121 Service and Maintenance which helps reduce the risk of driver’s being damaged when air bag opens. Serious frontal collision (faç ade or within 30º at left and right) will detonate front air bag. Within 1ms after the collision occurs, the air bag will inflate and swell;...
  • Page 122 If you do not know service life of the air bag on your vehicle well, Chery Authorized Service Stations are ready to inquire about relevant information for you.
  • Page 123: Child Safety Seat

    Service and Maintenance Child Safety Seat When installing the child safety seat, be sure to carefully read this operating instruction manual and observe the instructions of the manufacturer. When the vehicle is running, do not hold child on our lap. We suggest that children with age under 12 years old or stature under 150cm should use special child safety seat (such as baby seat, child safety seat or heightened seat cushion etc.) for riding.
  • Page 124 Service and Maintenance  A baby with body weight less than 10kg or age under 1 years old should be placed in the lying bed for baby at rear seat to make him/her lie flat on the bed for restraint and fixation. The best protection method for babies and infants is to use rear-facing baby safety seat on rear seat.
  • Page 125 Service and Maintenance  A infant with age under 4 years old or body weight between 10-18kg should sit in the child safety seat at rear seat of the vehicle. Traveling direction  A child with age between 4 and 12 years old or body weight between 18 and 36kg should sit in the rear seat with heightened seat cushion.
  • Page 126 Service and Maintenance shoulder other than neck while the lap belt will be snug on hip other than stomach. Traveling direction Each safety seat is only for one infant. According to the provisions in Road Traffic Safety Law, child is prohibited to sit in front seat should...
  • Page 127 Service and Maintenance...
  • Page 128 Service and Maintenance CHAPTER SIX SERVICE AND MAINTENANCE...
  • Page 129 Chery Automobile Co., Ltd. vehicle. Please strictly follow Please use special oil for Chery; otherwise, They have the personnel who have gone maintenance schedules in this manual to your vehicle may be damaged. through strict professional training held by perform maintenances so as to ensure Chery Automobile Co., Ltd.
  • Page 130: Daily Inspection

    Service and Maintenance and braking action are normal. Check destroy ecosystem and sewerage. Maintenance Schedule warning lights. (See Scheduled Maintenance Schedule hereunder for your The used engine oil, brake fluid, Daily Inspection: reference). antifreeze, batteries and tires can only be The reservoirs of brake fluid, coolant and disposed by the qualified waste disposal Working status of all exterior and...
  • Page 131: Monthly Inspection

    Service and Maintenance system of crankcase for wear and folding. Monthly Inspection:  Coolant level (under cold state of engine)  If any assembly, pipeline, hose or oil tank leaks.  Brake fluid level  Power steering oil level  If A/C works well ...
  • Page 132: Maintenance Items In Engine Compartment

    Service and Maintenance Maintenance Items in Engine Compartment Brake fluid reservoir Power steering fluid reservoir Battery inspection hole Washing fluid filler port Engine oil dipstick Expansion tank Coolant filler port...
  • Page 133: Engine Oil Dipstick

    Turn the filler cap clockwise until a click mark, only add the engine oil in example, when adding fuel or before a is heard, this indicates that it has been compliance with specifications of Chery to long journey. closed. between MIN and MAX marks. See the When checking engine oil, please park chapter “Capacities and Specifications”...
  • Page 134: Brake Fluid

    Service and Maintenance with specifications of Chery. See the chapter “Capacities and Specifications”. Please send it to a Chery Authorized Never engine Service Station as soon as possible for additive engine treating inspection of system leak. compound. They only When adding brake fluid, be sure to ensure needless but also may damage the it is absolutely clean.
  • Page 135: Engine Coolant Reservoir

    Service and Maintenance Engine Coolant Do not mix the coolant of Reservoir different colors and specifications. A1 is equipped with a main water tank and a auxiliary water tank. When adding coolant, observe the following method. Filling method at filler cap: when engine is under cold state and still, turn the filler The method for filling coolant into cap clockwise and force down to open it to...
  • Page 136 Therefore, please use the coolant in The coolant is a kind of of the system to result in scalding or compliance with specifications of Chery. toxic liquid and it can not be used to corrosion other...
  • Page 137: Windshield Washer System

    Service and Maintenance level should reach the MAX mark. please consult a Chery Authorized Service Windshield Washer If the level is below the MIN mark, be Station for details. System sure to add the specified oil and fluid. Your vehicle...
  • Page 138: Replacing Wiper Blade

    Service and Maintenance spare wheel). See the chapter “Capacities Checking wiper blade Replacing Wiper Blade Specifications” details recommended tire pressure. Under heavy load and during joy ride, you should especially observe the correct tire pressure. Under-pressure of tire will reduce stability, increase rolling resistance and quicken wear of tire, which will cause the damage that may result in traffic Lift wiper arm and make it form a right...
  • Page 139 We suggest in earnest that you use original wheel using the tire for winter), be tire or refer to the advices of a Chery sure to observe relevant instructions or Authorized Service Station when installing Please observe local provisions consult a Chery Authorized Service a tire.
  • Page 140: Wheel Train Belt

    Service and Maintenance our company. The original drive belts are Snow Antiskid Chain available authorized service The snow antiskid chain can be used with stations. the tires for summer and the ones for winter, but it can only be used on driving Note: wheels (front wheels).
  • Page 141: Washing The Car

    Lukewarm Water Can be Maximum permissible deflection: 10mm. Used to Wash Vehicle If the deflection exceeds the permissible value, please drive to a Chery Authorized Service Station for adjustment. Manual Flushing If using car washing distillate, please use Washing the Car abundant clear water to flush, and then use a dry cloth to dry the vehicle up.
  • Page 142 Regularly check Cleaning Headlamp anticorrosion protection of chassis; if Please drive to a Chery Authorized Service In order to damage the plastic lens of necessary, have it repaired by a Chery Station to have the damage or slight headlamp, do not use invasive abrasive or Authorized Service Station.
  • Page 143 Service and Maintenance Maintenance of Leather Cleaning Radiator Facing When polishing the vehicle, After having traveled for a period of time, take care polishing the windward faces of condenser and Use a wet cotton cloth and a towel to wipe compound contact with...
  • Page 144 Service and Maintenance 150kPa, condenser and fins of radiator will be damaged. Fins of radiator are necessary for good heat conduction. Do not brush the fins; otherwise, they may be damaged and heat conduction may be reduced. Never spray water onto hot radiator; otherwise, the hot gas generated may cause personal injury.
  • Page 145 Service and Maintenance Provisions on Scheduled Maintenances Please drive to a Chery Authorized Service Station for the maintenance at the specified kilometrage. Kilometrage (Km) Maintenance item 5000 15000 30000 ★ ★ Illumination, warning devices and flashers, horn: performance inspection ★...
  • Page 146 Service and Maintenance Kilometrage (Km) Maintenance item 5000 15000 30000 ★ Timing belt: check its wear status and tightness, if necessary, adjust or replace. ★ ★ ★ Hinge and lock body on hood: lubricate ★ ★ ★ Door hinge and door check: lubricate ★...
  • Page 147 Service and Maintenance Kilometrage (Km) Maintenance item 5000 15000 30000 ★ ★ ★ Brake lining/brake shoe: check its thickness, if necessary, replace. ★ ★ Brake disc/brake drum: check if it works normally and check it for damage, if necessary, replace. ★...
  • Page 148 Service and Maintenance Kilometrage (Km) Maintenance item 5000 15000 30000 ★ All joints in fuel system: check them for aging, damage, abnormal looseness or friction. ★ ★ Exhaust system: check it for leak and damage, if necessary, adjust or replace. Steering system: check level of power steering fluid and if the clearance between rack and pinion of ★...
  • Page 149 Service and Maintenance Kilometrage (Km) Maintenance item 5000 15000 30000 ★ ★ ★ Wheel: check it for looseness Check engine idle speed: check working status of engine at idle speed and check if electronic fuel ★ ★ ★ injection parameters and emission are normal, if necessary, adjust. ★...
  • Page 150 Service and Maintenance Maintenance card for initial Owner of the vehicle: _________ Chery 5,000km Organization (name): _________ (Within 6 months after Address: ___________________ date of purchase) Tel: _______________________ E-Mail:___________________ Date of purchase: ____________ Date: _______________ Seal of service station Nature of use: _______________ Kilometrage: _________ License plate No.: ____________...
  • Page 151 Service and Maintenance Maintenance card for initial 5,000km (within 6 months after date of purchase) Maintenance Date: ____________Kilometrage: ____________ Card for Initial Inspection item: Inspection item: □ □ □ □ 5,000km 1. Check lubrication system, cooling system and 11. Check tightness of generator belt and A/C fuel system for leak.
  • Page 152: Maintenance Certificate

    Service and Maintenance Maintenance Certificate Scheduled Maintenance Scheduled Maintenance Scheduled Maintenance Perform the maintenance items Perform the maintenance items Perform the maintenance items 5,000km kilometrage for 15,000km kilometrage at 5,000km kilometrage 10,000km kilometrage 15,000km kilometrage 20,000km kilometrage months after previous months after previous...
  • Page 153 Service and Maintenance Scheduled Maintenance Scheduled Maintenance Scheduled Maintenance Perform the maintenance items Perform the maintenance items Perform the maintenance items 5,000km kilometrage for 30,000km kilometrage at 5,000km kilometrage 25,000km kilometrage 30,000km kilometrage 35,000km kilometrage months after previous months after previous months after...
  • Page 154 Service and Maintenance Scheduled Maintenance Scheduled Maintenance Scheduled Maintenance Perform the maintenance items Perform the maintenance items Perform the maintenance items for 15,000km kilometrage at 5,000km kilometrage 5,000km kilometrage 45,000km kilometrage 50,000km kilometrage 40,000km kilometrage months after previous months after previous months after...
  • Page 155 Service and Maintenance Scheduled Maintenance Scheduled Maintenance Scheduled Maintenance Perform the maintenance items Perform the maintenance items Perform the maintenance items 5,000km kilometrage for 30,000km kilometrage at 5,000km kilometrage 55,000km kilometrage 60,000km kilometrage 65,000km kilometrage months after previous months after previous months after...
  • Page 156 Service and Maintenance Scheduled Maintenance Scheduled Maintenance Scheduled Maintenance Perform the maintenance items Perform the maintenance items Perform the maintenance items 5,000km kilometrage for 15,000km kilometrage at 5,000km kilometrage 70,000km kilometrage 75,000km kilometrage 80,000km kilometrage months after previous months after previous months after...
  • Page 157 Service and Maintenance Scheduled Maintenance Scheduled Maintenance Scheduled Maintenance Perform the maintenance items Perform the maintenance items Perform the maintenance items 5,000km kilometrage for 30,000km kilometrage at 5,000km kilometrage 85,000km kilometrage 90,000km kilometrage 95,000km kilometrage months after previous months after previous months after...
  • Page 158: Safety Protection System

    Air Bag Cable In order to ensure normal working of air   Pre-fastening seat belt Pre-fastening seat belt bag system, be sure to drive to a Chery   Other components Other components Authorized Service Station to have your 1.
  • Page 159: Capacities And Specifications

    Capacities and Specifications Replacement Record of Safety System  Driver air bag  Front seat passenger air bag  Left side air bag  Right side air bag  Air bag control module  Air Bag Cable  Pre-fastening seat belt ...
  • Page 160 Capacities and Specifications  Front seat passenger air bag  Left side air bag  Right side air bag  Air bag control module  Air Bag Cable  Pre-fastening seat belt  Other components 1. ---------------------------- 2. ---------------------------- 3. ---------------------------- 4.
  • Page 161 Capacities and Specifications  Right side air bag  Air bag control module  Air Bag Cable  Pre-fastening seat belt  Other components 1. ---------------------------- 2. ---------------------------- 3. ---------------------------- 4. ---------------------------- 5. ---------------------------- 6. --------------------------- Date: ------------------------ Seal of authorized service station:...
  • Page 162: Specifications

    Capacities and Specifications CHAPTER SEVEN CAPACITIES AND SPECIFICATIONS Vehicle Identification Direction...
  • Page 163: Vehicle Identification No

    Capacities and Specifications Vehicle Identification The vehicle identification number (VIN code) of Chery A1 model is printed under the drip rail on front wall (as shown in the figure above).
  • Page 164: Fuel Tank Capacity

    NAMEPLATE engine oil filter at engine exhaust side (see additives is temporary unavailable, or the figure below). Chery Automoible Co., Ltd. (Made in China) when the engine presents the failures such Brand Chery Type: SQR Seating Capacity: Number leaving factory:...
  • Page 165: Engine Oil

    Replacement neck-down type oil filler design and damage the engine under certain therefore only the refueling gun of Please use the special engine oil for Chery conditions, which is excluded from unleaded gasoline can insert into the oil auto. the warranty scope.
  • Page 166: Transmission Oil

    Power Transmission Oil district), the brake liquid also shall be warranty scope. replaced at the same time with Use the hydraulic oil that meets Chery Automotive oil replacing brake lining. When infusing specification. brake...
  • Page 167: Windscreen Washer Fluid

    1.3L displacement: 6.5L Cooling System 1.1L Coolant displacement: 6.0L Windscreen MAX mark Cleaning System Use the coolant that meets the Chery Fuel Tank specification. Chery Authorized Brake Liquid Service Station has the stock of Chery MAX mark /Clutch Oil Tank Table of Capacities OEM oil.
  • Page 168 Capacities and Specifications effective load. Please abide by the vehicle load defined manual applicable) and do not exceed the allowable total weight, otherwise it may cause the change of brake and operate and control performance and also may cause accidents. Complete Vehicle Unladen Mass SQR7130S12、SQR7130S126、...
  • Page 169 Capacities and Specifications Complete vehicle unladen mass (kg) 1040 Front axle (kg) Complete vehicle unladen axle load mass Rear axle (kg) Factory-set max. laden mass (including passengers) (kg) Factory-set max. total mass (kg) 1415 Front axle (kg) Axle Load Mass on Manufacturer Maximum Total Mass Rear axle (kg)
  • Page 170: Wheel Bolt Tightening Torque

    Capacities and Specifications Tyre pressure notice Wheel and tyre  The tyre pressure shall be inspected at least once each month. The tyre pressure is very important especially for high speed Tyre pressure driving. The pressure of cold tire shall be inspected before your journey ...
  • Page 171 Capacities and Specifications Tire Wheel 175/60R14× 79H 5J× 14 ET+46...
  • Page 172: Engine Data

    Capacities and Specifications ENGINE DATA SQR472F Model SQR473F Vertical type, water-cooling, 4 stroke, Vertical type, water-cooling, 4 stroke, in-line double overhead camshaft, 4 Type in-line double overhead camshaft, multi valve, multi point electric control point electric control gasoline injection gasoline injection Cylinder diameter (mm) Piston stroke (mm) 77.5...
  • Page 173 Capacities and Specifications Max. torque (N.m) Revolution at max. Torque 3800~4500 3500~4000 (r/min) Minimum fuel consumption rate (g/kW· h) The adjustment or inspection shall be conducted after the engine stopped running for at lease 5 minutes.
  • Page 174: Vehicle Dimension

    Capacities and Specifications Vehicle dimension 1370 2390 1578 3700...
  • Page 175: Dimension (Mm)

    Capacities and Specifications Item Dimension (mm) A=Max Length 3700 1578 B=overall width 1527 C=overall height C=overall height (luggage rack is optional) 1564 2390 D=Wheel Base Front 1370 E=Wheel Track 1355 Rear Minimum ground clearance...
  • Page 176 Capacities and Specifications...

This manual is also suitable for:

Face 2008

Table of Contents