Sensica sensilight mini User Manual
Hide thumbs
Also See for sensilight mini:
- Instructions for use manual (100 pages) ,
- User manual (32 pages) ,
- Manual (28 pages)
Table of Contents
Advertisement
Advertisement
Table of Contents

Related Manuals for Sensica sensilight mini


Summary of Contents for Sensica sensilight mini
- Page 1 Mini User Guide Instrucciones De Uso Mode D’emploi...
-
Page 2: Table Of Contents
Table of contents What is sensiLight™ Mini sensiLight™ Mini device description Who should use sensiLight™ Mini When shouldn’t sensiLight™ Mini be used Possible side effects Benefits User instructions Preliminary test Recommended treatment protocol Post-treatment care Cleaning and troubleshooting Customer service Device specification parameters Treatment log Labeling... -
Page 3: What Is Sensilight™ Mini
Mini is a personal use device is the growth phase, while Catagen and intended for the removal of unwanted hair. Telogen are the resting phases. Permanent sensiLight™ Mini features Sensica® hair reduction can only occur during the proprietary RPL™ technology (Reactive Anagen phase. -
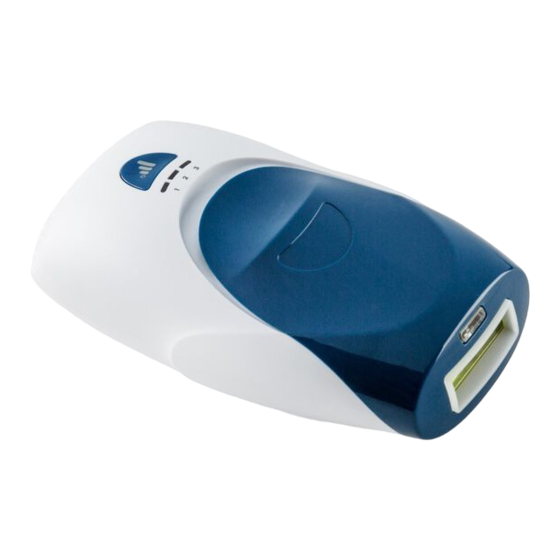
Page 4: Sensilight™ Mini Device Description
sensiLight™ Mini device description sensiLight™ Mini kit includes the following main components: • sensiLight™ Mini handheld device • External power supply Handheld description... - Page 5 User interface description The user interface and control capabilities include the following features: 1. ON/OFF and energy selection button. • Single button used for the device activation, deactivation, and energy selection. • Pressing the button (after the device is connected to the power supply) will turn the device on at energy level 1.
- Page 6 Indicator Mode No light Device not working (not connected to the power supply). “Blinking” Standby Device is in standby mode (before powering on or when green light left unattended for 3 minutes). 1-3 energy level Energy The three energy levels are indicated by three green LED lights level 1-3 lights.
-
Page 7: Who Should Use Sensilight™ Mini
continuously as long as the button is pressed. hair reduction after multiple treatment sessions. Who should use sensiLight™ When shouldn’t sensiLight™ Mini Mini be used • sensiLight™ Mini is intended for women and Who cannot use sensiLight™ Mini- men who desire to remove unwanted hair. CONTRAINDICATIONS • sensiLight™... - Page 8 outbreak in the treatment area since it can within the last 8 weeks as it may result in result in serious side effects. stimulation of pigmentation. • Do not use if you suffer from keloid scar • Do not use sensiLight™ Mini on the face (growth of extra scar tissue where the skin areas above the cheek line or around eyes, has healed after an injury) formation since...
- Page 9 from the sensiLight™ Mini treatment blisters on the area to be treated. window as it may cause eye injury. • Do not use sensiLight™ Mini on mucous • Never use flammable liquids such as membranes such as nostrils, lips of the alcohol (including perfumes, sanitizers, or mouth, eyelids, ears, genital area and the other applications containing alcohol) or...
- Page 10 • This appliance is not intended for use by Note: individuals with reduced physical, sensory sensiLight™ Mini is designed for use by a or mental capabilities. single user. • Do not use the device if: • The device is not working properly, appears damaged or broken (UV and IR emitted from this device).
-
Page 11: Possible Side Effects
Possible side effects Benefits When using sensiLight™ Mini according sensiLight™ Mini features an automatic to the instructions for use, side effects built-in skin color sensor that is designed are rare. However, every aesthetic to provide you with complete safety and procedure including the usage of home- reassurance. -
Page 12: User Instructions
User instructions Remember! sensiLight™ Mini comes with a built-in skin-tone sensor, enabling the sensiLight™ Mini is intended for use on application only on a suitable skin tone legs, arms, underarms, bikini line, back, range. This unique safety feature will not let shoulders, chest, and on allowed facial you treat areas where your skin is too dark areas. -
Page 13: Preliminary Test
Preliminary test 6. Wait 48 hours and examine the tested area. If the skin in the tested area seems normal The preliminary test is intended to (no response or mild redness), you can determine your skin’s reaction to proceed with a full treatment in the highest sensiLight™... -
Page 14: Recommended Treatment Protocol
4. Place sensiLight™ Mini treatment window Important notes: (see image - item ) on the desired • Try not to overlap pulses on the same body area with full contact to the skin. If spot. Repeated pulses on the same spot sensiLight™... - Page 15 The next 6-8 hair removal treatments will be four weeks apart. • Treatment 8+ hair removal treatments will be as needed, until desired results are achieved. Energy levels: Recommended energy levels are dependent on both your hair color and skin tone in the treated area.
- Page 16 Plan your sensiLight™ Mini treatment can be seen. Hair will continue to grow, up to two weeks after a hair reduction Energy level should primarily be chosen session. However, afterwards, as the hair based on your own comfort. grows in three different stages, it will The energy levels vary from level 1 to level 3 naturally and gradually fall out depending with a light fluence of 3-5 [J/cm²].
- Page 17 Facial treatment 1. Mark the treatment area with a white eye pencil. Use the mark as guidance The facial skin is a sensitive area that for delivering the pluses. This way you requires special care and caution. Make can avoid overlapping treatment areas sure you follow all instructions and safety or treating unwanted facial areas.
- Page 18 Upper lip, cheek, jaw, neck and chin treatment Note: Place the treatment window (see image The skin on lower third of the neck is more – item ) on the area as indicated in the sensitive. Avoid from overlapping treatment picture.
-
Page 19: Post-Treatment Care
• Apply a calming lotion such as Aloe Vera. electrocution. We recommend you to use Sensica post • If you do not plan on using your treatment lotion for increased treatment sensiLight™ Mini for a long period of time, efficacy and best possible results. -
Page 20: Customer Service
• In case of a safety issue or when the contact your local Sensica customer service or lamp has reached its end, a steady red visit our website: www.sensica.com light will come on. -
Page 21: Device Specification Parameters
Device specification Storage instructions parameters Emitted light spectrum: Storage and transport conditions 475 [nm] to 1,200 [nm] max. -10 º C to 70 º C (14 º F to 158 º F) Temperature Emitted energy flux: 5 [J/cm²] 0 to 90% RH at 55 º C (131 º F) Humidity Selectable energy levels: 3 levels Treatment area (window): 3 [cm²]... -
Page 22: Treatment Log
Treatment log Treatment date Treated area Comments... - Page 23 Treatment date Treated area Comments...
-
Page 24: Labeling
Labeling Model: IPL030EU Please read all warnings and safety Double insulation precautions prior to use Do not use sensiLight™ Mini device Consult Instructions for use on tanned skin or after sun exposure Do not let the device become wet. Keep away from bathtubs, Waste Electronic and Electrical showers, basins, or other vessels Equipment... - Page 25 Fitzpatrick skin type scale Do not use sensiLight™ Mini on naturally dark skin types. Sensica By Home Well Trading Ltd. visit us: www.sensica.com...
Need help?
Do you have a question about the sensilight mini and is the answer not in the manual?
Questions and answers