
Subscribe to Our Youtube Channel
Related Manuals for Serioux S1005TAB


Summary of Contents for Serioux S1005TAB
-
Page 2: Table Of Contents
Manual de utilizare Atentie: ........................................4 1. Aspect si butoane:................................... 5 1.1 Descriere..............................5 1.2 Pornire/oprire............................6 1.3 Buton inapoi............................. 6 1.4 Volum +, Volum- ............................. 6 1.5 Intrare mufa Jack ............................. 6 1.6 Card TF..............................6 1.7 Mini USB..............................6 1.8 Resetare ..............................6 2. Prima utilizare .................................... - Page 3 4.5 Language & input ..........................30 4.6 Date & Time Setting ..........................31 4.7 USB Mode Select ..........................32 4.8 About Device ............................32 4.9WI‐FI .......................................32 4.10Screenshotsetting ................................33 4.11HDMI..............................33 5. Apps Install and Manage ................................34 5.1 App Installer ............................34 6. Problem Solution....................................35 7. Basic Function ....................................35 8.Important Safety Precautions..............................35 ...
-
Page 4: Atentie
Atentie: Acest manual contine masuri importante de securitate si informatii despre utilizarea corecta a produsului, in vederea evitarii accidentelor. Va rugam cititi cu atentie manualul inainte de a utiliza dispozitivul. Va rugam nu va aflati in locuri cu temperaturi ridicate, umiditate sau foarte mult praf. Va rugam nu va aflati in locuri cu temperaturi ridicate, in special vara, nu lasati dispozitivul in masina cu geamurile inchise. -
Page 5: Aspect Si Butoane
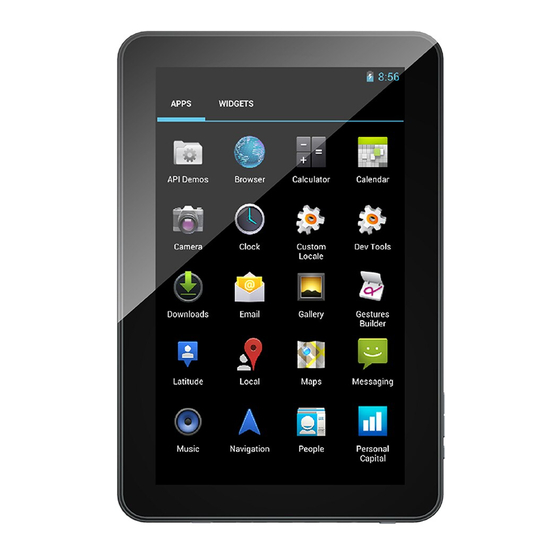
1. Aspect si butoane: 1.1 Descriere Ecran tactil (capacitiv) rezistiv de 10.1”: aveti posibilitatea de a face clic apasand pe pictogramele de pe ecranul tactil. 1、Buton inapoi 7、miniHDMI 2、Volum +... -
Page 6: Pornire/Oprire
1.2 Pornire/oprire Pornire: Tineti apasat lung pe butonul Power, sistemul va accesa interfata principala Oprire: In interfata meniului principal, apasati butonul Power pentru aproximativ 5 secunde pentru a opri dispozitivul, sistemul poate afisa optiunea "power off", faceti clic pe ”ok”, puteti opri dispozitivul in siguranta. -
Page 7: Conectarea La Pc
efectueaza cu ajutorul adaptorului standard (tensiune intrare: AC110~240V 50/60Hz Max:180MA. tensiune iesire: DC5.0~5.5V/2A), sau prin cablul USB, fara incarcator, selectati modul de incarcare prin USB. In timpul incarcarii pictograma bateriei se va anima. La sfarsitul procesului de incarcare, pictograma bateriei va deveni verde si nu va mai fi animata. Pentru a prelungi durata de viata a bateriei, la primele doua incarcari este recomandata consumarea completa a bateriei inainte de reincarcare. -
Page 8: Descrierea Barei De Stare
In interfata principala puteti: Gestiona pictogramele softurilor de pe interfata principala: apasati lung pe pictograma pentru 3 secunde, pictograma se va mari, apoi o puteti muta oriunde pe ecran. Sterge pictograme: apasati lung pe pictograma pentru 3 secunde, trageti pictograma in Recycle Bin, odata ce a devenit rosie, ridicati degetul de pe aceasta, apoi pictograma se va sterge. -
Page 9: Utilizarea Ecranului Tactil
Bara de stare deasupra ecranului Software interfata principala in dreapta sus, In dreapta jos este afisata pictograma bateriei cu starea de incarcare a acesteia, ora curenta, setarea timpului, meniu setari, buton ESC, card T-Flash, starea conexiunii USB s.a. 3.3 Utilizarea ecranului tactil Dispozitivul este echipat cu un ecran tactil de 10.1“. Ecranul tactil este descris in cele ce urmeaza si va sunt oferite unele sfaturi despre modul de utilizare al acestuia. -
Page 10: Setari Sunete, Afisare Notificari Si Luminozitate
4.1 Setari sunete, afisare notificari si luminozitate Setari sunet:Reglati volumul de redare si continutul media si a notificarilor de rspuns Auto rotirea ecranului: Atunci cand acesta optiune este selectata, ecranul se va roti in pozitia in care tineti dumneavoastra dispozitivul, orizontal sau vertical, in 4 directii. Animatii:Deschideti sau inchideti fereastra de animatii. -
Page 11: Aplicatii
Inchidere ecran:Inchiderea automata a ecranului pentru economisirea energiei. Setati la cat timp dupa ultimul contact cu dispozitivul doriti ca ecranul acestuia sa se inchida. 4.2 Aplicatii Gestionare aplicatii Surse necunoscute: Clic pe “Unknown Sources”, apoi clic pe “OK” Manager aplicatii: gestionarea si dezinstalarea aplicatiilor. 【Atentie】: Va rugam opriti conexiunea USB atunci cand Firmwire-ul se actualizeaza. -
Page 12: Stocare
Backup & resetare Resetarea la configurarile din fabrica. 4.4 Stocare Scoateti cardul TF, vedeti spatiul de stocare disponibil. 【Atentie】: Va rugam apasati pe optiunea ”delete SD card”, astfel incat sa indepartati in siguranta cardul SD. -
Page 13: Limba & Introducere Text
4.5 Limba & introducere text Setari: (Limba), introducere text si optiuni de corectare ortografica automata; Alegeti limba: 14 limbi nationale sunt disponibile Nota: Sistemul Android poate suporta 54 de limbi, interfata meniului suporta doar 14. Tastatura Android: Setari tastatura Android Sunet la apasarea tastelor Auto-calibrare Aratati sugestiile: Pe ecran au fost sugerate cuvinte in timpul tastarii Auto-complet: Bara de spatiu si punctuatia, inserarea automata a cuvantul evidentiat. -
Page 14: Selectare Mod Usb
4.7 Selectare mod USB Puteti conecta dispozitivul la computerul dumneavoastra, il puteti utiliza ca un hard-disk portabil si puteti deschide orice fisier salvat in dispozitivul dumneavoastra. 4.8 Despre dispozitiv WI-FI Apasati Settings → Wi-Fi, accesati setari Wi-Fi. Glisati butonul de Wi-Fi in pozitia de activare pentru a porni Wi-Fi-ul. Toate retelele din vecinatate vor fi listate, faceti clic pe numele retelei la care doriti sa va conectati;... -
Page 15: Setari Captura Ecran
4.10 Setari captura ecran Puteti captura imaginea ecranului oricand prin apasarea simbolului Apasati pe pictograma aplicatiei Screen Capture pentru a seta optiunile de captura. ● Selectati un timp de intarziere al temporizatorului (secunde). ● Selectati dispozitivul de stocare. ● Afiseaza in bara de stare pictograma captura ecran. 4.11 HDMI... -
Page 16: Instalarea Si Gestionarea Aplicatiilor
Dispozitivul poate fi conectat la televizor cu ajutorul unui cablu mini HDMI, televizorul si dispozitivul vor fi sincronizate. Pentru a folosi aceasta functie, introduceti cablul mini HDMI in partea dreapta a interfetei dispozitivului, pentru a-l conecta la televizor. Setari ecran televizor Dupa realizarea conexiunii HDMI, accesati Settings →... -
Page 17: Solutii La Probleme
Instalare: Clic “install”, accesati interfata de instalare Android. Gestionati: clic “manage”, accesati interfata aplicatiei tertului. Dezinstalare: Selectati aplicatia pentru Android pentru a fi dezinstalata. 6. Solutii la probleme Dispozitivul nu porneste 1. Verificati starea bateriei Conectati intai incarcatorul, apoi verificati din nou 3. - Page 18 ● Folositi doar adaptorul livrat impreuna cu dispozitivul. Folosirea oricarui alt adaptor va anuleaza garantia. ● Nu deschideti capacul dispozitivului. Inauntru nu exista piese reparabile de catre utilizatori. ● Daca cablul de alimentare este deteriorat, pentru a evita orice pericol, asigurati-va ca acesta este reparat de care producator, service-ul autorizat al producatorului sau de catre o persoana calificata similar.
- Page 19 Dispozitivul dumneavoastra mobil este un transmitator si un receptor radio. A fost conceput pentru a corespunde directivelor internationale cu privire la expunerea la unde radio. Aceste directive au fost concepute de catre o organizatie stiintifica independenta, ICNIRP, si includ masuri de siguranta, concepute pentru a oferi protectie tuturor, indiferent de varsta sau starea lor de sanatate.
- Page 20 Toate tabletele noastre sunt conforme cu standardele si reglementarile internationale si au recunoastere nationala pentru limitarea expunerii utilizatorilor la campurile electromagnetice. Aceste standarde si reglementari au fost adoptate dupa cercetari stiintifice ample. Aceste cercetari nu asociaza utilizarea telefoanelor mobile, cu efecte negative asupra sanatatii, daca dispozitivul este folosit in conformitate cu standardele si reglementarile.
-
Page 22: Attention
Attention: This handbook contains important security measures and the correct use of the product information, in order to avoid accidents. Please make sure to reading the manual carefully before use the device. Please don’t be in high temperature, moisture or very dust place Please don’t be in high temperature, especially in summer don't put the device in the car when Windows closed. -
Page 23: Appearance And Button
1. Appearance and Button: 1.1 Outlook Description 10.1” (Capacitive) Resistive touch panel: you can click, dragging on the icons in the touch panel 1、Back button 7、miniHDMI 2、Volum + 8、microUSB OTG2.0 3、Volum- 9、microUSB 2.0 4、Camera 10、Rest 5、Power on/off... -
Page 24: Power
1.2 Power Startup: Long Press and hold the power button, the system will enter the main interface Shutdown: In the main menu interface, Press the power button about 5 second to shutdown, The system can hint "power off" option, Click ”ok”. you can safely shut down. Screen Lock: short press the home button to lock or unlock the screen 【Attention】: 1. -
Page 25: Connect To Pc
adaptor (Input: AC110~240V 50/60Hz Max:180MA.. Output: DC5.0~5.5V/2A), this device without supply DC charging, USB interface can charge, Choose USB interface to charger During the charging, the battery icon will scroll When finished charging, battery icon will become green and stop rolling In order to prolong the service life of the machine, in the first twice use, recommend to use all the last power before further charge 【Attention】: 1. -
Page 26: Status Bar Describe
In the main interface, you can: Management main interface software ICONS: long press the icons 3 second, after the icons will bigger, then you can drag anywhere in the interface. Delete icons: long press the icons 3 second, drag the icons to the Recycle Bin icon, once it become red, Loosen your hand, after that you can delete icon You touch the screen keep a time;... -
Page 27: Use Touch Panel
The status bar above of the screen Top right display main interface software, Bottom right display the battery, battery charge icons, current time, set time, Settings Menu, ESC button. T-Flash card, USB connection status and so on 3.3 Use Touch Panel Device equipped with a 10.1 “ touch screen. Following the main touch screen area is described, and describes some of the tips for how to use the touch screen. -
Page 28: Sounds, Notification Display And Brightness Setting
4.1 Sounds, Notification Display and Brightness Setting Sound settings:Adjust media playback volume, and change the feedback sounds. Auto-rotate screen:When this option be selected, the screen will rollover with you holding direction, horizontal to Vertical, 4 side direction. Animation:Open or close the windows animation. Brightness:Adjust the Screen brightness. You can draw the button left to lower and right to higher. -
Page 29: Application
4.2 Application Manage application Unknown sources: Click “Unknown Sources”, then click “OK” Manage application: manager and uninstall Application 【Attention】: When you Firmware Upgrade, please close the USB connect How to uninstall the applications? 1. enter setting”>”Application”>”Manage application” And then there will be installed the program list 2. -
Page 30: Storage
Backup & reset Recover factory data reset 4.4 Storage Remove TF card, can view of the available storage space 【Attention】: Please touch option ”delete SD card”, so that can safety to Remove SD card 4.5 Language & input Setting: (Language), text input and automatic error correction options;... -
Page 31: Date & Time Setting
Select Language: 14 kind of national languages are available Remark: Android system can support 54 kind of language, now menu interface just support 14 kinds of language, Android keyboard: Android keyboard setting Sound on Key-press Auto- calibration Show suggestions: Display suggested words while typing Auto-complete: Spacebar and punctuation automatically insert highlighted word 4.6 Date & Time Setting ... -
Page 32: Usb Mode Select
4.7 USB Mode Select You can connect your device to your computer, use it as a removable disk and open any files saved on your device 4.8 About Device WI-FI Tap Settings → Wi-Fi, enter into Wi-Fi settings. Slide the Wi-Fi switch to turn on Wi-Fi. All the AP in the vicinity will be listed, click to select the name you want to connect to AP;... -
Page 33: Screenshotsetting
4.10Screenshotsetting You can capture a screen image by tapping at any time. Tap the Screen Capture application icon to set options for a screen capture. Select a delay timer to capture the screen (seconds). ● ● Select the default storage device. ●... -
Page 34: Apps Install And Manage
TV screen adjustment After connecting HDMI, Enter into Settings → Display → TV screen adjustment, By adjusting the drag strips in the interface to change the width and height of the TV side. ☆ After connecting HDMI, you can press the power button to turn off the screen, In order to get longer battery life. -
Page 35: Problem Solution
Uninstall: Click the installed APK to remove. 6. Problem Solution Device can’t to open 1. Check the battery power Connect adaptor first, then check again 3. After charging then can’t to open, please contact with the supplier After startup the screen or the opening picture has been appear, the device appear shutdown Power is not enough, please charge Headset can't hear the voice... - Page 36 qualified person in order to avoid any hazard. ● The charger is not intended for use by persons (including children) with reduced physical, sensory or mental capacity. Persons who have not read the manual, unless they have received explanations by a person responsible for their safety and supervision should not use this unit. ●...
- Page 37 This mobile device conforms to guidelines for exposure to radio frequency. Your mobile device is a radio transmitter and receiver. It was designed to meet the limits recommended by international guidelines on the exposure to radio-waves. These guidelines were developed by an independent scientific organisation, the ICNIRP, and include safety margins designed to assure the protection of all, regardless of their age or state of health.
- Page 38 All our tablets conform to international standards and regulations, and where appropriate national recognition, to limit the exposure of users to electro magnetic fields. These standards and regulations were adopted after extensive scientific research. This research does not link the use of mobile phones with any adverse effects on health if the equipment is used in accordance to standards and regulations.
- Page 39 Р ъ к о в о д с т в о з а у п о т р е б а Р ъ к о в о д с т в о з а у п о т р е б...
-
Page 40: Внимание
Внимание: Това ръководство за употреба съдържа важни мерки за безопасност и информации отностно правилната употреба на продукта, с цел избягване на инциденти. Моля, прочетете внимателно ръководството преди да използвате устройството. Моля, не стойте на места с високи температури, влажност или много прах. Моля, не... -
Page 41: Изглед И Бутони
1. Изглед и бутони: 1.1 Описание Резистивен тактилен дисплей (капацитивен) 10.1”: имате възможността да кликвате натискайки иконите на дисплейя. 1、Бутон назад 7、miniHDMI 2、Звук + 8、microUSB OTG2.0 3、Звук - 9、microUSB 2.0 4、Камера 10、Нулиране 5、Включване/Изклюване 11、Вход зарядно 6、Жак 12、Слот microSD... -
Page 42: Включване/Изключване
1.2 Включване/Изключване Включване: Задръжте натиснат бутона Power, системата ще отвори главния интерфейс Изключване: В интерфейса на главното меню, натиснете бутона Power за около 5 секунди, за да изключите таблета, системата може да покаже опцията "power off", кликнете на ”ok”, за да изключите... -
Page 43: Първа Употреба
【Внимание】: Следвайте нормалните стъпки на процеса за изключване и използвайте бутона RESET само ако не можете да изключите таблета, в противен случай може да засегнете операционната система на устройството. 2. Първа употреба 2.1 Работа с батерията и зареждане Заредете напълно батерията на таблета преди първата употреба. За... -
Page 44: Операционалния Интефейс На Таблета
В режим на трансфер можете да копирате или изтривате файлове от таблета или от паметта. 3. Операционалния интефейс на таблета 3.1 Описание на основния интерфейс След включване, на екрана ще се покаже основния интерфейс. В основния интерфейс можете да: Работите... -
Page 45: Описание На Статус Летата
Изтриване на икони: натиснете продължително иконата за 3 секунди, издърпайте иконата в Recycle Bin, след като е станала червена, вдигнете пръста от иконата, след това иконата ще се изтрие. Натиснете екрана и задръжте натиснат; ще се появи един диалогов прозорец “Add to Home screen”... -
Page 46: Употреба На Тактилния Екран
3.3 Употреба на тактилния екран Таблета е снабден с 10.1“ инчов тактилен екран. Екрана е описан по-долу и са дадени няколко съвета относно начина на употреба. Независимо от интерфейса, който ще изведете на екрана, ще можете да се върнете към основния... -
Page 47: Настройки Звуци, Уведомления И Яркост На Екрана
4.1 Настройки звуци, уведомления и яркост на екрана Настройки звук: Настройте силата на звука и съдържанието и на уведомленията за отговор. Автоматично завъртане на екрана:Когато е избрана тази опция, екрана ще се завърта в положението в което държите таблета, хоризонтално или вертикално, в 4 посоки. Анимации:Оворете... -
Page 48: Приложения
4.2 Приложения Управление на приложенията Неизвестни източници: Кликнете на “Unknown Sources”, след това на “OK” Мениджър приложения: управление и неинсталиране на приложенията. 【Внимание】: Моля, изключете USB връзката когато Firmwire-а се актуализира. Как се деинсталира едно приложение? 1. Изберете Settings ”>”Application”>”Manage application” след което ще видите списъка... -
Page 49: Архивиране & Възстановяване
4.3 Архивиране & възстановяване Възстановяване на фабричните настройки. Архивиране Извадете TF картата, проверете свободното място за архивиране. 【Внимание】Моля натиснете опцията ”delete SD card”, така че да изключите безопасно SD... -
Page 50: Език & Въвеждане На Текст
картата. 4.5 Език & въвеждане на текст Настройки: (Език), въвеждане текст и опции за автоматична корекция на правописа; Изберете езика: достъпни са 14 национални езика Бележка: Системата Андроид може да поддържа 54 езика, интерфейса на менюто поддържа само 14. Клавиатура Андроид: Настройки клавиатура Андроид Звук... -
Page 51: Избор Usb Режим
4.7 Избор USB режим Можете да свържете таблета към компютъра, можете да го използвате като преносима памет и можете можете да отворите всякакъв файл запаметен в таблета. 4.8 Относно таблета... -
Page 52: Wi-Fi
4.9 WI-FI Натиснете Settings → Wi-Fi, влезте в настройки Wi-Fi. Приплъзнете бутона на Wi-Fi в положение за активиране, за да включите Wi-Fi-то. Ще бъдат показани всички мрежи в близост, кликнете на името на мрежата към която желаете да се свържете; Ако... -
Page 53: Hdmi
●Изберете времето на закъснение на таймера (секунди). ●Изберете съхраняващото устройство. ●Показва в статус лентата иконата за улавяне на екрана. 4.11 HDMI Устройството може да бъде свързано към телевизор с помощта на кабебел mini HDMI, телевизора и таблета ще са синхронизирани. За да използвате тази функция, въведете кабела mini HDMI в дясно на... -
Page 54: Достъпност
4.12 Достъпност Настройте шрифта, автоматичното завъртане, т.н. 4.13 Сигурност Настройте блокирането на екрана/криптиране/пароли, т.н. 5. Инасталиране и управление на приложенията 5.1 Инсталиране на приложения Този таблет може да работи с приложения за Android на трети източници, повечето приложения могат да бъдат инсталирани от интернет, могат да бъдат копирани във флаш памет или на SD памет. -
Page 55: Решения На Проблеми
Инсталиране: Кликнете “install”, свържете се с инсталационния интерфейс Android. Управление: кликнете “manage”, отворете интерфейса на приложението. Деинсталиране: Изберете приложението за Android за да се деинсталира. 6. Решения на проблеми Таблета не се включва Проверете състоянието на батерията. Първо свържете зарядното, след това проверете отново. Ако... -
Page 56: Важни Мерки За Безопасност
Видео: AVI, RM, RMVB, MP4, WMV. Снимки: JPG, JPEG, BMP, GIF. 8. Важни мерки за безопасност Преди първата употреба на таблета, прочетете мерките за безопасност и ги запазете за последващи справки. Винаги следвайте тези мерки когато използвате таблета. Така намалявате опасността от пожар, токов удар или нараняване. Не... - Page 57 Работете внимателно с екрана. За почиствене на отпечатъците или праха на екрана, препоръчваме използването на меки, неабразивни кърпи, както са кърпите за почистване на очила. ИЗКЛЮЧЕТЕ ТАБЛЕТА НА МЕСТА С ОГРАНИЧЕНИЯ Изключете таблета на местата в които употребата им не е позволена или в ситуации при които може да...
- Page 58 Препоръките свързани с излагането на радио вълни на мобилните устройства използва мерна единица позната под името на специфична скоростна абсорбция или SAR. Границата SAR, така както е определена в препоръките на ICNIRP е 2.0 watts/kilogram (W/Kg) средно на 10 грама на клетка. При...
- Page 59 Радио-предавателното оборудване, вклюително устройствата wireless какъвто е таблета, могат да попречат на функционирането на неподходящо защитени медицински устройства. Консултирайте се с някой лекар или производителя на медицинското устройство, за да проверите дали е защитено правилно от външни радио вълни. Изключете устройството на места, в които се прилагат правилници, болници...
Need help?
Do you have a question about the S1005TAB and is the answer not in the manual?
Questions and answers