Table of Contents
Advertisement
Advertisement
Table of Contents

Related Manuals for Eclipse 55090


Summary of Contents for Eclipse 55090
- Page 1 FUJITSU TEN 55090 MODEL ESN E8 DVD TUNER WITH CDC/E-COM/DSP CONTROL AND REMOTE OWNER'S MANUAL We appreciate your purchase of this tuner. Please read through this manual for correct operation. We suggest that after reading it you keep this manual...
- Page 2 55090 Warnings and caution signs, illustrated below, are posted throughout this manual as well as on the 55090. They show safe and correct ways to handle the product so as to prevent personal injury to you and others and avoid damage to property.
- Page 3 Warning • Do not place the vinyl storage bag over a person. It may cause a serious accident or death by suffocation. • Do not adjust the controls while driving the car. To adjust the controls, stop the car in a safe location. •...
- Page 4 Warning • When installing this product, never use the existing nuts or bolts that secure parts of the fuel tank, or the steering or braking system. Otherwise, improper steering or braking or a fire may result. • To prevent a short circuit from occuring, disconnect the battery's negative terminal before installing this product.
- Page 5 Caution • Do not stick your fingers or hands into the disc slot. Doing so may cause personal injury. • This product must be operated only as on-board equipment, or it may cause electrical shock or injury. • Do not play distorted sounds for long periods of time; the speakers may overheat and cause a fire.
- Page 6 Caution • Do not install this product in locations where it cannot be fastened securely, such as places subject to frequent vibration. Otherwise, it may become dislodged and cause an accident or injury. • If this product is not connected properly, a short circuit, fire or accident may occur.
-
Page 7: Table Of Contents
Table of Contents Operating precautions ..........10 Notes on operation ..............10 About CDs and DVDs ..............12 About cleaning a disc ..............14 Names of controls and parts ........15 ESN (Key CD) security operating procedure ... 16 How to program the Key CD ............16 How to cancel the Key CD ............ - Page 8 Initial DVD settings ............... 40 Discs which are compatible with this player ......... 44 Notes on DVD ................45 Symbols used on DVD video discs ..........46 About copyright ................47 Explanation of DVD video terms ..........48 Table of language codes ............. 51 How to operate the CD player ........
- Page 9 How to use an optional NOB remote control ... 75 Turning the power on/off ............. 75 Adjusting the audio volume ............75 Switching playback modes ............76 How to play the tuner ..............76 How to play CDs ................. 77 Illuminating the NOB remote control ..........
-
Page 10: Operating Precautions
Operating precautions u Operating precautions <Your 55090 will perform well over a long period of time through correct handling and care.> Notes on operation • For your safety, play only at volume levels that allow outside sounds to be heard. - Page 11 Operating precautions • About dew condensation. In cold or rainy weather, just as the interior glass surface gets fogged, dew (water condensation) may also settle on the deck. When this occurs, disc playback may become intermittent or impossible. Dehumidify the air in the vehicle for a while before resuming playback.
-
Page 12: About Cds And Dvds
Operating precautions About CDs and DVDs • The signal recorded on a disc is read by a laser beam, so nothing touches the disc surface. A scratch on the recorded surface or a badly warped disc may cause deteriorated sound quality or intermittent playback. - Page 13 Operating precautions About brand new discs About disc accessories • You may notice that some brand • Do not use accessories new discs are rough around the (stabilizers, protective seals, laser center hole or outside edge. lens cleaners, etc.) sold for Remove the rough edges with “improving sound performance”...
-
Page 14: About Cleaning A Disc
Operating precautions About borrowed discs • Do not use a disc with glue or remnants of adhesive tape or labels. They may cause the disc to get stuck inside or damage the deck. How to remove discs • When removing the ejected disc, OKAY pull it straight out along the slot. -
Page 15: Names Of Controls And Parts
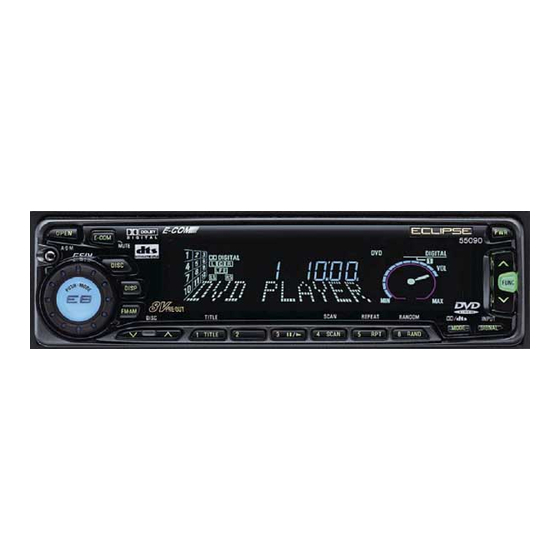
Names of controls and parts u Names of controls and parts Front view [ASM] button [FUNC] button [DISC] button [OPEN] button [PWR] button [DISP] button ※ [E-COM] button ] buttons buttons [1] to [6] [MODE] button DISC ] buttons [SIGNAL] button [FM ・... -
Page 16: Esn (Key Cd) Security Operating Procedure
A [SEC] message appears, then in two seconds it will change to [DISC]. The front panel opens; the 55090 is now ready to accept your Key CD in the CD slot. Insert the CD into the slot. The front panel closes. -
Page 17: How To Cancel The Key Cd
A [SEC] message appears, then in two seconds it will change to [DISC]. The front panel opens; the 55090 is now ready to accept your Key CD in the CD slot. Insert your Key CD into the slot. The front panel closes. -
Page 18: How To Change The Key Cd
ESN (Key CD) security operating procedure • This process cancels the protection for the ESN deck. • If power to the ESN deck is disconnected, then reconnected, a Key CD will not need to be inserted in order to return the unit to normal operation. •... -
Page 19: How To Resume Normal Operation (Esn Security Lock Out)
[SEC] message will appear for two seconds. Thereafter, the message changes to [DISC] and the 55090 is ready to accept your Key CD into the slot. Insert your Key CD. If the correct CD is inserted, an [OK] message will appear for two seconds and the CD will begin playing. -
Page 20: What Happens If An Incorrect Cd Is Inserted
Note l If after 5 tries the correct Key CD is not inserted, the display reads [CALL800]; the unit must be returned to Eclipse to be reset. In this case, please contact your Eclipse dealer for assistance or call Eclipse directly at (800) 233-2216. -
Page 21: How To Turn The Security Indicator On/Off
ESN (Key CD) security operating procedure [DISP] button [FM・AM] button ■ How to turn the security indicator on/off Once ESN security is activated, the indicator flashes whenever the vehicle’s ignition is turned off, warning potential thieves that the unit is protected. However, if you do not want this visible deterrent, it may be turned off. -
Page 22: How To Read The Electronic Serial Number
[ESN] appears on the display, followed by an eight-digit number; this number is your electronic serial number (ESN). You may use this number to identify your Eclipse 55090 in the event it is recovered after being stolen. -
Page 23: Basic Operation
Basic operation [DISC] button [PWR] button [OPEN] button [FM・AM] button u Basic operation This section covers basic operating procedures. For additional details, please refer to the sections on specific functions. n Turning the power on and off Press the [PWR] button. Pressing the button turns the power on and off. -
Page 24: Listening To The Tuner
Basic operation [DISP] button [OPEN] button [E-COM] button ] button [FM•AM] button Buttons [1] to [6] [AUDIO CONTROL] button [FUNC] button n Listening to the tuner Press the [FM•AM] button. This will turn the tuner on. To turn the tuner off, either press the [PWR] button or select another mode. -
Page 25: Adjusting Audio Volume
Basic operation n Adjusting the angle of the front panel You can adjust the angle of the display to suit your personal preference. Press and hold the [OPEN] button for more than one second. The front panel will open while the button is being pressed, and it will stop at the point where the button is released. -
Page 26: Displaying The Clock
Basic operation [DISP] button [AUDIO CONTROL] button Buttons [1] to [6] [FUNC] button n Displaying the clock Press the [DISP] button repeatedly until the time is displayed. Refer to the section on "Setting the clock" to set the time display. n Others t Disabling the guide tone feature (for button operation) -
Page 27: Switching Audio Control Modes
Basic operation 3 . To adjust the minutes, press either button [3] or [4] while holding the [DISP] button down. Button [3]: Turns the minute back. Button [4]: Turns the minute forward. •To set the clock to 0 minutes, 0 seconds (an exact hour), press button [5], holding down the [DISP] button. -
Page 28: Enabling The Loudness Control
Basic operation [DISP] button [AUDIO CONTROL] button [FUNC] button t Enabling the loudness control The loudness control may be turned on to emphasize low and high frequencies at low volume levels. Loudness compensates for the apparent weakness of low and high frequencies at low volume by boosting the bass and treble levels. - Page 29 Basic operation t Changing the display luminance The luminance level of the display can be changed by the following procedure to one of three levels. 1 . Press the [FUNC] button. 2 . Press and hold the [DISP] button for more than one second.
- Page 30 Basic operation [ASM] button [E-COM] button Button [5] [FUNC] button t Switching Non-Fader modes 1 . Press the [FUNC] button. 2 . Press button [5] to switch the phase. 3 . Press the [FUNC] button. Pressing the button will cancel Function mode. t Disabling the Tone Control Cancel feature 1 .
-
Page 31: How To Operate The Dvd Player
How to operate the DVD player u How to operate the DVD player When this player is connected to a monitor, you can view DVD pictures on the monitor screen. DVD operations should basically be carried out using the special remote control. However, if the description of operation tells you to "Press the ... -
Page 32: Inserting A Dvd
How to operate the DVD player [MODE] button [OPEN] button [BAND] button n Inserting a DVD Press the [OPEN] button on the player. The front panel opens. Insert the DVD disc into the disc slot, label side up. If the disc is double-sided, insert the disc so that the side to be played is facing downward. -
Page 33: Fast-Forwarding And Rewinding Pictures
How to operate the DVD player [CHAPTER] button n Fast-forwarding and rewinding pictures Press the [CHAPTER] buttons. The mode changes between tuner and disc modes [ ] : When pressed and released immediately, the picture moves to the next chapter. When pressed and held (for one second or more), the pictures are fast-forwarded. -
Page 34: Searching For Pictures
How to operate the DVD player Numeric input buttons [CLEAR] button [SEARCH] button [ENTER] button Button[5] n Searching for pictures Press the [SEARCH] button. The mode changes to Chapter Search Title Search Search Mode Cancel each time the button is pressed. Use the numeric input buttons on the remote control to enter the number for the picture you would like to search for, and... -
Page 35: Pausing The Picture/Frame-By-Frame Playback
How to operate the DVD player [STOP] button [PAUSE] button [PLAY] button n Pausing the picture/Frame-by-frame playback Press the [PAUSE] button. The picture playback will pause. If you press the [PAUSE] button while the picture is paused, the picture will play back one frame at a time. -
Page 36: Displaying Dvd Menus
How to operate the DVD player [TOP] button [ENTER] button n Displaying DVD menus If the [TOP] button is pressed during DVD-Video playback, the menu which is recorded on the DVD disc can be displayed on the screen (if using a DVD disc which has a menu recorded). -
Page 37: Displaying Title Menus
How to operate the DVD player [TITLE] button [ENTER] button n Displaying title menus If the [TITLE] button is pressed during DVD-Video playback, the title menu which is recorded on the DVD disc can be displayed on the screen (if using a DVD disc which has a title menu recorded). -
Page 38: Selecting Different Multiplex Audio Channels
How to operate the DVD player [SUB TITLE] button [AUDIO] button n Selecting different multiplex audio channels If the [AUDIO] button is pressed during DVD-Video playback, the audio channel languages which are recorded on the DVD disc can be displayed on the screen (if using a DVD disc which has multiplex audio channels recorded). -
Page 39: Selecting Different Multiplex Angles
How to operate the DVD player [ANGLE] button n Selecting different multiplex angles If the [ANGLE] button is pressed during DVD-Video playback, the multiplex angles which are recorded on the DVD disc can be displayed on the screen (if using a DVD disc which has different multiplex angles recorded). -
Page 40: Initial Dvd Settings
How to operate the DVD player [SET UP] button [ENTER] button Cursor button [STOP] button n Initial DVD settings When a DVD is being played back, press the [STOP] button on the remote control to stop playback. Press the [SET UP] button. The player will change to DVD setting mode. - Page 41 How to operate the DVD player Numeric input buttons [CLEAR] button [SET UP] button [ENTER] button Cursor buttons 3 . Press the [SET UP] button. DVD setting mode will be cleared. •You cannot select languages which have not been recorded on the disc. •If there is no menu recorded on the disc, no menu display will appear.
-
Page 42: Parental Lock Setting
How to operate the DVD player [SET UP] button [ENTER] button Cursor buttons t Parental lock setting 1 . Use the cursor buttons on the remote control to select PARENTAL LOCK, and then press the [ENTER] button. 2 . Use the numeric input buttons on the remote control to enter a password. - Page 43 How to operate the DVD player [SET UP] button [ENTER] button Cursor buttons •The audio-visual restriction levels are classified as follows. Level 1: Restricts playback to DVD programs for young children Levels 2~7: Restricts playback to DVD programs for children and general audiences Level 8: Allows any type of DVD program to be played back...
-
Page 44: Discs Which Are Compatible With This Player
How to operate the DVD player Discs which are compatible with this player •This player can be used to play the following types of disc. Refer to page 10 for further details. Type of disc Disc contents Size of disc DVD video discs Audio + video 12cm / 8cm... -
Page 45: Notes On Dvd
How to operate the DVD player Notes on DVD •This player is compatible with the NTSC color television format. It cannot play back discs which are recorded in other formats (such as PAL and SECAM). •This player has been designed to block the playback of some DVD video discs which have been obtained outside the proper retail region, and also some commercial-use discs, so be sure to check the region number (number for regions where the disc can be played back) which... -
Page 46: Symbols Used On Dvd Video Discs
How to operate the DVD player Symbols used on DVD video discs This player is equipped with a variety of functions for enjoying DVDs. Check the function symbols which are included in the DVD programming in order to get the maximum enjoyment from the DVD. Meanings and examples Functions Indicates the region number (number for... -
Page 47: About Copyright
How to operate the DVD player About copyright •The copying, broadcasting, projection, cable transmission, public presentation and rental (whether for payment or not) of DVD video discs and their contents are forbidden by law. •This player is manufactured under license from Dolby Laboratories Licensing Corporation. -
Page 48: Explanation Of Dvd Video Terms
How to operate the DVD player Explanation of DVD video terms DVD video A DVD which has moving pictures recorded on it. DVD video utilizes MPEG2, which is one of the global standards in digital compression technology, to compress the video data by 1/40th (on average) of its original size. - Page 49 How to operate the DVD player Multiplex angle This is one of the features of DVD video discs. The same scene is shot from different angles, and these angles are all recorded onto a single disc, so that you can change the angle when viewing the pictures.
- Page 50 How to operate the DVD player MPEG This is an abbreviation for Moving Picture Experts Group, and is an international standard for video compression. Some DVDs use this format for digital compression of audio tracks also. Linear PCM PCM is an abbreviation for Pulse Code Modulation, and refers to a form of digital audio.
-
Page 51: Table Of Language Codes
How to operate the DVD player Table of language codes These codes are used to specify the language for audio tracks, subtitles and on-screen menu displays. Language Input code Language Input code Japanese 1 0 0 1 Estonian 0 5 2 0 English 0 5 1 4 Basque... - Page 52 How to operate the DVD player Language Input code Language Input code Lingala 1 2 1 4 Slovak 1 9 1 1 Laothian 1 2 1 5 Slovenian 1 9 1 2 Lithuanian 1 2 2 0 Samoan 1 9 1 3 Latvian 1 2 2 2 Shona...
-
Page 53: How To Operate The Cd Player
How to operate the CD player [DISC] button u How to operate the CD player First press the [DISC] button to switch to the disc mode. It is assumed here that a CD has already been loaded into the unit. n Listening to CDs Press the [DISC] button. -
Page 54: Advancing To The Next Track Or Returning To The Beginning Of The Track Being Played
How to operate the CD player Button [4] ] buttons n Advancing to the next track or returning to the beginning of the track being played Press the [ ] button. [ ] button: Advances to the next track. ] button: Returns to the beginning of the track being played. -
Page 55: Repeating The Same Track (Repeat)
How to operate the CD player [DISP] button Buttons [5] and [6] n Repeating the same track (REPEAT) Press button [5 (RPT)] to repeat the track being played. To cancel, press button [5] again. n Playing tracks in random order (RANDOM) Press button [6 (RAND)] to play the tracks in random order. -
Page 56: Switching A Cd To Pause / Play
How to operate the CD player [OPEN] button Button [3] n Switching a CD to pause / play Push button [3( It pauses playing a CD. To cancel, press button [3] again. n Ejecting the disc Press the [OPEN] button. The front panel opens and the disc ejects. -
Page 57: Creating A Title For A Cd
How to operate the CD player Buttons [1] to [4] n Creating a title for a CD A CD title may be created, attached and displayed for your discs. If external CD changers are connected, a title for a CD will be created in the same way. - Page 58 How to operate the CD player Buttons [5] and [6] Button [1] Press either button [5] or [6] to select characters. Button [5]: Moves the character backward in its type. Button [6]: Advances the character forward in its type. [Upper-case characters, alphanumeric characters] Initial value [Up direction] A B C .
-
Page 59: Changing A Previously Set Title
How to operate the CD player Button [1] Buttons [3] to [6] n Changing a previously set title If external CD changers are connected, a previously set title for a CD will be changed in the same way. It is assumed here that the CD mode is selected. -
Page 60: Deleting A Previously Created Title
How to operate the CD player [DISP] button [ASM] button Buttons [1] and [2] ] buttons n Deleting a previously created title If external CD changers are connected, a previously created title for a CD will be deleted in the same way. It is assumed here that the CD mode is selected.
Need help?
Do you have a question about the 55090 and is the answer not in the manual?
Questions and answers