Makita TD090D Technical Information
Hide thumbs
Also See for TD090D:
- Instruction manual (49 pages) ,
- Instruction manual (13 pages) ,
- Instruction manual (12 pages)
Advertisement
Quick Links
Download this manual
See also:
Instruction Manual
T
ECHNICAL INFORMATION
Models No.
Description
C
ONCEPT AND MAIN APPLICATIONS
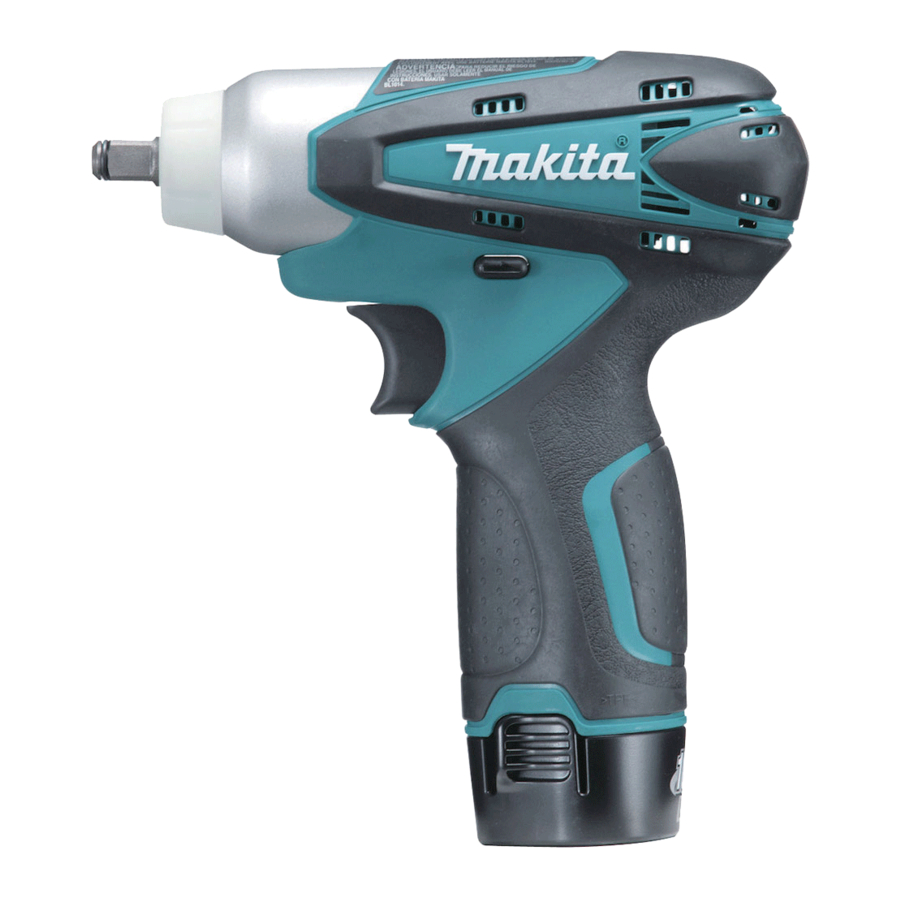
Model TD090D is a 10.8V cordless impact driver
compact and lightweight for easy handling, but featuring
high operation efficiency.
Uses new 10.8V Li-ion battery of stick type as a power unit.
This product is available in the following variations.
Model No.
TD090D
TD090DW
TD090DWE
(Li-ion 1.3Ah)
TD090DWEW
The models also includes the accessories listed below in "Standard equipment".
S
pecification
Cell
Voltage: V
Battery
Capacity: Ah
Charging time (approx.): min.
Max. output: W
Driving shank: mm (")
Machine screw
Standard bolt
Capacities
High tensile bolt
Coarse thread screw
Impacts per min.: min-
No load speed: min
Max. fastening torque: N.m [kgf.cm] (in.lbs)
Electric brake
Variable speed control by trigger
Reverse switch
LED job light
Net weight [with battery BL1013]: kg (lbs)
S
tandard equipment
Holster ......................... 1 pc
Note: The standard equipment for the tool shown above may differ by country.
O
ptional accessories
Phillips bits, Square bits, Socket bits, Drill chucks, Hex shank auger bits,
Hole saws for impact driver, Bit piece,
Charger DC10WA, Battery BL1013
TD090D
10.8V Cordless Impact Driver
Battery
quantity Charger
type
BL1013
2
DC10WA
=ipm
1
= rpm
-1
Length (L) 155 (6-1/8)
Width (W)
Height (H)
Plastic
Housing
carrying case
color
Makita-blue
white
Yes
Makita-blue
white
Li-ion
10.8
1.3
50
with DC10WA
115
6.35 (1/4) Hex
M4 - M8 (5/32 - 5/16")
M5 - M12 (3/16 - 1/2")
M5 - M10 (3/16 - 3/8")
22 - 90mm (7/8 - 3-1/2")
0 - 3,000
0 - 2,400
90 [910] (800)
Yes
Yes
Yes
Yes
0.92
(2.0)
W
Dimensions: mm (")
54 (2-1/8)
178 (7)
Offered to
USA, Canada
Mexico, Panama
All countries except
the four listed above
PRODUCT
P 1/ 6
L
H
Advertisement

Related Manuals for Makita TD090D


Summary of Contents for Makita TD090D
- Page 1 TD090D Description 10.8V Cordless Impact Driver ONCEPT AND MAIN APPLICATIONS Model TD090D is a 10.8V cordless impact driver compact and lightweight for easy handling, but featuring high operation efficiency. Dimensions: mm (") Uses new 10.8V Li-ion battery of stick type as a power unit.
-
Page 2: Necessary Repairing Tools
Disassembling of Hammer case complete [2] LUBRICATION Apply Makita grease N. No.2 to the portions designated with the black triangle and Makita grease FA No.2 to the portions designated with gray triangle to protect parts and product from unusual abrasion. - Page 3 P 3/ 6 epair [2] DISASSEMBLY/ASSEMBLY [3]-1. Hammer case section DISASSEMBLING 1) Remove Bumper from Hammer case complete. (Fig. 2) 2) Remove two Set plates with which Housings L and R are assembled to one another as follows: Insert a small slotted screwdriver through the punched hole of Set plate and Fig.
- Page 4 P 4/ 6 epair [3]-2. Hammer section DISASSEMBLING 1) Remove Hammer section in accordance with [3]-1. Hammer case section. 2) Press down Hammer using 1R045 and 1R346 to align the opening for Steel ball insertion with the top of cam grooving on Spindle.
-
Page 5: Circuit Diagram
P 5/ 6 epair [3]-4. Bit Holder Section and Anvil DISASSEMBLING (1) Disassemble Hammer case complete. See Figs. 2 to 5. (2) Put Hammer case complete on 1R232 to disassemble Ring spring 11 easily. See Fig. 14. (4) Remove Ring spring 11 as illustrated in Fig. 15. Now Bit holder section can be disassembled as illustrated in Fig. 16. Fig. -
Page 6: Wiring Diagram
P 6/ 6 iring diagram Fig. D-2 Pay attention to the directions of lead wires and connect Flag receptacles to electrical parts. Refer to the following illustration. red marking Terminal DC motor Fig. D-3 Before installing Switch in Housing R, route Lead wires as illustrated below and connect two Connectors. Do not put their Lead wires on the ribs of Housing L.
Need help?
Do you have a question about the TD090D and is the answer not in the manual?
Questions and answers