Table of Contents
Advertisement
Advertisement
Table of Contents

Related Manuals for Binatone SM800


Summary of Contents for Binatone SM800
- Page 1 USER GUIDE MOBILE TELEPHONE SM800...
-
Page 2: Table Of Contents
CONTENTS BOX CONTENT ........... 3 GETTING TO KNOW YOUR PHONE ....4 MENU OPERATION ..........7 INSTALLATION AND SETUP ........ 7 MAKING AND ANSWERING CALLS ....9 USING THE CONTACTS ........11 CALL LOG............14 MESSAGING ............15 SETTINGS ............19 GALLERY ............ -
Page 3: Box Content
BOX CONTENT In the box you will find: • 1 mobile handset • 1 charging cradle • 1 power adapter • 1 handset back cover • 1 user guide Keep the packing materials in a safe place in case you later need to transport the device. Warning The torch uses a high-brightness LED. -
Page 4: Getting To Know Your Phone
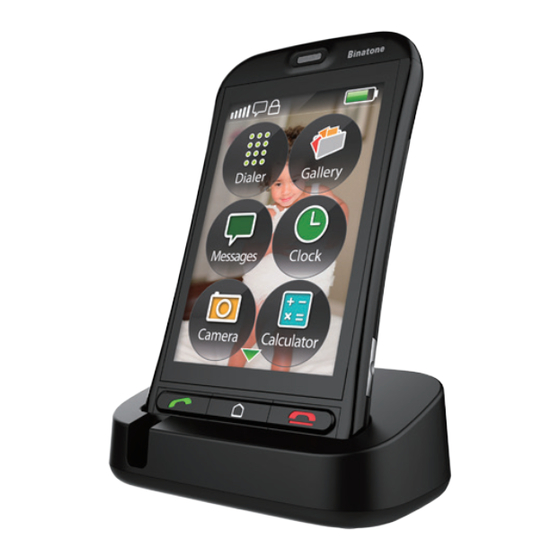
GETTING TO KNOW YOUR PHONE Keys and parts... - Page 5 Meaning • Press to answer a call during ringing Talk key • Press to enter the dial interface in standby • Press to dial a number • Press to end a call • Press to return to idle from any interface End key •...
- Page 6 Display icons and symbols The standby screen shows the following information: Meaning Radio link On with signal strength when linked. with mobile network. Battery charge level Internal segments cycle during battery charging. Alarm On if alarm is set. Ring and Vibrate off Ringer and vibration is off.
-
Page 7: Menu Operation
,there will display more menu, touch any main menu icon you wish INSTALLATION AND SETUP Before operating the SM800, a SIM card must be installed. Keep the SIM card out of reach of small children. - Page 8 Charge the battery Warning: Use only the supplied/approved batteries and chargers. Using others may be dangerous and will invalidate warranty. A battery must be fitted. Do not charge with the back cover removed. • Connect the charger lead firmly into the USB socket on the top of the handset, or place the handset directly in the charging cradle.
-
Page 9: Making And Answering Calls
Note: The battery can also be charged if the handset is connected to a computer USB port. Switching on and off To switch the phone on and off: • To switch off, press and hold End key until there display power off interface, then touch Power off to switch phone off. - Page 10 Last number redial • In idle mode, press Talk key to display dial interface, then touch call log icon to view the call log list – touch related icons to view Dialled calls, Missed calls, Received calls and All calls. •...
-
Page 11: Using The Contacts
USING THE CONTACTS You can store names and phone numbers in the Internal Contacts (up to 500) and in the SIM phone book (SIM dependant , but a maximum of 250). To access the contacts In idle mode: • Touch Menu then touch Contacts icon to enter Contacts menu. - Page 12 • Press Talk key or touch call icon to dial the number. To edit a contact entry • When in phonebook list, slide up and down to find the entry you want to change. • Press Options then select Edit, touch the Name bar to display the soft keyboard , and modify the name, then hide the soft keyboard .
-
Page 13: Phonebook Settings
Note: Before that insure the Reject numbers in blacklist is On, setting path as followed: Settings > Call settings > Blacklist > Reject numbers in blacklist>On Note: Once you add the number to the blacklist, the phone uses the number can’t dialing in yours. Phonebook settings •... -
Page 14: Call Log
CALL LOG In idle mode, press Talk key to display dial interface, then press call log icon to see the call log list – press icons to view Dialled calls, Missed calls, Received calls and All calls. To view the call log entries •... -
Page 15: Messaging
MESSAGING Received SMS are stored in the Inbox and the icon indicates new messages. Also “unread message ” is displayed until View or Cancel is pressed. To access the SMS menu • Press Menu then press Messaging icon to enter messaging menu as below: Write to write a new message. - Page 16 To write and send a text message In Messaging menu: • Press Write message, then press Text message to display a flashing cursor in number bar, press the bar to display soft keyboard, input telephone number or the names in your phonebook , then hide the soft keyboard, also you can press the TO icon to add contacts from Phonebook.
- Page 17 View to read the message Reply by to send a reply a message to the sender. Reply by to send a reply MMS to the sender. Call sender to call the sender Forward to forward the message to others Delete to delete the message.
- Page 18 To modify SMS settings • Press Menu to show Messaging and press the messaging icon to select. • Slide Down to Message Settings and press to enter in, then press Text message as follows: To set validity period, message type, on/off delivery report, on/off reply path ,set mailbox and so on Memory...
-
Page 19: Settings
SETTINGS Allows you to adjust various settings on the phone and also to reset them to their factory default values. • Press Menu then press Settings icon to select. • Choose from the list the options available. PROFILES Profiles allow quick changes to your phone sounds and to customize them based on your situation. -
Page 20: Call Settings
Call settings To set or modify the following call feature options: Call waiting to activate call waiting where you can press Talk to answer a 2nd call while holding the 1st. Call divert to set different incoming call diverts. Call barring to restrict making and receiving calls. - Page 21 9.3.1. Time and to set the displayed time and date. date Schedule Set the time and enable the status Power on/off ,then you can schedule power on/off your phone Language set the displayed language International Set the keypad language keyboards Display to set wallpaper on the idle screen ,time of screen auto lock ,date and...
-
Page 22: Network Settings
Network settings Network To search new network and set selection Automatic /Manual Preferences To set network priority GPRS When needed/Always connection GPRS Data prefer/Call prefer transfer pref. Security settings To managed the security of your phone. SIM security set SIM lock on: you need a PIN before use after startup and to Change password. -
Page 23: Gallery
GALLERY 10.1 Camera Press Gallery icon then press Camera to enter menu, press Options as follows: Photos to view saved photos Camera To set Anti-flicker and delay time of settings Camera Image To set image size and Image quality settings White balance To set white balance, default Auto. -
Page 24: Video Recorder
Delete Delete the image Sort by Sort the image by name, type, time, size and so on. Delete all files To delete all images Storage To set storage of image Image To display the information of the information image , name , resolution, size, create time and so on. -
Page 25: Clock
Preferred play To on/off the 3D mode of playing 3D mode the video Auto repeat To on/off auto repeat function 10.5 Sound recorder • Press Gallery icon then press Sound recorder to enter menu, touch the related icon to start / stop recorder. -
Page 26: Calendar
CALENDAR Open the Calendar to show the current month. options: View View the same day calendar event View all View the all calendar events Add event Add new event Jump to date to go to a specific date. Go to today to return to the present day. -
Page 27: Music
MUSIC • Press Music icon to enter music player interface, touch related icons to play, Pause, loop, shuffle. • When in music list , press Options as follows: Play Play the select music Details Display the details of current music, size, time, title and so on. -
Page 28: Safety And Precautions
SAFETY AND PRECAUTIONS When using your telephone, basic safety precautions should always be followed to reduce the risk of fire, electric shock and injury, including the following: 1. Switch off the phone in the vicinity of chemical plants, gas stations and other locations containing explosive objects. -
Page 29: Charging Your Battery
10. Avoid using the phone in extremely high or low temperature environments. Never leave the phone exposed under direct sunlight, in high humidity or in a dusty environment. 11. Do not use liquid or anything wet with strong detergents to clean the handset. 18.1 Charging your battery Your device is powered by a rechargeable battery... - Page 30 circuiting will occur when a metallic object such as a coin, clip or pen causes direct connection of the positive (+) and negative (-) terminals of the battery. This might happen, for example, when you carry a spare battery in your pocket or purse. Short- circuiting the terminals may damage the battery or the connecting object.
-
Page 31: Further Safety Information
• Do not use the mobile phone during charging. 18.2 Further safety information The unit and the accessories can contain small parts. Keep them out of the reach of small children. 18.3 Operating environment Remember to ollow any particular rules that may apply wherever you happen to be and always turn off the unit whenever its use is forbidden, as it can cause interference or danger. - Page 32 18.5 Pacemaker Pacemaker manufacturers recommend a distance of at least 15 cm. between a mobile phone and a pacemaker to avoid the risk of interference with the pacemaker. These recommendations are in accordance with independent research and recommendations from Wireless Technology Research.
- Page 33 18.8 Areas with explosion risk Always turn off the unit when you are in an area where there is a risk of explosion and follow all signs and instructions. An explosion risk exists in the places that include areas where you are normally requested to turn off your car engine.
-
Page 34: Guarantee And Service
GUARANTEE AND SERVICE The phone is guaranteed for 24 months from the date of purchase shown on your sales receipt. This guarantee does not cover any faults or defects caused by accidents, misuse, fair wear and tear, neglect, lightning, tampering with the equipment, or any attempt at adjustment or repair other than through approved agents. -
Page 35: Technical Details
TECHNICAL DETAILS Standard: GSM Mobile Frequency Band: GSM850/PCS1900MHZ System: Phase 2G Operating Time: Standby around: 600 Hours (with fully charged battery) Talk time : 4 hours Charging Time: <6 hours Temperature Range: Operating: 0 °C to 40 °C Storage: -20 °C to 60 °C Handset Battery: 3.7V DC, 1200mAh Battery Pack Travel Charger:... -
Page 36: Troubleshooting
TROUBLESHOOTING “Call failed” Check dialled appears number is correct, with full area code SIM card Some SIM cards are fitted thinner than others. Lightly press the – only makes SIM card holder to ensure a proper emergency contact is made. call The mobile The phone is switched... - Page 37 How can If the signal is weak, reception be try another location to make or improved? continue with a call, e.g. when indoors move towards a window. Reception is often poor in elevators, tunnels or underground railways and car parks. Can I If you want withhold suppress...
- Page 38 Warning Specific Absorption Rate (SAR) information SAR tests are conducted using standard operating positions accepted by the FCC with the phone transmitting at its highest certified power level in all tested frequency bands, although the SAR is determined at the highest certified power level, the actual SAR level of the phone while operating can be well below the maximum value, in general, the closer you are to a wireless base station antenna,...
- Page 39 pursuant to part 15 of the FCC Rules. These limits are designed to provide reasonable protection against harmful interference in a residential installation. This equipment generates uses and can radiate radio frequency energy and, if not installed and used in accordance with the instructions, may cause harmful interference to radio communications.
- Page 40 ICES-003 : This CAN ICES-3 (B)/NMB-3(B) digital apparatus complies with Canadian ICES-003. IC RSS warning This device complies with Industry Canada licence- exempt RSS standard (s). Operation is subject to the following two conditions: (1) this device may not cause interference, and (2) this device must accept any interference,including interference that may cause undesired operation of the device.
- Page 41 de brouillage radioélectrique à l’intention des autres utilisateurs, il faut choisir le type d’antenne et son gain de sorte que la puissance isotrope rayonnée équivalente (p.i.r.e.) ne dépasse pas l’intensité nécessaire à l’établissement d’une communication satisfaisante. (1/2) This radio transmitter (identify the device by certification number, or model number if Category II) has been approved by Industry Canada to operate with the antenna types listed...
- Page 42 www.binatoneglobal.com US and Canada: (1)-866-779-1632...
Need help?
Do you have a question about the SM800 and is the answer not in the manual?
Questions and answers