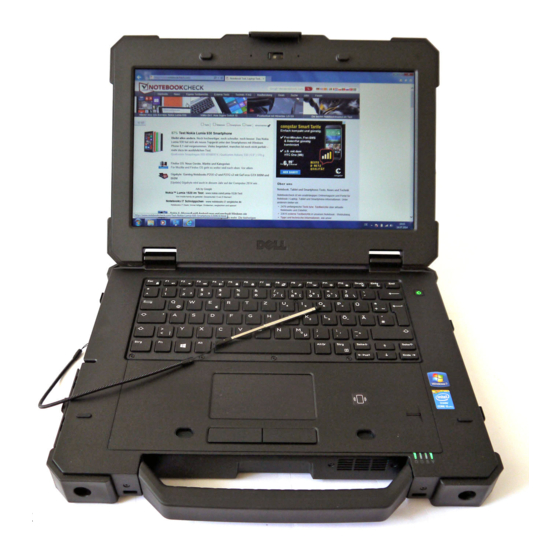
Dell Latitude 7414 Getting Started Manual
14" rugged extreme
Hide thumbs
Also See for Latitude 7414:
- Getting started manual (107 pages) ,
- Owner's manual (109 pages)

Subscribe to Our Youtube Channel
Related Manuals for Dell Latitude 7414


Summary of Contents for Dell Latitude 7414
- Page 1 Dell Latitude 14 Rugged Extreme – 7414 Getting Started Guide Regulatory Model: P45G Regulatory Type: P45G002...
- Page 2 © 2016 Dell Inc. All rights reserved. This product is protected by U.S. and international copyright and intellectual property laws. Dell and the Dell logo are trademarks of Dell Inc. in the United States and/or other jurisdictions. All other marks and names mentioned herein may be trademarks of their respective companies.
-
Page 3: Table Of Contents
Contents 1 Finding information and resources..............5 2 System overview....................6 3 Quick setup......................8 4 Removing and installing components............10 ......................10 Opening the press latch doors ......................10 Closing the press latch doors ..........................10 Removing the battery ..........................11 Installing the battery ........................ - Page 4 ..........................20 Display specifications ........................20 Touchpad specifications ........................21 Keyboard specifications ......................... 21 Adapter specifications ...................... 21 Physical dimension specifications ......................22 Environmental specifications 8 Contacting Dell....................23...
-
Page 5: Finding Information And Resources
Dell.com/regulatory_compliance for more information on: • Safety best practices • Regulatory certification • Ergonomics See Dell.com for additional information on: • Warranty • Terms and Conditions (U.S. only) • End User License Agreement Additional information on your product is available at Dell.com/support/manuals. -
Page 6: System Overview
System overview Figure 1. System front view... - Page 7 WARNING: Do not block, push objects into, or allow dust to accumulate in the air vents. Do not store your Dell computer in a low-airflow environment, such as a closed briefcase, while it is running. Restricting the airflow can damage the computer. The computer turns on the fan when the computer gets hot.
-
Page 8: Quick Setup
Quick setup WARNING: Before you begin any of the procedures in this section, read the safety information that shipped with your computer. For additional best practices information, see Dell.com/ regulatory_compliance. WARNING: The AC adapter works with electrical outlets worldwide. However, power connectors and power strips vary among countries. - Page 9 Figure 6. Power button NOTE: It is recommended that you turn on and shut down your computer at least once before you install any cards or connect the computer to a docking device or other external device, such as a printer.
-
Page 10: Removing And Installing Components
WARNING: Using an incompatible battery may increase the risk of fire or explosion. Replace the battery only with a compatible battery purchased from Dell. The battery is designed to work with your Dell computer. Do not use a battery from other computers with your computer. -
Page 11: Installing The Battery
NOTE: The battery is below the press latch door. To unlock the battery, slide the battery release latch to the right. Holding the pull tab, pull the battery out of the computer. Installing the battery Insert the battery into the battery slot until it clicks into place. Close the battery door and press it until it clicks into place. -
Page 12: Working On Your Computer
Working on your computer This section provides information about the backlit keyboard, stealth mode, function keys and converting your computer to notebook and tablet modes (if applicable). Using the backlit keyboard The Latitude rugged series comes equipped with a backlit keyboard that can be customized. The following colors are enabled: White Green... -
Page 13: Customizing The Backlit Keyboard In System Setup (Bios)
Customizing the backlit keyboard in System Setup (BIOS) Turn off the computer. Turn on the computer and when the Dell logo appears, press the F2 key repeatedly to bring up the System Setup menu. Under System Configuration menu, select RGB Keyboard Backlight. -
Page 14: Stealth Mode
Disabling stealth mode in the system setup (BIOS) Power off the computer. Power on the computer and at the Dell logo, tap the F2 key repeatedly to bring up the System Setup menu. Expand and open the System Configuration menu. -
Page 15: Enabling And Disabling The Wireless (Wifi) Feature
To disable stealth mode uncheck the Enable Stealth Mode option. Click Apply changes and click Exit. Enabling and disabling the wireless (WiFi) feature To enable wireless Networking, press Fn + PrtScr. Press Fn + PrtScr again to disable wireless Networking. -
Page 16: Quick Disconnect (Qd) Connector
Quick Disconnect (QD) connector Latitude fully rugged products come equipped with receptacles for QD (Quick Disconnect) connectors at the corners. These receptacles allow the connection of optional accessories such as shoulder straps. Installing the QD connector Align the QD connector to the receptacle on the corner of the computer. Press and hold the button on top of the QD connector. -
Page 17: Technical Specifications
Technical specifications NOTE: Offerings may vary by region. For more information regarding the configuration of your computer in: • Windows 10, click or tap Start → Settings → System → About. • Windows 8.1 and Windows 8, from the charms sidebar, click or tap Settings → Change PC settings. -
Page 18: Battery Specifications
Feature Specification Minimum memory 4 GB Maximum memory 32 GB Battery specifications Feature Specification Type 6-cell or 9-cell smart lithium ion Depth 80 mm (3.14 inches) Height 21 mm (0.82 inches) Width 166.9 mm (6.57 inches) Weight • 6-cell: 365.5 g (0.80 lb) •... -
Page 19: Video Specifications
Feature Specification Interface (internal) HD audio Interface (external) microphone in/stereo headphones/external speakers connector Speakers one mono speaker Internal speaker 2 W (RMS) amplifier Volume controls Volume up/Volume down buttons CAUTION: Adjustment of volume control, as well as the equalizer in the operating system and/or equalizer software, to other settings than the center position may increase the earphones and/or headphones output and cause hearing damage or loss. -
Page 20: Display Specifications
Feature Specification USB ports • one 4-pin USB 2.0-compliant port • one 9-pin USB 3.0-compliant port with PowerShare • two 9-pin USB 3.0-compliant ports SIM card slot one micro-SIM slot with security feature Display specifications Feature Specification Type WLED display Size 14.0 inches Height... -
Page 21: Keyboard Specifications
Keyboard specifications Feature Specification Number of keys • 83 keys: US English, Thai, French-Canadian, Korean, Russian, Hebrew, English- International • 84 keys: UK English, French Canadian Quebec, German, French, Spanish (Latin America), Nordic, Arabic, Canada Bilingual • 85 keys: Brazilian Portuguese •... -
Page 22: Environmental Specifications
Feature Specification Weight (minimum 7.8 lbs (3.54 kg) config) Environmental specifications Feature Specifications Temperature — –29°C to 63°C (–20°F to 145°F) operating Temperature — –51°C to 71°C (–60°F to 160°F) storage Relative humidity 10% to 90% (noncondensing) (maximum) — operating Relative humidity 0% to 95% (noncondensing) (maximum) —... -
Page 23: Contacting Dell
Dell product catalog. Dell provides several online and telephone-based support and service options. Availability varies by country and product, and some services may not be available in your area. To contact Dell for sales, technical support, or customer service issues: Go to Dell.com/support.
Need help?
Do you have a question about the Latitude 7414 and is the answer not in the manual?
Questions and answers