Dell Latitude 7410 Setup And Specifications
Hide thumbs
Also See for Latitude 7410:
- Service manual (81 pages) ,
- Setup and specifications (45 pages) ,
- Owner's manual (176 pages)

Related Manuals for Dell Latitude 7410


Summary of Contents for Dell Latitude 7410
- Page 1 Latitude 7410 Setup and Specifications 1.0.0.0 Regulatory Model: P119G and P131G Regulatory Type: P119G001 and P131G001 May 2020 Rev. A00...
- Page 2 A WARNING indicates a potential for property damage, personal injury, or death. © 2020 Dell Inc. or its subsidiaries. All rights reserved. Dell, EMC, and other trademarks are trademarks of Dell Inc. or its subsidiaries. Other trademarks may be trademarks of their respective owners.
-
Page 3: Table Of Contents
Display view.................................... 7 Palmrest view..................................9 Left view....................................10 Right view..................................... 10 Bottom view..................................11 Modes.....................................11 Chapter 3: Keyboard shortcuts....................... 14 Chapter 4: Specifications of Latitude 7410..................16 Dimensions and weights..............................16 Processors.................................... 16 Chipset....................................17 Operating system................................. 17 Memory....................................17 External ports..................................18 Internal connectors................................18 Wireless module..................................18... - Page 4 Downloading the audio driver............................38 Downloading the graphics driver............................38 Downloading the USB driver..............................39 Downloading the WiFi driver.............................. 39 Downloading the media-card reader driver........................40 Downloading the chipset driver............................41 Downloading the network driver............................41 Chapter 7: Getting help and contacting Dell..................43 Contents...
-
Page 5: Chapter 1: Set Up Your Computer
Set up your computer About this task This section discusses setting up your Dell Latitude 7410 system for the first time, including setting up the Internet connectivity and, personalizing with Dell apps. Steps 1. Connect the power adapter and press the power button. - Page 6 Follow the on-screen instructions to complete the setup. For more information about installing and configuring Ubuntu, see the knowledge base articles SLN151664 SLN151748 at www.dell.com/support. 3. Locate and use Dell apps from the Windows Start menu—Recommended. Table 1. Locate Dell apps Dell Product Registration Register your system unit with Dell. Dell Help and Support Access help and support for your system.
-
Page 7: Chapter 2: Chassis Overview
Chassis overview Display view Laptop 1. RGB or IR Camera (optional) 2. Camera status LED 3. LCD panel 4. Battery status LED Chassis overview... - Page 8 2-in-1 1. Proximity sensor 2. IR emitter (optional) 3. RGB or IR Camera (optional) 4. Camera status LED 5. Ambient Light Sensor (ALS) sensor 6. LCD panel 7. Battery status LED Chassis overview...
-
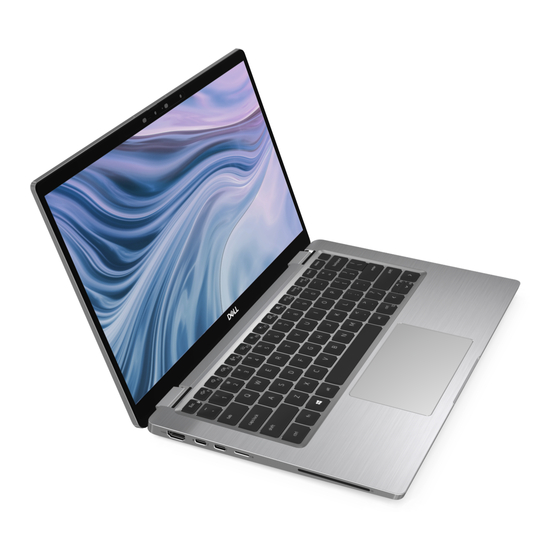
Page 9: Palmrest View
Palmrest view 1. Microphone array 2. SafeView switch 3. Microphone array 4. Power button (Optional: Fingerprint reader) 5. Touchpad Chassis overview... -
Page 10: Left View
Left view 1. HDMI 2.0 port 2. USB 3.2 Gen 2 Type-C port with DisplayPort (alt mode), Thunderbolt 3.0 with Power Delivery(PD) 3. USB 3.2 Gen 2 Type-C port with DisplayPort (alt mode), Thunderbolt 3.0 with PD 4. micro-SD card slot 5. -
Page 11: Bottom View
1. Cooling vents 2. Service tag label 3. Speaker grills Modes This section illustrates various usage modes of a Latitude 7410 Laptop and 2-in-1 computer: Notebook mode NOTE: This usage mode applies to both laptop and 2-in-1 configurations. Chassis overview... - Page 12 2-in-1 Modes NOTE: These usage mode applies 2-in-1 configurations only. Tablet mode Chassis overview...
- Page 13 Stand mode Tent mode Chassis overview...
-
Page 14: Chapter 3: Keyboard Shortcuts
Keyboard shortcuts This section describes the primary and secondary function associated with each of the Function Keys and their combination with function lock. NOTE: Keyboard characters may differ depending on the keyboard language configuration. Keys that are used for shortcuts remain the same across all language configurations. Some keys on your keyboard have two symbols on them. - Page 15 List of other keyboard shortcuts Table 3. List of other keyboard shortcuts Function key combinations Behavior Pause/Break Toggle scroll lock System request Open application menu Table 4. List of other keyboard shortcuts Function key combinations Behavior Fn+Ctrl+B Break Fn+Shift+B Unobtrusive mode NOTE: Option is disabled by deafult, needs to be activated in the BIOS.
-
Page 16: Chapter 4: Specifications Of Latitude 7410
Specifications of Latitude 7410 Dimensions and weights The following table lists the height, width, depth, and weight of your Latitude 7410. Laptop Table 5. Dimensions and weight Description Values Height : Front height 0.71 in. (18.13 mm) Rear height 0.76 in. (19.33 mm) Width 12.65 in. -
Page 17: Chipset
Windows 10 Home (64-bit) • Windows 10 Professional (64-bit) • Ubuntu 18.04 LTS (not available for 2-in-1 system configurations) Memory The following table lists the memory specifications of your Latitude 7410. Table 9. Memory specifications Description Values Memory slots Built on system board... -
Page 18: External Ports
External ports The following table lists the external ports on your Latitude 7410. Table 10. External ports Description Values USB ports • Two USB 3.2 Gen 1 Type-A ports, one with PowerShare • Two USB 3.2 Gen 2 Type-C ports with Power Delivery, DisplayPort over USB Type-C, and Thunderbolt 3 •... -
Page 19: Audio
TKIP Bluetooth Bluetooth 5.1 Bluetooth 5.1 WWAN modules The following list provides the mobile broadband module options available on Latitude 7410 1. 2-in-1: • Qualcomm Snapdragon X20 Gigabit LTE CAT 16 (DW5821e; e-SIM enabled), WW excluding China, Turkey, US •... -
Page 20: Storage
Peak 2.5 W Microphone Dual-array microphones Storage This section lists the storage options on your Latitude 7410. Your computer supports one of the following configurations: • M.2 2230, PCIe x4 NVMe, Class 35 SSD • M.2 2280, PCIe x4 NVMe, Class 40 SSD •... -
Page 21: Camera
You can define the primary behavior of the function keys (F1–F12) changing Function Key Behavior in BIOS setup program. Camera The following table lists the camera specifications of your Latitude 7410. Table 17. Camera specifications Description Values Number of cameras Camera type •... -
Page 22: Touchpad
For more information about touchpad gestures for Windows 10, see the Microsoft knowledge base article 4027871 support.microsoft.com. Fingerprint reader (optional) The following table lists the specifications of the optional fingerprint-reader of your Latitude 7410. Table 19. Fingerprint reader specifications Description Values... -
Page 23: Battery
Express charge : 2 hours • Standard charge: 3 hours NOTE: Control the charging time, duration, start and end time, and so on using the Dell Power Manger application. For more information on the Dell Power Manger see, https://www.dell.com/support/home/ product-support/product/power-manager/docs Life span (approximate) -
Page 24: Display
Enabling ExpressCharge requires that both the computer and the battery used be ExpressCharge capable. If these requirements are not met, ExpressCharge will not be enabled. Display The following tables lists the display specifications of your Latitude 7410. Table 22. 2-in-1 Display specifications Description... - Page 25 4K • Privacy Mode display is (brightness < 40%) : 2.4 W (max) certified. Anti-glare vs glossy Anti-glare Anti-glare Anti-glare Anti-glare Anti-glare finish Touch options Non-touch Non-touch Touch (no active pen Non-touch Non-touch support) Specifications of Latitude 7410...
-
Page 26: Gpu-Integrated
GPU—Integrated The following table lists the specifications of the integrated Graphics Processing Unit (GPU) supported by your Latitude 7410. Table 24. GPU—Integrated Controller External display support Memory size Processor Intel UHD Graphics • Two DisplayPort over USB Shared system memory... - Page 27 ControlVault 3 Advanced Authentication with FIPS 140-2 Level 3 Yes, for FPR, SC and CSC/NFC Certification Fingerprint Reader Only Touch Fingerprint reader in power button tied to ControlVault 3 Contacted Smart Card and ControlVault 3 FIPS 201 Smart card reader certification/SIPR Specifications of Latitude 7410...
-
Page 28: Chapter 5: System Setup
Boot Sequence allows you to bypass the System Setup–defined boot device order and boot directly to a specific device (for example: optical drive or hard drive). During the Power-on Self Test (POST), when the Dell logo appears, you can: •... -
Page 29: One Time Boot Menu
• Removable Drive (if available) • STXXXX Drive (if available) NOTE: XXX denotes the SATA drive number. • Optical Drive (if available) • SATA Hard Drive (if available) • Diagnostics NOTE: Choosing Diagnostics, will display the SupportAssist diagnostics screen. The boot sequence screen also displays the option to access the System Setup screen. One time boot menu To enter one time boot menu, turn on your computer, and then press F2 immediately. - Page 30 Table 28. System setup options—System information menu (continued) Overview Processor Information Processor Type Displays the processor type. Maximum Clock Speed Displays the maximum processor clock speed. Core Count Displays the number of cores on the processor. Processor L2 Cache Displays the processor L2 Cache size. Processor ID Displays the processor identification code.
- Page 31 Table 29. System setup options—Boot options menu (continued) Boot options UEFI Boot Path Security Enables or disables the system to prompt the user to enter the Admin password when booting a UEFI boot path from the F12 boot menu. Default: Always Except Internal HDD. Table 30.
- Page 32 Table 30. System setup options—System Configuration menu (continued) System Configuration Default: 10 seconds. Touchscreen Enables or disables the touchscreen for the operating system. NOTE: Touchscreen will always work in the BIOS setup irrespective of this setting. Default: ON. Table 31. System setup options—Video menu Video LCD Brightness Brightness on battery power...
- Page 33 Table 32. System setup options—Security menu (continued) Security Intel SGX Enables or disables the Intel Software Guard Extensions (SGX) to provide a secured environment for running code/storing sensitive information. Default: Software Control SMM Security Mitigation Enables or disables additional UEFI SMM Security Mitigation protections. Default: OFF.
- Page 34 Table 35. System setup options—Performance menu (continued) Performance Intel SpeedStep Enables or disables the Intel SpeedStep Technology to dynamically adjust processor voltage and core frequency, decreasing average power consumption and heat production. Default: ON. Intel TurboBoost Technology Enabled or disabled the Intel TurboBoost mode of the processor. If enabled, the Intel TurboBoost driver increases the performance of the CPU or graphics processor.
- Page 35 Table 37. System setup options—Wireless menu Wireless Wireless Switch Determines which wireless devices can be controlled by the Wireless Switch. For Windows 8 systems, this is controlled by an operating system drive directly. As a result, the setting does not affect the Wireless Switch behavior. NOTE: When both WLAN and WiGig are present, enable/disable controls are tied together.
- Page 36 Dell Auto operating system Recovery Controls the automatic boot flow for SupportAssist System Resolution Console and Threshold for Dell operating system Recovery tool. Default: 2. SupportAssist operating system Recovery Enables or disables the boot flow for SupportAssist operating system Recovery tool in the even of certain system errors.
-
Page 37: Clearing Bios (System Setup) And System Passwords
Clearing BIOS (System Setup) and System passwords About this task To clear the system or BIOS passwords, contact Dell technical support as described at www.dell.com/contactdell. NOTE: For information on how to reset Windows or application passwords, refer to the documentation accompanying Windows or your application. -
Page 38: Chapter 6: Software
Downloading the audio driver Steps 1. Turn on your computer. 2. Go to www.dell.com/support. 3. Enter the Service Tag of your computer, and then click Submit. NOTE: If you do not have the Service Tag, use the auto-detect feature or manually browse for your computer model. -
Page 39: Downloading The Usb Driver
Downloading the USB driver Steps 1. Turn on your computer. 2. Go to www.dell.com/support. 3. Enter the Service Tag of your computer, and then click Submit. NOTE: If you do not have the Service Tag, use the auto-detect feature or manually browse for your computer model. -
Page 40: Downloading The Media-Card Reader Driver
Downloading the media-card reader driver Steps 1. Turn on your computer. 2. Go to www.dell.com/support. 3. Enter the Service Tag of your computer, and then click Submit. NOTE: If you do not have the Service Tag, use the auto-detect feature or manually browse for your computer model. -
Page 41: Downloading The Chipset Driver
Downloading the chipset driver Steps 1. Turn on your computer. 2. Go to www.dell.com/support. 3. Enter the Service Tag of your computer, and then click Submit. NOTE: If you do not have the Service Tag, use the auto-detect feature or manually browse for your computer model. - Page 42 16. After the download is complete, navigate to the folder where you saved the network driver file. 17. Double-click the network driver file icon and follow the instructions on the screen to install the driver. Software...
-
Page 43: Chapter 7: Getting Help And Contacting Dell
Getting help and contacting Dell Self-help resources You can get information and help on Dell products and services using these self-help resources: Table 43. Self-help resources Self-help resources Resource location Information about Dell products and services https://www.dell.com/ Dell Support Tips Contact Support In Windows search, type Contact Support, and press Enter. - Page 44 Dell product catalog. Availability varies by country/region and product, and some services may not be available in your area. To contact Dell for sales, technical support, or customer service issues: 1.
Need help?
Do you have a question about the Latitude 7410 and is the answer not in the manual?
Questions and answers