Table of Contents
Advertisement
Advertisement
Table of Contents

Related Manuals for Sharp KH-9126CT00-EU


Summary of Contents for Sharp KH-9126CT00-EU
- Page 1 Home Appliances Cooking User Manual KH-9I26CT00-EU For Life...
-
Page 2: Table Of Contents
CONTENTS: Safety instructions Appliance description. Cooking surface and control panel of 2 heater Operation of the appliance Switching the appliance on and off Switching the cooking-zones on and off Residual heat indicator Key Lock Safety switch off function Child Lock Timer function Buzzer Boost Function... - Page 3 maintenance shall not SAFETY WARNINGS be done by children READ THESE INSTRUCTIONS CA- REFULLY AND COMPLETELY BEFO- without supervision. RE USING YOUR APPLIANCE, AND • WARNING: The app- KEEP THEM IN A CONVENIENT PLA- CE FOR REFERENCE WHEN NECES- liance and its acces- SARY.
- Page 4 • Do not use harsh ab- avoid the possibility of rasive cleaners electric shock. sharp metal scrapers • For induction hobs, to clean the oven door metallic objects such glass and other sur- as knives, forks, spo- face since they can...
-
Page 5: During Use
signed only for cooking food and is and disposed of immediately. intended for indoor domestic hou- • Protect your appliance against sehold use only and should not be atmospheric effects. Do not expo- used for any other purpose or in se it to effects such as sun, rain, any other application, such as for snow etc. - Page 6 position when it is not being used. • During cleaning and main- tenance • Always turn the appliance off befo- re operations such as cleaning or maintenance. You can do it after removing the plug for the applian- ce off or turning the main switches off.
-
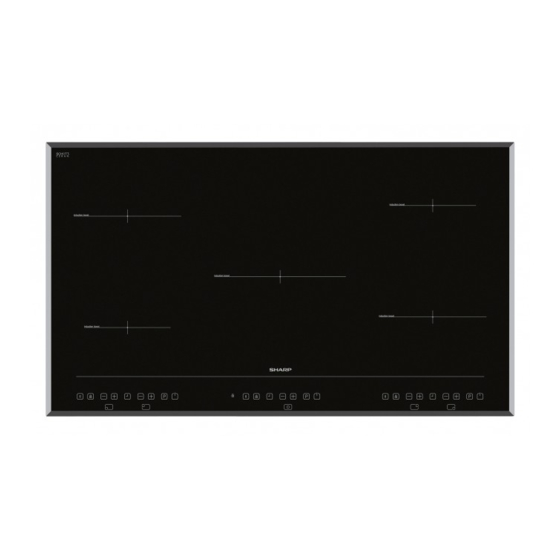
Page 7: Description Of The Hob
DESCRIPTION OF THE HOB Dear Customer, Please read the instructions in this user guide before using the hob and keep them for future reference. Cooking Surface for 5 heaters: Induction heating element Control panel Note: The appearance of your hob maybe different than the model shown above due to its configuration. - Page 8 Control Panel for 2 heater : 1- Key Lock 7- On/Off 2-Key Lock Indicator 8- Smart Pause 3-Heater Display 9- Decrease heat setting back 4-Timer 10- Increase heat setting back 5-Timer Display 11- Decrease heat setting front 6-Boost 12- Increase heat setting front...
- Page 9 Control Panel for 1 heater : 1- Key Lock Indicator 7- On/Off 2- Key Lock 8- Smart Pause 3- Timer 9- Decrease heat setting 4- Timer Display 10- Increase heat setting 5- Heater Display 6- Boost...
-
Page 10: Operation Of The Appliance
OPERATION OF THE Select the temperature setting by using the increase heat setting key APPLIANCE decrease the heat setting key Use the induction cooking zones with . The element is now ready to cook suitable cookware. on. For quickest boil times, select the desired cooking level and then press the P key to activate the Boost function. -
Page 11: Key Lock
Safety switch off function: the control has been switched on and off. Every cooking zone will be switched off after a defined maximum operation time if the heat setting is not modified. To deactivate the child lock, first switch Every change in the cooking zone puts the hob on. Simultaneously operate the maximum operation time back to the front increase heat setting key the initial value of the operating time and the decrease heat setting key limitation. -
Page 12: Buzzer
10 seconds after the last operation, Press the timer setting key the timer display changes to the timer increase the time or press that will run out next (in the event of decrease the time. Adjustment range programming more than 1 cooking is between 0 and 99 minutes. -
Page 13: Hints And Tips
display. (if appropriately labelled by the manufacturer) will give you the best Activating the booster can exceed the results. maximum power and the integrated power management will be activated. · Cookware made of enamelled steel The necessary power reduction or aluminium or copper bottoms can is shown by the blinking of the cause a metallic residue to remain on corresponding cooking zone display. -
Page 14: Installation Of The Appliance
· Any overhanging surface should be Cleaning tips at least 65cm above the hob. · Do not use abrasive pads, corrosive · Extractor fans must be fitted in cleaners, aerosol cleaners or sharp accordance with the manufacturer's objects to clean the surfaces of the instructions. hob. -
Page 15: Fitting The Hob Into A Worktop
· The power cable length should not exceed 2 metres. Fitting the hob into a work surface Min. 20mm · The hob can be inserted into any worktop provided it is heat resistant up to at least 90ºC. · Create an opening with the dimensions shown in the picture below Min. -
Page 16: Making An Electrical Connection
Separator Separator Min. 20mm Min. 20mm Min. Gap 5mm Min. Gap 5mm Separator Separator Min. 10mm Worktop mounting bracket Making an electrical connection Before making a connection, check View B that: View B The voltage power supply is the same as that quoted on the rating plate ·... - Page 17 ons and is in good working order. For the induction hob, the cable must be H05VV-F 3X4 mm² 60227 IEC 53 The fused switch is easily accessible ••. You will find the connection diagram once the hob has been installed. shown on the bottom of your appliance. If there is no dedicated hob circuit and fused switch, they must be installed by a qualified electrician before the hob is...
- Page 18 E8: The cooler temperature sensor is disabled, call an authorized service agent. E9 : Calibration error, call an authori- zed service agent.
- Page 19 Visit our website: www.sharphomeappliances.com Or contact us: Service & Support...