Table of Contents
Advertisement
Quick Links
Advertisement
Table of Contents

Subscribe to Our Youtube Channel
Related Manuals for VACBOT S200

Summary of Contents for VACBOT S200
- Page 1 USER MANUAL Vacuum and Floor Mopping Robot myVacBot S200...
-
Page 3: Table Of Contents
CONTENTS FEATURES ....................... SAFETY INSTRUCTIONS ..................PARTS ........................ASSEMBLY ......................FUNCTIONS ......................FEATURES & CLEANING MODE ................CLEANING FEATURES .................... CLEANING MODES ....................BATTERY INSTALLATION ..................BATTERY REMOVAL ....................CHARGING ......................DOCK ........................DOCKING TEST ...................... ROBOT BATTERY RECHARGE ................ROBOT BATTERY CARE .................. -
Page 4: Features
01 FEATURES We bring you an easy to use vacuum and floor mopping robot that works both on hard floor surfaces and carpets and also can be used for wet mopping operations. This is not just sweeper but a real vacuum cleaner with powerful suction, side brushes and a main brush. You can now enjoy your personal time while the vacuum and floor mopping robot will clean for you. -
Page 5: Safety Instructions
02 SAFETY INSTRUCTIONS Important • Carefully read the instructions before operating the unit. Please retain the manual for future reference. • This appliance is for indoor use only. • Rating: this unit must be only connected to a 220-240V / 50Hz earthed outlet. Always check the ratting label against your electrical supply. -
Page 6: Parts
03 PARTS 1. Vacuum and floor mopping robot 2. Home Base 3. User Manual 4. Remote Control 5. Room Limiter (Sonic Wall) 6. Power Supply Adaptor 7. Battery 8. Spare Parts Box 9. Cleaning Brush 10. Hair Removal Tool (inside the Home Base) 11. -
Page 7: Functions
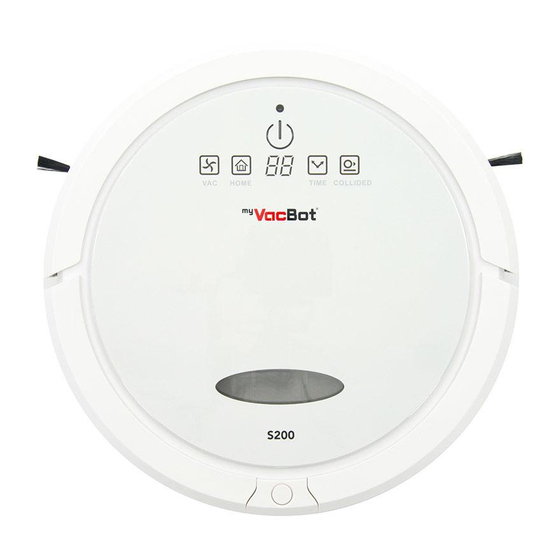
05 FUNCTIONS Power switch Start / Stop switch Dust-bin button Function display Bumper Charger Inlet Side-Brush Drop-Sensor (*4) Main-Brush Universal Wheel Charging-Pad Power switch – : ON o : OFF Side-Brush Air-outlet Dust-bin unit Wheel set... -
Page 8: Features & Cleaning Mode
06 FEATURES & CLEANING MODE Robotic Features 1. Scheduler/Recharging Home Base – Auto cleaning with scheduler & auto recharge when low on battery 2. Ultrasonic Obstacle Detection 3. Ultrasonic Collision Obstacle Detection 4. Anti-Falling Cliff Detection Sensor 5. Ultrasonic Dust Sensors 6. -
Page 9: Battery Installation
NOTES 1. The vacuum and floor mopping robot is suitable for hard floors and low to medium pile carpets. 2. This vacuum and floor mopping robot is not suitable for very uneven surfaces. Do not use in long pile/ tick carpet. Fold carpet fringes under the carpet before starting operation. 3. -
Page 10: Charging
11 CHARGING If the vacuum and floor mopping robot shuts down while working or the battery indicator flashes, please charge the vacuum and floor mopping robot immediately. When the vacuum and floor mopping robot completes its cleaning cycle or the battery level is low, the vacuum and floor mopping robot will return to its Home Base automatically if there is enough power left to do so. -
Page 11: Robot Battery Recharge
14 ROBOT BATTERY RECHARGE • When the Power Button on the vacuum and floor mopping robot blinks red, this indicates that the battery level is low. • The robot will shut down the vacuum engine and go back to the recharging Home Base. •... -
Page 12: Room Limiter (Sonic Wall)
3. When turned on, the blue LED light blinks for 70 seconds, then turns into standby mode. When myVacBot S200 starts working, the Room Limiter will turn on and show blue LED light. 4. The best effective distance of Sonic Wall barrier is about 2M (10ft). -
Page 13: Spinning Side Brushes
6. When myVacBot S200 is cleaning, the Sonic Wall must be positioned at least 1m (3ft) away from the Home Base and should avoid facing towards it. 7. When the vacuum and floor mopping robot completes the cleaning cycle you can power off the Sonic Wall by sliding the power switch to “OFF”... -
Page 14: Control Panel
18 CONTROL PANEL Power Button: Press the Power Button to activate the vacuum and floor mopping robot. The button will light up blue. The power button light indicates the status of the robot and its system. Power Button Light System Status Red LED Blinking Battery Level is low Blue LED Blinking... -
Page 15: Remote Control
4. Collided When this function is activated, the robot will slow down its moving speed in order not to collide with any objects when cleaning. This function is ideal on cluttered space. 5. Vacuum Motor The robot cannot perform the cleaning process without the activation of the vacuum motor function. 6. -
Page 16: Scheduling The Vacuum And Floor Mopping Robot
Collided Button: 1. Press this button to activate or to shut down the function. 2. Before the vacuum and floor mopping robot starts cleaning, it is suggested to clean up small items, like clothing, power cords, cables and loose fringes of rugs. 3. -
Page 17: Scheduling The Vacuum And Floor Mopping Robot
22 SCHEDULING 1. Press the “Schedule” button first. The LCD display will show “Scheduler”. 2. Press the “Week” button. The LCD display will show “Mo (Monday)” blinking. 3. If Monday is the chosen day, press the “Week” button again. Then Monday will be programmed in. 4. -
Page 18: Cleaning & Maintenance
24 CLEANING & MAINTENANCE In order to keep the robot in the best condition and for the best cleaning performance, perform the following maintenance. 1. Make sure the unit is unplugged before performing any cleaning operation. 2. Before first use and continuing after each use, wipe of unit with a damp cloth and dry thoroughly. 3. - Page 19 Wheels and Sensors 1. Check and remove all debris and dirt. 2. The myVacBot S200 is equipped with four ground sensors. Please clean them gently using a wet cloth or tissue. Do not use any solvents as they may damage the sensors.
-
Page 20: Wet Mopping Base Instructions
26 WET MOPPING BASE INSTRUCTIONS Reminder: Wet Mopping Base needs to be taken off before cleaning on carpets. Install New Mop: Remove their inner roller first. Remove the second roller. Take rollers out. New Mop Top Side Bottom Side Insert the roller from one end Place the wet mop through Insert the other roller of new mop. -
Page 21: Setting Id With Main Unit
If you have lost or buy a new one of Home Base or Sonic Wall. You are in need of a setting your ID into the new unit form communication with myVacBot S200. How to set up an ID (Status of main unit indicator lamps when studying):... - Page 22 3. Let the Sonic Wall Start to Study If the two symbols are all light up, please clear previous ID from the main unit. If any of the two symbols is not light up, please follow the steps below. Step 1: Power on the Sonic Wall so the power LED lights up. Step 2: Use one of toothpick to insert the hole at the back of the Sonic Wall and press down when you hear “BI”...
-
Page 23: App Instruction
28 APP INSTRUCTION 1. Scan QR-Code to download the app, install App and open it Apple IOS Android 2. App starting 3. Click „+“ in the 4. Click Wi-Fi Setting in 5. Confirm host into upper light corner the bottom networking stat 6. - Page 24 9a. Choose the 10. Enter into remote 11. Drag up to show 12. Click the arrow connected device then control inferface. In more menus into timer reservation jump to Step 10. Standby mode, press setting 9b. Click to view arrow keys to default firmware version start cleaning and delete online...
-
Page 25: Useful Tips
Leave enough space (15“ or more) for myVacBot S200 to operate Tip #3 Do not let loose edges of rugs, drapes, table cloths, etc. to get caught by myVacBot S200 brushes. Roll the loose edges of rugs underneath. Fold the rug edges that have loose ends under it. - Page 26 Tip #4 Fixing jams: If some object gets caught with the roller or side brush, turn the myVacBot S200 off immediately. Remove anything that caused the jam before using the cleaner again. myVacBot S200 will make a Turn it upside down and remove the Clean the vacuum entry.
-
Page 27: Troubleshooting
30 TROUBLESHOOTING Problem Cause Solution Error message Sensor malfunction or system Check the error messages on the jammed. next page for correct action. The vacuum and floor mopping Battery is not installed or installed Check if the battery is still in good robot cannot power on. -
Page 28: Product Specifications
Error Message Suggested Actions E1 Front Cliff Sensor The vacuum and floor mopping robot might be trapped in a specific area where there are stairs or floor edge. E2 Charging Error Please refer to the correct installation process of the charging dock and try again. - Page 32 Disposal: Do not dispose this product as unsorted waste. Collection of such waste must be handled separately as special treatment is necessary. Recycling facilities are now available for all customers at which you can deposit your old electrical products. Customers will be able to take any old electrical equipment to participating civic amenity sites run by their local councils.
Need help?
Do you have a question about the S200 and is the answer not in the manual?
Questions and answers