Table of Contents
Advertisement
Advertisement
Table of Contents

Subscribe to Our Youtube Channel
Related Manuals for VACBOT myVacBot B100

Summary of Contents for VACBOT myVacBot B100
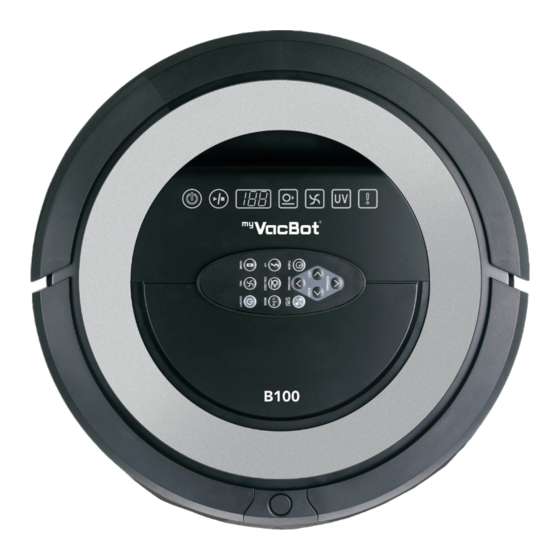
- Page 1 USER MANUAL Vacuum Robot myVacBot B100...
-
Page 3: Table Of Contents
CONTENTS SAFETY PRECAUTIONS ..................SAFETY INSTRUCTION ................... CAUTIONS ......................SPECIAL FEATURE ....................PARTS ........................ASSEMBLY ......................MAIN UNIT FEATURES ................... REMOTE CONTROL FUNCTION ................BATTERY INSTALLATION ..................BATTERY REMOVAL ....................SONIC WALL SETUP ....................DOCK ........................DOCKING TEST ...................... BATTERY CHARGING METHODS ................SCHEDULER OPERATIONS .................. -
Page 4: Safety Precautions
01 SAFETY PRECAUTIONS Before using this product, please read the following instructions and keep this operation manual for future reference. Please follow all normal safety precautions to avoid the occurrence of situations such as fire, short-circuit, and injury. Please make sure that you observe all the following safety precautions. 02 SAFETY INSTRUCTION 1. -
Page 5: Special Feature
Optimum dimension 33 x 8cm / 13 x 3.1 inch - Enables cleaning under beds, furniture 2. Once the myVacBot B100 is turned on, it will follow a five step repetitive movement cycling : This wide variety of movement helps to ensure that myVacBot B100 completely cleans a room. -
Page 6: Parts
05 PARTS 1. Main unit 2. Charging base 3. Box for spare parts 4. Remote control 5. Sonic-wall 6. Battery pack 7. Charger 8. Manual 9. Cleaner brush 10. Rolling-brush cleaner 06 ASSEMBLY Dust-bin button Remote control Power switch Start/Stop switch Bumper Charger inlet Function display... -
Page 7: Main Unit Features
During period 24hr of Main-Power-Button on, you also can use Remote- control to Power-on and Start / Stop myVacBot B100. ( When myVacBot B100 did not work over 24hr, myVacBot B100 will power-off itself to protect battery life. You must push Main-Power-Button again to wake up myVacBot B100.) Timer/ Movement Mode / Error, display: 1. - Page 8 The blue symbol light-up, the UV-Light is activated. You can push „UV“ button of remote control, to ON- OFF it. (When myVacBot B100 start working, the UV Light is followed your last time setting) Error : If myVacBot B100 got error, the Red symbol will be light-up.
-
Page 9: Remote Control Function
After power on main unit (by push down the Main power button), you can press ON/OFF keypad to control myVacBot B100. (If the last power off myVacBot B100 was over 24Hr, for power saving and battery life reason, you can not power on by remote control, please power on by Main power button) 2. -
Page 10: Battery Installation
Please follow below drawing, step by step to install battery. 1. Push down button, same time, pull out dust-bin. 2. Let myVacBot B100 flip over. Follow the Arrow direction of battery, and take battery into slot. 3. Let plastic hook lock battery ready. -
Page 11: Sonic Wall Setup
6. When myVacBot B100 cleaning, the Sonic Wall position must be away from charging base at least 1m (3 ft), and avoid face to charging base. 7. When myVacBot B100 complete cleaning , you can power off the Sonic wall by slided the power switch to „OFF“ position. -
Page 12: Dock
13 DOCKING TEST • Put the myVacBot B100 on the floor close to the Home Base and turn it on. Now press the „Home“ key on remote control. The myVacBot B100 should return to the Home Base automatically for self-charging. -
Page 13: Scheduler Operations
The scheduling function of myVacBot B100 is built in Charging-base. User has the freedom to set up the cleaning time according to pre-programmed schedule. On this preset cleaning time, myVacBot B100 will leave Home Base and start the cleaning session automatically. - Page 14 Anytime Go cleaning button: 1. Push button ( Just one shoot ): When myVacBot B100 is charging fully, it will leave charging-base to cleaning automatically. 2. Push button (Over 3 sec): If myVacBot B100 seated on charging-base, it will leave base and cleaning immediately.
-
Page 15: Installing Accessories
Side Brushes Main (Rolling) Brush • There are 2 color hairs on roller-brush, one is white, another is black.Also, there are 2 color push-buttons on myVacBot B100 bottom. • Match the hairs color with push-button color. • Push down button (do not release), then insert roller-brush. -
Page 16: General Operation
B100 will begin to automatically clean the floor. 6. At the end of the cleaning cycle, the myVacBot B100 will emit a long beep and will turn off the vacuum motor and start to search for Home base. If the low battery light on the unit is blinking, then the battery is low and myVacBot B100 needs to be recharged before it vac be used again. -
Page 17: Cleaning & Maintenance
18 CLEANING & MAINTENANCE The operation and maintenance of the myVacBot B100 is very simple. To maintain top performance of the unit, it is recommended that you follow a routine cleaning and maintenance schedule after earch use. Make sure to clean empty the Dust Bin and to brush off the Filter after every cleaning cycle. - Page 18 After operating the machine for a period of time, dust and dirt will accumulate on the vacuum entry on the bottom of the myVacBot B100 Cleaning this...
-
Page 19: Setting Id With Main Unit
Purpose: If lost or buy new one of charging base, sonic wall, remote control. You need setting ID into new unit for communication with myVacBot B100. How to set up an ID (Status of main unit indicator lamps when studying):... - Page 20 3. Let the Sonic Wall Start to Study If the three symbols are all light up, please clear previous ID from the main unit. If any of the three symbols is not light up, please follow the steps below. Step 1: Power on the Sonic Wall so the power LED lights up. Step 2: Use one of toothpick to insert the hole at the back of the Sonic Wall and press down when you hear “BI”...
-
Page 21: Useful Tips
Tip #3 Do not let the loose edges of rugs, drapes, table cloths, etc to get caught in the myVacBot B100 Roll under the loose edges of rugs and make sure that any table cloths, drapes, bedding etc don‘t hand down to the floor. - Page 22 Tip #5 Block areas where the myVacBot B100 could get stuck by placing objects in the way so that the myVacBot B100 does not go into these areas. The space under some furniture may not be high Use potted plants to block the myVacBot B100 and enough for the myVacBot B100 to get underneath.
-
Page 23: Product Specification
21 PRODUCT SPECIFICATION Suction Power Speed 1.2 meters per second, 11500 rpm vacuum motor Fast adapter/charger Input: 100 - 240V 50-60 Hz Output: 20Vdc 1000 mA Battery Ni-MH 14.4V, 2.8 Ah Rechargeable, 3.0 hours of charging time Noise 65 dB at distance of 1m Life time of UV ray 6000 hours continuously Capacity of dust bin...
Need help?
Do you have a question about the myVacBot B100 and is the answer not in the manual?
Questions and answers