Table of Contents
Advertisement
Advertisement
Table of Contents

Related Manuals for HandHeld NAUTIZ X8


Summary of Contents for HandHeld NAUTIZ X8
- Page 1 NAUTIZ X8 MANUAL...
-
Page 2: Table Of Contents
CONTENTS INTRODUCTION 1.1. Trademarks ............................4 1.2. About the NAUTIZ X8 Terminal ......................4 1.3. Model Name: NAUTIZ X8 ........................4 1.4. Accessories ............................5 SAFETY REGULATIONS 2.1. Symbols in this manual ........................6 2.2. General Safety Rules .......................... 6 2.3. - Page 3 USING CONTROL PANEL 6.1. System Properties ..........................30 6.2. Power Properties ..........................31 6.3. Program Buttons ..........................32 6.4. Backlight Properties ......................... 33 COMMUNICATION 7.1. Communication Options ........................34 7.2. Installing Additional Software ......................34 7.3. Connecting the USB Cable ......................34 7.4.
-
Page 4: Introduction
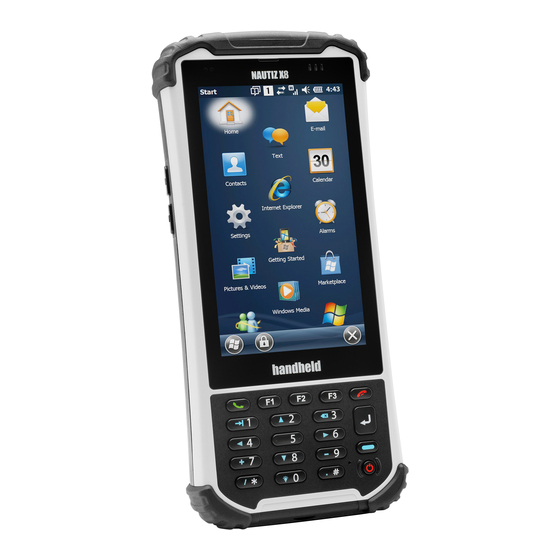
1.2. About the NAUTIZ X8 Terminal The new NAUTIZ X8 is the latest generation terminal device, combining a pocket sized rugged form factor built on Microsoft Windows Embedded Handheld 6.5.3 Pro operating system. It is designed and optimized for GIS and field applications where maximum performance and durability is required. -
Page 5: Accessories
AC Adapter, INPUT: AC100~240V 50/60Hz, OUTPUT: DC5V 1.8A with MicroUSB type NX8-1023 Handstrap NX8-1011 Stylus and tether NX8-1029 Tall Cap (optional) NAUTIZ X8 TERMINAL BOX CONTAINS THE FOLLOWING ITEMS: Terminal USB micro (PC sync and charging) 5V/1.8A AC Adaptor with MicroUSB type ... -
Page 6: Safety Regulations
Use only the components supplied by the manufacturer for the specific NAUTIZ X8 being used. Do not attempt to disassemble the NAUTIZ X8 Terminal, as it does not contain parts that can be repaired by the user. Any tampering will invalidate the warranty. -
Page 7: Fcc Rf Exposure
Pursuant to part 15 of the FCC Rules, you are cautioned that changes or modifications not expressly approved by Handheld could void your authority to operate the NAUTIZ X8 Terminal. This device complies with part 15 of the FCC Rules. Operation is subject to the following two conditions: (1) This device may not cause harmful interference, and (2) this device must accept any interference received, including interference that may cause undesired operation. -
Page 8: Radio Compliance
(2) l'utilisateur de l'appareil doit accepter tout brouillage radioélectrique subi, même si le brouillage est susceptible d'en compromettre le fonctionnement. 2.9 Radio Compliance NAUTIZ X8 RF terminals are in conformity with all essential requirements of the R&TTE Directive (1999/5/EC). This device is marked with in accordance with the Class II product requirements specified in the R&TTE Directive, 1999/5/EC. -
Page 9: Getting Started
3. Replace the battery door inserting the bottom first and then push the top of the door until the lock secures the door. NOTE: The battery door must be installed prior to booting the unit. WARNING: Use only Handheld-approved Li-Ion battery packs. Unauthorized battery may result in damage not covered by the warranty. -
Page 10: Charge The Batteries
3. Plug the power cable into the USB Jack on the side end of the Terminal. WARNING: Use only Handheld-approved peripherals, power cables, and power adapters. Unauthorized peripherals, cables, or power adapters may cause batteries to explode or damage your device. -
Page 11: Guidelines For Battery Pack Use And Disposal
Use only a Handheld approved power supply. The use of an alternative power supply will void the product warranty, may cause product damage and may cause heat, explosion or unit to ignite. -
Page 12: Turn Your Device On
continuing to use it. Do not replace the battery pack when the device is turned on. Do not use the battery pack if it is damaged in any way. Battery pack usage by children should be supervised. ... - Page 13 Icon Meaning Open the start menu Access the Wireless Manager Indicates numeric keypad Shows phone signal mode Shows the volume Indicates the Battery Control Panel (CPL) Indicates Clock & Alarm CPL Zoom in/ out Access the Bluetooth radio Left and right arrows are used to scroll through additional icons Icon Meaning Indicates AC connection mode...
-
Page 14: Using The Stylus
3.7 Using the Stylus The terminal comes with a stylus and a Lanyard. Use this stylus (or your finger) to select or enter information on the touch screen. The stylus functions as a mouse; generally, a tap is the same as a click. Tap the touch screen once to open menu items and select options. -
Page 15: Get To Know Your Device
GET TO KNOW YOUR DEVICE The following list outlines a few of the features included in your device. 4.1 NAUTIZ X8 Terminal Operating Systems: Microsoft Windows Embedded Handheld 6.5.3 Pro Texas Instruments 4470 dual-core @ 1.5GHz RAM Memory: 1GB ... -
Page 16: Front Panel Layout
4.2 Front Panel Layout Light/ Proximity sensor Receiver Touch screen display Keyboard (20-key numeric) LED INDICATOR Shows the information needed to operate your device as follows: Note: The LED is user-programmable. LED COLOR MEANING Red: Lights when main battery is charging. ... -
Page 17: Display Backlight
Handheld also mandates use of the proper stylus, which is one that has a stylus tip radius of no less than 0.8mm. Use of the stylus included with the terminal is... -
Page 18: Installing Your Screen Protector
4.6 Installing Your Screen Protector When installing a screen protector, use a flat plastic card (e.g., credit card) to apply the screen protector smoothly and remove any air bubbles. 1. Press the Power key to put the terminal in suspend mode. 2. -
Page 19: Back Panel Layout
4.7 Back Panel Layout Camera window LED window Handstrap mount Speaker Battery lock Battery cover Handstrap mount HANDSTRAP The Terminal comes with Handstrap that makes the terminal comfortable to hold and helps prevent from accidentally dropping the terminal. You can attach it to the device. INSTALLED BATTERY For information about installing the battery, see Install the Battery on paragraph 3.1. -
Page 20: Battery Cavity Layout
STYLUS AND TETHER The Terminal is shipped with a stylus that stores in a loop on the handstrap using it; see Using the Stylus in paragraph 3.8. 4.8 Battery Cavity Layout Micro SD slot Battery Pack Retainer IMEI number (for WWAN) 4.9 Installing Memory Cards The TERMINAL supports Micro Secure Digital (SD) memory cards up to 32GB. -
Page 21: Left Side Panel Layout
Top Panel Layout NOTE: Do NOT attempt to dismantle the unit for repair. There are no user-serviceable parts inside. Remove the cap only for Tall Cap replacement (optional) and see instructions shipped with this accessory. Contact Handheld to purchase a Tall Cap. -
Page 22: Usb Cable
4.14 USB Cable The MicroUSB Cable is used when communicating between the terminal and a host computer to transfer data via the USB interface. 4.15 Li-ion Battery Packs The Li-ion battery pack provides the main power supply for the terminal. 4.16 Battery Power There is an intelligent battery technology inside the terminal. - Page 23 CHANGING THE MAIN BATTERY PACK Before changing the battery pack, press the Power key to put the terminal in Suspend Mode so that operations are suspended before removing the main power source. ALWAYS put the terminal in Suspend Mode prior to changing the battery. 1.
-
Page 24: Managing Main Battery Power
4.18 Managing Main Battery Power Data and files saved on the Terminal may be stored in RAM memory; therefore, maintain a continuous power supply to the terminal to help prevent data loss. When you remove a battery pack, insert another charged battery pack in the Terminal. -
Page 25: Suspend Mode
FACTORY RESET CAUTION: To prevent data loss, back up all user data to an SD card or external memory device before performing an upgrade or factory reset. To Perform a Factory Reset: Perform a Hard Reset The terminal will reboot automatically and you will see first booting screen menu. -
Page 26: Nautiz X8 Technical Specifications
4.23 NAUTIZ X8 Technical Specifications Specification Model NAUTIZ X8 Operating System Microsoft Windows Embedded Handheld 6.5.3 Pro Application Software Tools and Demos 4470 dual-core @ 1.5GHz Processor Texas Instruments Memory/Disk 1GB RAM/4GB iNAND Flash Storage Expansion User accessible MicroSD/MicroSDHC slot 4.7"... - Page 27 Operating Temperature -30C - +60C; MIL-STD-810G 501.5/502.5 I,II,III Charging Temperature 0~45℃ (±3℃)) Storage Temperature -40C - +70C; MIL-STD-810G 501.5/502.5 I,II,III Humidity 90% relative at -30C - +60C; MIL-STD-810G 507.5 II Water IP67, IEC 60529 High impact resistant PC/ABS housings Construction Magnesium alloy internal chassis with component shock mounts Drop -STD-810G 516.6 IV...
-
Page 28: Using The Keypad
USING THE KEYPAD 5.1 Numeric Keypad Layout Keyboard (20-key numeric) 5.2 Navigation Keys Located in the center of the keypad for easy access with either hand, the navigation keys enable you to move the cursor up and down lines and from character to character. 5.3 Basic Keys Name Function... -
Page 29: Program Buttons
5.4 Program Buttons Buttons can be programmed to execute different functions using the Program Button program in the System part of Settings. The following buttons on the TERMINAL are programmed for the listed function. Key Combination Function No Action No Action No Action BLUE + F1 No Action... -
Page 30: Using Control Panel
USING CONTROL PANEL 6.1 System Properties Refer to the Settings -> System for information related to the system. VERSION TAB Select Start -> Settings -> System -> About -> Version tab to determine the following information about your Terminal: Operating system ... -
Page 31: Power Properties
6.2 Power Properties BATTERY TAB To see main battery level indicators tap Start -> Settings -> System -> Power. Set up the USB charging and On / Off. ADVANCED TAB To adjust power management settings: 1. Set idle time when on battery power before device suspends. 2. -
Page 32: Program Buttons
WAKEUP SOURCE TAB Enable Wake (Resume) resources from suspend (Sleep) mode. By default, all available resources are enabled. BATTERY INFO TAB To see battery information, tap Start -> Settings -> System -> Power icon -> Battery Info Tab. Indicate Capacities, Voltage, Estimated time, Serial number etc. -
Page 33: Backlight Properties
UP/DOWN CONTROL TAB Customize the way the Up/Down control repeats Delay before first repeat (Short/Long) Repeat rate (Slow/Fast) 6.4 Backlight Properties You can modify display and keyboard backlight brightness and set the backlight options (i.e. turn off time). To modify backlight settings open, tap Start ->... -
Page 34: Communication
Windows CE device. When selecting programs, verify that the program and version of the program are designed for the Windows Embedded Handheld 6.5 Pro and tapping Start - > Settings -> System -> About -> Version tab. Make a note of the information in the Processor field. -
Page 35: Workstation Communication
NOTE: You can download the most current version of Windows Mobile Device Center from www.microsoft.com. WARNING: Your terminal is designed to be connected to the host workstation using Handheld peripherals, power cables, and power adapters. Use of any non-Handheld peripherals, cables, or power adapters may cause damage not covered by the warranty. -
Page 36: Exploring The Terminal From The Workstation
Start -> Settings -> System -> About -> Version tab. Make a note of the information in the Processor field. Generally, software for Windows Embedded Handheld 6.5 Pro devices must be installed to the host workstation first, then transferred to the Terminal. -
Page 37: Wireless Radios
Some programs cannot be installed on workstations because they are designed exclusively for Windows Embedded Handheld 6.5 Pro devices. In these cases, the appropriate files must be stored on the host workstation and transferred to the terminal via Windows Mobile. -
Page 38: Wlan (802.11 B/G/N Radio)
The next step is to configure the connection parameters of the radio to connect to a wireless network. CONFIGURING THE WLAN RADIO The WLAN radio is configured in the Handheld WLAN Client, which you access by the program icon in the command bar. 7.16... -
Page 39: Wlan Client
WLAN CLIENT 8.1 Enabling the WLAN Radio The WLAN Driver must be enabled for the radio to transmit a signal. You cannot connect to a network unless the radio is enabled. There are two ways in order to enable WLAN Driver: Wi- Fi Turned on/off from Wireless Manager and from PWC Control. -
Page 40: Bluetooth Handler
BLUETOOTH HANDLER Bluetooth wireless technology is a short-range communications technology to connect portable and/or fixed devices while maintaining high levels of security. 9.1 Enabling the Bluetooth Radio 1. Select the device panel indicated by the UP arrow in the lower, right portion of the display. 2.
Need help?
Do you have a question about the NAUTIZ X8 and is the answer not in the manual?
Questions and answers