
Related Manuals for John Lewis Martha Sleigh cotbed


Summary of Contents for John Lewis Martha Sleigh cotbed
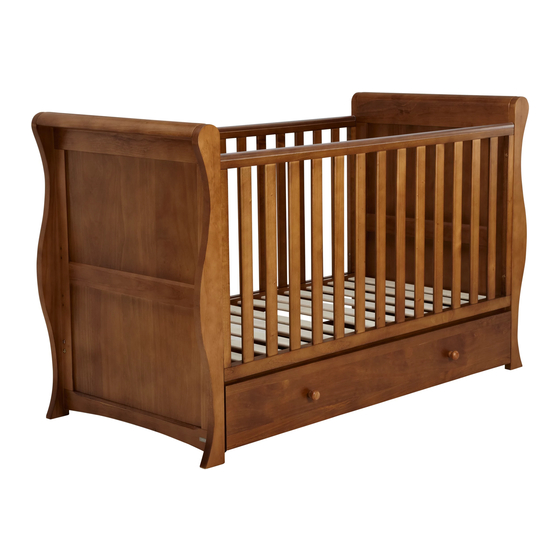
- Page 1 Martha Sleigh cotbed Instruction manual IMPORTANT - RETAIN FOR FUTURE REFERENCE - PLEASE READ CAREFULLY...
- Page 2 Your child’s safety is your responsibility. If you have a query with this product or require replacement Parts, please contact your nearest John Lewis department store. Lay out the Parts on a soft level surface and compare to the Part/Fixings checklist on pages 2 and 3.
- Page 3 Parts (continued) Drawer front x 1 Drawer side x 2 Drawer back x 1 Drawer centre x 1 Base x 2 You will need: 1 x 6mm Allen Key (supplied) Flat-headed screwdriver Cross-point screwdriver Cot assembly - step 1 Part A Fixing 2 Part B Take one End panel (Part A) and lay it on edge as shown on a soft surface with the drawer runner...
-
Page 4: Cot Assembly - Step
Cot assembly - step 2 Fixing 1 2 x Fixing 3 Part D 3 Optional positions Push two barrel nuts (Fixing 1) into the holes in the underside edges of the base (Part D) so that the slot in the end is visible and is in line with the base rail. If it is not, use a flat-bladed screwdriver to correct it. - Page 5 Cot assembly - step 4 Fixing 2 Fixing 1 Part A 2 x Fixing 4 2 x Fixing 3 Push the two remaining Dowels (Fixing 4) into the holes in the end of the Drawer trim (Part C). Insert two Barrel nuts (Fixing 1) into the holes in the underside of the Base (Part D) and ensure that the slots are aligned correctly (See step 2) Attach the second End panel (Part A) making sure that the Dowels in the Drawer trim are correctly fitted in to the holes in the End panel, then insert the four 65mm bolts (Fixing 3) and four 45mm bolts...
- Page 6 Drawer assembly - step 1 Part E Fixing 8 Fixing 5 Fixing 4 Part H Fixing 9 Push two dowels (Fixing 4) into the holes in the end of the Drawer centre (Part H). Attach the Drawer handles (Fixing 8) to the Drawer front (Part E) with the two Handle screws (Fixing 9). Screw the Cam pin (Fixing 5) into the centre hole in the Drawer front (Part E).
-
Page 7: Drawer Assembly - Step
Drawer assembly - step 3 Part I Fixing 7 Part I Part G Fixing 7 Fixing 7 Slide the two Drawer bases (Parts I) into the slots in the assembled drawer. Fit the Drawer back (Part G) onto the rest of the drawer, ensuring that the previously fitted Base parts fit into the slot. -
Page 8: Fixing
Care and maintenance Your furniture may be cleaned by wiping with a damp cloth and drying with a soft clean cloth. Do not use abrasives, bleach, alcohol or ammonia-based household polishes. Take care when handling or moving the furniture. Careless handling may cause damage. Safety notes - Cot mode Furniture can be dangerous if incorrectly installed. -
Page 9: Fixing
300mm between the wall and the side of the bed. Keep children clear during assembly as pack contains small parts which may present a choking hazard. Retain this information leaflet for future reference. John Lewis Partnership 171 Victoria Street London SW1E 5NN www.johnlewis.com...
Need help?
Do you have a question about the Martha Sleigh cotbed and is the answer not in the manual?
Questions and answers