
Subscribe to Our Youtube Channel
Related Manuals for Tim Sistem rittium 14 hydro


Summary of Contents for Tim Sistem rittium 14 hydro
- Page 1 RITTIUM 14 HYDRO Owners’s manual INSTALATION, ADJUSTMENT AND OPERATING INSTRUCTION EN 14785:2006...
-
Page 3: Table Of Contents
CONTENT WHAT IS PELLET? Quality of pellet REMARKS BEFORE OPERATING THE STOVE TECHNICAL CHARACTERSTICS BASIC PARTS OF THE STOVE INSTALATION OF THE STOVE DISPLAY AND REMOTE CONTROL Symbols of basic elements of the stove Remote control USE OF THE STOVE Turning on and turning off the stove Temperature and mode settings SETTINGS... -
Page 4: What Is Pellet
1. WHAT IS PELLET? Pellet is an energy fuel with high energy efficiency that is produced in special technological process of milling, drying and pressing of various materials of biological origin. As raw materials for its production can be used wood from forestry waste, firewood, sawdust and other wood waste (wood pellets);... -
Page 5: Remarks Before Operating The Stove
2. REMARKS BEFORE OPERATING THE STOVE Always follow the references given in this chapter. The manufacturer doesn’t take a responsibility for consequences in opposite cases. Not respecting the instructions of use and maintenance, cause the lose of right for consumer warranties. ... -
Page 6: Technical Characteristics
3. TECHNICAL CHARACTERISTICS Table 1. contains the technical characteristics. Table 1. Nominal power / Air / Water 14,62 / 4,30 / 10,32 Efficiency 92,37 Dimensions ( W x D x H ) 523 x 684 x 1041 Weight Fuel (dimensions) Wood pellet (6 mm L30 mm) ... -
Page 7: Basic Parts Of The Stove
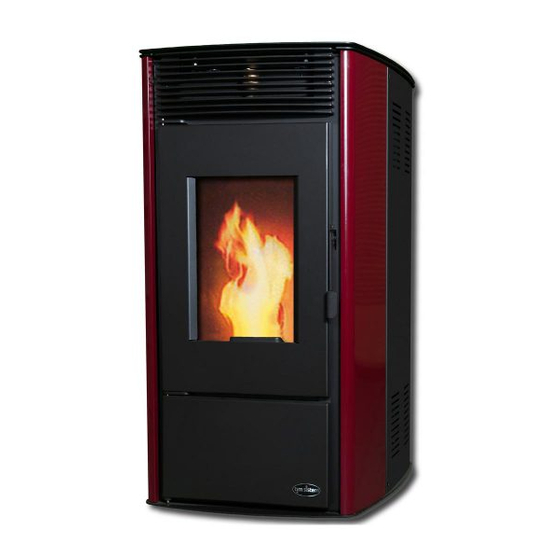
4. BASIC PARTS OF THE STOVE Picture 2: Basic features of the stove 1. Rear lateral 13. Display with commands 2. Front lateral 14. Smoke drain 3. Ashtray 15. Fresh air inlet 4. Ashtray door 16. Safety valves 5. Door of the firebox 17. -
Page 8: Instalation Of The Stove
5. INSTALATION OF THE STOVE With a stove you get the users manual, remote control, power cable. Parts that are included with the stove are presented on a Figure 3. Figure 3. Included gadgets Before you start installation of the stove you shoul read carefully instructions for use and maintenance, get to know well a regional regulations and legislation, in order to apply them. - Page 9 Under the stove can be set some sheet metal or a thicker glass of, minimal dimensions 700 x 800 mm, in a way that the front part is longer than the stove itself. The stove stands on adjustable feet which must be set so that the stove is stable. Feet are being adjusted by simple unscrewing or twisting.
- Page 10 Lacks of the chimney could be: 1.Chimney is lower than roof top, outlet diameter is to small, 2. Inclination of the chimney is to big, 3. Smoke exhaust is build with angles which are preventing draft, 4.More than one stove is connected to same chimney, 5.
-
Page 11: Display And Remote Control
6. DISPLAY AND REMOTE CONTROLL Image 6. Represents a display On display there are 6 keys which are being used for managing different functions of the stove. In the middle, there is a display where is being shown a basic information about the stove operation. -
Page 12: Remote Control
Timer indicator (turning the on and off according to a selected program) Heater indicator for burning the pellet Engine for pellet insertion indicator Emissions fan indicator Blower indicator Water pump indicator Warning indicator (the stove operate in incorrect way) Table 2. Symbols on the display 6.2. - Page 13 Pressing the buttons 1 and 6 at the same time turns stove ON and OF. Pressing the buttons 1 and 2 is being set a wanted temperature. Buttons 5 i 6 are there for mode settings. Settings of temperature and mode are described accurately in the chapter “USING THE STOVE”.
-
Page 14: Turning On And Turning Off The Stove
7. USINGTHE STOVE Keep to this Manual so your stove could last longer and to avoid unnecessary costs. Before starting, check if stove is well connected to power source and to an chimney. Also, check connections to a indoor central heating (in case that stove is connected to a fresh air ventilation system, check that connection also). -
Page 15: Temperature And Mode Settings
During the turnig the stove OFF, press the button 4 and keep it pushed antil CLEANING FINAL appears. Water pump will work until wáter temperature in boiler decrease to 52 After some time, sign OFF will apear on display which means that stove is turned off. 7.2. -
Page 16: Settings
8. SETTINGS 8.1. Clock settings Clock setting is being done in following way. Press the key 3 (set), after what there will be LOCK afterwards, press again the key 3 (set), in order displayed a message menu 01 SET C to access the clock setting menu. -
Page 17: How To Turn The Timer On
8.2.1. How to turn the timer on The timer is activated always in the same way no matter which type of the setting is active (daily, weekly or weekend program). The timer is getting active in a following way: Press the key 3 (set), after what a display will show a message menu 01 ST CLOCK. Then press the key 5 twice and there will be displayed the message menu 02 SET CHRONO. -
Page 18: Daily Programmer
8.2.2. Daily programmer NOTE: Make sure that the starting up and shutting down time does not overlap. It isalso necessary to pay attention that between this two processes pass at least 30 minutes. During the daily programming you can set two starting ups and two shutting downs of the system. Press the key 3 (set), afterwards there will be displayed menu 01 SET CLOCK. - Page 19 MENU SETING DISPLAY APPEARANCE OPTIONS m-2-2-01 CHRONO DAY off/on m-2-2-02 START 1 DAY off/00:00-23:50 m-2-2-03 STOP 1 DAY off/00:00-23:50 m-2-2-04 START 2 DAY off/00:00-23:50 m-2-2-05 STOP 2 DAY off/00:00-23:50 8.2.3. Weekly programming NOTE: Make sure that the starting up and shutting down time does not overlap.It is also necessary to pay attention that between this two processes pass at least 30 minutes.
- Page 20 Press the key 3 (set) and you will get a displayed message off m-2-3-01 CHRONO WEEKLY. With the keys 1 and 2 switch the program to on in order to activate a weekly timer. Use the keys 5 and 6 to scroll through menus, and the keys 1 and 2 to change the parameters.
- Page 21 m-2-3-06 m-2-3-07 m-2-3-08 m-2-3-09 WEDNESDA THURSDAY FRIDAY SATURDAY PROG-1 PROG-1 PROG-1 PROG-1 on/off on/off on/off on/off m-2-3-10 m-2-3-11 m-2-3-12 m-2-3-13 SUNDAY START STOP MONDAY PROG-1 PROG-2 PROG-2 PROG-2 on/off off/00:00-23:50 off/00:00-23:50 off/on m-2-3-14 m-2-3-15 m-2-3-16 m-2-3-17 TUESDAY WEDNESDA THURSDAY FRIDAY PROG-2 PROG-2 PROG-2...
- Page 22 m-2-3-26 m-2-3-27 m-2-3-28 m-2-3-29 FRIDAY SATURDAY SUNDAY START PROG-3 PROG-3 PROG-3 PROG-4 off/on off/on off/on off/00:00-23:50 m-2-3-30 m-2-3-31 m-2-3-32 m-2-3-33 STOP MONDAY TUESDAY WEDNESDA PROG-4 PROG-4 PROG-4 PROG-4 off/00:00-23:50 off/on off/on off/on m-2-3-34 m-2-3-35 m-2-3-36 m-2-3-37 THURSDAY FRIDAY SATURDAY SUNDAY PROG-4 PROG-4 PROG-4...
- Page 23 m-2-3-29 START PROG-4 08:00 m-2-3-20 START PROG-3 17:00 m-2-3-30 STOP PROG-4 23:00 m-2-3-21 STOP PROG-3 22:00 m-2-3-31 MONDAY PROG-4 m-2-3-22 MONDAY PROG-3 m-2-3-32TUESDAY PROG-4 m-2-3-23TUESDAY PROG-3 m-2-3-33 WEDNESDA PROG-4 off m-2-3-24 WEDNESDA PROG-3 on m-2-3-34 THURSDAY PROG-4 m-2-3-25 THURSDAY PROG-3 m-2-3-35 FRIDAY PROG-4 m-2-3-26 FRIDAY PROG-3 m-2-3-36 SATURDAY PROG-4...
-
Page 24: Language Settings
m-2-4-01 CHRONO WEEK-END m-2-4-02 START 1 WEEK-END 08:00 m-2-4-03 STOP 1 WEEK-END 17:00 m-2-4-04 START 2 WEEK-END 20:00 m-2-4-05 STOP 2 WEEK-END 23:30 8.3. Language settings There are four languages that can be set: English, Italian, French and German. Languages are being set by pressing the key 3 (set) and you will get a displayed message menu 01 SET CLOCK. -
Page 25: Seasonal Settings
8.4. Seasonal settings Having in mind that water in boiler is already hot you should consider the option of using this stove in winter and summer contiotions. To set the season press the key 3 (set) and display wil show menu 01 SET CLOCK. -
Page 26: Sound-Alerts
STAND-BY mode is ON STAND-BY mode is OFF To exit the timer setting press the key 4 twice. When accessing the STAND-BY mode the display will present a following figure. NOTE: Connecting to a room/ambiente thermostat is optional. Connecting procedure is showed in ANNEX. During connecting you shoud disconnect thermostat at the back of the stove. -
Page 27: Initial Pellet Loading
SPEAKER ON SPEAKER OFF To exit the timer setting press the key 4 twice. 8.7. Initial pellet loading When stof i sour of pellet, dosier is empty also se after the storage is filled again it takes some time to fill the dosier to so the stove could start When storage is empty Alarm 6 appears which is described in chapter ERRORS. -
Page 28: Technical Settings
8.8. Information on the operation of the stove Information on the operation of the stove are useful because at any moment you can trace in what mode is the stove is operating, the temperature of exhaust gases, the fan speed, time remaining until the next action, etc. -
Page 29: Operation Info
9. OPERATION INFO Status of stove operation can be verified with the help KEYS. Pressing this key is posible to see the current temperature of exhaust gases, stove operating modes, pellet insertion, the remaining time left untill next operation left. Pressing and holding the help key 1 there will be shown the following screen layout. - Page 30 Exhaust gases temperature measuring probe failure. message AL2 SONDA FUMI appears, you should check whether the probe for measuring the temperature of exhaust gases is well connected. If the probe is discoinnected, call the sevice in charge to change it. The probe cannot be adjusted or reconnected. Also, the probe testing is done in the following way.
- Page 31 Error can occur due mulfunctioning of the probe that measures the temperature of exhaust gases, caused by low exhaust temperatures, insufficient quantity of pellets required for ignition or due to malfunction of a lighter. If the exhaust temperature of 40 ° C is not reached in 25 minutes, the stove will not start operating.
- Page 32 Unscrew the safety thermostat cover (1) and check whether the needle is (2) retracted or extended. If the needle is pulled out, push the pin and restart the stove. If the needle is retracted, or if it can not be retracted, and the stove is still reporting the same mistake call the service.
-
Page 33: Cleaning And Maintainance
Non-functional probe for measuring the room temperature. In case of malfunction of the probe for measuring room temperature on display in place where the temperature should be indicated will be temperature is acctualy 0 ° written 00.0oC. In case that the room C, there will be written the same thing. - Page 34 When cleaning the combustión cup it’s necessary to take off the metal barrier, placed in the front part of the pot. Take the pot off and clean in from the ashes. With a sharp object, klean all holes on the pot. Glass parts must be cleaned only when the stove is completely cool.
- Page 35 Appearance of the stove when opening the inspection covers of the boiler. When cleaning inspection opening on the lid of the boiler, it is necessary to unscrew the 6 bolt head first, and then remove the cover of the inspection opening. Then remove the ash accumulated on the surface of the opening and clean the boiler tubes.
-
Page 36: Warranty
The warranty for this product is 24 months. TIM SISTEM is obliged to provide spare parts in due time after the stove is no longer produced. This warranty does not cover damage caused by: ... - Page 37 Distributor/ authorized service...
-
Page 38: Annex A: Conecting To A Heating Instalation -Cheme
13. ANNEX A CONECTING TO A HEATING INSTALATION - CHEME... -
Page 39: Annex B: Connecting To Control Unit - Cheme
14. ANNEX B CONNECTING TO CONTROL UNIT - CHEME... - Page 40 NOTES AND SERVICE CALENDAR ________________________________________________________________________ ________________________________________________________________________ ________________________________________________________________________ ________________________________________________________________________ ________________________________________________________________________ ________________________________________________________________________ ________________________________________________________________________ ________________________________________________________________________ ________________________________________________________________________ ________________________________________________________________________ ________________________________________________________________________ ________________________________________________________________________ ________________________________________________________________________ ________________________________________________________________________ ________________________________________________________________________ ________________________________________________________________________ ________________________________________________________________________ ________________________________________________________________________ ________________________________________________________________________ ________________________________________________________________________ ________________________________________________________________________ ________________________________________________________________________ ________________________________________________________________________ ________________________________________________________________________ ________________________________________________________________________ ________________________________________________________________________ ________________________________________________________________________ ________________________________________________________________________ ________________________________________________________________________ ________________________________________________________________________ ________________________________________________________________________ ________________________________________________________________________ ________________________________________________________________________ ________________________________________________________________________ ________________________________________________________________________ ________________________________________________________________________ ________________________________________________________________________ ________________________________________________________________________ ________________________________________________________________________...
- Page 41 ________________________________________________________________________ ________________________________________________________________________ ________________________________________________________________________ ________________________________________________________________________ ________________________________________________________________________ ________________________________________________________________________ ________________________________________________________________________ ________________________________________________________________________ ________________________________________________________________________ ________________________________________________________________________ ________________________________________________________________________ ________________________________________________________________________ ________________________________________________________________________ ________________________________________________________________________ ________________________________________________________________________ ________________________________________________________________________ ________________________________________________________________________ ________________________________________________________________________ ________________________________________________________________________ ________________________________________________________________________ ________________________________________________________________________ ________________________________________________________________________ ________________________________________________________________________ ________________________________________________________________________ ________________________________________________________________________ ________________________________________________________________________ ________________________________________________________________________ ________________________________________________________________________ ________________________________________________________________________ ________________________________________________________________________ ________________________________________________________________________ ________________________________________________________________________ ________________________________________________________________________ ________________________________________________________________________ ________________________________________________________________________ ________________________________________________________________________ ________________________________________________________________________ ________________________________________________________________________ ________________________________________________________________________ ________________________________________________________________________ ________________________________________________________________________ ________________________________________________________________________ ________________________________________________________________________...
- Page 42 __________________________________________________________________________________ __________________________________________________________________________________ __________________________________________________________________________________ __________________________________________________________________________________ __________________________________________________________________________________ __________________________________________________________________________________ __________________________________________________________________________________ __________________________________________________________________________________ __________________________________________________________________________________ __________________________________________________________________________________ __________________________________________________________________________________ __________________________________________________________________________________ __________________________________________________________________________________ __________________________________________________________________________________ __________________________________________________________________________________ __________________________________________________________________________________ __________________________________________________________________________________ __________________________________________________________________________________ __________________________________________________________________________________ __________________________________________________________________________________ __________________________________________________________________________________ __________________________________________________________________________________ __________________________________________________________________________________ __________________________________________________________________________________ __________________________________________________________________________________ __________________________________________________________________________________ __________________________________________________________________________________ __________________________________________________________________________________ __________________________________________________________________________________ __________________________________________________________________________________ __________________________________________________________________________________ __________________________________________________________________________________ __________________________________________________________________________________ __________________________________________________________________________________ __________________________________________________________________________________ __________________________________________________________________________________ __________________________________________________________________________________ __________________________________________________________________________________ __________________________________________________________________________________ __________________________________________________________________________________ __________________________________________________________________________________ __________________________________________________________________________________ __________________________________________________________________________________...
- Page 44 TIM SISTEM d.o.o. Prva industrijska No.9, 22 330 Nova Pazova, Srbija tel/fax: +381 22 32 80 76 e-mail: office@timsistem.rs www.tmisistem.rs...
Need help?
Do you have a question about the rittium 14 hydro and is the answer not in the manual?
Questions and answers