Advertisement
Advertisement
Table of Contents

Related Manuals for Nitgen eNBioAccess-T1


Summary of Contents for Nitgen eNBioAccess-T1
- Page 1 Fingerprint Access Controller eNBioAccess-T1 User Guide...
- Page 2 © Copyright 2013, NITGEN Co., Ltd. All rights reserved. This manual may not be reproduced, either wholly or in part, without prior permission. Product spec is subject to change without notice for improvement of fuction. NITGEN&COMPANY, NITGEN Logo are trademarks of NITGEN Co., Ltd.
-
Page 3: Table Of Contents
Table of Contents CHAPTER 1 BEFORE STARTING ............. 4 1.1 I NTRODUCTION ....................5 1.2 C OMPONENTS ....................6 1.3 N AME OF EACH PART ..................7 1.4 C ONFIGURATION OF EXTERNAL CABLE ...............8 1.4 LED SIGNALS ....................9 1.5 B UZZER SOUNDS ....................9 CHAPTER 2 SYSTEM CONFIGURATION ......... -
Page 4: Chapter 1 Before Starting
Chapter 1 Before Starting 1.1 Introduction 1.2 Components 1.3 LED Signals 1.4 Buzzer Sounds... -
Page 5: Introduction
1.1 Introduction Access control system eNBioAccess-T1 of Nitgen is a superior system which organically integrated core technologies such as fingerprint verification algorithm, optical sensor, embedded design technology and software application technology which are well acknowledged throughout the world of Nitgen. -
Page 6: Components
1.2 Components The following shows the components of eNBioAccess-T1. For the details of product installation, please refer to installation guide. If any of components is missing, please contact Customer Support Team. terminal Fixing bracket Adapter POWER CABLE Screws for terminal bracket... -
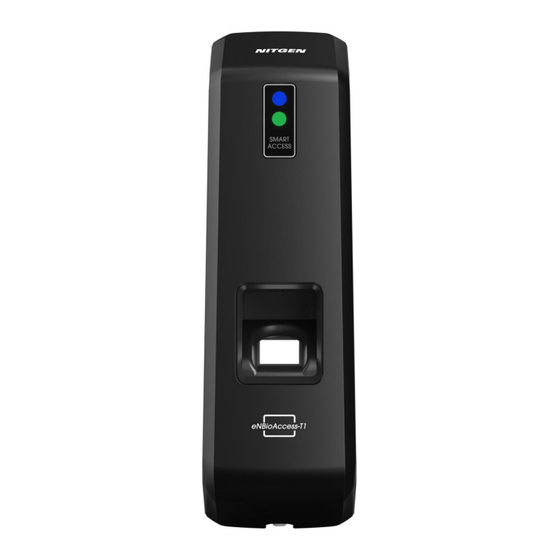
Page 7: Name Of Each Part
1.3 Name of each part (2) F ingerprint input section (3) C ard input section <Front> Name Description Section to display various terminal information Fingerprint input Section to input fingerprint for fingerprint verification section Card input section Section to touch card for card verification... -
Page 8: Configuration Of External Cable
1.4 Configuration of external cable ※ Configuration of external connection cable... -
Page 9: Led Signals
1.4 LED signals OFF: normal ON: ON for 1 second if verification fails ● Error blinker: blinker at the interval of 1 second if the cover is open Success ON: ON for 2 second if verification is ● Green successful blinker: Waiting for input of card or ●... -
Page 10: Chapter 2 System Configuration
Chapter 2 System Configuration 2.1 Network Mode 2.2 Independent Mode... -
Page 11: Network Mode
2.1 Network mode This mode is to control/manage by connecting the terminals to Access Manager Pro. Network Mode Client PC Server PC TCP/IP Figure2.1 Network configuration... -
Page 12: Independent Mode
2.2 Independent Mode This mode is to independently control/manage without connecting terminal(s) through network. Independent Mode Figure2.2 Terminal Configuration... -
Page 13: Chapter 3 How To Use
Chapter 3 How to Use 3.1 Network Setting... - Page 14 3.1 How to Set Network 3.1.1 Default setting at factory - DHCP mode: Not used - Terminal ID: 0 - Server IP: 192.168.0.171 - Terminal IP: 192.168.0.2 - Subnet Mask: 255.255.255.0 - Gateway: 192.168.0.1 3.1.2 Searching terminal in Access Manager Pro. Execute ‘Terminal Search’...
- Page 15 Click ‘Search’ button in the screen above to display terminals not registered at Access Manager Pro as shown below. Click “…” button to display detail setting screen as shown above.
- Page 16 To modify terminal ID and Network setting, check terminal to be set first, input value to be changed, and click “Modify ID” or “Modify IP” button to modify the value of the relevant terminal. Set terminal ID, Terminal Network item and click Connection Request button on the bottom to display terminal as not registered status in Access Manager Pro screen and to complete the setting.
-
Page 17: Chapter 4 Attachment
Chapter 4 Attachment 4.1 How to Input Fingerprint 4.2 Troubleshooting 4.3 Product Specification... - Page 18 4.1 How to input fingerprint To prevent verification error, input fingerprint observing the followings for registration and verification of user fingerprint. ① Maximize input area and evenly press the finger. Supposing that it is 0% when finger is pressed with no force and it is 100% when finger is pressed with max force, softly press it with about 70~80% of force.
-
Page 19: Troubleshooting
4.2 Troubleshooting <Time for fingerprint verification is too long or verification failed> If the server is used as business use or personal when terminal is in network mode and operating with 1:N (server) verification type, it may take long for verification and verification rate can be reduced due to server load. - Page 20 <network is disconnected> Check whether terminal registered ‘Information management “Access Manager Pro.” terminal management’. In case of terminal which is not registered, check the setting of the relevant terminal in ‘Information management terminal management terminal search -> search ‘…’’ of “Access Manager Pro.”.
- Page 21 2. If server management program is being used, restart the server. 3. If normal operation is failed even after checking all of these, please contact Customer Support Team.
-
Page 22: Product Specifications
4.3 Product Specifications Item Description 32Bit RISC CPU (400MHz) Memory 64MB DRAM, 4MB Flash 3 Color (Red, Green, Blue) Fingerprint sensor Optical type / 500 DPI Verification type Fingerprint, RF card Within 1:1 < 0.2 seconds Verification speed Within 1:N < 1 second (Based on 2,000 fingerprint) Fingerprint 2,000 fingerprints capacity...
Need help?
Do you have a question about the eNBioAccess-T1 and is the answer not in the manual?
Questions and answers