Table of Contents
Advertisement
Advertisement
Table of Contents

Related Manuals for BIOS WEATHER BW972


Summary of Contents for BIOS WEATHER BW972
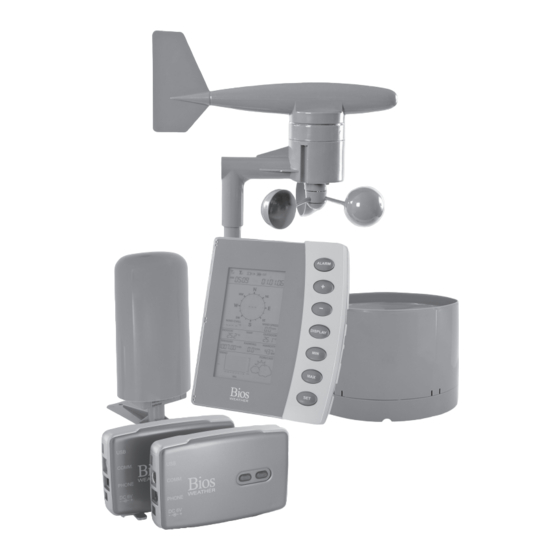
- Page 1 Home Weather Station with PC Interface and Modems Instruction Manual...
-
Page 2: Table Of Contents
HOME WEATHER STATION (HWS) with PC Interface and Modems Instruction Manual Table of Contents 1. Introduction 2. Safety Notes 3. Weather Station Function and Features Features of the Home Monitor Features of the Thermometer-Transmitter Sensor Features of the Wind Sensor Features of the Rain Sensor 4. -
Page 3: Introduction
1. INTRODUCTION Thank you for purchasing the Bios Weather Home Weather Station with PC Interface with Modems. Developed with state of the art technology and digital electronics, this device provides instant readouts of the weather conditions around you. -
Page 4: Features Of The Home Monitor
Features of the Home Monitor • Displays time and date with alarm clock • Displays weather conditions and records minimum and maximum values • Displays indoor and outdoor temperature in Celsius (ºC) or Fahrenheit (ºF) -- user selectable • Displays indoor relative humidity (RH%) •... -
Page 5: Features Of The Wind Sensor
Features of the Wind Sensor The wind sensor measures wind speed and wind direction and sends the data to the thermometer-transmitter sensor, which in turn transmits the data to the home monitor. Operating power is taken from the thermometer- transmitter sensor by cable connection. The wind sensor consists of the main unit with wind vane, 9m/30 ft. cable (already attached to the main unit) mast, and base bracket. -
Page 6: Mounting
5. MOUNTING CAUTION: Great care must be taken when mounting the HWS components. The manufacture/supplier cannot be held liable for personal or property damage when setting up the components. Please use caution when choosing a mounting point. Prior to drilling mounting holes and permanently affixing any of the units, please ensure the following points are considered: 1. -
Page 7: Wind Sensor
B. Wind Sensor First, choose whether the wind sensor will be mounted vertically or horizontally (on a mast). Make sure that you position the wind sensor in a free, open area that is not protected by objects, which may distort or interfere with the wind (e.g. -
Page 8: Cable Preparation For Horizontal Mounting
NOTE: Make sure that when you are securing the base bracket with the 2.75" screws, you are aware of the cable. Prevent driving a screw through the cable! NOTE : For proper wind speed measurement ensure the vertical joining section is at 90º to the horizon (Fig.A). Horizontal Mounting Cable Preparation for Horizontal Mounting 1. -
Page 9: Rain Sensor
HORIZONTAL MOUNT C. RAIN SENSOR C. RAIN SENSOR NOTE: Make sure the following contents have been included with your HWS for mounting the rain sensor. • 2 x 2.75" screws (to fix rain sensor to a flat surface) Place the rain sensor as far away as possible from tall buildings, trees or other obstructions. It is suggested that the rain sensor should be no closer to tall objects or obstructions than twice the height of the object compared to the sensor. -
Page 10: Connecting The Sensors
NOTE: Make sure the following contents have been included with your HWS for mounting the transmitter: • 2 x 1.75" wall mounting screws • plastic anchors for screws Wall Mount 1. Affix the wall bracket onto a desired wall using the 1.75" screws provided 2. -
Page 11: Powering Up The Modems
1. Plug in the AC/DC adaptor (for the home monitor) to the power outlet in your wall. 2. Insert the adaptor into the DC socket located on the right side of the home monitor. 3. Once the adaptor has been plugged in, "IO" will flash on the top left side of the LCD and "---"... -
Page 12: Pc Modem
Weather Analyzer Software and the PC Modem Once the weather station and modem is set up in one location you are now ready to install the Weather Analyzer software onto your PC and the PC modem in a different location. To install the Weather Analyzer software please refer to the Weather Analyzer software please refer to the Weather Analyzer... -
Page 13: Changing Batteries In The Transmitter
10. CHANGING BATTERIES IN THE TRANSMITTER 1. Press and hold the DISPLAY button until the LCD exits the normal display mode and "IO" begins to flash in the top left corner. 2. Follow steps 5-9 in the "Powering Up Your HWS" section above. 11. -
Page 14: Button Breakdown (Quick Reference)
14. BUTTON BREAKDOWN (Quick Reference) No. BUTTON FUNCTION ALARM • Press and release to enter "Alarm Set Mode" Button • Toggles between the multiple segments of the "Alarm Set Mode" • Turns all sounding alarms off (alarm clock, indoor/outdoor temperature alarms) "+"... -
Page 15: Setting The Home Monitor
15. SETTING THE HOME MONITOR NOTE : If you press the DISPLAY button, the LCD screen will display certain sections. Continually press the DISPLAY button to get through the different display sections eventually returning to the "Normal Display Mode". If you pause at any time for more than 7 seconds while setting the time, date or measurement preferences, the home monitor will automatically exit the "Set Display Mode". -
Page 16: Outdoor Temperature Alarm
Outdoor Temperature Alarm 15. Press the ALARM button again to progress to the outdoor temperature alarm. 16. "TEMP" and "OUTDOOR" will begin to flash. 17. Repeat steps 11-14 to set your outdoor temperature alarm. NOTE: • When the clock alarm sounds, the “((•))” logo on the LCD will begin to flash to the right of the time. •... -
Page 17: Indoor/Outdoor Battery Level
20. INDOOR/OUTDOOR BATTERY LEVEL The battery level shows the actual voltage of the battery in the transmitter and the home monitor. The battery level is represented by three levels: When there are no batteries in the home monitor or transmitter the battery icon will not appear. 21. -
Page 18: Weather Forecasting
NOTE: • The trend chart will not appear on the LCD after powering up the home monitor for the first time. It has to collect air pressure data for 24 hours before it can display a trend. • If at anytime power is lost to the home monitor, all trend information will be erased and must be collected again for 24 hours to display a trench once the power is restored. - Page 19 TABLE 1: Elevation of Above Sea Level Above Sea Level Major Cities in Canada City City City City feet feet NOTE: The elevation in meters (m) Calgary, AB 1049 Saskatoon, SK 3440 1653 and feet (ft) refers to the elevation of Charlottetown, PE Prince George, BC Prince George, BC...
-
Page 20: Troubleshooting
28. TROUBLESHOOTING LCD is blank A. This occurs because there is no power supplied to the main unit. 1. Check the AC power connections to the receiving unit and the power from the wall outlet. 2. Check the batteries and replace if needed (View Section 10: Changing Batteries in the Transmitter). - Page 21 to the home monitor. (View Section 11: Wireless Transmission). 2. Check the batteries in the transmitter. Replace if needed. (View Section 10: Changing Batteries in the Transmitter). 3. Make sure that the wind speed sensor cord is securely fastened in the "wind"...
- Page 22 3. Electromagnetic interference can occur from different sources that transmit radio waves that may affect how the main unit receives data transmit radio waves that may affect how the main unit receives data transmit radio waves that may aff from the transmitter (if at all). It is recommended that you place the transmitter and monitor significantly close together if there is a large amount of electromagnetic interference in your area.
- Page 23 Pressure reading is too high / The pressure sensor in your weather station is very sensitive to voltage low / changed changes if you scroll through the display screen (using the DISPLAY button) or plug in the AC adaptor with the batteries in it, the pressure may change because the voltage to the sensor has either increases or decreased.
- Page 24 from the direction of that tree. 3. Wind speed and directional data will not change if there is "transmission interference". That means that some of the data transmitted has been corrupted by other sources emitting waves. This could be anything - wiring in walls, appliances, other electrical devices operating in proximity of the monitor or transmitter, or between the two.
- Page 25 In colder temperatures, battery life is much less - not that the use of lithium batteries allow the chemical reaction that is creating power to occur in colder temperatures (-40 º C / -40 º F) compared to alkaline batteries, which fail at approximately -10 º C (14 º F), but it does not necessarily mean that the battery's charge will last longer.
- Page 26 Analyzer Software. Analyzer Software. Analyzer 4. If you have an answering machine or voice mail it is very important to have the rings set to a higher number than the HWS modem (over 5 rings), otherwise the answering machine or voice mail will pick up first and there will be no connection between the two modems.
-
Page 27: Product Specifications
30. WARRANTY Bios Weather Home Weather Station is guaranteed to be free from defects in material and workmanship for one year from the date of purchase. The warranty does not apply if the defect or malfunction is a result of user abuse, misuse, alteration, modification or damages in transit. -
Page 28: Resources
31. RESOURCES TO LOOK AT... National Weather Services http://www.nws.noaa.gov US Environment Protection Agency: http://www.epa.gov Environment Canada: http://www.weatheroffice.ec.gc.ca/climateData/canada_e.html Real Estate Journal – Wall Street Journal (for US city elevation information): http://homes.wsj.com/cityprofiles/ 32. FCC INFORMATION Warning: Changes or modifications to this unit not expressly approved by the party responsible for compliance could void the user authority to operate the equipment.
Need help?
Do you have a question about the BW972 and is the answer not in the manual?
Questions and answers