Table of Contents
Advertisement
FV-08VKML2
READ AND SAVE THESE INSTRUCTIONS.
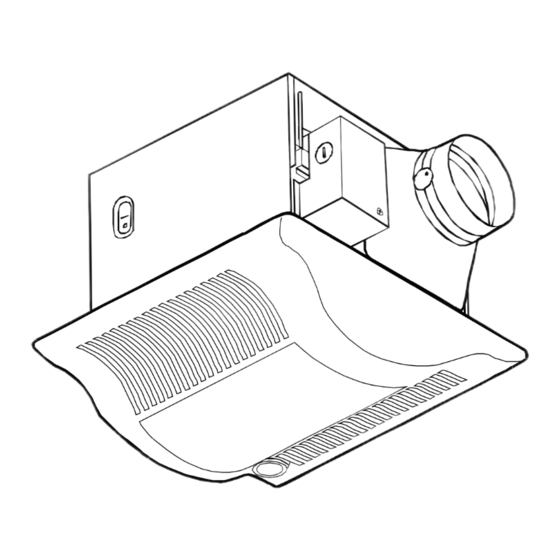
Thank you very much for having purchased our Ventilating Fan
Please read these instructions carefully before attempting to install,
operate or service the Panasonic Ventilating Fan.Failure to comply
with instructions could result in personal injury and/or property
damage.Please retain this booklet for future reference.
Table of Contents
II
III
Ventilating Fan
INSTALLATION
INSTRUCTIONS
Model No.
II
FV-08VKML2
FV-08VKSL2
FV-08VKSL2
.
2
3
3
3
4
5
5
6
6
7
8-10
11-12
12
13
14
14
15-16
16
16
Advertisement
Table of Contents

Subscribe to Our Youtube Channel
Summary of Contents for Panasonic FV-08VKML2
-
Page 1: Table Of Contents
Thank you very much for having purchased our Ventilating Fan Please read these instructions carefully before attempting to install, operate or service the Panasonic Ventilating Fan.Failure to comply with instructions could result in personal injury and/or property damage.Please retain this booklet for future reference. -
Page 2: Please Read Prior To Installing This Fan
These fans are designed to run continuously Four Bedrooms microchip technology that monitors the Panasonic Corporation of North American One Panasonic Way,Secaucus,NJ 07094 Panasonic Home & Environment Company Unit of Panasonic Consumer Electronic Company One Panasonic Way,Secaucus,NJ 07094 1-866-292-7292 Five Bedrooms... -
Page 3: Unpacking
100W incandescent lamp. Panasonic ventilating fan model FV-08VKML2 is equipped with a motion sensor that shifts the fan to high flow automatically when motion is deteced.It is use-adjustable to operate 0.5-60 minutes after motion is no longer detected. -
Page 4: Dimensions
DIMENSIONS FV-08VKML2 FV-08VKSL2 13(330) 10 1/4(261) Grille Adatpor Fan body Damper Suspension bracket Bracket cover (For 16 inches on center joists,only use suspension brasket ,for 19.2 inches on center joists,only use suspension bracket .If more than 19.2 inches on center joists,use suspension brasket... -
Page 5: Wiring Diagram
WIRING DIAGRAM Fan body FV-08VKML2 DC-Motor Orange Sensor Yellow White Black Lighting unit Electronic Lamp Ballast Fan body FV-08VKSL2 White Black DC-Motor Blue Orange Purple Lighting unit Electronic Lamp ballast SWITCH INDICATION Switch indications on blower unit Low speed air-volume preset switch positions... -
Page 6: Operation
Fan active speed at the high speed. SPECIFICATIONS Specifications Voltage Frequency Model No. direction (Hz) FV-08VKML2 Exhaust FV-08VKSL2 Exhaust HVI Certified performance based on HVI Procedures 915,916,and 920 Reference specifications Voltage Frequency Model No. direction (Hz) FV-08VKML2 Exhaust... -
Page 7: General Safety Information
GENERAL SAFETY INFORMATION 1. Do not install this ventilating fan where interior room temperature may exceed 104 F (40 C). 2. Make sure that the electric service supply voltage is AC 120V, 60Hz. 3. Follow all local electrical and safety codes, as well as the National Electrical Code (NEC) and the Occupation Safety and Health Act (OSHA). -
Page 8: Installation I (Joist Mounting- ) I
INSTALLATION IMPORTANT: Remove the tape from damper and adaptor before installation. As shown below: Adaptor 1. Insert the suspension bracket into the fan body and adaptor. (Select the suspension bracket as shown below.) Joists Spacing A on center joists Insert Suspension bracket 12 inches 16 inches 19.2 inches vertical joists... - Page 9 Lead wires 4 Long screws (ST4.2X20) 2 Long screws (ST4.2X20) Screws (ST4.2X12) Circular duct Conduit Junction box Green wires Red wires Lead wires Wire nut (FV-08VKML2) (FV-08VKSL2) Joist Fig.2-1 Joist Fig.2-2 Joist Fig.3 Joist Duct tape or clamps Conduit Green wires Wire nut Fig.4...
- Page 10 5 (FV-08VKML2) (Fig.6-1) 11. Insert the sensor unit into the housing of the grille and insert other mounting spring into the slot as shown and mount grille to fan body (FV-08VKML2) (Fig.6-2, Fig.6-3) CAUTION: Mount grille carefully so that lead wire of sensor unit is not pinched.
-
Page 11: Installation Ii (Joist Mounting- )
13 1/4 15 1/2 (336 394) 16 1/2 18 3/4 (419 480) 21 1/4 23 1/2 (540 597) Inches (mm) 1/ (12.7) 5/8 (15.9) Joist Conduit Junction box cover Gloves Slots (FV-08VKML2) (FV-08VKSL2) Fig.8 Adaptor Fig.9 Circular duct Fan body Adaptor claws Fig.10... -
Page 12: Installation Iii ( -Joist Mounting) I
-joist size and fix the Ⅰ -joist. (Fig.14) Ⅰ (page 9, page 10) to ) CONTINUED Screw driver Machine screw Plug connector Screw (ST4.2X12) 2 Long screws (ST4.2X20) 4 Long screws (ST4.2X20) I-joist (FV-08VKML2) (FV-08VKSL2) Receptacle Fig.11 Fig.12 Suspension bracket Screw (ST4.2X12) Fig.13 Fig.14... -
Page 13: Installation I (Suspended Between Joist Mounting)
INSTALLATION 1. Before installation, secure the lighting unit to fan body (refering to Fig.5 of page 10). 2. Insert the suspension bracket into bracket cover of adaptor side and the back of the fan body. (Fig.15-1,15-2) (select the suspension bracket according to spacing A as shown below.) 16 inches and 19.2 inches horizontal joist... -
Page 14: Installation (Wooden Header)
INSTALLATION 1. Before installation, secure the lighting unit to fan body (refering to Fig.5 of page 10). 2. Install header between joists by using nails or screws. 3. Install the fan body and secure it by using long screws(ST4.2X20) (Fig.19, Fig.20) 4. - Page 15 MAINTENANCE WARNING: Disconnect power source before working on unit. Routine maintenance must be done every year. CAUTION: 1. Never use gasoline, benzene, thinner or any other such chemicals for cleaning the ventilating fan. 2. Do not allow water to get into the motor. 3.
-
Page 16: Maintenance
1. Remove grille. (Squeeze mounting spring and pull down) (Fig.21-1,21-2 of page 15) 2. Remove the 4 W night lamp. (Fig.26) 3. Change the fluorescent lamps (Panasonic FDS 18E27/4, 18W or FDS18E35/4, 18W or FDS18E42/4, 18W) or the 4W night lamp, connect the plug connector and replace the grille.


Need help?
Do you have a question about the FV-08VKML2 and is the answer not in the manual?
Questions and answers