Advertisement
Quick Links
Advertisement

Related Manuals for Sinar P-SLR


Summary of Contents for Sinar P-SLR
- Page 1 User Manual...
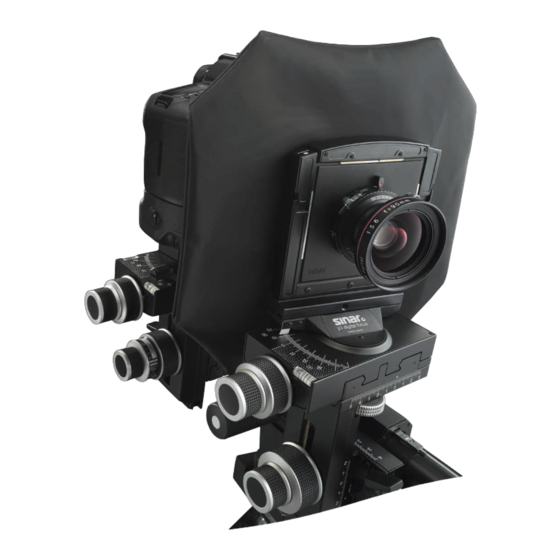
- Page 2 Sinar combines highest demands on technology, materials, design and ease of operation. This equally applies to professional cameras, electronics and accessories. Before use, please read the operating instructions carefully to correctly operate the Sinar camera and fully benefit from all the possibilities and advantages.
-
Page 3: Table Of Contents
Index Scope of Delivery General Information Operating Elements of the Sinar p-slr View Camera Camera Set-up Mounting the Lens The Lens Shade Attaching the Bellows Lens Hood Portrait/Landscape Mode The Plane of Sharpness Technical Data Accessories Sinar Core Products p-slr User Manual... -
Page 4: Scope Of Delivery
1x User Manual General Information The Sinar p-slr was developed especially for photographers who wish to benefit from the unique characteristics of a Sinar view camera while using their single lens reflex camera. Exact control of perspective and selective sharpness, the most important creative tools in photography, are set and evaluated precisely on a view camera –... - Page 5 3. Operating Elements Sinar p-slr View Camera Operating elements To benefit from the creative potential of the Sinar p3-df SLR view camera the following of the camera operating elements are at your disposal: Lever for Coarse Focusing Micro meter drive to tilt the horizontal axis H...
-
Page 6: Camera Set-Up
4. Camera Set-up Mounting the Rail Clamp With the Rail Clamp 411.21.000 the Sinar view camera p-slr is mounted either on the Sinar Pan Tilt Head 516.61.000 or directly on a tripod. 1. Turn the clamping lever (1) to the right (release) – Fit camera on Pan Tilt Head or tripod and tighten the tripod screw (2) –... - Page 7 1. Position the basic rail in the middle of the rail clamp and mount the rail clamp onto the tripod. Remove both rail caps. 2. Move the front standard on the basic rail. 3. Attach the rail cap. 4. Move the bearer on the basic rail. p-slr User Manual...
- Page 8 7. Mount the SLR camera on the L-bracket and place it onto the Quick Clamping Adapter. Now, pull the Quick Clamping Lever backwards to fasten the camera tightly on the bearer. 8. Move the standards apart to use the centering aid. p-slr User Manual...
- Page 9 11. If the alignment is not carried out correctly, the sensor of the SLR camera is outside the center of the lens image circle and therefore the image quality is not optimal. 12. Move apart the front and rear standards until the centering aid cone and plate can be easily removed. p-slr User Manual...
- Page 10 4. Camera Set-up Mounting the camera 4 13. Attach the bellows to the SLR camera. 14. Attach the bellows to the front standard. 15. Mount the lens on the front standard. p-slr User Manual...
- Page 11 Sinar Photography. The front coupling frame of the Sinar p-slr is equipped with a snap latch, so no tools are required for the attachment of the lens. The lens board is placed on the lower edge of the frame and then latched in place at the upper edge of the coupling frame.
-
Page 12: The Lens Shade
6. The Lens Shade Attaching the lens shade The following accessories are required for attaching the Sinar Lens Shade: 547.81.xxx Adapter Ring 493.23.041 Lens Shade p3 / arTec / lanTec To attach the Sinar Lens Shade please proceed as follows: 1. -
Page 13: Attaching The Bellows Lens Hood
7. Attaching the Bellows Lens Hood Attaching the To attach the Sinar bellows lens hood please proceed as follows: Bellows Lens Hood 1. Equip your lens with the corresponding Lens Adapter Ring. 2. Attach the Bellows / Filter Holder 100 on the adapter ring and fix the screw. - Page 14 7. Insert the other side of the Joint Rod 2 into the notch of the Bellows Clip. Bellows Lens Hood 2 Position the Bellows Lens Hood avoiding vignetting and fix the screws. Fully assembled Bellows Lens Hood on the Sinar p-slr. p-slr User Manual...
- Page 15 L-bracket from the bearer of the p3. Rotate camera to portrait format and reattach, tighten the lever by pulling it backwards. Stopping Lever Press the lever forwards for release. p-slr User Manual...
-
Page 16: The Plane Of Sharpness
Displacement of the Rear Standard influences the plane of sharpness and the perspective. The Front Standard Displacement of the Front Standard influences only the plane of sharpness. The perspective of the object remains unchanged. Rear Standard Front Standard p-slr User Manual... -
Page 17: Technical Data
Sinaron, CPL and eShutter; Focal Length 90 to 180 mm Product overview Catalog number Description Sinar p3-slr-N 491.83.010 Sinar p3 for Nikon SLR cameras, without Lens and Nikon camera Sinar p3-slr-C 491.83.020 Sinar p3 for Canon SLR cameras, without Lens and Canon camera Sinar Conversion Kit p3-slr-N 497.13.010... -
Page 18: Accessories
553.15.100 472.41.000 472.51.010 581.01.001 Reduction Adapter 4x5/100 Rod Holder 100 Joint Rod 2 Strain Relief 473.41.000 516.61.000 411.71.000 475.66.020 Bellows/Filter Holder 100 Pan Tilt Head 2 Geared Rail Clamp Sinar p3 System Case 547.81.XXX Lens Adapter Ring p-slr User Manual... -
Page 19: Sinar Core Products
12. Sinar Core Products Sinar p3 Sinar rePro Sinar lanTec Sinar arTec Sinar eXact Digital Back Sinar eShutter p-slr User Manual... - Page 20 Flexibility and Creativity For more than 65 years, Sinar is the leading manufacturer of view camera systems for professional photography. Sinar stands for exquisite camera precision made in Switzerland as well as for ergonomic design and unlimited creative freedom. All relevant elements for composing the image are available, like swings and tilts or horizontal and vertical shifts.
Need help?
Do you have a question about the P-SLR and is the answer not in the manual?
Questions and answers