
Related Manuals for DèLonghi SLM 60 PPP


Summary of Contents for DèLonghi SLM 60 PPP
- Page 1 DE ’ L O N G H I C OO KING USER & INSTALLATION INSTRUCTIONS S LM 60 PP P MULTIFUNCTION ELECTRIC OVEN...
-
Page 2: Table Of Contents
CONTENTS Page Number Introduction ..........Important Safety Precautions and Recommendation . -
Page 3: Introduction
Dear Customer, Thank you for purchasing the DeLonghi SLM 60 PPP multifunction electric oven. The safety precautions and recommendations listed below are for your own safety and that of others. They will also provide a means by which to make full use of the features offered by your appliance. -
Page 4: Important Safety Precautions And Recommendation
IMPORTANT SAFETY PRECAUTIONS AND RECOMMENDATIONS IMPORTANT: This appliance is designed and manufactured solely for the cooking of domestic (household) food and is not suitable for any non domestic application and therefore should not be used in a commercial environment. The appliance guarantee will be void if the appliance is used within a non domestic environment i.e. - Page 5 • Do not use a steam cleaner because the moisture can get into the appliance therefore making it unsafe. • Do not touch the appliance with wet or damp hands (or feet). • Do not use the appliance whilst in bare feet. •...
- Page 6 • Make sure that electrical cables connecting other appliances in the proximity of the oven cannot become entrapped in the oven door. • WARNING: When correctly installed, your product meets all safety requirements laid down for this type of product category. However special care should be taken around the rear or the underneath of the appliance as these areas are not designed or intended to be touched and may contain sharp or rough edges,...
- Page 7 • SAFE FOOD HANDLING: Leave food in the oven for as short a time as possible before and after cooking. This is to avoid contamination by organisms which may cause food poisoning. Take particular care during warmer weather. • WARNING: Take care NOT to lift the appliance by the door handle.
-
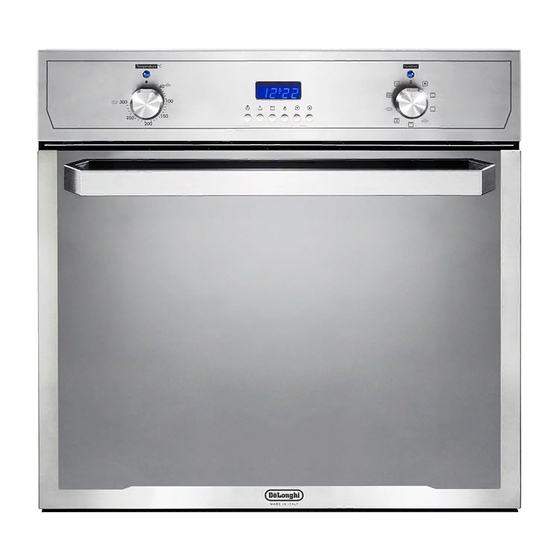
Page 8: Control Panel
1 - CONTROL PANEL Fig. 1.1 CONTROLS DESCRIPTION Oven temperature control knob Electronic/Clock Programmer Function selector control knob Power on indicator light Oven temperature indicator light Please note: This appliance incorporates a safety cooling fan which you will hear operating whenever the oven or grill is being used. -
Page 9: How To Use The Multifunction Oven
2 - HOW TO USE THE MULTIFUNCTION OVEN OPERATING PRINCIPLES Attention: The oven door becomes Heating cooking very hot during operation. MULTIFUNCTION oven are obtained in the Keep children away. following ways: by normal convection The heat is produced by the upper and lower heating elements. - Page 10 Fig. 2.1 Fig. 2.2 TEMPERATURE KNOB (fig. 2.1) To turn on the heating elements of the oven, set first the function selector to the required setting and then the thermostat knob to the desired temperature. To set the temperature, line up the temperature knob indicator with the required temperature.
- Page 11 LOWER HEATING ELEMENT In this position only the lower element is switched on. Heat is distributed by natural convection. The temperature must be regulated between 40 and 220°C maximum. LEAVENING - UPPER HEATING ELEMENT In this position only the upper element is switched on. Heat is distributed by natural convection.
- Page 12 COOKING ADVICE ROASTING To obtain classical roasting, it is necessary STERILIZATION to remember: Sterilization of foods to be conserved, in • that it is advisable to maintain a full and hermetically sealed jars, is done in temperature between 180 and 200°C. the following way: •...
-
Page 13: Oven Temperature Guide
3 - OVEN TEMPERATURE GUIDE Electric oven temperature Cooking process Oven heat Gas mark °C °F Keeping food hot, very cool ½ milk puddings Egg custards cool Rich fruit cakes, cool braising Low temperature moderate roasting, shortbread Victoria sandwich, plain fruit cake, moderate baked fish Small cakes, choux... - Page 14 FUNCTION NAME TEMP. TEMP. R E C O M - DESCRIPTION OF THE M I N . M A X . MENDED FUNCTION FUNCTION (°C) (°C) LEVELS RECOMMENDED FOODS Turns the light on inside OVEN LIGHT the oven to check on the food that is cooking Meringue, Soufflés, Cream Puffs...
-
Page 15: Pizza Stone
For foods that must be well done on the outside HOT AIR and tender or rare on the COOKING inside, i. e. lasagna, lamb, roast beef, whole fish, etc. When the fan only is on, DEFROSTING air is circulated at room FROZEN 1 o 2 temperature... - Page 16 COOK THE PIZZA FOR 4 MINUTES. Margherita style pizza will be ready in 4 minutes. For pizzas with thick dough and lots of toppings, 6 minutes is recommended. You can adjust the cooking time according to your personal tastes for a softer or harder crust. The pizza is done when it looks cooked, with the edges risen, crispy and browned.
- Page 17 With the De’Longhi PPP oven, dough leavening times are also quicker. LEAVENING FUNCTION The leavening function cuts the leavening time in half, and makes the dough uniform, elastic and easy to kneed. Compared to leavening on a surface in a room, dough leavened in the oven using our special function rises better and more quickly, saving you time and helping you make perfect dough for tasty, soft and fragrant pizzas.
- Page 18 DESSERT DISH The aluminium Dessert Dish is an excellent accessory to help you perfectly cook all types of desserts, and it is similar to ones used by professional bakers. Made entirely in aluminium it is very light and easy to handle. Its structural design makes it much better at applying even heat on the entire surface, preventing hotter and cooler spots from occurring, which is sometimes the case with the more traditional enamel grill pans.
-
Page 19: Electronic/Clock Programmer
4 - ELECTRONIC CLOCK/PROGRAMMER The electronic clock/programmer is a device which groups together the following functions: • 24 hours clock with illuminated display. • Timer (up to 23 hours and 59 minutes). • Program for automatic oven cooking. • Program for semi-automatic oven cooking. Description of the buttons: Description illuminated... -
Page 20: Electronic Timer
ELECTRONIC CLOCK ELECTRONIC TIMER (fig. 4.2) The programmer is equipped with an The timer program consists only of a electronic clock with illuminated numbers buzzer which may be set for a maximum which indicates hours and minutes. period of 23 hours and 59 minutes. Upon immediate connection of the oven or If the AUTO symbol is flashing push the after a power cut, three zeros will flash on... - Page 21 AUTOMATIC OVEN COOKING Set the temperature and the cooking program by using the switch and To cook food automatically in the oven, it is thermostat knobs of the oven (see necessary to: specific chapters). Set the length of the cooking period. oven programmed Set the end of the cooking time.
- Page 22 SEMI-AUTOMATIC COOKING At the end of the cooking time the oven will turn off automatically, the symbol This is used to automatically switch off the will turn off, AUTO will flash and a buzzer oven after the desired cooking time has will be sound, which can be turned off by elapsed.
- Page 23 IMPORTANT – OVEN NOT WORKING If the oven is not working, it may have been accidently set to “AUTOMATIC” or the power to the appliance was interrupted. If the Timer is showing the letter “AUTO” as below or the time of day is flashing, the Oven may not turn on or be delayed in its operation. Before requesting a service call, please refer to the timer set up instructions in this handbook and ensure the timer is set to “MANUAL”...
-
Page 24: Cleaning And Maintenance
5 - CLEANING AND MAINTENANCE GENERAL ADVICE Enamelled parts: • Before you begin cleaning, you All the enamelled parts must be cleaned must ensure that the appliance is with a sponge and soapy water or other switched off at the oven switch. non-abrasive products. - Page 25 WIRE RACKS • Assemble the wire racks to the oven walls using the 2 screws (fig. 5.1). • Slide in, on the guides, the shelf and the tray (fig. 5.2). The shelf must be fitted so that the safety notch, which stops it sliding out, faces the inside of the oven;...
- Page 26 GREASE FILTER • A special screen is provided at the back of the oven to catch grease particles, mainly when meat is being roasted (fig. 5.4). • Clean the filter after any cooking! The grease filter can be removed for cleaning and should be washed regularly in hot soapy water (fig.
- Page 27 To remove the telescopic sliding shelf supports: • Remove the side racks by unscrewing the fixing screws (fig. 5.6). • Lay down the telescopic sliding shelf support and side racks, with the telescopic sliding shelf support underneath. • Find the safety locks. These are the tabs that clip over the wire of the side rack (arrow 1 in fig.
- Page 28 REMOVING AND REPLACING THE INNER DOOR GLASS PANE FOR CLEANING If you wish to clean the inner pane of glass of the door, make sure you follow the precautions and instructions very carefully. Replacing the glass pane and the door incorrectly may result in damage to the appliance and may void your warranty.
- Page 29 REMOVING THE OVEN DOOR The oven door can easily be removed as follows: • Open the door to the full extent (fig. 5.9). • Open the lever “A” completely on the left and right hinges (fig. 5.10). • Hold the door as shown in fig. 5.8. •...
- Page 30 CLEANING THE INNER PANES OF GLASS The oven door is fitted with no. 3 panes: • no. 1 outside; • no. 1 inner; • no. 1 in the middle. To clean all panes on both sides it is Fig. 5.13 necessary to remove the inner and the middle panes as follows: REMOVING THE MIDDLE AND...
- Page 31 Remove the middle pane: • Gently unlock the middle pane of glass from the bottom clamps by moving it as in fig. 5.18. • Gently lift the bottom edge of the pane (arrow 1 in fig. 5.20) and remove it by pulling it out from the top clamps (arrow 2 in fig.
- Page 32 REPLACING THE MIDDLE AND INNER PANES OF GLASS Make sure the door is locked open (see fig. 5.15). Replace the middle pane: • Check that the four rubber pads are in place (“M” in fig. 5.21). • Check that you are holding the pane the correct way.
- Page 33 Replace the inner pane: • Check that the four rubber pads are in place (“D” in fig. 5.24). • Check that you are holding the pane the correct way. You should be able to read the wording on it as it faces you. •...
-
Page 34: Advice For The Installer
Advice for the installer IMPORTANT • The appliance is designed and approved for domestic use only and should not be installed in a commercial, semi commercial or communal environment. Your product will not be guaranteed if installed in any of the above environments and could affect any third party or public liability insurances you may have. -
Page 35: Installation
6 - INSTALLATION IMPORTANT • The oven can be fitted in standard units, width and depth 60 cm. • Installation requires a compartment as illustrated in figures 6.1 and 6.2. On the lower side, the oven must lay on supports standing the oven weight. •... - Page 36 To ensure internal ventilation, aeration channels must be provided as illustrated in the figures 6.3 and 6.4. Fig. 6.4 50 mm Fig. 6.3 30 mm...
- Page 37 FIXING THE OVEN Introduce the oven into the furniture opening and fix it with screws (not supplied) as figure 6.5. It is essential that the oven rests on a surface which will support its weight, as the screw fixing is only complementary. Note It is essential that when installing your oven adequate air circulation is allowed for within the installation.
- Page 38 IMPORTANT: To avoid damage to the lower trim please note the following instructions. The lower trim is designed to allow for good air circulation and the correct opening of the oven door. To ensure the trim is not damaged due to the appliance being placed on the floor, the appliance should be suitably supported as in below illustrations.
-
Page 39: Electrical Installation
7 - ELECTRICAL INSTALLATION IMPORTANT: The appliance must be installed in accordance with the manufacturer’s instructions. Incorrect installation, for which the manufacturer accepts no responsibility, may cause damage to persons, animals and property. The connection of the appliance to earth is mandatory. The manufacturer declines all responsibility for any inconvenience resulting from the inobservance of this condition. - Page 40 ELECTRICAL FEEDER CABLE CONNECTION WARNING: If the power supply cable is damaged, it must be replaced only by an authorised service agent in order to avoid a hazard. To connect the supply cable: • Unhook the terminal board cover by inserting a screwdriver into the two hooks “A” (figure 7.2).
-
Page 41: Guarantee & After Sales Service
8 - GUARANTEE Your new “De’Longhi” product comes with 12-month guarantee covering all parts and labour. If your appliance proves to be defective as a result of faulty materials or workmanship during the guarantee period, these parts will be repaired or replaced free of charge. AFTER SALES SERVICE IMPORTANT –... - Page 44 Descri pt ion s an d illu st ra tion s in this book l et ar e given as simpl y indicati ve. T he m an uf a ct u r er re s erv es t he right , c onsidering the charact erist ics of t he models d escr ib ed h e re , at any time and wit ho ut notice, t o make even tual nece ssary modifi cat io ns f or t h e ir c o ns truc t ion or f or c om mercial ne eds.
Need help?
Do you have a question about the SLM 60 PPP and is the answer not in the manual?
Questions and answers