Panasonic SA-AK770 Operating Instructions Manual

Panasonic SA-AK770 Operating Instructions Manual

Panasonic cd stereo system operating instructions

Advertisement

Dear customer
Thank you for purchasing this product.
For optimum performance and safety, please read these instructions
carefully.
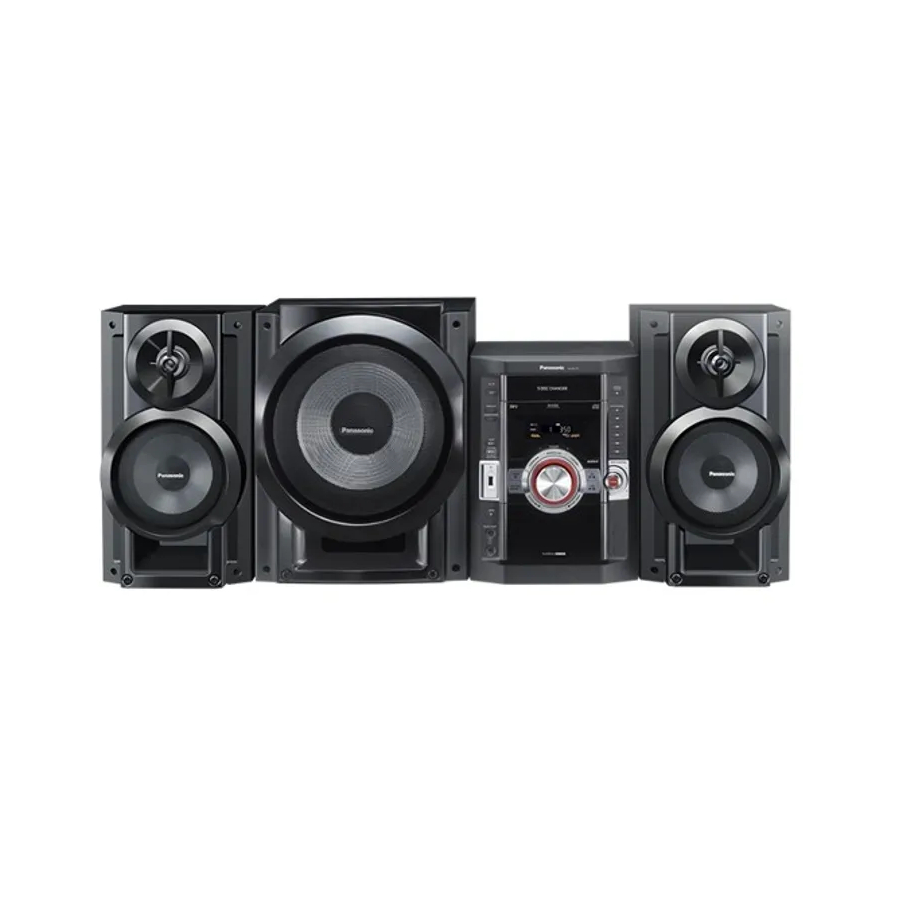
These operating instructions are applicable to the following system.
System
Main unit
Front speakers
Subwoofer
SUPPLIED ACCESSORIES
Please check and identify the supplied accessories.
Use numbers indicated in parentheses when asking for
replacement parts. (As of January 2008)
1 x AC mains lead
For the United Kingdom
(K2CT3CA00004)
For Continental Europe
(K2CQ2CA00007)
For Australia and N.Z.
(K2CJ2DA00008)
1 x Remote Control
(N2QAYB000279)
Unless otherwise indicated, illustrations in these operating
instructions are for the United Kingdom and Continental Europe.
Operations in these instructions are described mainly using the
remote control, but you can perform the operations on the main unit
if the controls are the same.
Your unit may not look exactly the same as illustrated.
EG EB GN
SC-AK770
SA-AK770
SB-AK770
SB-WAK770
2 x Remote control
batteries
1 x FM indoor antenna
(RSA0007-L1)
1 x AM loop antenna
(N1DAAAA00001)
Operating Instructions
CD Stereo System
Model No.

Table of contents

Caution for AC Mains Lead ......................3
Safety precautions ...................................4
Placement of speakers .............................4
Simple setup .............................................5
Preparing the remote control ..................6
DEMO function ..........................................7
Overview of controls ................................8
Discs ........................................................10
Using the FM/AM radio ...........................13
Using the timers .....................................14
Using sound effects ...............................15
Using other equipment ..........................16
Troubleshooting guide ...........................20
Specifi cations .........................................22
Maintenance ............................................23
When moving the unit ............................23
Before connecting, operating or adjusting this product, please
read these instructions completely.
Please keep this manual for future reference.
Note:
"EB" on the packaging indicates the United Kingdom.
SC-AK770
RQTV0286-2B

Advertisement

Table of Contents
loading

Summary of Contents for Panasonic SA-AK770

  • Page 1: Table Of Contents

    Thank you for purchasing this product. For optimum performance and safety, please read these instructions carefully. These operating instructions are applicable to the following system. System SC-AK770 Main unit SA-AK770 Front speakers SB-AK770 Subwoofer SB-WAK770 SUPPLIED ACCESSORIES SUPPLIED ACCESSORIES Please check and identify the supplied accessories.
  • Page 2 (Back of product) Inside of product Tuotteen sisällä Produktets innside SUOMI RQT8043...
  • Page 3: Caution For Ac Mains Lead

    Caution for AC Mains Lead For United Kingdom, “EB” area code model only. For your safety, please read the following text carefully. This appliance is supplied with a moulded three pin mains plug for your safety and convenience. A 5-ampere fuse is fi tted in this plug. Should the fuse need to be replaced please ensure that the replacement fuse has a rating of 5-ampere and that it is approved by ASTA or BSI to BS1362.
  • Page 4: Safety Precautions

    Safety precautions Placement Set the unit up on an even surface away from direct sunlight, high temperatures, high humidity, and excessive vibration. These conditions can damage the cabinet and other components, thereby shortening the unit’s service life. Place it at least 15 cm away from wall surfaces to avoid distortion and unwanted acoustical effects.
  • Page 5: Simple Setup

    Simple setup Making the connections Connect the AC mains lead only after all the other connections have been made. Speaker connections Speaker connections Speaker Terminal or connector color Front (left and right) White Subwoofer Purple Please refer to “Connecting the Universal Dock for iPod” on page 16 and “Connecting and playing a Bluetooth device”...
  • Page 6: Preparing The Remote Control

    Simple setup (continued) Optional antenna connections Optional antenna connections Use an outdoor antenna if the radio reception is poor. Note: Disconnect the outdoor antenna when the unit is not in use. Do not use the outdoor antenna during a lightning storm. FM outdoor antenna Rear panel of this main unit...
  • Page 7: Demo Function

    DEMO function -7 STOP, –DEMO Handling of the disc trays and discs Not doing the following will cause damage to the unit. Removing the mains plug Press [y/I] to turn off the unit and remove the mains plug only after all the displays have disappeared. Inserting a disc •...
  • Page 8: Overview Of Controls

    Overview of controls Main unit Refer to the numbers in parentheses for page reference. Buttons labelled such as 1 function in exactly the same way as the controls on the remote control. Display panel Disc trays AC supply indicator [AC IN] This indicator lights when the unit is connected to the AC mains supply.
  • Page 9 Remote control Buttons labelled such as 1 function in exactly the same way as the controls on the main unit. Sleep timer (14), Auto off 2 Display (11, 13, 16, 19) Dimmer function Numeric selection (10, 13, 16, 17) Disc selection (10) Tuner (FM/AM) selection (13) Music port selection (16) 3 Disc play or pause (10, 18)
  • Page 10: Discs

    Discs Basic play Basic play Press [0, OPEN/CLOSE] on the main unit to open the tray. The unit turns on, load a disc in the current tray with the label facing up. Press [0, OPEN/CLOSE] to close the tray. Press [6, CD] to start play. You can also press [DISC] and then [1] ~ [5] to select and play the other loaded discs.
  • Page 11 Checking the track information You can select a desired disc display mode. Press [DISPLAY] during play or pause. Elapsed play time Remaining play time Elapsed Remaining Album play time play time Playing bit rate (during play only) (Artist) (Track) Note: •...
  • Page 12: Cassette Tape - Play And Record

    Cassette tape – Play and record The buttons described for “Cassette tape – Play and record” are mainly using the main unit unless indicated otherwise. Basic play Basic play Use normal position tapes. High position and metal position tapes can be played, but the unit will not be able to identify the characteristics of these tapes.
  • Page 13: Using The Fm/Am Radio

    Using the FM/AM radio Manual tuning Manual tuning Press [FM/AM] (main unit: [FM/AM/MUSIC P.]) to select “FM” or “AM”. Press [PLAY MODE] to select “MANUAL”. Press [4, / REW] or [¢, / FF] to select the frequency of the required station. “...
  • Page 14: Using The Timers

    Using the timers Setting the clock Setting the clock This is a 24-hour clock. Press [CLOCK / TIMER] to select “CLOCK”. Each time you press the button: ˚ PLAY CLOCK Original display Within 8 seconds or so Press [4, / REW] or [¢, Press [CLOCK / TIMER] to fi...
  • Page 15: Using Sound Effects

    Using sound effects Changing the sound quality: Preset EQ Changing the sound quality: Preset EQ Press [PRESET EQ] repeatedly to select your desired setting. HEAVY CLEAR SOFT EQ-OFF (off) Setting Effect HEAVY Adds punch to rock CLEAR Clarifi es higher frequencies SOFT For background music VOCAL...
  • Page 16: Connecting To Portable Audio Equipment

    Avoid interfering with other Panasonic equipment equipment Other Panasonic audio or video equipment may start functioning when you operate the unit using the supplied remote control. You can operate this unit in another mode by setting the remote control operating mode to “REMOTE 2”.
  • Page 17 Connecting and playing a Bluetooth device Connecting and playing a Bluetooth device For the United Kingdom and Continental Europe By connecting a Bluetooth Receiver (example: SH-FX570R, sold separately), you can receive and play the audio stored in your Bluetooth audio source device (personal computer, etc). SH-FX570R (not included) Connect the Bluetooth Receiver into the OPTION port and...
  • Page 18: Recording To Usb Mass Storage Device

    Using other equipment (continued) Recording to a USB mass storage device Recording to a USB mass storage device You can record sound or music tracks from the disc to a USB mass storage device. Note: • This function does not work during any “RANDOM” mode selection.
  • Page 19 Display function This function allows you to display the information during recording. Press [DISPLAY] repeatedly during USB recording mode. Elapsed play time Remaining play time USB remaining REC time Recording REC mode Elapsed Remaining play time play time USB remaining Recording REC time REC mode...
  • Page 20: Troubleshooting Guide

    Troubleshooting guide Before requesting service, make the following checks. If you are in doubt about some of the check points, or if the solutions indicated in the chart do not solve the problem, consult your dealer for instructions. ■ Common problems When the unit is in standby mode, the display lights up and changes continuously.
  • Page 21: Disc Trays

    ■ Using the USB device No response when • Disconnect the USB device and then reconnect it back. Alternatively, turn the unit off and [¶ REC, TAPE] button is then back on. pressed. USB recording stops • Select a suitable recording mode (128 KBPS or 192 KBPS) and resume recording. suddenly.
  • Page 22: Specifi Cations

    Specifi cations AMPLIFIER SECTION RMS output power Front Ch (both channels driven) 250 W per channel (6 Ω), 1 kHz, 10% THD Subwoofer Ch 200 W per channel (6 Ω), 100 Hz, 10% THD Total RMS stereo mode power FM/AM TUNER, TERMINALS SECTION Preset station Frequency Modulation (FM) Frequency range...
  • Page 23: Maintenance

    Maintenance If the surfaces are dirty To clean this unit, wipe with a soft, dry cloth. • Never use alcohol, paint thinner or benzine to clean this unit. • Before using chemically treated cloth, read the instructions that came with the cloth carefully. When moving the unit Remove all discs.
  • Page 24 Matsushita Electric Industrial Co., Ltd. Web Site: http://panasonic.net Pursuant to at the directive 2004/108/EC, article 9 (2) Panasonic Testing Centre Panasonic Marketing Europe GmbH Winsbergring 15, 22525 Hamburg, Germany RQTV0286-2B L0408KE2058...

This manual is also suitable for:

Sb-ak770Sb-wak770Sc-ak770

Table of Contents