Table of Contents
Advertisement
Advertisement
Table of Contents

Related Manuals for Yamaha ISX-80


Summary of Contents for Yamaha ISX-80
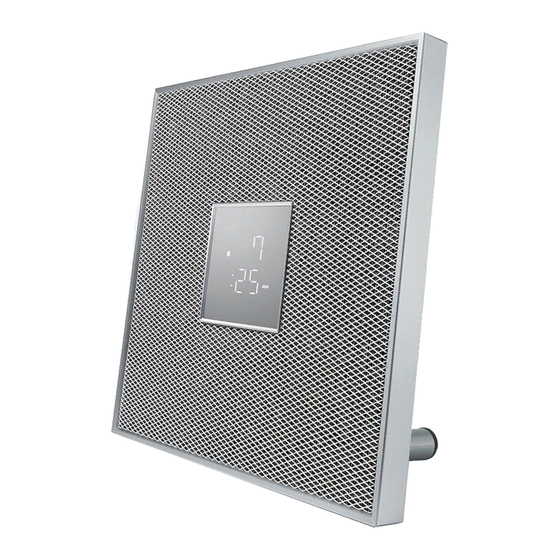
- Page 1 I ntegrated Audio System O W NE R ’S MANUAL...
-
Page 2: Caution: Read This Before Operating Your Unit
• Insert the battery according to the polarity markings (+ and -). is dangerous and may cause fire, damage to this unit, and/or personal injury. Yamaha will not be held • Change all batteries if you notice the following conditions: responsible for any damage resulting from use of this unit with a voltage other than specified. - Page 3 Making sure that neither core is connected to the earth terminal of the three pin plug. We, Yamaha Music Europe GmbH hereby declare that this unit is in compliance with the essential requirements and other relevant provisions of Directive 1999/5/EC.
-
Page 4: Table Of Contents
Table of Contents CAUTION: READ THIS BEFORE Presetting network contents Using the sleep timer ..22 ..34 OPERATING YOUR UNIT. Presetting contents..22 ..i Adjusting brightness of front Selecting preset contents..22 Introduction panel display ..4 ..35 Listening to the Music with Supplied accessories..4 AirPlay ..23 Updating the firmware... - Page 5 Shelf style.... 10 Musical space around shelf 2 types of installation styles Wall style ..... 11 Musical interior in Harmony with wall...
-
Page 6: Introduction
Introduction Confirm the package contents and useful points of this manual. Supplied accessories About this manual • How to operate this unit is described mainly using the remote control. • iOS and Android mobile devices are collectively referred as “mobile devices.” The specific type of mobile device is noted in explanations as needed. -
Page 7: Part Name
Part name Familiarize yourself with all parts and these functions. Wi-Fi indicator ( P.15) Top panel Bluetooth indicator ( P.25, 26) (Power)/CONNECT ( P.15) SOURCE ( P.31) VOLUME–/+ Controls the volume. PRESET ( P.22, 29 ) ALARM ( P.31) -
Page 8: Rear/Side Panel
Part name Hole for wall-hanging installation ( P.11) Rear/side panel Screw hole for attaching safety wire (M4) ANTENNA jack ( P.9) Cable-holding slit ( P.9) Screw hole for installing the stand ( P.10) AUX jack ( P.27) DC input connector ( P.9) CLOCK switch ( P.17) -
Page 9: Front Panel Display
Part name Source indicator Adjusting display brightness Front panel display Shows selected source. You can adjust the brightness of the front panel display by pressing DIMMER on the remote control Illumination sensor P.35). Detects ambient lighting. Do not cover this sensor. Play indicator Displays the playback mode. -
Page 10: Remote Control
Part name Controlling with the remote control Infrared signal transmitter Remote control Point the remote control at the remote control sensor on (Power) ( P.13) the unit. Source buttons Switch the audio source to be played. DIMMER ( P.35) CLOCK SETUP ( P.17) ALARM ( P.31, 33) -
Page 11: Preparations
Preparations Connect FM antenna or AC adaptor and turn the unit on. Do not connect the power cable of the unit until you have finished connecting all cables. Connecting FM antenna Connect the supplied antenna to the unit. Pass the antenna cable through the cable-holding slit on the back. -
Page 12: Installation
Preparations Installation When installing on a shelf Attach the non-skid pad to the bottom of the unit (2 places). • Attach the provided cable clamp to the bottom, you can also put together cables clean. Attach the provided stand. Attach the cover. •... - Page 13 Continue to the next page \ • Secure installation is the owner's responsibility. Yamaha shall not be liable for any accident caused by improper installation. If you are uncertain about the wall strength, please consult an installation specialist.
- Page 14 Preparations Hook the hole for wall-hanging installation onto the screw head. • Make sure that the screw is securely caught by the narrow part of the hole. • To prevent the unit from falling down, it is recommended to attach a commercially available safety wire.
-
Page 15: Turning On The Power
Preparations Status in standby/eco standby Turning on the power Standby standby Plug the power cable into the wall outlet Setting of the clock and press Enable/disable the alarm • The unit turns on. Control from the app • Press again to turn off (standby mode). Clock display •... -
Page 16: Install The "Musiccast Controller" App
• Perform the network settings of this unit, and connect to the Wi-Fi network • Play songs stored on computers (servers) • Select an Internet radio station • Distribute and receive audio between the unit and other Yamaha MusicCast devices • Set the clock • Set the alarm •... -
Page 17: Connecting To The Network
Preparations Connecting to the network Mobile device You can play back music files stored on your PC, mobile devices, DLNA -compatible NAS, or audio contents on the Internet, by connecting this unit to the network. You can This unit also operate the unit with your mobile device. * Digital Living Network Alliance Wireless router (access point) -
Page 18: Connecting To The Network By Sharing The Ios Device Setting
Preparations • You need iOS device with iOS 7.1 or later. Connecting to the network by sharing the iOS • The network settings on iOS devices cannot be applied to the unit to establish a wireless device setting connection if your wireless router (access point) uses WEP encryption. -
Page 19: Setting The Clock
Preparations • The clock setting will be lost if you disconnect the Setting the clock power cable from the wall outlet for about a week. Set the clock again. Once the clock is set, the alarm function will be • The clock format (12-hour/24-hour) can be available. -
Page 20: Playing Network Contents
Playing network contents This unit allows you to play back music files such as MP3, WMA, or FLAC (lossless audio data compression format) files stored in the computer (server) connected to the network or NAS. You can also listen to world-wide radio stations via the Internet. Play back the Internet radio ( P.21) Play back music files stored on your PC (... -
Page 21: Listening To The Songs In The Computer
Listening to the songs in the computer This unit allows you to play back music files such as MP3, WMA, or FLAC (lossless audio data compression format) files stored in the computer (server) connected to the network or NAS. • For details on media sharing settings, refer to Setting the media Windows Media Player help. -
Page 22: Playing Back Songs In The Pc
Listening to the songs in the computer • You can use the remote controller for the Playing back songs in following operations: the PC Play/pause Move to the next or previous song Use the “MusicCast CONTROLLER” installed in a mobile in the folder. -
Page 23: Listening To Internet Radio
Listening to Internet radio You can listen to Internet radio stations from all over the world. Use the “MusicCast CONTROLLER” installed in a mobile device to listen to Internet radio. Make sure that the unit is connected to the Internet properly ( P.15). -
Page 24: Presetting Network Contents
Presetting network contents Up to 6 contents can be registered with the unit; and up to 40 contents with “MusicCast CONTROLLER.” You can easily play back contents after registered. Operation with buttons on the unit Presetting contents • Presetting contents Use “MusicCast CONTROLLER”... -
Page 25: Listening To The Music With Airplay
Listening to the Music with AirPlay The AirPlay function allows you to play back iTunes/iPod music on the unit wirelessly via a network. Make sure that the unit and your PC or iPod are connected to the same router ( P.15). -
Page 26: Listening To Music Via Bluetooth Connection
Listening to music via Bluetooth connection You can listen to sound wirelessly from a Bluetooth compatible device. • If pairing information for a device is deleted, you Pairing a Bluetooth will need to perform pairing of that device again in order to connect it again. -
Page 27: Performing Pairing And Playing Back Music
Listening to music via Bluetooth connection • If another device is already connected to the unit, Performing pairing and press and hold to terminate the Bluetooth connection, then perform pairing with the new playing back music device. • You can check or change the network name of this unit with “MusicCast CONTROLLER.”... -
Page 28: Connecting A Paired Bluetooth Device And Playing Back Music
Listening to music via Bluetooth connection • Decrease the volume of the unit before Connecting a paired playback. Otherwise, playback volume may be too loud. Bluetooth device • If connecting from the unit, the unit searches for and playing back music the Bluetooth device connected the last time. -
Page 29: Listening To External Sources
Listening to external sources This unit allows playback of external devices, such as a mobile music player. For the connection of each external device, refer to its supplied owner’s manual. Unplug the power cable of the unit. Remove the back cover of the unit and connect the external device to the unit. -
Page 30: Listening To Fm Radio Stations
Listening to FM radio stations To listen to FM radio stations, connect the supplied FM antenna. See “Connecting FM antenna” (P.9) for connecting the antenna to the unit. • If station reception is weak, you can tune into a Tuning in FM stations station manually by pressing the button Auto preset... -
Page 31: Presetting Fm Stations
Listening to FM radio stations Operation with buttons on the unit Presetting FM stations • Presetting FM stations Tune into a station you want to store. Up to 6 contents can be registered with the unit; and up to 30 contents with “MusicCast CONTROLLER.” Press and hold PRESET. -
Page 32: Using The Alarm Function
Using the alarm function The unit includes an alarm function (IntelliAlarm) that plays back music sources or set of beeps (built-in alarm) at the set time in a variety of different methods. The alarm function has following features. 3 types of alarms Source Use “MusicCast CONTROLLER”... -
Page 33: Setting The Alarm Time With The Unit
Using the alarm function • The alarm setting will be erased if the system Setting the alarm time enters standby mode without properly completing it. with the unit • Set the alarm type by using “MusicCast CONTROLLER.” Press and hold •... - Page 34 Using the alarm function (when alarm types other than BEEP are selected) Press PRESET specify the content or radio station to be played. • Pressing again the same PRESET 1-6 button will resume the content. • Preset contents and radio stations you want to play back ( P.22, 29).
-
Page 35: Turning The Alarm On/Off
Using the alarm function • The alarm setting will be saved even if the alarm is Turning the alarm on/ turned off. If the alarm is turned on again by pressing ALARM, the alarm will sound with the ALARM previous alarm settings. Press •... -
Page 36: Using The Sleep Timer
Using the sleep timer You can set the time to elapse which the unit automatically enters to standby mode. Press several times to select the time. • Time can be selected from 30/60/90/120 min., or OFF. • lights up shortly after the time is selected, and the sleep timer is set. -
Page 37: Adjusting Brightness Of Front Panel Display
Adjusting brightness of front panel display • When AUTO is set, the brightness of the front Press several times to select the panel display is adjusted automatically with the brightness. illumination sensor ( P.7). Ensure that the sensor is not covered. •... -
Page 38: Updating The Firmware
Updating the firmware When new firmware is detected from the network, “UP” will be shown on the front panel display (press any button to turn off the “UP” indication on the front panel display). There are two ways to updating the firmware. •... -
Page 39: Disabling The Wireless Function
Disabling the wireless function Wireless functions (Wi-Fi, Bluetooth) of the unit can be disabled. • Set the side panel CLOCK switch to “ON.” It is not Disabling the Wi-Fi possible to change the setting in “OFF.” function • The wireless function is enabled, when you connect to the network or the network setting is When the unit is in the standby state, press initialized. -
Page 40: Troubleshooting
Refer to the table below when the unit does not function properly. If your problem is not listed below or if the instruction below does not help, turn off the unit, disconnect the power cable, and contact the nearest authorized Yamaha dealer or service center. -
Page 41: Network
Troubleshooting Problem Cause Solution Set the brightness of the front panel display to a setting other than AUTO. Or, The front display becomes dim. The front display setting is set to AUTO. do not cover the illumination sensor. The power cable of the unit was unplugged from the outlet. Or an outage The clock setting has been cleared. - Page 42 Troubleshooting Problem Cause Solution The files in the PC cannot be viewed or Use the file format supported by both the unit and the media server The files are not supported by the unit or the media server. played back. P.43).
-
Page 43: Bluetooth
Troubleshooting Bluetooth Problem Cause Solution The unit is turned off. Turn the unit on and perform the paring ( P.25). Terminate current Bluetooth connection, and perform pairing with the new Another Bluetooth device is connected. device. This unit and the device are too far apart. Pair the unit and device within a distance of 10 m (33 ft). -
Page 44: Fm Reception
Troubleshooting Problem Cause Solution The volume of the connecting device is set too low. Turn up the volume of the connecting device. Switch the output of Bluetooth audio signals of the connecting device to the The connecting device is not set to send Bluetooth audio signals to the unit. unit. -
Page 45: Supported Devices/Media And File Formats
Supported devices/media and file formats Supported devices/ File format medias File format the unit supporting is as follows. DLNA • The unit supports playback of WAV (PCM format only), MP3, WMA, MPEG-4 AAC and FLAC files (1- or 2-channel PC with Windows Media Player 11 or Windows Media audio only). -
Page 46: Specifications
• The speed of signal transfer and the distance at which communication is possible differs according to the distance between the communicating devices, the presence of obstacles, radio wave conditions and the type of equipment. • Yamaha does not guarantee all wireless connections between this unit and devices compatible with Bluetooth function. -
Page 47: Trademarks
Trademarks AirPlay, iPad, iPhone, iPod, iPod touch, and iTunes are trademarks of Apple Inc., registered in the U.S. and other countries. MusicCast is a trademark or registered trademark of Yamaha ® Bluetooth word mark and logos are registered trademarks Corporation. - Page 48 For detailed guarantee information about this Yamaha product, and Pan-EEA* and Switzerland warranty service, please either visit the website address below (Printable file is available at our website) or contact the Yamaha representative office for your country. * EEA: European Economic Area http://europe.yamaha.com/warranty/...
Need help?
Do you have a question about the ISX-80 and is the answer not in the manual?
Questions and answers