Table of Contents
Advertisement
Quick Links
Advertisement
Table of Contents

Subscribe to Our Youtube Channel
Related Manuals for Columbia a4 series


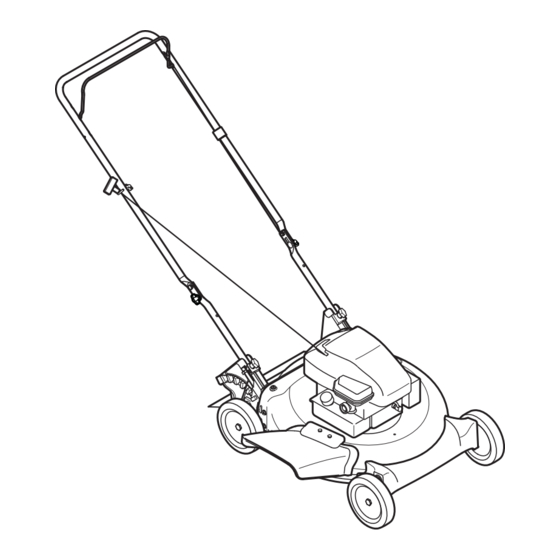
Summary of Contents for Columbia a4 series
- Page 1 Printed In USA 769-06599 12.17.10...
-
Page 2: Table Of Contents
To The Owner Thank You Thank you for purchasing your new equipment. It was carefully The manufacturer reserves the right to change product engineered to provide excellent performance when properly specifications, designs and equipment without notice and operated and maintained. without incurring obligation. -
Page 3: Safe Operation Practices
Important Safe Operation Practices This symbol points out important safety instructions which, if not followed, could endanger the personal safety and/or property of yourself and others. Read and follow all instructions in this manual before attempting to operate this machine. Failure to comply with these instructions may result in personal injury. - Page 4 When starting engine, pull cord slowly until resistance contact or thrown object injuries. is felt, then pull rapidly. Rapid retraction of starter cord (kickback) will pull hand and arm toward engine faster than Many injuries occur as a result of the mower being pulled over the foot during a fall caused by slipping or tripping.
- Page 5 Check the blade and engine mounting bolts at frequent Service for damage (e.g., bent, cracked, worn) Replace blade with Safe Handling Of Gasoline: To avoid personal injury or property damage use extreme listed in this manual. “Use of parts which do not meet the original equipment specifications may lead to improper and the vapors are explosive.
- Page 6 Notice Regarding Emissions Spark Arrestor Engines which are certified to comply with California and federal This machine is equipped with an internal combustion engine and should not be used are certified to operate on regular unleaded gasoline, and on or near any unimproved forest-covered, brush may include the following emission control systems: Engine exhaust system is equipped with a spark arrester meeting applicable local or state laws (if any).
- Page 7 Safety Symbols This page depicts and describes safety symbols that may appear on this product. Read, understand, and follow all instructions on the machine before attempting to assemble and operate. Symbol Description Read, understand, and follow all instructions in the manual(s) before attempting to assemble and operate To reduce the risk of injury, keep hands and feet away.
-
Page 9: Assembly & Set-Up
Assembly & Set-Up Contents of Carton One Lawn Mower One Side Discharge Chute Two Wheels Hardware Pack Group 1 Group 2 Recommended Tools for Assembly wrench (1) Assembly NOTE: This unit is shipped without gasoline or oil in the engine. Fill up with gasoline and oil as instructed in the accompanying Handle Remove any packing material which may be between... - Page 10 Follow the steps below to complete handle assembly: upper handle up as shown in Fig. 3-2. Do not crimp cable while lifting the handle up. lower handle (shown in Fig. 3-3 deck cutaway) line Reattach bolts and wing nuts removed earlier into lower holes of handle as shown in Fig.
- Page 11 Side Discharge Chute (Hardware Pack, Group 2) The chute deflector provided is a safety device. Do not operate the mower unless the chute deflector has been properly installed. Place the chute deflector in position on the deck, aligning holes. See Figure 3-7. Insert the screws from the top of the deck down through the chute deflector.
-
Page 12: Controls & Features
Controls and Features ntro Blade Control Recoil Starter The blade control is attached to the upper handle of the mower. The recoil starter is attached to the right upper handle. Stand Depress and squeeze it against the upper handle to operate the behind the unit and pull the recoil starter rope to start the unit. -
Page 13: Operation
Operation To Start Engine is standing near the lawn mower while starting indoors or in enclosed, poorly ventilated areas. Engine exhaust contains carbon monoxide, an loose clothing away from any moving parts on engine and lawn mower. If your unit is equipped with a primer, prime engine as instructed in the separate engine manual packed with your unit. -
Page 14: Maintenance & Adjustment
Maintenance & Adjustments Maintenance General Recommendations Always observe safety rules when performing any maintenance. The warranty on this lawn mower does not cover items that have been subjected to operator abuse or negligence. To receive full value from warranty, operator must maintain the lawn mower as instructed here. -
Page 15: Service
Service Blade Care Lubricate the engine crankshaft and the inner surface of the blade adapter with light oil. Slide the blade adapter When removing the cutting blade for sharpening or replacement, protect your hands with a pair of heavy gloves or use a heavy rag to hold the part number) faces the ground when the mower is in the blade. -
Page 16: Troubleshooting
Troubleshooting Problem Cause Remedy Engine Fails to start Engage blade control. Spark plug boot disconnected. Connect wire to spark boot. Fuel tank empty or stale fuel. Fill tank with clean, fresh gasoline. Engine not primed (if equipped with primer). section. Faulty spark plug. -
Page 17: Replacement Parts
Replacement Parts Component Part Number and Description NOTE: number ready. Refer to page 2 for more information regarding locating your model and serial numbers. -
Page 18: Emission Control Warranty Statement
system (ECS) warranty on your outdoor 2006 and later small off-road spark-ignited engine and equipment (outdoor equipment the period of time listed below provided there has been no abuse, neglect or improper maintenance of outdoor equipment engine. Your ECS may include parts such as the carburetor, fuel-injection system, the ignition system, catalytic converter, fuel tanks, fuel lines, fuel caps, valves, canisters, filters, vapor hoses, clamps, connectors, and other associated emission-related components. - Page 19 The outdoor equipment engine owner will not be charged for diagnostic labor that is directly associated with diagnosis of a defec- tive, emission-related warranted part, provided that such diagnostic work is performed at a warranty station. warranty of any warranted part. warranted parts sufficient to meet the expected demand for such parts.
-
Page 20: Warranty
For equipment purchased in Canada only. THREE YEAR LIMITED WARRANTY The limited warranty set forth below is given by MTD Products Limited with respect to new merchandise purchased and used in Canada and/or its territories and possessions (either entity respectively, “MTD”). MTD warrants this product (excluding its normal wear parts as described below) against defects in material and workmanship for a period of three (3) years commencing on the date of original purchase and will, at its option, repair or replace, free of charge, any part found to be defective in materials or workmanship. - Page 21 THREE YEARS- 120 Hrs. LIMITED WARRANTY For three (3) years-120 hrs. whichever come first, from the date of original purchase of COLUMBIA products, COLUMBIA will either repair or replace, at its option, free of charge, F.O.B. factory or authorized service firm, any part found to be defective in material and workmanship.
- Page 22 Notes...
Need help?
Do you have a question about the a4 series and is the answer not in the manual?
Questions and answers