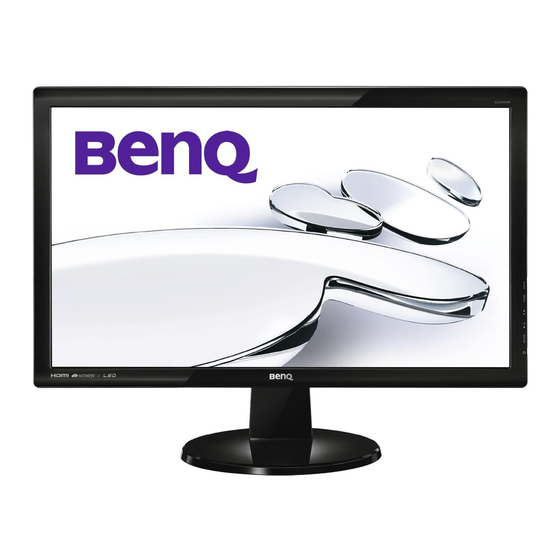
BenQ G2450HM Service Manual

BenQ G2450HM Service Manual

Hide thumbs Also See for G2450HM:
Table of Contents

Advertisement

Applicable Country & Regions: Global
Service Manual for BenQ:
G2450HM: D-SUB + HDMI + DVI + AUDIO
P/N: 9H.L7NLA.TBW
GL2450HM: D-SUB + HDMI + DVI + AUDIO
P/N: 9H.L7CLA.TBE
GL2450HE: D-SUB + HDMI + DVI + AUDIO
P/N: 9H.L7CLA.FBE
Glossy Black Chassis Colors
Product Service Manual – Level 1~2
Notice:
For RO to input specific "Legal Requirement" in specific NS regarding to responsibility and
liability statements.
Please check BenQ's eSupport web site, http://esupport.benq.com, to ensure that you have the
most recent version of this manual.
First Edition (Sep. 2011)
©
Copyright BenQ Corporation 2011. All Right Reserved.
nd
Version: 2
Date:10-31-2012
1

Advertisement

Table of Contents
loading

Summary of Contents for BenQ G2450HM

  • Page 1 Notice: For RO to input specific “Legal Requirement” in specific NS regarding to responsibility and liability statements. Please check BenQ’s eSupport web site, http://esupport.benq.com, to ensure that you have the most recent version of this manual. First Edition (Sep. 2011) ©...
  • Page 2: Table Of Contents

    Content Index Abbreviations & Acronyms ............................3   1. About this Manual ..............................5   1.1 Important ................................5   1.2 Trademark ................................5   2. Introduction ................................6   2.1 RoHS (2002/95/EC) Requirements – Applied to all countries require RoHS............. 6   2.2 Safety Warning and Notice ..........................
  • Page 3: Abbreviations & Acronyms

    Abbreviations & Acronyms Analog to Digital Converter Automatic Frequency Control: control signal used to tune to the correct frequency BenQ BenQ Corporation BTSC Broadcast Television System Committee Central Process Unit CVBS Composite Video Blanking and Synchronization Digital Light Processing / Texas Instruments®...
  • Page 4 Not Connected Non Volatile Memory: IC containing TV related data (for example, options) On Screen Display Personal Computer Printed Circuit Board (or PWB) Remote Control transmitter Red, Green and Blue. The primary color signals for TV. By mixing levels of R, G and B, all colors (Y/C) are Read Only Memory Data signal on I...
  • Page 5: About This Manual

    Service Manual that provide repair engineer various choice. 1.1 Important Only trained service personnel who are familiar with this BenQ Product shall perform service or maintenance to it. Before performing any maintenance or service, the engineer MUST read the “Important Safety Information”.
  • Page 6: Introduction

    2. Introduction This section contains general service information, please read through carefully. It should be stored for easy access place. 2.1 RoHS (2002/95/EC) Requirements – Applied to all countries require RoHS. The RoHS (Restriction of Hazardous Substance in Electrical and Electronic Equipment Directive) is a legal requirement by EU (European Union) for the global electronics industry which sold in EU and some counties also require this requirement.
  • Page 7: Compliance Statement

    BenQ service center for assistance. 6. To avoid possible electric shock, do not dissemble or repair the monitor. 7. If a bad smell or an abnormal sound appears to come from the monitor, contact your nearest BenQ service center for assistance immediately.
  • Page 8: General Description

    3. General Description This new LCD (Liquid Crystal Display) monitor BenQ G2450HM&GL2450HM/GL2450HE offers numerous features and functions, for example:  Panel Type: TN + CCFL (For G2450HM)  Panel Type: TN + LED (For GL2450HM/GL2450HE)  Minimal space requirements thanks to slim casing ...
  • Page 9: Product Overview

    5. Product Overview 5.1 Monitor Specifications G2450HM GL2450HM/GL2450HE Conf. 2 Conf. 3 D-sub (include component source) + D-sub (include component source) + DVI-D + HDMI + speaker DVI-D + HDMI + speaker Panel Type (TN / VA / TN + CCFL...
  • Page 10 Audio line in Earphone Jack Voltage Rating AC: 100~240V (Built-in) AC: 100~240V (Built-in) Power-On Mode <35W (max) <35W (max) Power Supply Standby Mode <0.3W (max) <0.3W (max) Power Off Mode <0.3W (max) <0.3W (max) Chassis Colors Glossy black, detail refer to artwork Glossy black, detail refer to artwork (proposal A) Brown Carton with at least C flute (BE...
  • Page 11 5.1.1 Certification G2450HM Certification / Requirement Shipment Certification Regulatory Country Request for (Black is Type Applied BenQ Region Country Applied by Remark (Pls Certification mandatory (safety/safety Sample vendor select) (Pls select) and blue is & BenQ Reguest voluntary) EMC/EMC/GP) Must include...
  • Page 12 and VCCI Vender provide J-Moss relevant information and report If VOC Class Level: Vender test is Meet the provide requested, PC3R PC3R relevant please ★ ★★ requirement of information provide 1 2009 version. and report sample for ★★★ testing. Safety & EMC Vender provide One sample of...
  • Page 13 Including BSMI certificate, BSMI report and BSMI authorization letter for BENQ if the Taiwan BSMI Safety & EMC applicant of BSMI certificate is vendor and vendor will perform the clearance for BenQ. Saudi SASO Safety Arabia Vender provide relevant TR RoHS...
  • Page 14 Class Level: Vender provide gold silver EPEAT relevant information cuprum and report Mexico Safety Safety & EMC Vender provide relevant information and report Vender Member provide countries of WEEE relevant European information Union and report Vender provide REACH relevant information and report Safety Bauart...
  • Page 15 Report by EPA recognition of Accreditation Laboratory and Certificate by EPA International Energy Star recognition of Certification Body (CB). Effective date: 2011-1-1. BenQ phase in date: 2010-12-06. TCO'03 Safety & GP TCO'06 Safety & GP International International Safety & GP Displays 5.0...
  • Page 16 GL2450HM//GL2450HE Certification / Requirement Shipment Certification Regulatory Country Request for (Black is Type Applied BenQ Region Country Remark Applied by (Pls Certification mandatory (safety/safety Sample vendor select) (Pls select) and blue is & BenQ Reguest voluntary) EMC/EMC/GP) Must include Australia,...
  • Page 17 and VCCI Vender provide J-Moss relevant information and report If VOC Class Level: Vender test is Meet the provide requested, PC3R PC3R relevant please ★ ★★ requirement of information provide 1 2009 version. and report sample for ★★★ testing. Safety & EMC Vender provide One sample of...
  • Page 18 Including BSMI certificate, BSMI report and BSMI authorization letter for BENQ if the Taiwan BSMI Safety & EMC applicant of BSMI certificate is vendor and vendor will perform the clearance for BenQ. Saudi SASO Safety Arabia Vender provide relevant TR RoHS...
  • Page 19 Class Level: Vender provide gold silver EPEAT relevant information cuprum and report Mexico Safety Safety & EMC Vender provide relevant information and report Vender Member provide countries of WEEE relevant information European and report Union Vender provide REACH relevant information and report Safety Bauart...
  • Page 20 Checklist in information and report Including Test Report by EPA recognition of Accreditation Laboratory and Certificate by EPA International Energy Star recognition of Certification Body (CB). Effective date: 2011-1-1. BenQ phase in date: 2010-12-06. International International Safety & GP Displays 5.0...
  • Page 21: Panel Inspection Specification

    5.2 Panel Inspection Specification 1. Scope: 1.1 The incoming inspection standards shall be applied to TFT-LCD Modules (hereinafter called "Modules") that supplied by AU Optronics Corporation (hereinafter called "seller"). 1.2 Specifications contains _ Electrical inspection specification _ Appearance specification _ Outside dimension specification 2.
  • Page 22 Major defects: A major defect is a defect that is likely to result in failure, or to reduce materially the usability of the product for its intended purpose. Minor defects: A minor defect either is a defect that is not likely to reduce materially the usability of the product for its intended purpose, or is a departure from an established having little bearing on the effective use or operation of the product.
  • Page 23 Test Pattern Defect Full Black For bright dot(s) Full White For dark dot(s) Monotone Red /Green /Blue For bright and dark dot(s) Note 4: The judgment criteria of particle occurred bright dot is the same as bright dot judgment criteria. Note 5: The display uniformity (general mura) symptoms will use 8% ND Filter.
  • Page 24 Note 1: When L>=2W, defect count as liner defect. Note 2: D=1/2(W+L) Note 3: To verify the responsibility of following defects was caused by supplier, the IQC checks as requested on above items before mass production such as the Polarizer Scratch, Gap Mura, TFT Glass broken…etc. 6.3 Outside dimension specification: Testing Inspection Item...
  • Page 25 7. Inspection judgment: 7-1 The judgment of the shipped lot (acceptance or rejection) should follow the sampling plan of MIL-STD-105E, single sampling, normal inspection, level II. 7-2 If the number of defects is equal to or less than the applicable acceptance level, the lot shall be accepted. 7-3 If the number of defects is more than the applicable acceptance level, the lot shall be rejected and the buyer should inform the seller of the result of incoming inspection in writing 8.
  • Page 26: Level 1 Cosmetic / Appearance / Alignment Service

     Never push objects or spill liquid of any kind into this product. F/W Upgrade SOP Upgrade by 715GT089-B/ C 1. Materials list ISP JIG: 715GT089-B/C VGA cable BenQ PN: 5D.Y3W37.031 TPV P/N: 089G728 GAA DB Monitor USB cable USB port driver TPV P/N: 089G1758 X ISP tool: V4.5.0.8.0...
  • Page 27 2.Connection 3.Install USB driver. 3.1. When insert the USB cable to PC USB port, will pop up a Hardware Wizard to help you install the USB driver if you use this ISP board first time. You can install it successfully as the below instruction step by step. Remark: The USB driver files path: D:\FTC100103(Mstar)\FTCUSB.INF...
  • Page 28 Click “Finish” to complete the USB serial port driver installation. 4. Install the ISP tool. 4.1.Copy the three files in one folder.
  • Page 29 4.2. Double-click to run the ISP tool. 4.3. Set the parameters in “Device” window. Tick “WP Pin pull to high during ISP”.
  • Page 30 4.4. Connect to the monitor. Click “Connect”. If the tool communicate with monitor successfully, the tool will detect the flash type of monitor. 4.5. Load the F/W you want to upgrade.
  • Page 31 4.6. Set the restore address. Please fill “0x03F000” and “4KB” as follow. 4.7. Set parameter in “Auto” window. If you have set “Restore address”, please tick “Restore Data”.
  • Page 32 4.8.Processing of upgrade. After clicking “Run”, the tool start to program. It is forbided to power off monitor or switch off connection during programming. 4.9.Successful upgrade. When upgrade successful, there will be green Pass letter appearing.
  • Page 33 5. Check the FW version after upgrade.(Take below figure as an instance) (1)Connect signal source and power cable to monitor and DC off it. (2) Press “menu” key and “power on” key synchronously as below figure. When the screen lights, release the two buttons and then press “menu”...
  • Page 34 6. Troubleshooting. 6.1. Can’t Entry ISP Mode!! The method to cure it: (1) Click “Config” to check the port type is USB. If no selection of USB as below please disconnect the JIG and then link it again. (2) Check the cables and ISP JIG are connected fluently. (3) Click the “Dis Con”...
  • Page 35 Upgrade by 715GT034-D 1. Materials list LPT cable (male to male) VGA cable 12V DC adapter TPV P/N: N/A TPV P/N: 089G728 GAA DB TPV P/N: ADPC12416BEP ISP JIG: 715GT034-D Monitor LPT driver ISP tool: V4.5.0.8.0 New F/W...
  • Page 36 2. Connection Don’t press down these two buttons. 3.Install LPT driver. 3.1. Double-click to install it. And restart PC after that. 4. Install the ISP tool. 4.1.Copy the three files in one folder.
  • Page 37 4.2. Double-click to run the ISP tool. 4.3.Click the “Config” to set the relevant parameters as below. (1).Click “Config” item. (2).Select “AOC” and click “Apply” in JIG column. (3).The speed should be less than 50kHz. (4).Select “LPT1” in port type and click “Auto Detect” until the OK appears.
  • Page 38 4.4. Set the parameters in “Device” window. Tick “WP Pin pull to high during ISP”. 4.5. Connect to the monitor. Click “Connect”. If the tool communicate with monitor successfully, the tool will detect the flash type of monitor.
  • Page 39 4.6. Load the F/W you want to upgrade. 4.7. Set the restore address. Fill “0x03F000” and “4KB” for BENQ G2450HM/GL2450HM//GL2450HE.
  • Page 40 4.8. Set parameter in “Auto” window. If you have set “Restore address”, please tick “Restore Data”. 4.9.Processing of upgrade. After clicking “Run”, the tool start to program. It is forbided to power off monitor or switch off connection during programming.
  • Page 41 4.9.Successful upgrade. When upgrade successful, there will be green Pass letter appearing. 5. Check the FW version after upgrade. (1)Connect signal source and power cable to monitor and DC off it. (2) Press “menu” key and “power on” key synchronously as below figure. When the screen lights, release the two buttons and then press “menu”...
  • Page 42 (3)If the version is right, please do factory reset in user menu as below, or re-upgrade F/W as the above steps. The reset will turn off burn in mode. 6. Troubleshooting. 6.1. Can’t Entry ISP Mode!! Methods to cure: (1) Check the cables and ISP JIG are connected fluently. (2) Click the “Dis Con”...
  • Page 43: Adjustment / Alignment Procedure

    Adjustment / Alignment Procedure The Control Panel 1. AUTO: Adjusts vertical position, phase, horizontal position and pixel clock automatically. 2. MENU key: Activates OSD main menu and return to the previous menu or exit OSD. 3.▲ /Volume key: For Up/Increase adjustment. The key is the hot key for Volume. 4.▼...
  • Page 44 Mode hot key Press the ▼ key continually to switch between the 6 modes for the main window, including Standard, Movie, Game, Photo, sRGB, and Eco. The setting will take effect immediately. Input hot key (not available for analog-only models) Press the ENTER key to toggle between different PC video signal inputs that may be connected to your monitor.
  • Page 45 Display Menu Available menu options may vary depending on the input sources, functions and settings. Menu options that are not available will become grayed out. 1. Press the MENU key to display the main menu. 2. Press the ▲ or ▼ keys to select DISPLAY and then press the ENTER key to enter the menu. 3.
  • Page 46 Picture Menu Available menu options may vary depending on the input sources, functions and settings. Menu options that are not available will become grayed out. 1. Press the MENU key to display the main menu. 2. Press the ▲ or ▼ keys to select PICTURE and then press the ENTER key to enter the menu. 3.
  • Page 47 User Mode: The blend of the Red, Green and Blue primary colors can Press the ▲ or ▼ keys and the ENTER be altered to change the color tint of key to select Red, Green, or Blue. Then the image. Go to the succeeding use the ▲...
  • Page 48 Item Function Operation Range Selects a picture mode that best suits the type of images shown on the screen. • Standard - for basic PC application. • Movie - for viewing videos. • Standard • Game - for playing video games. •...
  • Page 49 Determines the color space (RGB or YUV) based on the following detected video signal: • D-Sub (VGA) from PC: The default Color Format is RGB. • D-Sub (Component) from a video device: The default Color Format is YUV. Press the ENTER key You might need to manually set the Color to select this option.
  • Page 50 decrease the volume. Press the ▲ or ▼ • ON Mute Mutes the audio input keys to change • OFF the settings. • Auto Audio Detect Select (for Press the ▲ or ▼ Allow users to select the audio source or let the monitor detect it •...
  • Page 51 from those shown on the right, • Polish depending on the product supplied • Japanese in your region. • Czech • Traditional Chinese • Hungarian • Simplified Chinese • Serbo-Croatian • Romanian • Dutch • Russian • Swedish • Portuguese Adjusts the horizontal position of H.
  • Page 52 by hot key. • OFF Sets the time to power off the Press the ENTER key to select Auto Power • 10min. monitor automatically in power this option. Press the ▲ or ▼ keys • 20min. saving mode. to change the settings. •...
  • Page 53 Display Timing Table For G2450HM/GL2450HM//GL2450HE Note: P: Preset Mode NP: None Preset Mode FS: Fail Save Mode (show “out of range”, but still can see picture) O: Out of Range (only show “out of range”, without picture) BenQ Preferred Pixel clock...
  • Page 54 1024x768 80.00 60.24 74.93 DMT-8 1024x768 78.75 60.02 75.03 DMT-9 1024x768 94.50 68.68 85.00 1152x720 66.75 44.86 1152x864 94.50 63.85 70.01 DMT-10 1152x864 108.00 67.50 75.00 GTF-7 1152x864 119.651 77.09 85.00 1152x870 100.00 68.68 75.06 1152x900 92.94 61.80 65.95 1152x900 105.59 71.73 76.07...
  • Page 55 1440x900 136.75 70.6 1600X900-R 97.75 55.54 59.98 1600x1000-R 108.5 61.648 59.910 CVT-10 1600x1000 132.25 62.14 59.87 1600x1000 169.25 78.356 74.83 CVT-2 1600x1200-R 130.25 74.01 59.92 DMT-14 1600x1200 162.00 75.00 60.00 1600x1200 175.50 81.25 65.00 1600x1200 189.00 87.50 70.00 DMT-15 1600x1200 202.50 93.75 75.00...
  • Page 56 HDMI CEA-861D General Parameters Horizontal V-Sync Parameters Pixel Clock H-Sync V-Sync Freq. Code HDMI H-Total H-Active H Blank V-Total V-Active V Blank (unit: MHz) (unit: kHz) (unit: Hz) Prog 25.175 31.469 59.940 Prog 27.000 31.469 59.940 Prog 74.176 31.469 59.940 1650 1280 74.176...
  • Page 57 DVI HPD: To disable the hot plug pin detection. (DVI port default: Off) HDMI HPD: To disable the hot plug pin detection. (HDMI port default: On) 8. add BenQ logo on/off item, the default is “on” 9. add the auto power on item, the default is “on”...
  • Page 58: Level 2 Circuit Board And Standard Parts Replacement

    Level 2 Circuit Board and Standard Parts Replacement Product Exploded View Note: The parts information listed below are for reference only, and are subject to change without notice. Please go to http://cs.tpv.com.cn/hello1.asp for the latest information. Item Description Unit BEZEL LENS KEY BUTTON KEY BOARD...
  • Page 59 SPEAKER PLATE REAR COVER HINGE STAND BASE FOOT PAD SCREW Item Part No. Description Unit 0D1G1030 6120 POWER BOARD & MAINFRAME 0M1G1740 8120 POWER BOARD & MAINFRAME 0D1G1030 6120 MAIN/POWER BOARD & MAINFRAME AM1G1740 10 47 CR3 STAND & HINGE 0M1G 130 10 47 CR3 MAIN FRAME &...
  • Page 60: Six Angles' View

    Six Angles’ View...
  • Page 61: Product Disassembly/Assembly

    Product Disassembly/Assembly Disassembly 1) Remove the base Place the monitor face down on a smooth surface. Be careful to avoid scratch and injury during the process of uninstall. And then remove the base. Remove the stand. Press the hole; pull at the stand strongly at the same time. The hole.
  • Page 62 3) Remove the rear cover Remove the screw in red to remove the rear cover: Pull apart bezel & rear cover. Note: Be careful, the BEZEL CLIP is easy to break.
  • Page 63 Note: The positions of the clips on the rear cover are as follow. There are some small gaps between CLIPS. It’s suggested to separate bezel and rear cover from the gaps. Example: You can separate the bezel and rear cover from here. 4) Remove the main frame from the panel.
  • Page 64 Remove the AC cover from the mainframe. 6) Remove the boards from the main frame. Remove screws in red; remove the black rubberized fabric, and then pull out the wire. The power board The main board Connect main board and speaker. Connect main board and power board.
  • Page 65 7) Remove the speaker. Pull at the foot of the speaker strongly as follow picture. The foot of the speaker The foot of the speaker The foot of the speaker The foot of the speaker 8) The panel 9) The bezel.
  • Page 66 Assembly Assemble the speaker on the main frame. Pull at the foot of the speaker strongly. The wire of the speaker will be traversed from the middle hole as follow picture. The wire will connect power board and speaker. The foot of the speaker The foot of the speaker The foot of the speaker The foot of the speaker...
  • Page 67 3) Assemble the main board and power board on the main frame. Connect main board and power board; connect speaker and power board. Lock the main board and power board on the mainframe. Stick the black rubberized fabric. Connect main board and power board.
  • Page 68 5) Assemble the panel on the bezel. 6) Assemble the main frame and the key board. Connect key board and main board, panel and power board, panel and main board. Stick the black rubberized fabric and aluminum foil. Connect panel and main board.
  • Page 69 7) Assemble the rear cover. Lock the mainframe and rear cover as follow picture. 8) Assemble the stand. Push the stand as follow picture.
  • Page 70 9) Assemble the base.
  • Page 71: Block Diagram

    Block Diagram Main Board Crystal Panel Interface 14.31818MHz (CN452) (X401) Flash ROM Key Control Interface Pm25LD020C-SCE Scalar IC (CN401) (U402) TSUMO88QWDT3-LF-1 (U401) EEPROM EEPROM EEPROM CAT24C02WI CAT24C02WI CAT24C02WI (U101) (U502) (U505) D-Sub Connector DVI Connector HDMI Connector (CN101) (CN501) (CN502)
  • Page 72 Power Board GL2450HM//GL2450HE 715G5000P01000003H AC input Bridge Rectifier Transformer EMI filter Rectifier diodes and Filter Start Resistor (R908) Feedback PWM Control Circuit Power Switch (IC901) (Q901) Photo coupler (IC902) +16V D801 L802 MOSFET Connector (Q806) (CN802) PWM Control Feedback Circuit ON/OFF MP3389EY (U801)
  • Page 73 G2450HM 715G5000P01001003H AC input Bridge Rectifier Transformer EMI filter Rectifier diodes and Filter Start Resistor (R908) Feedback PWM Control Circuit Power Switch (IC901) (Q901) Photo coupler (IC902) MOSFET +16V (Q805/Q806) Inverter Connector (CN801/ CN802/ CN803/ CN804) PWM Control Feedback Circuit...
  • Page 74: Schematic Diagram

    Schematic Diagram Main Board 715G4997M0E000004L VCC3.3 U702 R703 100R SOT 252 NC/G1117-33T43UF ADJ_BACKLIGHT 5 VCC3.3 CN701 CO-Lay VCC3.3 U703 VIN VOUT VCC3.3 3,4,5,6 ON/OFF SOT 223 LSP2159BE33AD R716 NC/100R CONN R706 on_BACKLIGHT 5 Q701 LMBT3904LT1G R709 C720 10N 50V R710 NC/47K 1/16W 5% PANEL_ID Q702...
  • Page 75 VGA_B+ R104 0R05 1/10W R105 C102 47N16V H_Sync R102 0R05 1/10W R103 100R HSY NC V_Sync R106 100R VSYNC VGA_B- R110 C109 47N16V GNDB VCC3.3 R111 470R C110 1N50V VGA_G+ R115 0R05 1/10W R116 C111 47N16V VGA_5V CN101 DDCA_SCL R112 VGA_CABLE_DET R124 100R...
  • Page 76 DVI_5V VCC3.3 R503 NC/0R05 1/16W DVI_5V D502 BAV70 C502 0.1UF 16V Q502 R506 DVI_HPD LMBT3904LT1G CN501 ZD505 RLZ5.6B ZD502 RLZ5.6B ZD504 RLZ5.6B VSY NC DVI_DETIN DVI_DETIN R505 100R 1/16W 5% DVI_DET SY NC GND DVI_SCLIN DVI_SCLIN R507 DVI_SCL DDC SCL DVI_SDAIN DVI_SDAIN R508...
  • Page 77 AVDD_AU ADC1.8 AVDD VCC3.3 VCC1.8 VCC3.3 FB401 120OHM FB402 120OHM FB403 120OHM VCC1.8 2,3,4,6 VCC3.3 VDDC AVDD ADC1.8 VDDP AGND VCTRL VDDP VCC3.3 RIN0P AVDD_EAR GNDR RIN0M PA[0..9] VCC3.3 GIN0P PA[0..9] FB405 120OHM GNDG GIN0M LVA3P SOGIN0 LVA3M BIN0P LVACKP FB404 120OHM GNDB...
  • Page 78 CN452 PA[0..9] PA[0..9] PB[0..9] PB[0..9] SCL_PANEL SDA_PANEL VLCD CONN T P V ( Top Victory Electronics Co . , Ltd. ) OEM MODEL Size TPV MODEL 絬 隔 瓜 絪 腹 G4997-M0D-000-0040 Panel Interf ace 715G4997-M0D-000-0040 Key Component PCB NAME 称爹...
  • Page 79 Headphone output CN605 LINE INPUT From AMP out (passitive) Pitch 2.5mm +5V_AUDIO LOUTP FB602 120OHM From Scalar line-out (negative) To Speaker NC/CONN CN601 R603 15K 1/16W AGND LINEIN_L0 R604 15K 1/16W From AMP out (passitive) LINEIN_R0 JACK From AMP out (negative) CN606 FB605 CN602...
  • Page 80: Power Board

    Ltd. ) OEM MODEL Size Custom FB902  J607 竚эFB902 G5000-P0B-000-0010-7-110602 TPV MODEL PLPCB9141QQBL 絬 隔 瓜 絪 腹 HEAT SINK(Q901) HEAT SINK(D901 D906) Key Component 01.POWER PCB NAME 715G4124-P0B ODM MODEL 称爹 Date Monday , August 01, 2011 Sheet AGND BENQ G941...
  • Page 81 D802 +16V L802 SB5150-E 47UH D801 C812 C801 U801 change to 1206 footprint R801 220N 50V MP3389EY R826 3.3 OHM 1/4W 300K 1/8W 5% C803 0.47UF 50V Q806 R804 C802 VFAULT 10 OHM 1/4W G1 D1 C805 0.47UF 50V 68NF 10% 50V GATE C838 R805...
  • Page 82 G2450HM 715G5000P01001003H R929 100 OHM 1/4W L905 BD901 C916 1.1uH GBL408 R930 100 OHM 1/4W 1000PF500V +16V R903 100 OHM 1/4W R904 470OHM 3W ZD901 C929 M T ZJ20B 470UF 25V C918 D901 1000UF 25V R905 Y A868C15RSC 470OHM1/10W T901...
  • Page 83 R817 +16V 2.2 OHM 1/4W Q805 ZD802 C823 4.7uF 25V ON/OFF RLZ5.6B ZD803 G1 D1 RLZ5.6B C824 4.7uF 25V R816 2.2 OHM 1/4W R802 +5Vi CN801 C819 R803 R804 PT801 CONN 47PF 5% SL 3KV APM4548AK 5K1 1/8W 5% 5K1 1/8W 5% POWER X'FMR 22R 1/8W 5% C803...
  • Page 84 Key Board 715G5048K01000004I LED_RED# LED_GRN# LED001 CN001 CONN R008 9K1 1/8W 1% LBADC1 R003 1K 1/8W 1% LBADC2 R002 3K 1/8W +/-1% DC_POWERON LED_GRN# LED_RED# R007 0R05OHM1/8W ZD007 ZD008 R004 1K 1/8W 1% R005 3K 1/8W +/-1% NC/UDZSNP5.6B NC/UDZSNP5.6B CN001 pin1 SMD: down DIP: up ZD006...
  • Page 85: Troubleshooting

    Troubleshooting Frequently asked questions (FAQ) The image is blurred: Read the instructions on the link "Adjusting the Screen Resolution" on the CD, and then select the correct resolution, refresh rate and make adjustments based on these instructions. How do you use a VGA extension cable? Remove the extension cable for the test.
  • Page 86 “NO” in the “OSD Lock” submenu from the “OSD Settings” menu (under SYSTEM), and all OSD controls will be accessible. If your problems remain after checking this manual, please contact your place of purchase or e-mail us at: Support@BenQ.com...
  • Page 87 No Power No power Check power cable is Re-plug the power cable tightened? Check Power “On/Off” Turn on the Power “On/Off” switch is “On”? Check the LED Check the AC po indicates is OK? Replace the power board Replace main board and check connections Replace key board and check connections...
  • Page 88 No Video (Power LED Green) No Video (Power LED Green) Press the power Replace the main board button is OK? Replace the power The end board Replace the main The end board and connection Replace the LVDS/FFC Check the LVDS/FFC cable or panel cable or panel Replace the key board...
  • Page 89 DIM (image overlap, focus or flicker) Reset in factory mode The end Set to the optimal The end frequency, select the recommended frequency Readjust the phase and pixel The end clock in the user mode Pull out signal cable and Check the signal cable check “Self Test Feature and the PC...
  • Page 90 Color is not optimal Color is not optimal Color shift Miss color Reset the factory mode Replace the signal cable In the user mode, set the” color settings” until customer satisfy The end Pull out the signal cable and check the screen color display is normal? Replace the signal cable or PC Replace the main board...
  • Page 91: Pcb Layout

    PCB LAYOUT Main Board 715G4997M0E000004L...
  • Page 93 Power Board GL2450HM//GL2450HE 715G5000P01000003H...
  • Page 95 G2450HM 715G5000P01001003H...
  • Page 98 Key Board 715G5048K01000004I...
  • Page 99: Appendix 1 – Screw List / Torque

    Appendix 1 – Screw List / Torque Part No. Type Description Quantity Torque 0D1G1030 6120 D3*6 POWER BOARD & MAINFRAME 6 ± 1kgf.cm 0M1G1740 8120 M4*8 POWER BOARD & MAINFRAME 6 ± 1kgf.cm 0D1G1030 6120 D3*6 MAIN/POWER BOARD & MAINFRAME 6 ±...

This manual is also suitable for:

Gl2450heGl2450hm

Table of Contents