Panasonic SC-PT870 Operating Instructions Manual
Dvd home theater sound system
Hide thumbs
Also See for SC-PT870:
- Operating instructions manual (36 pages) ,
- Operating instructions manual (40 pages) ,
- Operating instructions manual (40 pages)
Table of Contents
Advertisement
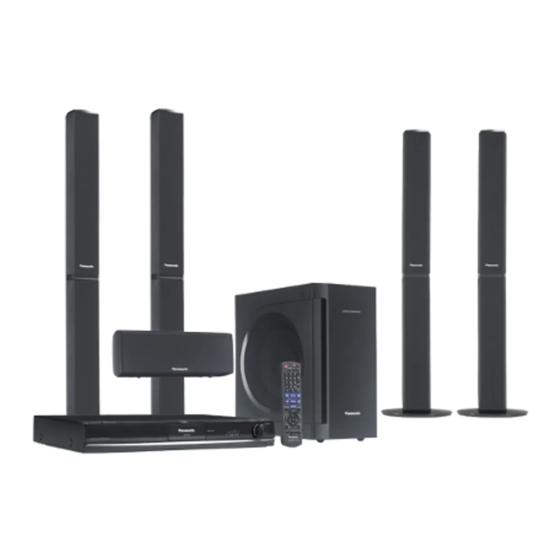
This illustration shows SC-PT570.
Dear customer
Thank you for purchasing this product. For optimum
performance and safety, please read these instructions
carefully.
Before connecting, operating or adjusting this
product, please read the instructions completely.
Please keep this manual for future reference.
[Note[
"EB" on the packaging indicates the United Kingdom.
[EB]
Operating Instructions
DVD Home Theater Sound System
The illustrations shown may differ from your unit.
Region number
The player plays DVD-Video marked with labels
containing the region number "2" or "ALL".
Example:
2
ALL
SC-PT570
Model No.
SC-PT870
2
3
5
RQTX0227-1B
Advertisement
Table of Contents

Related Manuals for Panasonic SC-PT870


Summary of Contents for Panasonic SC-PT870
-
Page 1: Operating Instructions
Operating Instructions DVD Home Theater Sound System This illustration shows SC-PT570. SC-PT570 Model No. SC-PT870 The illustrations shown may differ from your unit. Dear customer Thank you for purchasing this product. For optimum performance and safety, please read these instructions carefully. - Page 2 Indicates features applicable to: ≥These operating instructions are applicable to [PT570] : SC-PT570 : SC-PT870 [PT870] models SC-PT570 and SC-PT870. ≥Unless otherwise indicated, illustrations in these System SC-PT570 SC-PT870 operating instructions are of SC-PT570. This unit SA-PT570 SA-PT870 ≥Operations in these instructions are described...
-
Page 3: Table Of Contents
TABLE OF CONTENTS Getting Started Accessories ......4 Setting up the radio ..... . 12 Caution for AC Mains Lead . -
Page 4: Accessories
(figures A and B). Confirm the AC mains plug ≥E-mail: customer.care@panasonic.co.uk fitted and follow the instructions below. Direct Sales at Panasonic UK Illustrations may differ from actual AC mains plug. ≥For customers: 0844 844 3856 1. Open the fuse cover with a screwdriver. -
Page 5: Safety Precautions
Safety precautions Placement Foreign matter Set the unit up on an even surface away from direct Do not let metal objects fall inside the unit. This can sunlight, high temperatures, high humidity, and excessive cause electric shock or malfunction. vibration. These conditions can damage the cabinet and Do not let liquids get into the unit. -
Page 6: Step 1 Assembling The Speakers
step 1 Assembling the speakers [PT570] Front speaker Preparation Front and surround speakers [PT870] ≥To prevent damage or scratches, lay down a soft cloth and perform assembly on it. ≥For assembly, use a Phillips-head screwdriver (not included). Make sure you have all the indicated components before starting assembly, setup, and connection. ≥Keep the screws out of reach of children to prevent swallowing. -
Page 7: Step 2 Installation
≥This unit and supplied speakers are to be used only as You can enjoy surround speaker sound wirelessly indicated in this setup. Failure to do so may lead to when you use the optional Panasonic wireless damage to the amplifier and/or the speakers, and may accessory (example: SH-FX70). -
Page 8: Step 3 Connections
step 3 Connections Turn off all equipment before connection and read the appropriate operating instructions. Do not connect the AC mains lead until all other connections are complete. This unit SPEAKERS FM ANT AV OUT AV OUT (75 ) OPTICAL OPTICAL COMPONENT COMPONENT... -
Page 9: Audio And Video Connections
[Note] 21). ≥Non-HDMI-compliant VIERA Link “HDAVI Control” [Note] cables cannot be utilized. If your Panasonic TV is VIERA Link ≥It is recommended that If there is more compatible, you can operate your TV you use Panasonic’s than one HDMI synchronising with home theater operations terminal, refer to HDMI cable. -
Page 10: Step 4 Ac Mains Lead Connection
This unit AV OUT OPTICAL COMPONENT VIDEO OUT Audio and video connections (continued) Other audio connections TV or external Cable required This unit Features equipment terminal (not included) terminal ≥Do not bend sharply [\OPTICAL\IN\\] This is the preferred connection for best sound and true surround sound. -
Page 11: Step 6 Smart Setup
step 6 SMART SETUP The Smart setup screen assists you to make Smart setup settings necessary settings. ≥Language Preparation Select the language used on menu screen. Turn on your TV and select the ≥TV aspect appropriate video input mode (e.g. Select the aspect to suit your TV. -
Page 12: Setting Up The Radio
Setting up the radio Confirming the preset channels PLAY MODE Select “FM”. PLAY MODE RADIO ≥This unit: EXT-IN Press [SELECTOR]. Numbered buttons Select the channel. ≥To select a 2-digit number RADIO e.g. 12: [S10] RADIO EXT-IN e.g. Display SEARCH SEARCH SEARCH SKIP SKIP... -
Page 13: Rds Broadcasting
Presetting stations manually RDS broadcasting Up to 30 stations can be set. The unit can display the text data transmitted by the radio 1 While listening to the radio broadcast data system (RDS) available in some areas. Press [OK]. If the station you are listening to is transmitting RDS signals, 2 While the frequency is flashing on the display “RDS”... -
Page 14: Selecting The Source By The Remote Control
Selecting the playback source (continued) [Note] RADIO RADIO, EXT-IN Confirm the audio connection to the SCART (AV), AUX or iPod EXT-IN OPTICAL IN terminal on this unit when you select the USB, iPod corresponding sources ( 9, 10). Reduce the volume on the TV to its minimum, and then adjust the volume of this unit. -
Page 15: Selecting Sound Mode
While “MANUAL” Select other surround modes. Whisper-mode Surround Each time you press [2, 1]: is displayed PLII MOVIE Except [DivX] § You can enhance the surround effect for low volume Suitable for movie software, or the 5.1-channel sound. (Convenient for late night viewing.) one recorded in Dolby Surround. -
Page 16: Basic Play
Basic play If you are experiencing problems, refer to troubleshooting ( 34 to 36) Preparation To display the picture, turn on your TV and change its video input mode (e.g. VIDEO 1, AV 1, HDMI, etc.) to suit the connections to this unit. Using this unit SELECTOR Turn on the unit. -
Page 17: Using The Remote Control
Using the remote control On-screen Select item select — Numbered buttons Confirm Enter number [DVD-VR] [DVD-V] [VCD] [CD] e.g. To select 12: SLOW, SEARCH SEARCH SEARCH PLAY [S10] SKIP SLOW SKIP SKIP PAUSE [VCD] with playback control PAUSE Press [∫ STOP] to cancel STOP STOP the PBC function, and then... -
Page 18: Other Modes Of Play
Other modes of play Program play (up to 30 items) Select an item. PLAY MODE PLAY MODE e.g. [DVD-V] DVD-V PROGRAM SELECT TITLE TITLE CHAPTER TITLE 1 TITLE 2 TITLE 3 TITLE 4 REPEAT REPEAT PLAY PLAY S TA R T: P L AY CLEAR ALL ≥Repeat this step to program other items. -
Page 19: Using Navigation Menus
Using navigation menus ∫ Selecting the picture in Thumbnail menu PLAY PLAY [JPEG] SKIP SKIP SKIP While picture is e.g. displayed STOP Group and Group name content number TOP MENU, JPEG images G 1/ DIRECT NAVIGATOR MENU RETURN RETURN MENU, PLAY LIST PLAY LIST Playing data discs... -
Page 20: Using On-Screen Menus
Using on-screen menus [DVD-V] [DivX] (with multiple soundtracks) To select audio soundtrack Numbered buttons [DVD-VR] [VCD] AUDIO To select “L”, “R”, “L+R” or “L R” [DVD-V] (Karaoke disc) To select “ON” or “OFF” for vocals To select “OFF”, “V1”, “V2” or “V1+V2” PLAY PLAY for vocal selections... - Page 21 To rotate a picture (during pause) Menu 3 (Audio) [JPEG]: To make the dialogue in movies 0,------. 90,------.180,------.270 ROTATION easier to hear ^--------------------------------------------J DIALOGUE [DVD-V] (Dolby Digital, DTS, 3-channel Menu 2 (Video) or higher, with the dialogue recorded in ENHANCER the center channel) NORMAL [DivX] (Dolby Digital, 3-channel or...
-
Page 22: Using The Viera Link "Hdavi Control
VIERA Link “HDAVI Control” VIERA Link “HDAVI Control” is a convenient function that [Note] offers linked operations of this unit, and a Panasonic TV Playback may not be immediately displayed on the TV. If (VIERA) under “HDAVI Control”. You can use this function you miss the beginning portion of playback, press [:] or by connecting the equipment with the HDMI cable. -
Page 23: Speaker Control
Speaker control VIERA Link Control only with TV’s remote control (for “HDAVI Control 2 or later”) You can select whether audio is output from this unit’s speakers or the TV speakers by using the TV menu settings. You can control the playback menus of this unit with the TV’s For details, refer to the operating instructions of your TV. -
Page 24: Operating Other Devices
(Extension: “.asf”, “.ASF”) § SKIP SKIP SKIP PAUSE DivX (Extension: “.divx”, “.DIVX”, “.avi”, “.AVI”) STOP STOP For Panasonic D-Snap/DIGA § FUNCTIONS [Note] ≥Maximum: 255 folders (excluding Root folder), 4000 files, 28 characters for file/folder name. MENU RETURN MENU RETURN ≥Only one memory card will be selected when connecting a You can play an external device through your home theater multiport USB card reader. - Page 25 Select “IPOD”. Enjoying photos The iPod automatically switches to this iPod Select the iPod menu. unit’s display mode. Music menu appears on the TV. e.g. iPod Home Cinema Music Playlists Ar tists Albums Songs Play a slideshow on your iPod. Podcasts Genres You can use the remote control to operate the iPod...
-
Page 26: Changing The Player Settings
Changing the player settings MENUS Choose the language for disc menus. ≥[ENGLISH] ≥FRENCH ≥SPANISH ≥GERMAN RETURN ≥ITALIAN ≥SWEDISH ≥DUTCH ≥POLISH RETURN SETUP ≥OTHER – – – – §2 SETUP The original language designated on the disc is selected. §1 Input the appropriate code from the language code list §2 Show the setup menu. - Page 27 SPEAKER SETTINGS STILL MODE Select the delay time of the speakers. Specify the type of picture shown when paused. (Effective when playing 5.1-channel sound) ≥[AUTO] (Center and surround speakers only) : The picture is not blurred, but picture quality is ≥FIELD §...
- Page 28 Changing the player settings (continued) OTHERS menu HDMI menu REGISTRATION [DivX] VIDEO PRIORITY Display the unit’s registration code. ≥[ON]: When using the HDMI AV OUT terminal for video ≥[SHOW\CODE] output. The resolution of the video output from the You need this registration code to purchase and play DivX HDMI AV OUT terminal is optimized according to the Video-on-Demand (VOD) content ( 29).
-
Page 29: Divx Information
DivX information ABOUT DIVX VIDEO-ON-DEMAND: Displaying DivX subtitles text This DivX Certified device must be registered in order to ® You can display subtitles text recorded onto the DivX video play DivX Video-on-Demand (VOD) content. disc on this unit. First generate the DivX VOD registration code for your Depending on the methods used to create the file, the device and submit it during the registration process. -
Page 30: Speaker Installation Option
Interface are trademarks or registered trademarks of and licensing may be obtained from MPEG LA, LLC. See HDMI Licensing LLC. http://www.mpegla.com. HDAVI Control is a trademark of Panasonic Corporation. Plays DivX video ® DivX is a registered trademark of DivX, Inc., and is used ®... -
Page 31: Glossary
Glossary Decoder JPEG (Joint Photographic Experts Group) A decoder restores the coded audio signals on DVDs to This is a system used for compressing/decoding colour still normal. This is called decoding. pictures. The benefit of JPEG is less deterioration in picture quality considering the degree of compression. -
Page 32: Discs That Can Be Played
Discs that can be played Reference Commercial discs Indicated in these Disc Logo Remarks instructions by High quality movie and music discs DVD-Video [DVD-V] Music discs with video Including SVCD (Conforming to IEC62107) Video CD [VCD] Music discs [CD] Recorded discs (±: Playable, —: Not playable) Recorded on a DVD Recorded on a personal computer, video recorder, etc. -
Page 33: Maintenance
≥You can play MPEG4 data [conforming to SD VIDEO specifications (ASF [MPEG4] “.asf” DVD-R/ standard)/MPEG4 (Simple Profile) video system/G.726 audio system] recorded with Panasonic SD multi cameras or DVD recorders with this unit. CD-R/RW ≥The recording date may differ from that of the actual date. DVD-RAM “.DIVX”... -
Page 34: Troubleshooting Guide
Troubleshooting guide Before requesting service, make the following checks. If you “REMOTE 1” or “REMOTE 2” are in doubt about some of the check points, or if the solutions indicated in the following guide do not solve the Match the modes on this unit and remote control. Depending problem, consult your dealer for instructions. - Page 35 When using VIERA Link “HDAVI Control” with §1 Picture “HDAVI Control 3 or later” compatible TV The picture on the TV is not displayed correctly or When using VIERA Link “HDAVI Control” with §2 “HDAVI Control 2 or later” compatible TV disappears.
-
Page 36: Specifications
Troubleshooting guide (continued) Cannot display iPod photos/videos on the TV. ≥Ensure the video connection to the SCART (AV) The USB drive or its contents cannot be read. terminal on this unit and select “VIDEO/YPbPr” from ≥The USB drive format or its contents is/are not “VIDEO OUT –... - Page 37 Type 1 way, 1 speaker system (Kelton type) to the DivX Home Theater Profile. Speaker unit(s) Impedance 6 ≠ MPEG4 data recorded with Panasonic SD multi §7 1. Woofer 16 cm Cone type cameras or DVD video recorders 2. Passive Radiator...
-
Page 38: Control Reference Guide
PLAY MODE 15, 26) Turn Whisper-mode Surround on/off ( < TV operations Aim the remote control at the Panasonic TV and press the button. [Í]: Turn the TV on/off [AV]: Change the TV’s video input mode MUTE [r, s]: Adjust the TV volume REPEAT This may not work properly with some models. - Page 39 TUNE MODE FM MODE MEMORY Dock for iPod SMART SETUP OPEN CLOSE VOLUME SURROUND OUTPUT SETUP MIC SELECTOR TUNE Pull Dock for iPod open 14 15 Standby/on switch (Í/I) Select the source #D-IN #IPOD DVD/CD#USB#FM#AV#AUX Press to switch the unit from on to standby mode or vice §...
- Page 40 Panasonic Corporation Web Site: http://panasonic.net Pursuant to at the directive 2004/108/EC, article 9(2) Panasonic Testing Centre Panasonic Marketing Europe GmbH Winsbergring 15, 22525 Hamburg, Germany RQTX0227-1B F1208ZA1128...
Need help?
Do you have a question about the SC-PT870 and is the answer not in the manual?
Questions and answers