Table of Contents
Advertisement
Quick Links
- 1 Connecting Speaker Cables
- 2 Connecting External Devices
- 3 Connecting a Control Panel
- 4 Setup Mode Operation Procedure
- 5 Initializing the Settings Via Connected Controll Panels (Dcp Setup)
- 6 List of Dip Switch Settings
- 7 List of Functions Operated Via the Control Panel
- Download this manual
See also:
Owner's Manual
Advertisement
Table of Contents

Related Manuals for Yamaha MA2120


Summary of Contents for Yamaha MA2120
- Page 1 POWER AMPLIFIER Setup Guide Installationsanleitung Guide de configuration Guía de configuración Guida alla configurazione Guia de Configuração Руководство по настройке 设置指南 セ ッ ト ア ッ プ ガ イ ド...
-
Page 2: Table Of Contents
• The illustrations as shown in this manual are for instructional purposes only, and may appear somewhat different from those on your device. • The company names and product names in this manual are the trademarks or registered trademarks of their respective companies. MA2120 Setup Guide... -
Page 3: Connections
Euroblock plug NOTE • You must use the supplied Euroblock plugs. If the plugs have been lost, please contact your Yamaha dealer. • Use the 6-pin Euroblock plugs when connecting to the [INPUT] connectors 1-6. • To prepare the cable for attachment to a Euroblock connector, strip the wire as shown in the illustration using stranded wire to make connections. -
Page 4: Connecting Microphones Or External Devices
When connecting the power cord to an AC outlet, an input signal will turn on the power of this device by the auto-wake function. To avoid unexpected loud sounds, be sure to connect microphones and external devices with the power off status. Euroblock MA2120 rear panel NOTE Refer to “Attaching Euroblock Plugs” for Euroblock plug installation. -
Page 5: Connecting The Pa2120 Power Amplifier
To utilize this functionality, connect the [LINE OUT] jack of the MA2120 to the [INPUT] jack of the PA2120 using an RCA cable when all devices are powered off. If you wish to further expand capacity, it is possible to connect another PA2120 power amplifier. Simply connect the [THRU OUT] jacks of the PA2120 to the [INPUT] jacks of the additional PA2120 power amplifier. -
Page 6: Connecting A Control Panel
Connecting Yamaha Digital Control Panel (DCP1V4S, DCP4S, DCP4V4S) to MA2120 enables you to control the volume, to switch inputs, etc. remotely. You can connect up to two control panels. The total length of the cables from the MA2120 to the last control panel must not exceed 800 meters in the case of 24AWG. -
Page 7: Using The [Remote] Connector (Euroblock 3-Pin)
[z] button on the front panel, or by the auto-wake function with input signal detection. The power can only be turned on via the [REMOTE] connector. • When the device is put into mute mode via the [REMOTE] connector, the [z] button will flash in green. MA2120 Setup Guide... -
Page 8: Setup Mode (Advanced Settings)
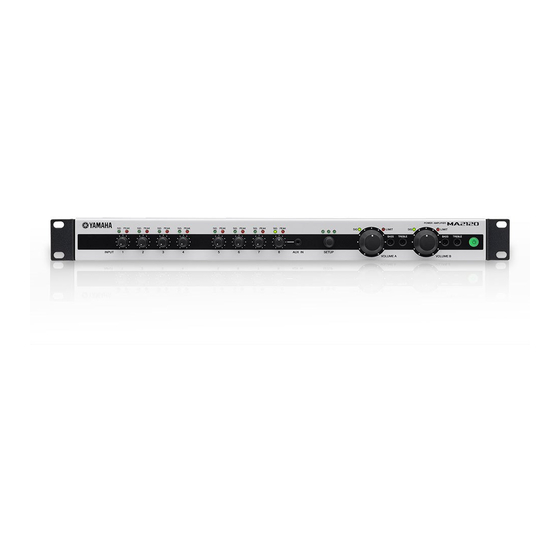
Setup Mode (Advanced settings) Advanced settings for MA2120 power amplifier can be configured by using the [SETUP] encoder and input level knobs 1 - 8. Input level knobs 1 - 8 [SETUP] encoder There are three types of setup modes that can be used to configure advanced settings. Operation and functionality for each setup mode type is shown as follows: •... -
Page 9: Operation Procedure
The parameter value changes with each click of the encoder. Off: (Default setting) 2 and 3: 5 and 6: Press the [SETUP] encoder to apply the setting. The status is back to the channel select (Step 3). MA2120 Setup Guide... -
Page 10: Applying Eq (Equalizer) To The Input Signal
If the set EQ value for [INPUT 7] and [INPUT 8] exceeds +5dB, the enhancer function starts and harmonic overtones are added. Press the [SETUP] encoder to apply the setting. The status is back to the channel select (Step 3). MA2120 Setup Guide... -
Page 11: Applying Echo/Reverb To The Input Signal
The parameter value changes with each click of the encoder. 10%: 20% to 40%: 50%: (Default setting) 60% to 90%: 100%: Press the [SETUP] encoder to apply the setting. The status is back to the channel select (Step 3). MA2120 Setup Guide... -
Page 12: Adjusting The Ducker Sensitivity
Turn the [SETUP] encoder to select the target level. Off: (Default setting) Low: Normal: Press the [SETUP] encoder to apply the setting. The status is back to the channel select (Step 3). MA2120 Setup Guide... -
Page 13: Setting The Chime Volume
Turn the [SETUP] encoder to turn the linked operation function for [SPEAKERS] and [LINE OUT] on or off. Off: (Default setting) Press the [SETUP] encoder to apply the setting. The status is back to the channel select (Step 3). MA2120 Setup Guide... -
Page 14: Microphone Feedback Suppressor
Turn the [SETUP] encoder to switch between resuming the previous settings or initializing the settings when turning on the power. Resume: (Default setting) Initialize: Press the [SETUP] encoder to apply the setting. The status returns to Step 3. MA2120 Setup Guide... -
Page 15: List Of Dip Switch Settings
Link off ([SPEAKERS] and [LINE OUT] jack volume levels are controlled separately) Link on ([SPEAKERS] and [LINE OUT] jack output is controlled together) NOTE When the link function is on, you can control the volume by using both of [SPEAKER] and [LINE OUT] on the control panel. MA2120 Setup Guide... -
Page 16: [Speaker A] And [Speaker B] Dip Switches
Setting High pass filter 150Hz Low pass filter 150Hz Low pass filter 200Hz Frequency correction tailored for Yamaha VXS series speakers Frequency correction tailored for the Yamaha VXS10S/VXS10ST subwoofer (45-150Hz) Frequency correction tailored for Yamaha VXC series speakers MA2120 Setup Guide... -
Page 17: Appendix
[INPUT 4] on/off [INPUT 5] on/off [INPUT 6] on/off [INPUT 7] on/off [INPUT 8] on/off [INPUT 1] on/off [INPUT 3] on/off 4, 5 Chime on Chime on Mute [INPUT] 7 and 8 Mute [INPUT] 7 and 8 6, 7 MA2120 Setup Guide... -
Page 18: High-Impedance And Low-Impedance Connections
It is also possible to connect speaker systems that have different input power ratings. In the case of speaker systems that are capable of changing their input power rating (Yamaha VXC and VXS series, etc.), this can be utilized to vary the volume of each speaker. -
Page 19: Technical Specifications
Terminal MIC/LINE IN INPUT 1-6 3.5mm Euro Block 6pin x3 balanced LINE IN INPUT 5-6 MONO RCA PIN x4 unbalanced INPUT 7-8 STEREO RCA PIN x2 unbalanced INPUT 8 3.5mm STEREO mini phone x1 (Front Panel) unbalanced MA2120 Setup Guide... -
Page 20: Electrical Characteristics
SETUP x3 (Green), OUTPUT SIGNAL x2 (Green), OUTPUT LIMIT x2 (Red) AC Power Requirement 100V, 120V, 230V-240V 50Hz/60Hz (*1) *1 It has confirmed that it is working with ±10% of the voltage of the rated supply voltage. MA2120 Setup Guide... -
Page 21: General Specifications
18.90 x 1.73 x 13.82 inch Net Weight 4.9kg Included Accessories AC power cord (2.0m) x1, 3.5mm Euroblock plug (6pin) x3, 3.5mm Euroblock plug (3pin) x1, Owner's Manual x1, Setup Guide x1 Optional accessories Digital Control Panel (DCP1V4S-US/EU, DCP4V4S-US/EU, DCP4S-US/EU ) MA2120 Setup Guide... - Page 22 Technical Specifications Dimensions (unit: mm) MA2120 Setup Guide...
-
Page 23: Block Diagram
Technical Specifications Block Diagram MA2120 Setup Guide... -
Page 24: Level Diagram
Technical Specifications Level Diagram MA2120 Setup Guide... -
Page 25: Current Draw
200W-70V : 0.87 AMP-MODE 200W-100V : 1.90 AMP-MODE : 3Ω 2.05 AMP-MODE 4Ω : 1.83 AMP-MODE 8Ω : 1/3 output power 1.89 AMP-MODE : 120W-70V 1.91 AMP-MODE 120W-100V : 1.71 AMP-MODE 200W-70V : 1.68 AMP-MODE : 200W-100V MA2120 Setup Guide... - Page 26 Yamaha Pro Audio global website http://www.yamahaproaudio.com/ Yamaha Downloads http://download.yamaha.com/ Manual Development Department © 2016 Yamaha Corporation Published 02/2016 KSHD-A0 Printed in China ZT16370...
Need help?
Do you have a question about the MA2120 and is the answer not in the manual?
Questions and answers