Yamaha CRX-N470 Owner's Manual
Network cd receiver
Hide thumbs
Also See for CRX-N470:
- Quick manual (85 pages) ,
- Service manual (90 pages) ,
- Quick manual (85 pages)
Table of Contents
Advertisement
Advertisement
Table of Contents

Related Manuals for Yamaha CRX-N470


Summary of Contents for Yamaha CRX-N470
- Page 1 N e t wo r k C D R e ce i ve r OWNER’S MANUAL...
- Page 2 “dangerous voltage” within Since hearing damage from loud sounds is often undetectable until it is too late, Yamaha and the product’s enclosure that may be of suffi cient magnitude to constitute a risk of the Electronic Industries Association’s Consumer Electronics Group recommend you to avoid...
- Page 3 This product, when installed as indicated in the instructions contained in this manual, Telephone: 714-522-9011 meets FCC requirements. Modifi cations not expressly approved by Yamaha may void your Type of Equipment: Network CD Receiver authority, granted by the FCC, to use the product.
- Page 4 14 Do not attempt to modify or fi x this unit. Contact qualifi ed Yamaha service personnel when • If you fi nd leaking batteries, discard the batteries immediately, taking care not to touch the any service is needed.
- Page 5 ■ For U.K. customers • Do not use different types of batteries (such as alkaline and manganese batteries) together. Specifi cation of batteries may be different even though they look the same. Danger of explosion If the socket outlets in the home are not suitable for the plug supplied with this appliance, it should may happen if batteries are incorrectly replaced.
- Page 6 Information for users on collection and disposal of old equipment • Yamaha is not liable for any loss or corruption of data in USB devices that are used. It is and used batteries: recommended that you make backups of data for restoring in the event of data loss.
-
Page 7: Table Of Contents
Table of Contents What you can do with this unit Connect the unit directly with a ······8 mobile device Introduction ······39 ······9 More on playback Accessories······9 ······40 About this manual······9 Shuffle/Repeat playback······40 Part names Playback information······41 ······10 Presetting content to FAVORITES······42 Front panel······10 Adjusting sound quality······43 Rear panel······11... -
Page 8: What You Can Do With This Unit
What you can do with this unit • This unit is a Network CD Receiver, on which you can enjoy playing back music files stored on your media servers (PC or NAS) connected to the same network, USB devices, audio content on Internet radio, FM radio, CD, AirPlay devices (iPhone/iTunes), and external devices including DVD players, by connecting the unit to your home network and audio system. -
Page 9: Introduction
Confirm the package contents and useful points of this manual. Accessories About this manual • Instructions and illustrations used in this manual refer to the CRX-N470, unless otherwise specified. • How to operate this unit is described mainly using the remote control. -
Page 10: Part Names
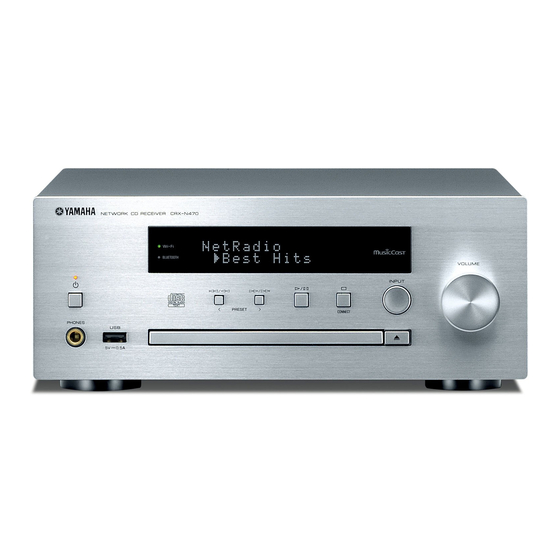
Part names Familiarize yourself with all parts and their functions. Power indicator Front panel Lights up when the unit is on. A (Power) ( P.16) PHONES Connect headphones to this jack. • When headphones are connected to it, Note there is no sound from the speakers or subwoofer. -
Page 11: Rear Panel
Part names Power cable ( P.16) Rear panel Wireless antenna ( P.19) AUX 1 jacks (RCA input) ( P.27) AUX 2 jack (mini jack input) ( P.27) ANTENNA jack ( P.15) SUBWOOFER jack ( P.14) NETWORK jack ( P.15) Connects to a network using a commercially available network cable. -
Page 12: Front Panel Display
Part names Front panel display 4 5 6 Multi information display Shuffle/repeat indicator Shows various information, such as music information Lights up when you shuffle or repeat music of your CD, and the radio frequency. USB device or computer. Characters shown on the front panel display are Adjusting display brightness Note alphanumerics only. -
Page 13: Remote Control
Part names Installing batteries Infrared signal transmitter Remote control (Open/close the disc tray) ( P.23) Source buttons Switch the input source to be played. Numeric buttons ( P.23, 37) MEMORY ( P.31, 37) Audio control, cursor control buttons P.23, 24, 34, 36) Check the “+”... -
Page 14: Preparations
Preparations Connect speakers, the antenna, etc. and turn the unit on. Do not connect the power cable of the unit until you have finished connecting all cables. Connecting speakers Right speaker Left speaker Remove the insulation from the ends of the speaker cables to expose the bare wires. -
Page 15: Connecting The Antenna
Preparations Connecting the Preparing to connect to a network antenna Connecting to a wireless network Connecting to a wired network Connect the supplied antenna to the unit. Raise the wireless antenna. Connect the unit to a router, as the illustration shows. •... -
Page 16: Turning On The Power
Preparations Option menu regarding power (System Config) Turning on the power (Bold: default) For details on operating the option menu, refer to Plug the power cable into a power outlet, "Option settings" ( P.44). and press AutoPowerStby • The unit turns on. This configures whether the unit automatically enters the Within 6 m •... -
Page 17: Connecting To A Network
Connecting to a network You can play back music files stored on your PC, mobile devices, DLNA*-compatible NAS, or audio content on the Internet by connecting this unit to a network. * Digital Living Network Alliance Selecting connection method Using the MusicCast CONTROLLER app is the most simple and recommended way to connect to a network. •... -
Page 18: Connecting Using Musiccast Controller
• For setting up MusicCast CONTROLLER, you can also refer to the "MusicCast Setup Guide", which CONTROLLER is available on the following site: Yamaha Downloads http://download.yamaha.com/ Connect this unit to the same home network as your mobile devices. Install the “MusicCast CONTROLLER”... -
Page 19: Connecting To A Wireless Network
Connecting to a network Connecting to a About WPS WPS (Wi-Fi Protected Setup) is a standard established by wireless network the Wi-Fi Alliance, which allows easy establishment of a wireless home network. Setup can be performed using a WPS (Wi-Fi Protected •... - Page 20 Connecting to a network • If the network settings of an iOS device are Note Sharing the settings of an iOS device applied, all network and Bluetooth connection settings as well as account information for This applies the network settings of your iOS device to the streaming services will be initialized.
-
Page 21: Connecting To A Wired Network
Connecting to a network • If you are using a router that does not support Note Connecting to a wired DHCP, configure the network settings from [Network Config] within Option settings network P.44). • When setting the subnet manually, each server must be connected to the same subnet as the Press unit (... -
Page 22: Updating The Firmware
USB memory device. If this message is shown, follow the steps below to The firmware can be downloaded from the perform the update. Yamaha Website. Press To update the firmware using a USB memory device... -
Page 23: Listening To Music
Listening to music • This unit allows playback of audio CDs, and data CDs in Note Listening to CDs which MP3/WMA files are recorded. For details on playable CDs, see “Supported devices/media” P.52). INPUT Press INPUT to select [CD]. Or, press •... -
Page 24: Playing Back Music On Usb Devices
Confirms the selected item and proceeds ENTER/ to the next level or starts playback. • Yamaha and suppliers do not accept any Caution liability for the loss of data saved on a USB HOME Shows the top-level item. -
Page 25: Playing Back Music Via Bluetooth Connection
Listening to music • If the device does not connect to the unit Note Playing back music via automatically after the pairing is completed, select the unit again in the Bluetooth setting on connection your device. • If pairing information for a device is deleted, you will need to perform pairing of that device again in order to connect it again. - Page 26 Listening to music • Decrease the volume of the unit before Note Connecting a paired device playback. Otherwise, playback volume may be and playing back music too loud. • If connecting from the unit, the unit searches for If the unit is connected to another device via Bluetooth the Bluetooth device connected the last time.
-
Page 27: Playing Back Music From External Devices
Listening to music Playing back music from external devices This unit allows playback from external devices, such as a DVD player. Unplug the power cable of the unit 3.5 mm stereo and connect the external device to the mini-plug cable Stereo pin cable unit. -
Page 28: Listening To Dab Stations (Crx-N470D Only)
Listening to music • You can also perform an initial scan from the Note Listening to DAB Option settings. Press when the source is DAB. stations (CRX-N470D only) - Option menu is shown on the front panel display. See “Connecting the antenna” ( P.15) for connecting the supplied antenna to the unit. - Page 29 Listening to music • To cancel the DAB preset setting, press Note Presetting DAB stations • You can change the information of the DAB station shown on the front panel display by OPTION Use the preset function to store your favorite 30 DAB MEMORY pressing the DISPLAY button.
- Page 30 Listening to music • When performing Tune Aid and the DAB signal Note Confirming the reception is weak, try adjusting the position of the antenna to obtain good reception. You can confirm the DAB signal level. This is useful when setting up the antenna.
-
Page 31: Listening To Fm Radio Stations
Listening to music • If station reception is weak, you can tune into a Note Listening to FM radio station manually by pressing the button repeatedly. Playback in this case is monaural. stations See “Connecting the antenna” ( P.15) for connecting TUNER the supplied antenna to the unit. - Page 32 Listening to music Manual preset • To cancel manual preset setting, press Note Tune into a station you want to preset Deleting a preset station P.31). Use the option settings to delete a preset station. MEMORY OPTION Press OPTION when the source is FM. Press - The Option menu is shown on the front panel •...
-
Page 33: Radio Data System (U.k. And Europe Models Only)
Listening to music • If the signal transmission of the Radio Data Note Radio Data System System station is too weak, this unit may not be able to receive Radio Data System information (U.K. and Europe completely. In particular, RT (Radio Text) information uses a lot of bandwidth, so it may be models only) less available compared to other types of... -
Page 34: Listening To The Internet Radio
Listening to music • Playback information can be shown by pressing Note Listening to the the DISPLAY button while Internet radio is played back, as shown below. Internet radio Radio station name (default) Playing time Make sure that the unit is connected to the Internet properly ( P.17). -
Page 35: Playing Back Songs In The Computer
Listening to music • For details on the file formats that this unit can Note Playing back play back, refer to “File Formats” ( P.53). • For details on media sharing settings, refer to the songs in the Help of Windows Media Player. computer For a PC or a NAS with other DLNA server software installed... - Page 36 Listening to music • If playback is not possible, check the network Note Playing back songs in the PC connections and your router settings, and then connect the unit and the PC to the same network. Press repeatedly and select •...
-
Page 37: Presetting Network Content
Listening to music • If the input preset number already has content Note Presetting registered, the content is overwritten. • If is pressed during presetting, the preset is network content canceled. Presetting network content allows it to be played back more easily in the future. -
Page 38: Playing Back Music With Airplay
Or, change the unit’s input source to Turn on the unit and display the something other than AirPlay. iPhone playback screen on the iPhone. CRX-N470 XXXX and select the unit's name. • The input source switches to [AirPlay] (except when Net Standby is Off ( P.16)). -
Page 39: Connect The Unit Directly With A Mobile Device
Connect the unit directly with a mobile device Connect the unit directly with a mobile device wirelessly (Wireless Direct). Put up the wireless antenna of the unit in advance ( P.15). Press • The security methods selectable in step 5 are Note [OPEN] and [WPA2-PSK(AES)]. -
Page 40: More On Playback
More on playback Features such as shuffle/repeat playback, displaying song information, and presetting favorites make this unit even more convenient to use. • Operation is the same for playback of content Note Shuffle/Repeat from PCs (servers), USB devices, AirPlay, and CDs. playback Shuffle (Random) playback Press... -
Page 41: Playback Information
More on playback • Characters shown on the front panel display are Note Playback information alphanumerics only. While content from a PC (server), a USB device, AirPlay, or a CD is being played back, the song title, elapsed time, etc. can be shown on the front panel display. -
Page 42: Presetting Content To Favorites
More on playback • When presetting content to a FAVORITES Note Presetting content to button, any content that is already registered to that button will be replaced. FAVORITES • Pressing a FAVORITES button triggers one of the actions below, depending on the input source of the content registered to it. -
Page 43: Adjusting Sound Quality
More on playback • To cancel audio quality configuration, press Adjusting sound Note OPTION. quality Option menu for sound quality 1, 4 OPTION (Bold: default) The unit’s sound quality can be adjusted. Refer to “Option Equalizer menu for sound quality” at right. Adjusts low frequency [Bass] and high frequency [Treble]. -
Page 44: Option Settings
More on playback Option settings Option settings allow you to configure the unit to suit how you will use it. Press • The Option menu list is shown on the front panel display. Refer to “Option menu list” ( P.45). Select a desired option menu with and press 1, 4... - Page 45 More on playback Option menu list Menu Sub menu Default Function Menu Sub menu Default Function Subnet Mask 0.0.0.0 Confirms the subnet mask. Preset Delete P.32) Deletes preset stations. Default Gateway 0.0.0.0 Confirms the default gateway. Auto Preset Sets the Auto Preset. Network Info DNS Server(P)
-
Page 46: Troubleshooting
Refer to the table below when the unit does not function properly. If your problem is not listed below or if the instruction below does not help, turn off the unit, disconnect the power cable, and contact the nearest authorized Yamaha dealer or service center. -
Page 47: Network
Troubleshooting Network Problem Cause Solution Enable the DHCP server function of the router. In addition, in the [Network Config] of the option settings of the unit, set [DHCP] to [On]. If you want to configure the network parameters manually, check that you are using an IP The network feature does not function. -
Page 48: Bluetooth
Troubleshooting Problem Cause Solution The network separation function of the router may prevent the iPhone The iPhone does not recognize the unit A multi-SSID supported router is used. from accessing the unit. When connecting an iPhone, use SSID that can when using AirPlay. -
Page 49: Disc
Troubleshooting Problem Cause Solution The volume of the Bluetooth device is set too low. Turn up the volume of the Bluetooth device. Switch the output of Bluetooth audio signals of the Bluetooth device to the The Bluetooth device is not set to send Bluetooth audio signals to the unit. unit. -
Page 50: Dab Reception (Crx-N470D Only)
Troubleshooting DAB reception (CRX-N470D only) Problem Cause Solution Cannot tune into any DAB stations. The initial scan operations were not performed. Perform the initial scan operations ( P.28). The DAB signals are too weak. Use the DAB Tune Aid feature to conform the best position of the antenna The initial scan operations are not P.30). -
Page 51: Messages On The Front Panel Display
Troubleshooting Messages on the front panel display Message Cause Solution Configure the sharing settings and select the unit as a device to which Access Denied Access to the PC is denied. music contents are shared ( P.35). Turn off the unit and reconnect your USB device. If the problem persists, try The unit cannot access the USB device. -
Page 52: Supported Devices/Media And File Formats
Supported devices/media and file formats Handling discs Supported devices/ Discs • Do not touch the surface of the disc. Hold a disc by its edge or center hole. • This unit is designed for use with audio CD, CD-R/RW media •... -
Page 53: File Format
Supported devices/media and file formats File format File format the unit supporting is as follows. DLNA/USB Disc Sampling Gapless Format Sampling frequency (kHz) Quantization bitrate Quantization Bitrate Number of Format frequency playback bitrate (bit) (kbps) channels 8-48 (kHz) supported 16-48 32/44.1/48/ 88.2/96/176.4/ 16/24... -
Page 54: Specifications
The contents of this manual apply to the latest specifications as of the publishing date. To U.S.A. and Canada models: 87.5 MHz to 107.9 MHz Tuning range obtain the latest manual, access the Yamaha website then download the manual file. Other models: 87.5 MHz to 108.0 MHz DAB (CRX-N470D ONLY) -
Page 55: Trademarks
This product utilizes GPL/LGPL open-source software in some sections. You have the right to obtain, duplicate, modify, and redistribute this open-source code only. For information on GPL/ LGPL open source software, how to obtain it, and the GPL/LGPL license, refer to the Yamaha Corporation website (http://download.yamaha.com/sourcecodes/musiccast/). - Page 56 VAROITUS OBSERVERA Muiden kuin tässä esitettyjen toimintojen säädön tai asetusten muutto saattaa altistaa vaaralliselle Apparaten kopplas inte bort från växelströmskällan (nätet) så länge som den är ansluten till säteilylle tai muille vaarallisille toiminnoille. vägguttaget, även om själva apparaten har stängts av. ADVARSEL Netspæendingen til dette apparat er IKKE afbrudt, sålæenge netledningen siddr i en stikkontakt, Advarsel: Usynlig laserstråling ved åbning når sikkerhedsafbrydere er ude af funktion.
- Page 57 For detailed guarantee information about this Yamaha product, and Pan-EEA* and Switzerland warranty service, please either visit the website address below (Printable file is available at our website) or contact the Yamaha representative office for your country. * EEA: European Economic Area http://europe.yamaha.com/warranty/ Yamaha Global Site http://www.yamaha.com/...
Need help?
Do you have a question about the CRX-N470 and is the answer not in the manual?
Questions and answers