Table of Contents
Advertisement
Assembly Installation, Care Maintenance
and User Instructions Manual
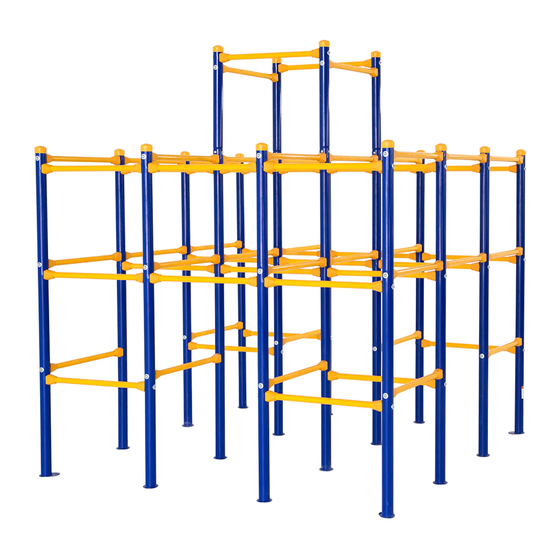
Jungle Gym Base Station
Model SJG200
WARNING
!
SKYWALKER
SPORTS
Read all precautions and instructi-
ons in this manual before using this
equipment. Save this manual for
future reference.
Maximum occupancy 3 users.
Skywalker Holdings LLC
Maximum weight capacity 243 lbs.
AGES 4 to 8
P.O. Box 574, Brigham City, UT 84302
Model SJG200 Traditional Jungle Gym
Advertisement
Table of Contents

Related Manuals for Skywalker sjg200


Summary of Contents for Skywalker sjg200
- Page 1 Save this manual for future reference. Maximum occupancy 3 users. Skywalker Holdings LLC Maximum weight capacity 243 lbs. AGES 4 to 8 P.O. Box 574, Brigham City, UT 84302 Model SJG200 Traditional Jungle Gym...
-
Page 2: Table Of Contents
Model # Warning Label and ID label is located at the bottom base corner of the Jungle Gym Age Grading: 4-8 years, maximum weight of 81 lbs. Maximum Occupancy 7 children SJG200 3 children SJG201 2 children SJG202 1 children SJG203 1 children The total maximum weight not exceed of 567 lbs. -
Page 3: Before You Begin
BEFORE YOU BEGIN Thank you for selecting a Skywalker Sports Jungle Gym. The Jungle Gym will provide many years of backyard fun. Your Jungle Gym comes equipped with warnings and instructions for the assembly, care, maintenance, and use. This information must be read by all Jungle Gym supervisors and communicated to or read by all users before any person is allowed to use the Jungle Gym. -
Page 4: Playground Surfacing Materials Information
PLAYGROUND SURFACING MATERIALS INFORMATION The following information is from Section 4 of the United States Consumer Product Safety Comission’s (USCPSC) Outdoor Home Playground Safety Handbook for playground surfacing material. X3. SECTION 4 OF THE CONSUMER PRODUCT SAFETY COMMISSION’S OUTDOOR HOME PLAYGROUND SAFETY HANDBOOK X3.1Select Protective Surfacing —... -
Page 5: User Instructions
USER INSTRUCTIONS Observing the following statement and warnings reduces the likelihood of serious or fatal injury. The Jungle Gym Base Station is designed for up to 3 persons and not to exceed 243 lb. total weight limit. On-site adult supervision for children of all ages at all times is required. Instruct children not to walk close to, in front of, behind, or between moving items. -
Page 6: Jungle Gym Safety Information
JUNGLE GYM SAFETY INFORMATION A Jungle Gym is a recreational product. The information on this manual identify important safety precautions. The precautions are not all-inclusive, because a Jungle Gym can be used in ways that this manual cannot cover completely. USING THE JUNGLE GYM SAFELY Adult Supervision of Children Children using the Jungle Gym must be supervised by adults at all times. -
Page 7: Assembly
ASSEMBLY PART IDENTIFICATION CHART Before beginning assembly, refer to the drawings below to identify all the parts used in assembly. The number in parentheses by each drawing is the key number of the part, from the PART LIST on page 18. Corner Upright 1) - 2 Top Upright1... -
Page 8: Pre-Assembled Part Chart
PRE-ASSEMBLED PART CHART Before beginning assembly, refer to the drawings below to identify all the pre-assembled parts. Corner Upright 1assembly ( 1,13) - 2 Side Upright 1assembly ( 2,13) - 2 Side Upright 2 assembly ( 3,13) - 2 Corner Upright 2 assembly ( 4,13) - 2 Side Upright... - Page 9 ASSEMBLY Make Things Easier for Yourself! This manual is designed to ensure that the jungle gym can be assemble successfully by anyone Most people find that by setting aside plenty of time, assembly will go smoothly. Before beginning assembly , carefully read the following information and instruction: * The assembly requires two persons.
- Page 10 2. Attach three Plastic Protectors (14) to the Long Cross Bar (5) with three M6X40mm Button Bolts (16), three M6 Washers (17) and three M6 Locknuts (15). Then fix the Corner Upright (1) with the M8 Arc Washer (18) and the M8X35mm Button Bolt (19). Attach the other three Plastic Protectors (14) to the Long Cross Bar (5) in the same way.
- Page 11 4. First find the Corner Upright 2 (4) with marked 4. Attach three Plastic Protectos (14) to two Long Cross Bars (5) and the Short Cross Bars (6) with three M6X40mm Button Bolts (16), three M6 Washers (17) and three M6 Locknuts (15). Finally fix Corner Upright 2 (4) with three M8 Arc Washers (18) and the Short Cross Bar (6) three M8X35mm Bolts (19).
- Page 12 6. First find the Side Uproght 1(2) and the Middle Upright 1 (9) with marked 2,9. Attach two Plastic Protectors (14) to the Short Cross Bar (6) with two M6 X40mm Button Bolts (16), two M6 Washers (17) and two M6 Locknuts (15). Then fix the Side Uproght 1(2) and the Middle Upright 1 (9) with two M8 Arc Washers (18) and two M8X35mm Button Bolts (19).
- Page 13 8. First find Middel Upright 2(10) with marked 10. Attach four Plastic Protectors (14) with four M6 X40mm Button Bolts (16), four M6 Washers (17) and four four M6 Locknuts (15). Do not tighten the locknuts. 9. First find the Side Upright 2 (3)with marked 3. Attach two Plastic Protectos(14) to two Long Cross Bars (5) with two M6X40mm Button Bolts (16), two M6 Washers (17) and two M6...
- Page 14 10. First find the Top Upright 1 (11), the Top Upright 2 (12) with marked 11,12. Attach two Plastic Protectors(14) to the Short Cross Bar (6) with two M6X40mm Button Bolts (16), two M6 Washers (17) and two M6 Locknuts (15). Then fix the Top Upright 1 (11), the Top Upright 2 (12) with two M8 Arc Washers (18) and two M8X35mm Button Bolts (19).
- Page 15 12. First find the finished pre-assembled Step 11 as shown. Attach four Plastic Protectors (14) to four Short Cross Bars (6) of the Step 5 with four Step 11 Step 5 M6X40mm Button Bolts (16), four M6 Washers(17) and four M6 Locknuts (15). Fianlly fix the setp 11 with four M8 Arc Washers (18) and four M8X35mm Button Bolts (19).
-
Page 16: Long Cross Bar ( 5)
14. First find the finished pre-assembled Setp 11 as shown. Attac sixteen Plastic Protectors (14) to eight Long Cross Bars (5) with sixteen M6X40mm Button Bolts (16), sixteen M6 Washers(17) and sixteen M6 Locknuts (15). Attach two Plastic Protectors (14) to two Short Cross Bars(6) with two M6X40mm Button Bolts (16), two M6 Washers(17) and two M6 Locknuts (15). - Page 17 ! WARNING Read the assembly, installation, care, maintenance, and use instructions in this manual prior to assembling and using this Jungle Gym. Save this manual for future reference.
-
Page 18: Parts List
PART LIST Key No. Descriprition Key No. Descriprition Top Upright2 Corner Upright Side Upright Plastic Cap Plastic Protector Side Upright M6 Locknut Corner Upright M6 Washer Long Cross Bar M6 x 40mm Button Bolt Short Cross Bar Side Upright M8 Arc Washer M8 x 35mm Button Bolt Side Upright Middle Upright1... -
Page 19: Exploded Drawing
EXPLODED DRAWING 18 19... -
Page 20: Maintenance Information
MAINTENANCE INFORMATION This product was manufactured using quality materials and crafted to provide you and your family with many years of enjoyment and exercise. Proper maintenance care will help to prolong the life and reduce the possibility of injury. The following guidelines should be followed. 1. -
Page 21: Limited Warranty
Holdings, LLC option, the product at one of this authorized service centers. All products for which a warranty claim is made must be received by Skywalker Holdings, LLC at one of its authorized locations. Preauthorization may be obtained by calling Skywalker Holding, LLC Customer Care Hot Line at 1-866-603-Jump(5867).
Need help?
Do you have a question about the sjg200 and is the answer not in the manual?
Questions and answers