Panasonic CF-20 Operating Instructions Manual
Hide thumbs
Also See for CF-20:
- Operating instructions and reference manual (180 pages) ,
- Operating instructions manual (148 pages) ,
- Get connected (12 pages)
Table of Contents
Advertisement
Please read these instructions carefully before using this product, and save this manual for future use.
OPERATING INSTRUCTIONS
Contents
Introduction .....................................................
Description Of Parts ........................................
First-Time Operation .....................................
Turning On / Turning Off ..............................
Useful Information
Handling And Maintenance ..........................
Installing Software .......................................
Troubleshooting
Troubleshooting (Basic) ...............................
Appendix
Specifications ..............................................
Limited Warranty .................................
Standard Limited Warranty ..........................
Basic Guide
Personal Computer
CF-20
Model No.
series
2
4
14
20
21
26
31
36
40
45
52
Advertisement
Table of Contents
Troubleshooting

Related Manuals for Panasonic CF-20


Summary of Contents for Panasonic CF-20
-
Page 1: Operating Instructions
OPERATING INSTRUCTIONS Basic Guide Personal Computer CF-20 Model No. series Contents Getting Started Introduction ............. Description of Parts ........First-time Operation ........Turning On / Turning Off ......Useful Information Handling and Maintenance ......Installing Software ........Troubleshooting Troubleshooting (Basic) ....... -
Page 2: Introduction 4
Introduction Thank you for purchasing this Panasonic product. For optimum performance and safety, please read these instructions carefully. In these instructions, the names are referred as follows. indicates Windows 10 Operating System. indicates Windows 7 Operating System. n Terms and illustrations in these instructions Conditions that may result in minor or moderate injury. - Page 3 To access the on-screen manuals, follow the steps below. Double-click [Manual Selector] on the desktop, and select the manual and click [Open]. 1. Double-click the [Panasonic PC Settings Utility] on the desktop screen, and then click [Support] - [Manual] - [Launch Manual Selector].
-
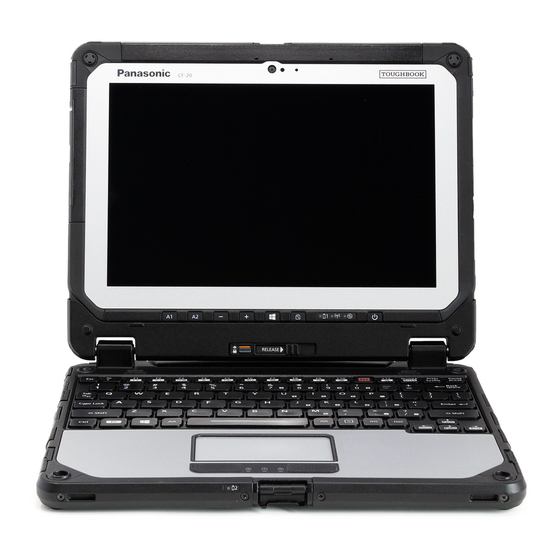
Page 4: Description Of Parts
Description of Parts Camera Main Unit Keyboard Base A: Wireless WAN Antenna / GPS Antenna : Wireless ready This indicator lights when Wireless <Only for model with wireless WAN/GPS> LAN, Bluetooth, and/or Wireless WAN Reference Manual “Wireless WAN” è are connected and ready. It does not Reference Manual “GPS”... - Page 5 T: USB 3.0 Port Reference Manual “USB Devices” è U: LAN Port Connect to a network “LAN” è V: Serial Port Reference Manual “Serial Port” è...
- Page 6 Description of Parts Main Unit (Right Side) Main Unit (Left Side) A: DC-IN Jack H: microSD Memory Card Slot Only the main unit can be charged. Keep microSD Memory Cards away from B: Pen Holder infants and small children. C: Pen Reference Manual “SD Memory è...
- Page 7 Keyboard Base (Left Side) A: DC-IN Jack E: USB 2.0 Port B: SD Memory Card Indicator Connect to a network “USB Devic- è (Blinking: During access or a password is es” requested) F: VGA Port C: SD Memory Card Slot Reference Manual “External Dis- è...
- Page 8 Description of Parts Keyboard Base (Bottom Side) A: Carrying Handle B: External Antenna Connector (CH2) C: External Antenna Connector (CH1) D: Expansion Bus Connector Reference Manual “Port replicator” è E: Battery Cover F: Battery Cover Latch G: LED Indicator Battery Status Reference Manual “Battery Power”...
- Page 9 Main Unit (Bottom Side) Rear Camera <Only for model with Rear Camera> A: Camera Indicator B: Camera Light C: Camera Lens Reference Manual “Camera” è D: Back Cover The shape of this may vary depending on the model. E: Release Latch F: microSIM Card Slot <Only for model with wireless WAN>...
- Page 10 Description of Parts Main Unit (Top Side) A: Tether Hole B: LED Indicator Battery Status : Power Status Off: Power off/Hibernation Green: Power on Blinking Green: Sleep Blinking green rapidly: Cannot power on or resume due to low temperature. C: Barcode Reader <Only for model with Barcode Reader>...
- Page 11 Detaching the main unit from the keyboard base After Detach the main unit from the keyboard base, you can use the main unit as a tablet or reat- tach it in the reverse direction. CAUTION l Before detaching the main unit, confirm the following things. - Save the necessary data. - Close files you have opened from removable disks and network drives.
- Page 12 Description of Parts C Slide the release lever (B) in the direction of the arrow. RELEASE D Detach the main unit from the keyboard base. CAUTION l When detaching the main unit from the key- board base, hold the position at the locations dashed line circled in the illustration.
- Page 13 Attaching the main unit to the keyboard base A Push the main unit at the locations dashed line circled in the illustration in a downward direc- tion. Release lever (B) will return to the direction of the arrow. B Raise detach the lock (A) above. NOTE l Confirm that the red signs near the detach lock and the release lever can not be seen.
- Page 14 First-time Operation n Preparation A Check and identify the supplied accessories. If you do not find the described accessories, contact your support office. • AC Adaptor ..1 • AC Cord ..1 • Battery Pack . . 1 Model No: CF-AA6413C Model No: CF-VZSU0QW •...
-
Page 15: Open The Display
Connect your computer to a power outlet A Open the cover. B Connect your computer to a power outlet. The battery charging starts automatically. CAUTION l Do not disconnect the AC adaptor until the first-time opera- tion procedure is completed. l When using the computer for the first time, do not connect any peripheral device except the battery pack and AC adap- tor. - Page 16 If the computer does not power on even after cooling down, contact Panasonic Technical Support (è pages 45 - 51). <For MUI OS model> Select language and OS (32-bit or 64-bit)
- Page 17 l During setup of Windows, use the touchpad and clicking to move the pointer and to click an item. l Setup of Windows will take approximately 5 minutes / 20 minutes. Go to the next step, confirming each message on the dis- play. l You can set the Wireless Network after the setup of Win- dows is complete.
- Page 18 Manual “Create a Recovery Disc” about creating the disc. NOTE Panasonic PC Settings Utility You can check the status of the computer, and change the settings. Double-click [Panasonic PC Settings Utility] on the desktop to start the utility. (è Reference Manual “Panasonic PC Settings Utility”)
- Page 19 n Before using wireless function A Click (Notification) at the task tray, and then click (All settings) - [Network & Internet] - [Airplane mode]. Set [Airplane mode] to [Off], and then; Set [Wi-Fi] to [On] (for wireless LAN). Set [Cellular] to [On] (for wireless WAN). Set [GPS] to [On] (for wireless WAN). Set [Bluetooth] to [On] (for Bluetooth).
- Page 20 Turning On / Turning Off Turning On Press and hold the power switch (è page 4) until the power indicator (è page 4) lights. NOTE l Do not press the power switch repeatedly. l The computer will forcibly be turned off if you press and hold the power switch for four sec- onds or longer.
-
Page 21: Handling And Maintenance
Handling and Maintenance Operation environment l Place the computer on a flat stable surface not subject to shock, vibration, and danger of dropping. Do not place the computer upright or turn it over. If the computer is exposed to an extremely strong impact, it may become damaged. l Operating environment : - 10 ° C to 50 ° C {14 ° F to 122 ° F } (IEC60068-2-1, 2) Temperature: Operation : -20 ° C to 60 ° C {- 4 ° F to 140 ° F } Storage Humidity: Operation : 30% to 80% RH (No condensation) Storage : 30% to 90% RH (No condensation) Even within the above temperature/humidity ranges, operation for a long time in extreme en- vironments, smoking nearby, or operation in places where oil is used or where there is a lot of dust will result in the product deterioration and will shorten the product life. - Page 22 Handling and Maintenance l The pointer cannot follow the pen (included) movement if you move the pen (included) too quickly. <Only for model with digitizer> l The digitizer uses electromagnetic induction and may not work properly near strong electrical field or magnetic field such as: Ÿ Near AM radio base station or relay station antennas Ÿ Near CRT displays that generate strong electromagnetic field noise Move the digitizer away from such locations so it will work properly. n When using peripheral devices Follow these instructions and the Reference Manual to avoid any damage to the devices. Care- fully read the instruction manuals of the peripheral devices. l Use the peripheral devices conforming to the computer’s specifications. l Connect to the connectors in the correct direction. l If it is hard to insert, do not try forcibly but check the connector’s shape, direction, alignment of pins, etc. l If screws are included, fasten them securely. l Remove the cables when you carry the computer. Do not pull the cables forcibly. n Preventing your computer from unauthorized use via wireless LAN/Bluetooth/wireless <Only for model with wireless LAN/Bluetooth/wireless WAN>...
- Page 23 n Sensors This computer is equipped with four sensors (acceleration sensor, gyro sensor, magnetic sensor, ambient light sensor), and you can use these sensors with any software that is compatible. As the accuracy of each sensor output is dependent on the operating environment and other con- ditions, the results should only be used as a reference. The acceleration sensor, gyro sensor, and magnetic sensor are located at the bottom left of the LCD. The detection results of each sensor may vary depending on how you are holding the com- puter, the application software you are using, and other factors. l Automatic brightness adjustment The computer is equipped with an automatic brightness adjustment function that adjusts the display screen based on the ambient light sensor. You can configure the automatic adjustment function as follows. A Click (Start) at the lower left, and then click (Settings) - [System] - [Display]. B Set [Change brightness automatically when lighting changes] to [On]. CAUTION Ÿ The [Adjust my screen brightness automatically] item may not be available in some cases. In such cases, click the arrow to the left of [Settings] at the top left of the screen, and perform the operation from [System] - [Display] again. A Click (Start) - [Control Panel] - [Hardware and Sound] - [Power Option]. B Click [Change plan settings] for the power plan currently used. C Click [Change advanced power settings] and double-click [Display]. D Double-click [Enable adaptive brightness], make necessary settings, and click [OK]. Set each item to ON, and the brightness of the screen display will adjust automatically. The ambient light sensor is located at the top of LCD. The ambient light cannot be detected properly if this area is obstructed or dirty. l Magnetic sensor The magnetic sensor on the computer operates by detecting geomagnetism. Therefore, the magnetic sensor may not function properly and it readings may be inaccurate, especially in the following environments.
- Page 24 Handling and Maintenance CAUTION Ÿ Hold the computer firmly when moving it. Strong shocks from dropping the computer may result in damage. If the sensors do not works correctly, check the settings according to the follow- Ÿ ing steps. A Click (Start) - [Control Panel] - [Hardware and Sound] - [Location and Other Sensors]. B Add the check mark for each check box. C Click [Apply]. Maintenance To clean the LCD panel If drops of water or other stains get on the surface of the LCD panel, wipe them off immediately. Failure to do so may result in staining. Use the soft cloth included with the computer. (For further information, refer to “Suggestions About Cleaning the LCD Surface”. Reference Manual “Screen Input Operation”) To clean areas other than the LCD panel Wipe with a soft dry cloth such as gauze. When using detergent, dip a soft cloth in water-diluted detergent and wring it thoroughly. CAUTION l Do not use benzene, thinner, or rubbing alcohol since it may adversely affect the surface caus- ing discoloration, etc. Do not use commercially-available household cleaners and cosmetics, as they may contain components harmful to the surface.
- Page 25 n Remove the built-in battery 1. Turn off the computer, and disconnect the AC adaptor. 2. Detach the main unit from the keyboard base. ( page 11) 3. Turn over the main unit. 4. Slide both latches (A) to the arrow direction, and then remove the cover. Depending on the models, the shape of cover may differ. 5. Slide both latches (B) to the arrow direction, and then remove the battery pack. 6. Remove the screws (10) and lift the cover. 7. Pull out the built-in bridge battery in the sheet cover, and then remove the connector of the built-in bridge battery. 8. Insulate the connectors of the built-in bridge battery by covering them with plastic tape, for example.
-
Page 26: Installing Software
Installing Software Installing software will return the computer to the default condition. When you install the soft- ware, the internal SSD data will be erased. Back up important data to other media or an external flash memory before installation. CAUTION l Do not delete the Recovery Partition on the SSD. If it has been deleted, the Recovery Disc could not be created. To check the Recovery Partition, perform the following methods. Right-click at the bottom left corner of the Desktop screen. Click (Start) and right-click [Computer], then click [Manage]. l A standard user needs to enter an administrator password. Click [Disk Management]. Reset Windows Preparation If the computer does not operate normally, or becomes unstable, you can reset Windows to solve the problem. l Remove all peripherals and SD memory card, etc. l Connect the AC adaptor and do not remove it until installation is complete. Perform “Reset Windows”. A Click (Start) - [Settings] - [Update & security] - [Recovery]. B Click [Get Started] under “Reset this PC”. C Select the option. 1. [ Keep my files] Windows reinstallation can be completed in a short time (Approximately 30 minutes). Applications and other items that do not come with this computer will be removed. - Page 27 Check the [UEFI Boot] setting of the Setup Utility. [UEFI Boot] should be set to as follows. When installing Windows 10 : [Enabled] When installing Windows 7 : [Disabled] Press At the confirmation message, select [Yes] and press Enter . Computer will restart. Press while [Panasonic] boot screen is displayed. The Setup Utility starts up. l If the password is requested, enter the Supervisor Password. Select the [Exit] menu, then select [Recovery Partition] and press Enter Click [Recovery]. Click [CANCEL] to abort the operation. Click [Reinstall Windows] and click [Next].
- Page 28 Installing Software Click [Next]. If the option is displayed, select the setting and click [Next]. l [Initialize and reinstall Windows to the whole Disk] Select this option when you want to install Windows to the factory default. After instal- lation, you can create a new partition. For how to create a new partition, refer to “To change the partition structure” ( page 19) l [Reinstall Windows to the OS related partitions] Select this option when the flash memory has already been divided into several parti- tions and you want to keep the partition structure. For how to create a new partition, refer to “To change the partition structure” ( page 19). This does not appear if Windows cannot be installed to the recovery partition and the area usable by Windows. At the confirmation message, click [YES]. <For localized OS model> Select OS (32bit or 64bit) and click [OK]. <For MUI OS model> Select language and system type (32bit or 64bit), then click [OK].
-
Page 29: Optical Drive
Set the Recovery Disc into the DVD drive or commercially available optical drive. Press At the confirmation message, select [Yes] and press Enter . Computer will restart. Press while [Panasonic] boot screen is displayed. The Setup Utility starts up. l If the password is requested, enter the Supervisor Password. Select the [Exit] menu, then select DVD drive or commercially avail- able optical drive in [Boot Override] and press Enter The computer will restart. - Page 30 Installing Software <For MUI OS model> Click [Next]. If the option is displayed, select the setting and click [Next]. l [Reinstall with HDD recovery partition.] Standard recovery method. You can use recovery from Recovery Partition. l [Reinstall without HDD recovery partition.] Increase usable disk size. You can NOT use recovery from Recovery Partition. When this option is selected, you can no longer create Recovery Disc(s) after the re- covery operation. CAUTION l Carefully choose above item because you cannot change it later. Click [Next]. If the option is displayed, select the setting and click [Next]. l [Initialize and reinstall Windows to the whole Disk] Select this option when you want to install Windows to the factory default. After instal- lation, you can create a new partition. For how to create a new partition, refer to “To change the partition structure” ( page 19). l [Reinstall Windows to the OS related partitions] Select this option when the flash memory has already been divided into several parti- tions and you want to keep the partition structure. For how to create a new partition, refer to “To change the partition structure” ( page 19). This does not appear if Windows cannot be installed to the recovery partition and the area us- able by Windows. Click [Recovery ALL Partitions.]. Click [Remain Recovery Partition.].
-
Page 31: Troubleshooting (Basic)
“Reference Manual”. For a software problem, refer to the software’s instruc- tion manual. If the problem persists, contact Panasonic Technical Support (è pages 45 - 51). You can also check the computer’s status in the PC Information Viewer (è... - Page 32 B Click [Clock, Language, and Region] - [Date and Time]. l If the problem persists, the internal clock battery may need to be replaced. Contact Panasonic Technical Support (è pages 45 - 51). l When the computer is connected to LAN, check the date and time of the server.
-
Page 33: Shutting Down
n Starting Up Cannot resume. l One of the following operations may have been carried out. Press the power switch turn on the computer. Data not saved will be lost. Ÿ In sleep mode, the AC adaptor or battery pack was disconnect- ed, or a peripheral was connected or disconnected. - Page 34 Troubleshooting (Basic) n Display No display. l The external display is selected. Press switch the display. Then click the display mode. Wait until the display has been switched completely before press- again. l When using an external display, Ÿ Check the cable connection. Ÿ...
- Page 35 n Touchpad The pointer does not work. l When using the external mouse, connect it correctly. l Restart the computer using the keyboard. l If the computer does not respond to keyboard commands, read “No response” (è page 35). Cannot input using the l Set [Touch Pad] to [Enabled] in the [Main] menu of the Setup Util- ity.
-
Page 36: Limited Use License Agreement
Programs and related documentation nor in or to the algorithms, con- cepts, designs and ideas represented by or incorporated in the Programs and related docu- mentation, all of which title, ownership and rights shall remain with Panasonic Corporation or its suppliers. - Page 37 “Reference Manual”. At least three (3) years from delivery of this product, Panasonic will give to any third party who contacts us at the contact information provided below, for a charge no more than our cost of physically performing source code distribution, a complete machine-readable copy of the corre- sponding source code covered under GPL V2.0, LGPL V2.1 or the other licenses with the obli-...
- Page 38 En utilisant les logiciels, vous vous engagez de manière définitive à respecter les termes, clauses et conditions des présentes. Panasonic Corporation a mis au point ou obtenu les Logiciels et vous en concède l’utilisation par les présentes. Vous assumez l’entière responsabilité du choix de ce Produit (y compris des Logiciels associés) pour obtenir les résultats escomptés, ainsi que de l’installation, de l’utilisation...
- Page 39 D’ADAPTATION A UN USAGE PARTICULIER. Veuillez vous référer aux modalités et aux conditions de ceux-ci figurant dans “Manuel de référence”. Pendant au moins trois (3) ans à compter de la livraison de ce produit, Panasonic donnera à tout tiers qui nous contactera en utilisant les coordonnées ci-dessous, pour un montant non supérieur à...
- Page 40 Specifications This page provides the specifications for the basic model. The model number is different according to the unit configuration. l To check the model number: Check the bottom of the computer or the box the computer came in at the time of purchase. l To check CPU speed, memory size and the flash memory drive (SSD) size: Run the Setup Utility (è Reference Manual “Setup Utility”) and select [Information] menu. [Processor Speed]: CPU speed, [Memory Size]: Memory size, [Hard Disk]: SSD size n Main Specifications ®...
- Page 41 n Main Specifications Sensor Ambient light Equipped sensor Digital compass Equipped Gyro sensor Equipped Acceleration Equipped sensor Keyboard / Pointing Device <Only for model with touchscreen> 82 Keys (Back Light Keyboard) / Touchpad / Touchscreen (Capacitive) <Only for model with digitizer> 82 Keys (Back Light Keyboard) / Touchpad / Touchscreen / Digitizer Power Supply AC adaptor or Battery pack...
-
Page 42: Optional Devices
, Wireless Toolbox Adobe Reader, Battery Recalibration Utility, Infineon TPM Professional *21*22 Package , Concealed Mode Settings Utility, USB Charge Setting Util- ity, Dashboard for Panasonic PC, Power Plan Extension Utility, Touch Screen Mode Setting Utility , Wireless Switch Utility, Wireless Connec- *21 *22 tion Disable Utility... - Page 43 Double-click [Manual Selector] on the desktop, and select “Installation Manual for Trusted Platform Mod- ule (TPM)”. Operation has been tested and confirmed using Panasonic SD/SDHC/SDXC Memory Cards with a ca- pacity of up to 64 GB. Operation on other SD equipment is not guaranteed. Does not guarantee operation of all USB-compatible peripherals.
- Page 44 (Start) and input “c:\util\wlprjct\Supplementary Instructions.pdf” in [Search programs and files] Enter and press Panasonic PC Settings Utility includes the following functions: Battery Charge Speed / Battery Recalibra- tion / Touch Operation Support / USB Charge Settings / Power Saving Settings / etc. Perform on the recovery disc. Alternatively perform on the SSD recovery partition.
- Page 45 Complete unit replacement fulfills the full obligation and is at the discretion of Panasonic and is limited to once during the coverage term. Maximum benefit is limited to one replacement per coverage year of the Motherboard, LCD, Storage Drive, and Keyboard.
- Page 46 Programs will meet your requirements or that the operation of the Programs will be uninterrupted or error free. Panasonic shall have no obligation for any defects in the disk(s) or other media on which the Programs are furnished resulting from your storage thereof, or for defects that have been caused by operation of the disk(s) or other media Panasonic’s entire liability and your exclusive remedy under this warranty shall be limited to the...
- Page 47 This limited warranty only covers failures due to defects in materials or workmanship which occur during normal use. If a unit is sent to a Panasonic Authorized Service Center and no hardware failure is found, the customer will be billed for labor to correct a software issue or reimage the hard drive plus shipping and applicable administrative fees at the current rates set by the service provider.
- Page 48 THIS PRODUCT IS NOT INTENDED FOR USE AS, OR AS PART OF, NUCLEAR EQUIPMENT/SYSTEMS, AIR TRAFFIC CONTROL EQUIPMENT/SYSTEMS, OR AIRCRAFT COCKPIT EQUIPMENT/SYSTEMS PANASONIC WILL NOT BE RESPONSIBLE FOR ANY LIABILITY RESULTING FROM THE USE OF THIS PRODUCT ARISING OUT OF THE FOREGOING USES.
- Page 49 Claim Procedure – In the event of a defect in material or workmanship in the media during the sixty (60) days warranty period, and you return it, transportation costs prepaid, to Panasonic Canada Inc., Computer Products Marketing, 5770 Ambler Drive, Mississauga, Ontario L4W 2T3, within the warranty period, together with a copy of your purchase receipt, and an explanation of the suspected defect, PCI will replace in Canada the defective disk(s) or other media.
- Page 50 GARANTIE LIMITÉE – ORDINATEURS ET PÉRIPHÉRIQUES PANASONIC Couverture – Panasonic Canada Inc. (« PCI ») garantit à l’acheteur original que ce produit informatique (à l’exclusion des supports des logiciels) est, au moment de sa vente par PCI ou d’un revendeur agréé par PCI, ex- empt de défauts de pièces et de fabrication dans les conditions normales d’utilisation, et ce, pendant la période...
- Page 51 GARANTIE LIMITÉE – SUPPORTS DES LOGICIELS Couverture – Panasonic Canada Inc. (« PCI ») garantit à l’acheteur original que la ou les disquettes ou tout autre support sur lequel le ou les programmes sont fournis sont exempts de défauts de pièces et de fabrica- tion dans des conditions normales d’utilisation au Canada, et ce, pour une période de soixante (60) jours...
- Page 52 Service Agreement Period listed below. In the event that any prod- uct (or part thereof) is replaced, Panasonic shall transfer ownership of the replacement product (or part) to the customer and the customer shall transfer ownership of the replaced product (or part) to Panasonic.
- Page 53 Service Centre, together with a copy of the purchase receipt, within the aforesaid warranty period. Panasonic shall have no obligation for any defects in the disk(s) or other media on which the Pro- grams are furnished resulting from your storage thereof, or for defects that have been caused by...
- Page 54 Product and licensed to Purchaser, its quality, performance, mer- chantability, or fitness for a particular purpose. Panasonic does not warrant that the functions contained in the software will be uninterrupted or error free. Panasonic assumes no risk of and shall not in any case be liable for any damages, including, without limitation, any special, inciden-...
- Page 55 Panasonic System Communications Company of North America Two Riverfront Plaza Newark, NJ 07102 Panasonic Canada Inc. 5770 Ambler Drive, Mississauga, Ontario L4W 2T3 Panasonic Australia Pty. Limited ACN 001 592 187 ABN 83 001 592 187 1 Innovation Road, Macquarie Park NSW 2113 Importer’s name &...
Need help?
Do you have a question about the CF-20 and is the answer not in the manual?
Questions and answers