Table of Contents
Advertisement
Advertisement
Table of Contents

Related Manuals for Unitec Portal TI+


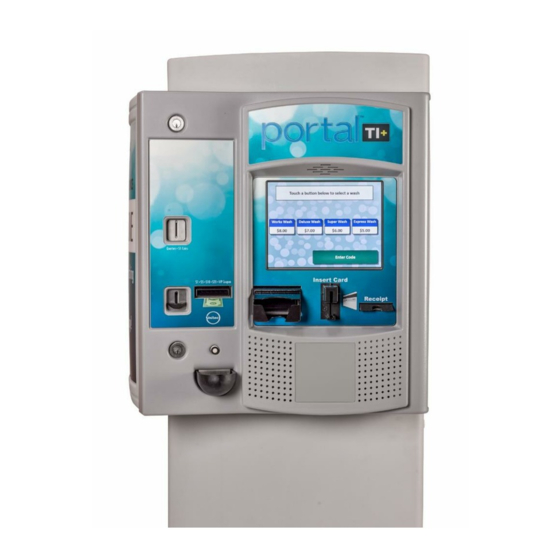
Summary of Contents for Unitec Portal TI+
- Page 1 ® Portal Installation Manual Unitec 443-561-1200 • www.StartwithUnitec.com...
- Page 2 Distributor Name: Proprietary Information and Materials of Unitec Inc. Such proprietary information and materials may not be disclosed to third parties without the prior written consent of Unitec Inc. D E C L A R A T I O N...
-
Page 3: Table Of Contents
P O R T A L T I + Table of Contents Site Planning and Preparation ...................... 1 General ..........................1 Mounting Options ........................1 Positioning the Portal ......................1 1.3.1 In-Bay Applications ........................1 1.3.2 Express Wash Applications ......................2 Electrical Preparation ...................... - Page 4 P O R T A L T I + Camera Connection ......................30 3.10 Gate Wiring ........................30 3.11 Connecting the Reach Free ID Option................30 System Test ........................... 31 Appendix A. Dimensional Schematic of the Portal TI+ ..............33 Appendix B.
-
Page 5: Site Planning And Preparation
1.2 Mounting Options Unitec offers a mounting base for the Portal and a “brick-in” kit. The base is available in (2) heights, 35 in. for a standard (grade) mount and 29 in. for curb mounting. The base consists of a tubular steel frame with a plastic cover. -
Page 6: Express Wash Applications
P O R T A L T I + Figure 1. Portal Installation at the Wash Entrance For curb mount applications, the front surface of the Portal should be even with the edge of the curb. To achieve this dimension, the base frame should be installed so its leading edge is 8 in. -
Page 7: Figure 3. Express Exterior Island
If the Unitec ReachFree ID (RFID) option is included, the RF Antenna should be located adjacent to the Portal. Figure 3 provides guidelines for the design of an Express lane with the Portal, gate and RFID (antenna) option. -
Page 8: Electrical Preparation
P O R T A L T I + 1.4 Electrical Preparation 1.4.1 Conduit Installation A typical installation will require 3 conduit runs for, power, data and wash control lines. DO NOT run data wires in the AC Power or Wash Control conduits. Additional conduit runs may be needed when a gate or the Portal RFID option are to be used. -
Page 9: Figure 5. Portal Base Dimensions
P O R T A L T I + Figure 5. Portal Base Dimensions The Portal base frame is a welded tubular structure that has the same plate on the top and bottom. Its designed so that wires and/or conduit can be routed into the Portal through the round conduit holes on the top. -
Page 10: Power Requirements
P O R T A L T I + 1.4.2 Power Requirements The Portal requires 120 VAC, 8 Amps service. In applications where barrier gates are to be used, each gate requires 120 VAC, 5 Amps service. The Portal and Gate must be powered from separate circuits. -
Page 11: Mechanical Installation
P O R T A L T I + 2 Mechanical Installation 2.1 Hardware Required Prior to beginning the installation, take the time to verify that all the following required parts are present and accounted for. Items supplied with the Portal: ... -
Page 12: Base Installation
P O R T A L T I + The following items are required only when installing the Portal TI+ into an existing concrete slab: Hammer drill 2.5” Concrete hammer drill bit 2.3 Base Installation Pull all wires through conduits before mounting the base. See Electrical Planning for Note:... -
Page 13: Brick-In Installation
P O R T A L T I + When installing the frame in pre-existing concrete, set the frame in the desired location and mark the location of each leg of the frame. Drill 2 ½ in. diameter by 8 in. deep (minimum) holes in the concrete for the frame legs. -
Page 14: Positioning The Portal
P O R T A L T I + Figure 7. Bricked-In Mounting Options 2.4.2 Positioning the Portal The adapter plate should be located so its front edge is recessed 4.50” from the front face of the brick structure (as shown in Figure 8). The adapter plate has (2) sets of mounting holes. One set is used to install the Portal so its front door will be flush with the brick. -
Page 15: Figure 8. Positioning The Adaptor Plate
P O R T A L T I + Figure 8. Positioning the Adaptor Plate Portal Installation Manual Document #: PTL1001... -
Page 16: Figure 9. Door Positioning Options
P O R T A L T I + Figure 9. Door Positioning Options Portal Installation Manual Document #: PTL1001... -
Page 17: Brick-In Guidelines
P O R T A L T I + Figure 10. Portal Mounting for Bricked-In Installation 2.4.3 Brick-in Guidelines 2 . 4 . 3 . 1 U s i n g t h e A d a p t e r P l a t e The recommended procedure when mounting the Adaptor Plate directly to the brick structure is as follows: 1. -
Page 18: Figure 11. Portal Brick-In With Adaptor Plate
P O R T A L T I + Figure 11. Portal Brick-In with Adaptor Plate 2 . 4 . 3 . 2 U s i n g t h e C u r b H e i g h t F r a m e Follow the base installation instructions in section 2.3 to set the base frame in the concrete. -
Page 19: Figure 12. Portal Brick-In With Adaptor Plate On Base Frame
P O R T A L T I + Figure 12. Portal Brick-In with Adaptor Plate on Base Frame Portal Installation Manual Document #: PTL1001... - Page 20 P O R T A L T I + [ T H I S P A G E I N T E N T I O N A L L Y L E F T B L A N K ] Portal Installation Manual Document #: PTL1001...
-
Page 21: Electrical Installation
3 Electrical Installation 3.1 Hardware Required Unitec does not provide connectors for terminating the field-installed wires. These wires will vary by application but connectors that may be required include: RJ-45 Modular Plugs (for terminating the CAT-5 network cable). ... -
Page 22: Connecting Power
P O R T A L T I + Figure 13. Portal Interior 3.4 Connecting Power The Portal TI+ uses an IEC-320-C13 male power inlet to supply the unit with power. This inlet can be found on the back wall on the right-hand side of the Portal TI+ case. 1. -
Page 23: Figure 14. Inside The Ac Connector
P O R T A L T I + Figure 14. Inside the AC Connector 5. Remove the screw holding the stabilizer plate in place and set both aside until after you have finished securing the wires. 6. Thread the power wires through the strain relief. 7. -
Page 24: Network Connection
CAT 5 cable into the other end of the surge protector. The facility end of the Cat-5 cable connects to one of the LAN ports on the Unitec router. The router’s WAN port should be connected to the Internet Service device (e.g. DSL or Cable modem). -
Page 25: Telephone Cable
P O R T A L T I + 3.6 Telephone Cable A telephone cable is required if the Portal is equipped with the “Datatran” dial-up credit option. Each end of the cable should be terminated with RJ - 11 modular phone plug as follows: 1. -
Page 26: Wash Control Wiring
P O R T A L T I + Figure 18. Telephone Line Connection (for Data Modem) 3.7 Wash Control Wiring 3.7.1 Overview In applications where the Portal will communicate with the Wash Controller, the wash control wires will need to be connected to the Wash I/O Board. Most wash manufacturers use a five-wire system to provide the arming signals for the selected wash packages. -
Page 27: Wiring The Wash Relay Interface
P O R T A L T I + Each wash manufacturer has its own specific color code system and wash relay pin-outs; therefore, it is important to review the appropriate wash documentation prior to beginning this portion of the installation. 3.7.2 Wiring the Wash Relay Interface To wire the wash relays, connect the wires that come from the PLC to the appropriate pin numbers in the phoenix connector using the following procedures:... -
Page 28: Figure 19. Wash I/O Board Connectors
P O R T A L T I + Figure 19. Wash I/O Board Connectors 4. Remove the Phoenix connector from the socket. 5. Turn the connector so that the wire inputs are facing up as shown below. Figure 20. 10-Pin Phoenix Connector ... -
Page 29: Wiring The Wash-In-Use Interface
6. Referring to the figure above, connect the wash relay arming wires, the wash relay common wire, and any spare option relay wires to the appropriate pins, as indicated in the following table. Use the screwdriver to open and/or secure the manufacturer wash wires to each of the Unitec relay locations. Wash Relays Signal... -
Page 30: Figure 21. 6-Pin Phoenix Connector
4. Referring to the figure above, connect the following wires to the appropriate pins, as indicated in the following table. Use the screwdriver to open and/or secure the manufacturer wash wires to each of the Unitec relay locations. Wash-In-Use Connections... -
Page 31: Intercom Systems
2, 3, and 4 wire intercoms are supported. A digital intercom is recommended if the intercom wiring is sharing conduit with other communications wiring, but not required. Unitec does not supply intercom systems. -
Page 32: Connection Overview
P O R T A L T I + Figure 22. Intercom Component Locations on the Display IO Board 3.8.4 Connection Overview Call Function: A view of the diagram below shows J34 and J35. The unit will initiate a call function by closing the contacts on RL5. -
Page 33: Figure 23. Four-Wire Intercom Configuration
P O R T A L T I + Figure 23. Four-Wire Intercom Configuration 3 Wire Intercom Configuration: This mode requires two conductors for audio and one additional conductor for the call function. This mode uses a common ground for both audio and the call function (SP-). -
Page 34: Camera Connection
Figure 26. BNC Male Plug for Camera Connection 3.10 Gate Wiring In multi-lane applications, a Unitec or 3 party gate controller is required. Refer to the instructions provided with the gate controller for connecting wires between it and the Portal. If needed, a gate can be used with a single Portal and no gate controller. -
Page 35: System Test
4 System Test Once the installation is complete, a thorough test should be performed to ensure all Portal functions are operational. This test should verify: Functionality of hardware devices (through diagnostic tests in maintenance mode). Washes and added services are properly configured and wash outputs are properly wired. - Page 36 P O R T A L T I + [ T H I S P A G E I N T E N T I O N A L L Y L E F T B L A N K ] Portal Installation Manual Document #: PTL1001...
-
Page 37: Appendix A. Dimensional Schematic Of The Portal Ti
Appendix A. Dimensional Schematic of the Portal TI+ Figure 25. Bottom View of the Portal TI+ Portal Installation Manual Document #: PTL1001... - Page 38 P O R T A L T I + Portal Installation Manual Document #: PTL1001...
-
Page 39: Appendix B. Iptran Installation
Portal TI+ unit. The IPTran is shipped separately as it needs to be configured at Unitec with the merchant account and processor information. To install the IPTran, you will first mount it to the hopper cage, and then connect the power and communications cables. - Page 40 P O R T A L T I + C o n n e c t t h e C a b l e s IPTran Wiring Connect the CAT5 line to the Datatran. Connect the modem communication cable to the communications port on the DataTran Plug the other end of the communications cable (with the DB9 connetor) into Com 3, Port A of the Carrier Board.
- Page 41 P O R T A L T I + Com A Location on Carrier Board Plug the power supply cord into the power inlet on the modem. Plug the power supply cord into the power outlet in the power supply located on the back of the Portal case.
-
Page 42: Appendix C. Portal Networking
A print server (for connecting a local report printer) In cases where there will be more than (4) Unitec devices on the network, an Ethernet switch will need to be added. The WAN port of the switch connects to one of the LAN ports of the Unitec router. - Page 43 P O R T A L T I + When a router (or modem with built-in router) is used between the Unitec router and broadband connection, it must be configured to allow external connections to and from the Portal. The router should be configured to: ...
- Page 44 P O R T A L T I + Terminating Ethernet Cables 1. Carefully remove the outer jacket of the cable. Be careful when stripping the jacket as to not nick or cut the internal wiring. One good way to do this is to cut lengthwise with snips or a knife along the side of the cable, away from yourself, about an inch toward the open end.
- Page 45 P O R T A L T I + 3. Untwist the pairs so they will lay flat between your fingers. The white piece of thread can be cut off even with the jacket and disposed (see Warnings). For easier handling, cut the wires so that they are 3/4"...
- Page 46 P O R T A L T I + 6. Keep the wires flat and in order as you push them into the RJ-45 plug with the flat surface of the plug on top. The white/orange wire should be on the left if you're looking down at the jack.
- Page 47 P O R T A L T I + computers or phone system equipment, making it even more crucial that the pairs are in the correct order. A simple cable tester can quickly verify that information for you. Should you not have a network cable tester on hand, simply test connectivity pin to pin. Portal Installation Manual Document #: PTL1001...
-
Page 48: Appendix D. Installing A Print Server
2. Connect one end of the Ethernet patch cable to the Ethernet port on the print server. 3. Connect the other end of the Ethernet patch cable to the Unitec router. 4. Connect the AC adapter to the print server and plug it in. - Page 49 P O R T A L T I + Portal Installation Manual Document #: PTL1001...
-
Page 50: Appendix F. Installation Of The External Pos
The external POS Interface device allows codes to be purchased at registers or pumps (points of sale, or POS). The Ethernet port connects to the Unitec router; the serial port connects to the C-store POS System. A standard 9-pin serial cable is included with the POS device but some systems may require an alternate cable (or adapter).
Need help?
Do you have a question about the Portal TI+ and is the answer not in the manual?
Questions and answers