Table of Contents
Advertisement
Advertisement
Table of Contents

Related Manuals for Traktor KONTROL D2


Summary of Contents for Traktor KONTROL D2
- Page 1 Manual...
- Page 2 Disclaimer The information in this document is subject to change without notice and does not represent a commitment on the part of Native Instruments GmbH. The software described by this docu- ment is subject to a License Agreement and may not be copied to other media. No part of this publication may be copied, reproduced or otherwise transmitted or recorded, for any purpose, without prior written permission by Native Instruments GmbH, hereinafter referred to as Native Instruments.
- Page 3 Contact NATIVE INSTRUMENTS GmbH Schlesische Str. 29-30 D-10997 Berlin Germany www.native-instruments.de NATIVE INSTRUMENTS North America, Inc. 6725 Sunset Boulevard 5th Floor Los Angeles, CA 90028 www.native-instruments.com NATIVE INSTRUMENTS K.K. YO Building 3F Jingumae 6-7-15, Shibuya-ku, Tokyo 150-0001 Japan www.native-instruments.co.jp NATIVE INSTRUMENTS UK Limited 18 Phipp Street London EC2A 4NU www.native-instruments.com...
-
Page 4: Table Of Contents
Table of Contents Table of Contents Welcome to the World of TRAKTOR KONTROL D2! ............9 Where to Start ..........................9 Manual Conventions ........................11 Using Your D2—Getting Started ................. 15 Using the Browser ........................16 2.1.1 Opening the Browser ....................16 2.1.1.1... - Page 5 Using Performance Modes on Remix Decks ................. 102 3.9.1 Selecting and applying a Performance Mode ............. 103 3.9.2 Using Performance Mode Pitch .................. 104 3.9.3 Using Performance Mode Filter .................. 105 3.9.4 Using Performance Mode FX SEND ................106 TRAKTOR KONTROL D2 - Manual - 5...
- Page 6 Settings Button ..................130 4.2.7.4 Display Buttons ..................132 4.2.7.5 Display ......................133 4.2.7.6 View Button ....................138 4.2.7.7 Performance Mode Button .................138 4.2.8 Performance Controls ....................138 4.2.9 Slot Volume Faders ....................139 4.2.10 Pads .......................... 140 TRAKTOR KONTROL D2 - Manual - 6...
- Page 7 TRAKTOR Won’t Start ....................162 6.1.2 TRAKTOR Crashes ...................... 162 6.1.3 Updates ........................163 Getting Help ..........................163 6.2.1 Knowledge Base ......................163 6.2.2 Technical Support ...................... 163 6.2.3 Registration Support ....................164 TRAKTOR KONTROL D2 - Manual - 7...
- Page 8 Table of Contents 6.2.4 User Forum ........................ 164 Technical Specification ..................... 165 TRAKTOR KONTROL D2 - Manual - 8...
-
Page 9: Welcome To The World Of Traktor Kontrol D2
Thank you for choosing TRAKTOR KONTROL D2. What is TRAKTOR KONTROL D2? TRAKTOR KONTROL D2 provides a direct tactile interface to TRAKTOR PRO's features and al- lows you to achieve more with the controller hardware so you have to do less on your computer screen. - Page 10 CONTROLLER EDITOR Manual Besides using D2 with the dedicated TRAKTOR software, you can also use it as a powerful and highly versatile MIDI controller with any other MIDI-capable application or device. This is made possible by the CONTROLLER EDITOR software, an application which allows you to as- sign MIDI controller messages to D2's pads, knobs, faders and encoders.
-
Page 11: Manual Conventions
Welcome to the World of TRAKTOR KONTROL D2! Manual Conventions • Registration Support You will find more information on these in chapters ↑6.1, Troubleshooting ↑6.2, Getting Help. Manual Conventions This section introduces you to the signage and text highlighting used in this manual. This man- ual uses particular formatting to point out special facts and to warn you of potential issues. - Page 12 Results of actions are indicated by this smaller arrow. → Naming Conventions Throughout the documentation, we will refer to the TRAKTOR KONTROL D2 hardware control- ler either as the controller or simply D2. The TRAKTOR 2 software and TRAKTOR SCRATCH will be referred to as TRAKTOR.
- Page 13 Welcome to the World of TRAKTOR KONTROL D2! Manual Conventions Numbering scheme for FX and Performance controls Display Buttons On each side of a display, there are two buttons marked by a square icon. To differentiate them from each other, we'll refer to them as depicted here:...
- Page 14 Welcome to the World of TRAKTOR KONTROL D2! Manual Conventions Numbering scheme for Display Buttons Pads Each Deck comes with eight multi color pads. Where necessary, we'll refer to them in this or- der: Numbering of the Pads in the PERFORMANCE section...
-
Page 15: Using Your D2-Getting Started
DJ sessions. General Prerequisites We assume here that your TRAKTOR KONTROL D2 system is already up and running. If that's not the case, please follow the instructions in the separate Setup Guide and return to this chapter when you are ready. -
Page 16: Using The Browser
Browser, and how to load tracks into Decks. 2.1.1 Opening the Browser To open the Browser: Push the BROWSE encoder. ► The Browser will be displayed in the display. TRAKTOR KONTROL D2 - Manual - 16... -
Page 17: Scrolling Through Music Folders
Press the BROWSE encoder to open a folder. ► Press the BROWSE encoder to load a track. ► To return to the previous folder: Press the BACK button. ► To exit the Browser: TRAKTOR KONTROL D2 - Manual - 17... -
Page 18: Browsing Using Touch Interactions
2.1.3 Preview Tracks In the Browser of the TRAKTOR KONTROL D2 it is possible to preview tracks directly. The pre- view will be audible in TRAKTOR's Output Review channel routing to an output channel on your audio interface that is connected to your mixer. -
Page 19: Sorting Tracks
To speed up scrolling through folders including a very large number of tracks, you can sort the tracks by categories TITLE, ARTIST, BPM, IMPORT DATE, #, and KEY. The selected category is dis- played at the bottom-left in the Browser. To sort your tracks by another category: TRAKTOR KONTROL D2 - Manual - 19... - Page 20 The tracks will then be resorted. Additionally, you can display the tracks in ascending or descending order: Press the button 1 to switch between ascending and descending order. ► The Browser displaying tracks in descending order. TRAKTOR KONTROL D2 - Manual - 20...
-
Page 21: Loading And Playing A Track
Let’s load the track “Techno 1” from the included demo tracks on to Deck A. You can check this by looking at the display: you should see a blue indicator reading A: The Deck Display with DECK A indicator. TRAKTOR KONTROL D2 - Manual - 21... - Page 22 While looking at the display reading No Track Loaded. Push Browse Knob, do the following: Press the BROWSE encoder to open the Browser. Navigate to the folder FAVORITES > Demo Tracks. Scroll to track Techno TRAKTOR KONTROL D2 - Manual - 22...
-
Page 23: Switching Deck Focus
Switching Deck Focus Although you can control four TRAKTOR Decks with the D2, it is only possible to have the fo- cus on one Deck. To access the respective other Decks, you have to switch the Deck focus. - Page 24 Using Your D2—Getting Started Switching Deck Focus • If Deck A or B is focused, the DECK button, the Mode Select Button and the LED ring around the LOOP encoder will be lit in blue. TRAKTOR KONTROL D2 - Manual - 24...
- Page 25 • If Deck C or D is focused, the DECK button, the Mode Select Button and the LED ring around the LOOP encoder will be lit in white. Switch the D2's Deck Control In order to access the other Deck side: TRAKTOR KONTROL D2 - Manual - 25...
-
Page 26: Switching Deck View And Zooming
Spilt View to show both Decks together in the display - Decks A and C on the left side, Decks B and D on the right side. The display focused on just one Deck has the fol- lowing appearance: TRAKTOR KONTROL D2 - Manual - 26... - Page 27 Press the View button located in the top-right corner of the display area to toggle Deck ► View between Single View and Split View. The display now shows both Decks in Split View. → The focused Deck always acquires the majority of space in the display. TRAKTOR KONTROL D2 - Manual - 27...
- Page 28 Changing Deck View does not change the Deck's focus. Zooming To get a more precise view of the waveform at the current Playhead position, you can zoom in or out of the waveform. TRAKTOR KONTROL D2 - Manual - 28...
- Page 29 Using Your D2—Getting Started Switching Deck View and Zooming To zoom into the waveform: Press Display button 3 repeatedly until you reach the desired zoom level. ► To zoom out of the waveform: TRAKTOR KONTROL D2 - Manual - 29...
-
Page 30: Using Cue Points
On a Track Deck in HOTCUE mode, pad 1 always represents the Start Cue Point that will be assigned automatically as soon as a track is loaded. The remaining pads can be assigned with further HotCues, as explained in the following section. TRAKTOR KONTROL D2 - Manual - 30... -
Page 31: Setting And Deleting Cue Points (Hotcues)
Prerequisites We assume here that you already followed the instructions in the previous tutorials (see Ena- bling Decks). TRAKTOR KONTROL D2 is in the following state: • The track “Techno 1” is loaded on Deck A. • The Deck A is set to HOTCUE mode (default state). - Page 32 In the display, a CuePoint will be highlighted by a blue indicator and the pad number. ► You can store up to eight CuePoints per track, including the first which is automatically set to the track start. The highlighted CuePoint in the display. To delete a Cue Point: TRAKTOR KONTROL D2 - Manual - 32...
-
Page 33: Aligning Tracks Using Hotcues
Snapping to the Beats You don’t have to worry about being precise enough to set a HotCue directly on a beat; by de- fault, TRAKTOR will make sure this happens automatically. This is because the Snap mode is on, indicated by the lit button located in the top-mid in the TRAKTOR software: The S and Q button in the TRAKTOR software. - Page 34 Using Your D2—Getting Started Adjusting Deck-specific tempo Adjusting the Deck-specific Tempo Press the Display Button 1. pop-up becomes visible on the display. TRAKTOR KONTROL D2 - Manual - 34...
- Page 35 The Deck-specific tempo has changed. → If the Deck is assigned as the MASTER, tempo adjustments made with the BROWSE encoder will also be applied to any other Deck with their SYNC button activated. TRAKTOR KONTROL D2 - Manual - 35...
-
Page 36: Using Keylock
To avoid issues like these, TRAKTOR provides the Keylock feature which uncouples the pitch and the tempo of a track. This allows you to basically lock the pitch while adjusting the tempo or vice versa. In order to... - Page 37 Using Your D2—Getting Started Using Keylock On a Deck, press the Display Button 2. pop-up opens on the display. For tracks which have been analyzed by TRAKTOR, their key is displayed here. TRAKTOR KONTROL D2 - Manual - 37...
- Page 38 Now press Display Button 1 to open the pop-up and adjust the track's tempo by turn- ing the BROWSE encoder. You can hear the tempo change, but the track's key remains intact. → TRAKTOR KONTROL D2 - Manual - 38...
- Page 39 If you want to change just the key of a track without affecting its tempo, proceed as follows: On a Deck, press the Display Button 2. pop-up opens on the display. If the track has been analyzed by TRAKTOR, its key will be displayed here.
- Page 40 Press the Display Button 2 again to exit the window in the display. You will hear that the track's key has changed, while the tempo is preserved. → TRAKTOR KONTROL D2 - Manual - 40...
-
Page 41: Using Your D2-Getting Advanced
• The track “Techno 1” is loaded on Deck A and is not playing. 3.1.1 Using Touch Strip to Seek Press the PLAY button. While holding the SHIFT button, the LED strip above the recessed touch-sensitive area will display this: TRAKTOR KONTROL D2 - Manual - 41... - Page 42 Using Your D2—Getting Advanced Using Touch Strip The LED segments represent the entire length of the track. The three orange segments represent the current playhead position within the track. TRAKTOR KONTROL D2 - Manual - 42...
- Page 43 Using Your D2—Getting Advanced Using Touch Strip While holding SHIFT, place your finger on the Touch Strip beneath the orange LEDs and swipe to the right to move forwards in the track's waveform. TRAKTOR KONTROL D2 - Manual - 43...
- Page 44 Using Your D2—Getting Advanced Using Touch Strip The three orange LEDs will follow your finger movement to the right, as does the playhead in the waveform. TRAKTOR KONTROL D2 - Manual - 44...
- Page 45 Using Touch Strip Swipe your finger to the left to move backwards in the track's waveform. The three orange LEDs will follow your finger movement to the left, just as the playhead in the waveform. TRAKTOR KONTROL D2 - Manual - 45...
-
Page 46: Using Touch Strip To Nudge/Pitchbend
Sync. The SYNC button's backlight goes dim. Listen to the track playing in Deck A, and press the PLAY button of deck on an appropri- ate downbeat to start playback. TRAKTOR KONTROL D2 - Manual - 46... - Page 47 Swipe your finger toward the left side of the Touch Strip until the blue LEDs disappear ► and a single orange LED is shown. If blue LEDs are shown above the left side of the Touch Strip on the Deck not assigned to MASTER: TRAKTOR KONTROL D2 - Manual - 47...
- Page 48 Swipe your finger toward the right side of the Touch Strip until the blue LEDs disappear ► and a single orange LED is shown. The phase-alignment is corrected and both tracks are perfectly synched. → TRAKTOR KONTROL D2 - Manual - 48...
-
Page 49: Using The Touch Strip To Scratch And Backspin
To enable the preference Touch to Scratch for the D2: In the TRAKTOR window click File, then Preferences to open the preferences window. TRAKTOR KONTROL D2 - Manual - 49... - Page 50 Using Your D2—Getting Advanced Using Touch Strip Navigate to the Traktor Kontrol D2 window, check the Shift + Touch to Scratch preference in the Touchstrip section. TRAKTOR KONTROL D2 - Manual - 50...
- Page 51 On the Deck: Hold the SHIFT button. On the Touch Strip swipe to the left. This will move the playhead slightly forwards in the track's waveform, and you will hear the typical scratch effect. TRAKTOR KONTROL D2 - Manual - 51...
- Page 52 Using Your D2—Getting Advanced Using Touch Strip On the Touch Strip swipe to the right. This will move the playhead slightly backwards in the track's waveform and you will hear the typical scratch effect. TRAKTOR KONTROL D2 - Manual - 52...
- Page 53 As soon as you cease moving your finger on the Touch Strip, the playhead remains at that → position. A scratch effect can only be created when the track is stopped. Performing a Backspin On the Deck: Hold the SHIFT button. TRAKTOR KONTROL D2 - Manual - 53...
-
Page 54: Playing With Loops In Hotcue Mode
As soon as you lift your finger from the Touch Strip, the playhead remains at that posi- → tion. Backspins are enhanced by the fact that TRAKTOR will stop the spin as soon as you re- lease the SHIFT button. Playing with Loops in HOTCUE Mode Now that we've covered all basic mixing techniques and how to use the Touch Strip, we will focus on D2’s looping facilities in HOTCUE mode. -
Page 55: Engaging And Disengaging A Loop
Press the LOOP encoder. The LED ring around the LOOP encoder starts to rotate to indi- cate the loop is activated. This will automatically add a loop at the current playback position in the track. → TRAKTOR KONTROL D2 - Manual - 55... - Page 56 Note that you can adjust the loop size either before or after you’ve set the Loop! If you ad- just the loop size beforehand, the next loop you set will acquire the set loop size value. TRAKTOR KONTROL D2 - Manual - 56...
-
Page 57: Moving A Loop
The step size you move the selection by is the same as the loop size, which is shown in the display. Turning the LOOP encoder when there is no Loop active lets you jump backward/forward through the track by the same step size. TRAKTOR KONTROL D2 - Manual - 57... -
Page 58: Storing A Loop
Storing Loops works in a similar way. Let's say you have stored two HotCues in the track currently playing: Press the LOOP encoder to engage a Loop. To store the active Loop, press an unlit pad. The pad lights up green. TRAKTOR KONTROL D2 - Manual - 58... -
Page 59: Playing With Loops In Loop Mode
When LOOP mode is activated, the top row of pads light up in green and the bottom row of pads light up in orange. The green pads represent four Loop sizes. The orange pads represent Beatjump sizes. TRAKTOR KONTROL D2 - Manual - 59... -
Page 60: Looping With Pre-Defined Sizes
Press the LOOP button to enable LOOP mode. The LOOP button lights up brightly and the pads also illuminate. With a track playing and LOOP Mode enabled, you can perform the following actions: TRAKTOR KONTROL D2 - Manual - 60... -
Page 61: Beatjumping
While a loop is engaged, rotate the LOOP encoder to alter the LOOP's size. This will pro- ► duce some interesting sound variations. Loop sizes can be changed in TRAKTOR's software preferences: Preferences>TRAK- TOR KONTROL D2>Loop Mode Sizes>Loop. 3.3.2 Beatjumping With the orange pads, you can jump forward or backward in the track by the amount prede- fined as Beatjump size. -
Page 62: Using Freeze Mode
Press pad 7 to jump forward by 1 beat. If jumped out of a loop, playback continues as normal. Beatjump sizes can be changed in TRAKTOR's software preferences: Preferences>TRAK- TOR KONTROL D2>Loop Mode Sizes>Beatjump. Using the Loop encoder to define Beatjump sizes in real time By default, pad 5 and pad 8 skip position back and forward by the amount shown in the dis- play as loop-size value. - Page 63 (see the image above). Deck A in Freeze Mode. Prerequisites We assume here that the D2 s in the following state: • The track “Techno 1” is loaded on Deck A and stopped. TRAKTOR KONTROL D2 - Manual - 63...
-
Page 64: Engaging Freeze Mode On A Track
Using Your D2—Getting Advanced Using FREEZE Mode 3.4.1 Engaging Freeze mode on a track On Deck A: Press PLAY to trigger playback. TRAKTOR KONTROL D2 - Manual - 64... - Page 65 Press any of the eight pads to trigger playback and get a feel for the slices. Press the HOTCUE button to exit Freeze mode. If no further slice is triggered, the Playhead position will leave the frozen area and playback continues towards the end of the track. TRAKTOR KONTROL D2 - Manual - 65...
-
Page 66: Adjusting The Freeze Slice Size
The SLICE SIZE window pops up in the display. While holding the FREEZE button, turn the Loop encoder to increase or decrease the slice size from a 1/4 of a beat to a range of 4 beats. Release the FREEZE button. TRAKTOR KONTROL D2 - Manual - 66... -
Page 67: Slicer Mode
Freeze mode and the playback behavior of the pads changes. Instead of playing from the slice start to the end of the entire track, pressing and holding a pad in Slicer Mode will play back just the corresponding slice repeatedly Slicer mode enabled. TRAKTOR KONTROL D2 - Manual - 67... - Page 68 Using Your D2—Getting Advanced Using FREEZE Mode To enable Slicer Mode on a Deck: Turn the Loop encoder to define the desired Loop size. Press the Loop encoder to engage a loop. TRAKTOR KONTROL D2 - Manual - 68...
- Page 69 Slicer mode to the active loop. The Slices appear in green. While Slicer mode is engaged you can perform the following actions: Press any of the pads to jump between the Slices. ► TRAKTOR KONTROL D2 - Manual - 69...
- Page 70 Using Your D2—Getting Advanced Using FREEZE Mode Hold a pad to retrigger its slice. ► Hold two pads simultaneously to loop the entire area between the first and last selected ► slice. TRAKTOR KONTROL D2 - Manual - 70...
-
Page 71: Using Flux Mode
• FREEZE mode: press and hold a pad to play back from a cue point. When you let go, play- back resumes at the second Playhead's position instead of continuing playback from the cue point. TRAKTOR KONTROL D2 - Manual - 71... - Page 72 Slicer mode on the pads. If the option Touch to Scratch is enabled in the TRAKTOR Preferences you can perform a backspin effect for two beats by using FLUX mode: Press the FLUX button to enable FLUX mode.
-
Page 73: Remixing With Remix Decks
Deck C. Remix Deck should be shown in the left display. Press the BROWSE encoder to open the Browser. Navigate to the folder TRACK COLLECTION > All Remix Sets > Remix Deck Tutorial. TRAKTOR KONTROL D2 - Manual - 73... - Page 74 Using Your D2—Getting Advanced Remixing with Remix Decks Select the Remix Set Remix Deck Tutorial and press the BROWSE encoder to load it. TRAKTOR KONTROL D2 - Manual - 74...
-
Page 75: Triggering Samples
The pads now illuminate orange and green, corresponding to the Remix Deck page shown in the display. 3.6.2 Triggering Samples For a demonstration of how a Remix Deck works, please perform the actions listed below in the following order: TRAKTOR KONTROL D2 - Manual - 75... - Page 76 The Sample is highlighted, the Playhead of its waveform moves, and the Sample will loop. Press SHIFT + pad 1 to stop playback. Now press pad 1, pad 2, pad 3, and pad 4 to trigger their samples. TRAKTOR KONTROL D2 - Manual - 76...
- Page 77 The first four pads light up. → The Samples play back. Select another Sample of a Remix Slot While the Samples are playing, you can switch to other Samples within the Remix Slots. For example: TRAKTOR KONTROL D2 - Manual - 77...
- Page 78 Select other Pages of a Remix Set A Remix Set can include up to 64 samples. On the D2 controller, the Remix Set is split into eight pages where each set of eight samples is stored. TRAKTOR KONTROL D2 - Manual - 78...
- Page 79 To select another page of a Remix Set: Press Display Button 4 or 3 to scroll a page downwards or upwards. ► Alternatively, hold the REMIX button while turning the Deck's LOOP encoder. TRAKTOR KONTROL D2 - Manual - 79...
-
Page 80: Triggering Samples Using Different Quantize Sizes
Using Your D2—Getting Advanced Remixing with Remix Decks 3.6.3 Triggering Samples using Different Quantize Sizes Press Display Button 2. QUANTIZE window opens in the display. TRAKTOR KONTROL D2 - Manual - 80... - Page 81 Now press the pads to trigger samples. After you press a pad, TRAKTOR will play out the currently playing sample to the end of → the 16 beats segment and then start playing back the sample assigned to the pad you pressed.
-
Page 82: Adjusting Levels And Using Filters Of Remix Slots
Just like Track Decks the Remix Decks can become out-of-phase at times, even when they have their corresponding SYNC button engaged. The Touch Strip provides you with immedi- ate visual feedback (via its LEDs) to allow you to make necessary adjustments. TRAKTOR KONTROL D2 - Manual - 82... -
Page 83: Capturing Samples From Track Decks (Using Remix Mode)
• Deck C is set up as an empty Remix Deck. • All Remix Slot Volume Faders are raised to the top. Capturing a Sample and Playback To capture a Sample of a track on Deck A: Set the focus on Deck A. TRAKTOR KONTROL D2 - Manual - 83... - Page 84 While holding CAPTURE, touch the Loop encoder to let the CAPTURE window pop-up and turn the Loop encoder to select the capture Source "DECK A". Release the Loop encoder to close the CAPTURE window and release the CAPTURE button. TRAKTOR KONTROL D2 - Manual - 84...
- Page 85 Using Your D2—Getting Advanced Capturing Samples from Track Decks (Using Remix Mode) Press the REMIX button to enable REMIX Mode. The pads should now be unlit because nothing is loaded into Remix Deck C. TRAKTOR KONTROL D2 - Manual - 85...
- Page 86 Turn the Loop encoder to define the capture size. On Deck press the PLAY button to start playback. Press one of the unlit pads to capture a Sample from the current playback position. TRAKTOR KONTROL D2 - Manual - 86...
- Page 87 The pad now illuminates a new color and the captured Sample is shown in the display. Playback of Captured Samples from a Track Deck As soon a Sample is captured, you can perform the following actions: TRAKTOR KONTROL D2 - Manual - 87...
- Page 88 Capturing Samples from Track Decks (Using Remix Mode) Capture further samples from another Capture Source and/or using another Capture size. ► The pads now illuminate with new colors and the first four captured samples are shown in the display. TRAKTOR KONTROL D2 - Manual - 88...
- Page 89 TOR software and selecting Save Remix Set. Rename the set by clicking on the Deck head- er where New Remix Set is displayed. Saved Remix Sets will be added to: BROWSER>TRACK COLLECTION>ALL REMIXSETS. TRAKTOR KONTROL D2 - Manual - 89...
-
Page 90: Adding Fx
3.8.1 Assigning Decks to the FX Units The FX Unit at the top of the D2 controls either FX Unit 1 or FX Unit 2 of the TRAKTOR soft- ware. This depends on the current Deck control: • When the Deck control is currently on Decks A and C, the FX Unit controls FX Unit 1 of the TRAKTOR software. -
Page 91: Setting Up An Fx Unit To Group Fx Mode
Setting up the FX Unit to Group FX Mode To load a Group FX into the FX Unit: Press the FX SELECT button of FX Unit at the top left of the D2. The FX Unit 1 menu opens. TRAKTOR KONTROL D2 - Manual - 91... - Page 92 Apply the Group FX to the Track As soon you set up your Group FX, activate the effects slots with the FX buttons and control one parameter of each effect with the FX knobs: TRAKTOR KONTROL D2 - Manual - 92...
- Page 93 Using Your D2—Getting Advanced Adding FX The FX Knobs and FX buttons. As soon you touch any FX knob, the FX panel will drop down in the display. ► TRAKTOR KONTROL D2 - Manual - 93...
-
Page 94: Exchanging Effects In The Group Fx
You can activate/deactivate each effect slot individually by pressing the corresponding FX ► buttons 2 to 4 below. 3.8.3 Exchanging effects in the Group FX To exchange any of the effects slots in a Group FX setup: TRAKTOR KONTROL D2 - Manual - 94... - Page 95 In the FX Unit menu, press FX Button 3 to exchange the effect in effects slot 2. An over- view of available FX will be displayed. Turn the BROWSE encoder to select the Gater effect and press the BROWSE encoder to load it. TRAKTOR KONTROL D2 - Manual - 95...
-
Page 96: Setting Up An Fx Unit In Single Fx Mode
• The D2 controls the right Decks B and D so that the FX Unit of the D2 controls FX Unit 2 of the TRAKTOR software. • The track "Techno 2" is loaded into Deck B. The track is playing and audible. To load a Single FX to FX Unit 2: TRAKTOR KONTROL D2 - Manual - 96... - Page 97 FX Unit 2's setup menu opens in the display. Press FX Button 1 to display the FX Unit 2 options. Ensure the options Single Insert are selected. Press FX Button 2 to display the list with available FX. TRAKTOR KONTROL D2 - Manual - 97...
- Page 98 FX. The FX Unit 2 menu closes. Press FX button 1 to activate the Delay. You will hear a delayed signal being added to the playing track. With the Delay enabled, you can perform the following actions: TRAKTOR KONTROL D2 - Manual - 98...
- Page 99 Turn FX Knob 1 clockwise. The Delay effect gets louder. The mix value in the FX drop- ► down panel in the display increases. Turn FX Knob 1 counter-clockwise. The Delay effect gets quieter. The mix value in the FX ► drop-down panel in the display decreases. TRAKTOR KONTROL D2 - Manual - 99...
- Page 100 Press FX button 3 to use the freeze feature (FRZ)of the Delay effect. Your track is muted ► and the Delay effect starts to decay. Press FX button 3 again to re-engage the track going into the Delay effect. TRAKTOR KONTROL D2 - Manual - 100...
-
Page 101: Storing A Snapshot
You can save a default state for any of the effects by doing the following: Adjust the FX knobs and buttons to your liking. Press the FX button 1 to display the FX Unit's options. TRAKTOR KONTROL D2 - Manual - 101... -
Page 102: Routing Fx
→ the values you stored. 3.8.6 Routing FX TRAKTOR’s effects are insert effects by default, but you can also use them as post fader ef- fects or as send effects. To change FX Routing, either select Insert, Post Fader, or Send in the FX Unit's options. -
Page 103: Selecting And Applying A Performance Mode
Set the Deck focus to Deck C. Press pads 2, 3 and 4 to trigger samples. Press the left Performance Mode button until the Display reads FX SEND just above the Per- formance controls. TRAKTOR KONTROL D2 - Manual - 103... -
Page 104: Using Performance Mode Pitch
You can have all Performance Modes enabled simultaneously. Skip through the Perform- ance Modes to check which modes are active. 3.9.2 Using Performance Mode Pitch When Performance Mode Pitch is enabled: Touch a Performance knob to expand the PITCH parameters overview in the display. TRAKTOR KONTROL D2 - Manual - 104... -
Page 105: Using Performance Mode Filter
You will hear the result in the audio and see the values change in the PITCH parameters → overview. 3.9.3 Using Performance Mode Filter When Performance Mode Filter is enabled: Touch a Performance knob to enlarge the FILTER parameters overview in the display. TRAKTOR KONTROL D2 - Manual - 105... -
Page 106: Using Performance Mode Fx Send
FX Unit/s. In this case, Deck C is assigned to FX Unit 2, which is set up as a Reverb. As soon as the Buttons are enabled in this Performance Mode, the audio effect from FX Unit 2 should become audible. When Performance Mode FX SEND is enabled: TRAKTOR KONTROL D2 - Manual - 106... - Page 107 You can hear a Reverb effect being added to the Remix Slots. Slot 1's value of 25% → means that you're listening to a mix of 75% unprocessed signal and 25% Reverb. TRAKTOR KONTROL D2 - Manual - 107...
-
Page 108: Working With Beatgrids
3.10 Working with Beatgrids TRAKTOR recognizes a track's BPM precisely and sets the Beatgrid. Some tracks, however, need manual correction e.g. a track with a complex rhythm or with uneven timing, coming from a tape machine or warped vinyl, and the D2 provides you with the controls to do this. - Page 109 In this example, you can see the Beatmarker isn't aligned with the very beginning of the → waveform. As a result, the track will not sync with others. In the following section you will learn how to fix a misaligned Beatgrid manually. TRAKTOR KONTROL D2 - Manual - 109...
-
Page 110: Correcting A Beatgrid Manually
In the background, the entire track is played back and the red playhead travels across the waveform displayed be- low the loop. TRAKTOR KONTROL D2 - Manual - 110... - Page 111 Rotate Performance knob 2 (BPM) to correct the detected BPM value in coarse steps. Try ► to align the second, third and fourth beat (in most cases indicated by the biggest peaks in the waveform) with the second, third and fourth Beatmarker. TRAKTOR KONTROL D2 - Manual - 111...
- Page 112 (rather than a large amount of motion) thus allowing for precise setting of the Beatgrid tempo over the length of the track. Beatgrid Zoom Mode To set the position of the Beatgrid with greater precision you can use the Beatgrid Zoom Mode: TRAKTOR KONTROL D2 - Manual - 112...
-
Page 113: Additional Help Actions
Rotate Performance knob 3 and 4 to adjust the Beatgrid. Press the button 1 again to exit Beatgrid Edit Zoom Mode. 3.10.3 Additional Help Actions Tap the Tempo Tap allows you to manually set the tempo by tapping along the playing track: TRAKTOR KONTROL D2 - Manual - 113... - Page 114 The Tick works like a metronome, giving you an audible pulse for every beat. Align the Tick and the beats in your track for perfect sync. You can only hear the Tick on the CUE (headphones), not the MAIN (audience). TRAKTOR KONTROL D2 - Manual - 114...
- Page 115 Reset your edits If your edits do not produce the desired result, you can undo your edits: Press Display Button 4 (RST). ► This will reset your edits to the auto-detected values. → TRAKTOR KONTROL D2 - Manual - 115...
- Page 116 The stored tempo (BPM) is locked and cannot be changed until you unlock it by clicking LOCK again. All tracks with a locked Beatgrid will show a small Lock Icon within the Browser. TRAKTOR KONTROL D2 - Manual - 116...
-
Page 117: Hardware Reference
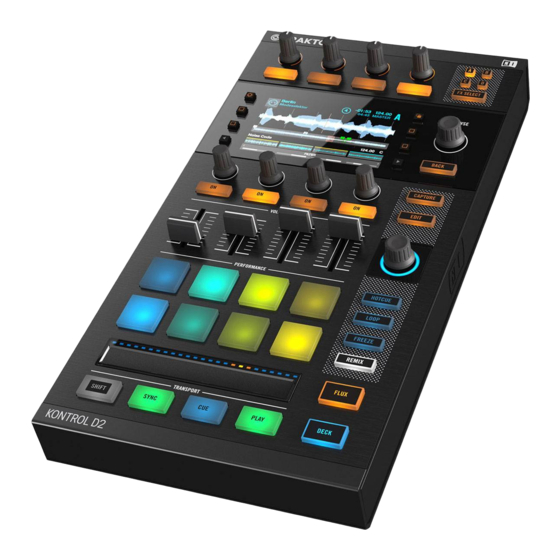
This chapter details the interface elements on your D2 and explains how they interact with the TRAKTOR software. This includes an overview of the main areas of the user interface, as well as a full reference for every button, knob, fader, and the color display. - Page 118 Overview of the Controller Sections on D2's Top side The top view of the TRAKTOR KONTROL D2 is divided into thwo main areas listed in the table below: The table also provides the links referring to the section with more information.
-
Page 119: The Deck
The Deck D2 features a Deck section that gives you hardware control over the software Decks in the TRAKTOR software. Active TRAKTOR Decks always work in one of the Deck modes, as either Track Deck, Remix Deck or Live Input. - Page 120 Link to section providing further information DECK button ↑4.2.1, DECK Button FLUX button ↑4.2.2, FLUX Button Mode Select buttons ↑4.2.3, Mode Select Buttons Loop Encoder ↑4.2.4, Loop Encoder EDIT button ↑4.2.5, EDIT Button TRAKTOR KONTROL D2 - Manual - 120...
-
Page 121: Deck Button
Deck or B) is focused and white when the sec- ondary Deck or D) is focused. 4.2.2 FLUX Button Press D2's FLUX button to enable Flux Mode for the focused Deck. FLUX Button TRAKTOR KONTROL D2 - Manual - 121... -
Page 122: Mode Select Buttons
Hotcue is the default mode for Track Decks. While in Hotcue mode, the pads store and trigger CUE markers in a track while it's playing. This mode is disabled automatically when you switch focus to a Remix Deck. TRAKTOR KONTROL D2 - Manual - 122... -
Page 123: Loop Button
• The first row of pads (green) allow you to loop part of a track. By default the pads are as- signed common loop sizes1/8 of a beat, 1/4 of a beat, 1/2 of a beat, 1 beat. You can change the loop sizes in TRAKTOR's D2 Preferences: Preferences>Traktor Kontrol D2>Loop Mode Sizes > Loop For more information, see the TRAKTOR manual. -
Page 124: Freeze Button
Beatjump sizes can be changed in TRAKTOR's software preferences: Preferences>TRAK- TOR KONTROL D2>Loop Mode Sizes>Beatjump. • If Quantize is activated, TRAKTOR waits for the next beat before jumping. • If Quantize is deactivated, TRAKTOR jumps immediately after pressing the pad. - Page 125 Adjust the size of the Freeze slices by pressing and holding the FREEZE button and then ► turning the Loop encoder. The waveform in the display adjusts its zoom level accordingly. You can vary slice sizes between 1/4 beat and 4 beats. TRAKTOR KONTROL D2 - Manual - 125...
-
Page 126: Remix Button
The Loop encoder is dedicated to looping functions on either Track Decks or Remix Decks. It has a press function to engage a loop, a rotate function to adjust the loop size, as well as a segmented LED ring indicating that a loop is engaged. TRAKTOR KONTROL D2 - Manual - 126... -
Page 127: Edit Button
4.2.5 EDIT Button Pressing the EDIT button lets you adjust a track's Beat Grid. The TRAKTOR software can ana- lyze your music and apply a Beat Grid which allows automatic beat-matching and synchroniza- tion. EDIT Button In most cases (through its... -
Page 128: Capture Button
On the D2's graphic color display, some functionality is dynamically shown or hidden by means of the Display buttons adjacent to the display. The following image and table give a detailed overview of the Display area and controls and provide links referring to sections with further information. TRAKTOR KONTROL D2 - Manual - 128... -
Page 129: Back Button
BACK button lets you navigate a level up in the fold- er structure, up to the Browser's top level. Pressing the BACK button for longer than a second lets you exit the Browser. TRAKTOR KONTROL D2 - Manual - 129... -
Page 130: Browse Encoder
FX Unit configuration screen. You can configure the Browse encoder to open the Browser on touch. To do so, activate the Auto Open Browser on Touch option in TRAKTOR's Traktor Kontrol D2 Preferences. 4.2.7.3 Settings Button The Settings button is on the top-left. - Page 131 When in the Settings, press Display Button 2 twice to switch to the TOUCH settings. Turn the Performance knobs underneath the display to increase or decrease global touch sensitivity for different kinds of controls: ENCODERS, ENDLESS KNOBS, KNOBS, and FADERS. TRAKTOR KONTROL D2 - Manual - 131...
-
Page 132: Display Buttons
Display Buttons Press any of these buttons to open the pop-up and see each button's functionality This is an overview of what these buttons do depending on what you see on the display. TRAKTOR KONTROL D2 - Manual - 132... -
Page 133: Display
View button. 4.2.7.5 Display Every active TRAKTOR Deck is either a Track Deck, Remix Deck or Live Input Deck. Here's an overview of the information D2's display provide for each of these: TRAKTOR KONTROL D2 - Manual - 133... - Page 134 Hardware Reference The Deck Track Deck Track Deck View TRAKTOR KONTROL D2 - Manual - 134...
- Page 135 BPM value. SYNC indicates that the Deck is synchronized to a Tempo Master. If a Deck isn't synchronized at all, the Deck header shows tempo deviation in percent from the file's original tempo. TRAKTOR KONTROL D2 - Manual - 135...
- Page 136 Hardware Reference The Deck Remix Deck Remix Deck View TRAKTOR KONTROL D2 - Manual - 136...
- Page 137 BPM value. SYNC indicates that the Deck is synchronized to a Tempo Master. If a Deck isn't synchronized at all, the Deck header shows tempo deviation in percent from the file's original tempo. TRAKTOR KONTROL D2 - Manual - 137...
-
Page 138: View Button
Hardware Reference The Deck (7) The absolute position on TRAKTOR's timeline measured in Bars.Beats.Phrases. 4.2.7.6 View Button The View button is located in the top right corner of the display area. View Button It switches between view types: • Single View: Only the focused Deck is displayed. -
Page 139: Slot Volume Faders
D2 offers a separate volume fader per slot. This allows you to mix signals from up to four slots within a single Remix Deck, before it runs through the channel fader and the Crossfader. TRAKTOR KONTROL D2 - Manual - 139... -
Page 140: Pads
The Deck of the D2 comes with a set of 8 pads. Depending on the mode selected via the Mode Select buttons, these pads are assigned different functions. Pads Here's an overview of what the pads do in each mode: TRAKTOR KONTROL D2 - Manual - 140... - Page 141 In Loop mode, pressing a pad instantly loops playback for the number of bars set as Loop Mode Size in Preferences > Traktor Kontrol D2 > Loop Mode Sizes > Loop. These values are by default: • 1/8 Bar Loop •...
-
Page 142: Touch Strip
For Track- and Remix Decks, the LEDs work as a Beat Phase Meter, showing the focused Deck's beat phase offset from the MASTER Deck. This is the same meter as displayed in TRAKTOR's Deck. Direction of Scratching If you didn't learn scratching with LPs and turntables, you may find inversing the Touch Strip's direction more intuitive. -
Page 143: Transport Controls
↑5.3, Direction of Tempo Bending In TRAKTOR's default setting, swiping your finger on the Touch Strip has a similar effect to speeding up or slowing down an LP with your hand: • Move to the left to speed up the LP. - Page 144 Hardware Reference The Deck PLAY Button CUE Button button is tied to the Cue Points workflow in TRAKTOR. CUE Button button functions as follows: • If a Deck is playing, press to jump to the Floating Cue Point and stop playback.
-
Page 145: The Fx Unit
The FX Unit Above the Deck, the D2 features an FX Unit which can be assigned to any of the Decks. Four knobs and buttons allow you to control effects parameters in real time. TRAKTOR KONTROL D2 - Manual - 145... - Page 146 Control the 1st effect in the FX Unit. FX Knob 3 Controls FX parameter 2. Control the 2nd effect in the FX Unit. FX Knob 4 Controls FX parameter 3. Control the 3rd effect in the FX Unit. TRAKTOR KONTROL D2 - Manual - 146...
-
Page 147: Fx Select Button
The options in these FX Settings determine how you will use the FX Unit. 4.3.2 FX Unit Assignment In order to route a Deck's signal to an FX Unit, press the corresponding FX Assign button in the mixer channel. FX Assign Buttons TRAKTOR KONTROL D2 - Manual - 147... -
Page 148: The Rear Panel
Hardware Reference The Rear Panel In TRAKTOR's default setup with 2 FX Units, press the left FX button to assign the mixer ► channel to FX Unit 1. Press the right FX button to assign the channel to FX Unit 2. The FX assign buttons light up bright orange when assigned. -
Page 149: Kensington Lock Slot
USB 3-equipped computers. Due to the large amounts of data transmitted to the TRAKTOR KONTROL D2, it may not work properly when connected to a USB hub. Make sure to connect D2 directly to a USB port on your computer if possible. -
Page 150: Power Section
(2) ON/OFF switch: press this switch to turn your device on or off. Do not use the TRAKTOR KONTROL D2 with a power supply other than the one included in delivery. In case of loss or damage, make sure to purchase a replacement power supply ap- proved by Native Instruments for use with the D2. - Page 151 Hardware Reference The Rear Panel USB Hub TRAKTOR KONTROL D2 - Manual - 151...
-
Page 152: Preferences Pane In Traktor
Preferences Pane in TRAKTOR Preferences Pane in TRAKTOR Once configured via the Setup Wizard, a dedicated pane for D2 is added to TRAKTOR's Prefer- ences window, which lets you configure the behavior of the touch controls, as well as overall LED brightness for the back-lit buttons and the Loop and Beatjump Sizes assigned to each Deck's pads. -
Page 153: Restore Default
Preferences Pane in TRAKTOR Restore Default Restore Default This button recalls all factory default settings for the TRAKTOR KONTROL D2 and lets you choose its basic deck configuration via the Setup Wizard. Touch Controls A number of controls are sensitive to touch. TRAKTOR lets you activate touch functions, which will save you the dedicated press of a button for a few features. -
Page 154: Calibrate
Off states. Depending on your light conditions during a performance, it can be necessary to adjust these. On State Brightness: sets the brightness level for engaged buttons and pads. Dim State Percentage: sets the brightness level for inactive buttons and pads. TRAKTOR KONTROL D2 - Manual - 154... -
Page 155: Loop Mode Sizes
32, +LOOP. Enable MIDI Controls The TRAKTOR KONTROL D2 allows you to use the Performance Knobs, Performance Buttons, and the Performance Faders below the Display as MIDI output controls. You can use these controls to send MIDI messages to other software or external equipment. This feature is not enabled by default and requires some configuration. - Page 156 Preferences Pane in TRAKTOR Enable MIDI Controls Enable MIDI Controls option in the Preferences. To assign the MIDI message and MIDI channel to the various MIDI controls: Select Controller Manager tab in the Preferences. TRAKTOR KONTROL D2 - Manual - 156...
- Page 157 Generic MIDI from the list to create a new Generic MIDI Device. In the upper-right corner, select the MIDI port to use as the output for this Generic MIDI device. TRAKTOR KONTROL D2 - Manual - 157...
- Page 158 Deck side (assigned to Decks A and C), while the last 4 knobs, fad- ers, and buttons correspond to the right Deck side (assigned to Decks B and D). TRAKTOR KONTROL D2 - Manual - 158...
- Page 159 Pitch Bend message to this control, or you can hover your mouse over one of the other two menus to show a list o specific CC and Note numbers and names. You can then click one of these to map the control to the specified Note or CC. TRAKTOR KONTROL D2 - Manual - 159...
- Page 160 Press the Performance Mode buttons next to the display until the MIDI page appears. ► Touch a Performance knob to enlarge the MIDI pane displaying current parameters of the ► selected MIDI controls. TRAKTOR KONTROL D2 - Manual - 160...
- Page 161 Slot Volume Faders to output MIDI messages, make sure neither of the Decks control- led by the D2 is a REMIX Deck. Otherwise the Slot Volume Faders will still control the Re- mix Slot volumes instead of outputting MIDI. TRAKTOR KONTROL D2 - Manual - 161...
-
Page 162: Troubleshooting - Getting Help
• Try to rename the file collection.nml in the TRAKTOR 2 Root folder and restart TRAKTOR. This way, TRAKTOR will create a blank Collection. Re-import the renamed .nml file to re- store your Collection. -
Page 163: Updates
Instruments. The Online Support Form will ask you to enter information about your hard- ware and software setup. This information is essential for our Support team to be able to pro- vide you with quality assistance. You can reach the Online Support via: TRAKTOR KONTROL D2 - Manual - 163... -
Page 164: Registration Support
• The brand and specifications of your computer • The software version number The version number of your software is displayed in the TRAKTOR splash screen you see when the application launches. After startup, the same splash screen can be opened by clicking the TRAKTOR logo in the upper right corner of the user interface. -
Page 165: Technical Specification
• Operating temperature: +5 to +35 °C (41 to 95 °F), max 85% non-condensing humidity • Storage temperature: 0 to 40 °C (32 to 104 °F), max 85% non-condensing humidity Do not install this unit in locations exposed to high humidity or direct sunlight. TRAKTOR KONTROL D2 - Manual - 165...
Need help?
Do you have a question about the KONTROL D2 and is the answer not in the manual?
Questions and answers