Advertisement
Octagon 20 and 40 Digital high performance egg incubators
Contents
Section
1
2
3
4
5
6
7
8
9
10
11
12
13
Users instructions
Subject
2040xGB Issue6
Page
2
2
3
4
4
5
7
7
8
8
8
9
10
Advertisement
Table of Contents

Related Manuals for Brinsea Octagon 20


Summary of Contents for Brinsea Octagon 20
-
Page 1: Table Of Contents
2040xGB Issue6 Octagon 20 and 40 Digital high performance egg incubators Users instructions Contents Section Subject Page Introduction Unpacking Location and Installation Storage of eggs Temperature Humidity and Ventilation Egg setting Egg turning Hatching Cleaning up Servicing Troubleshooting Specifications... -
Page 2: Introduction
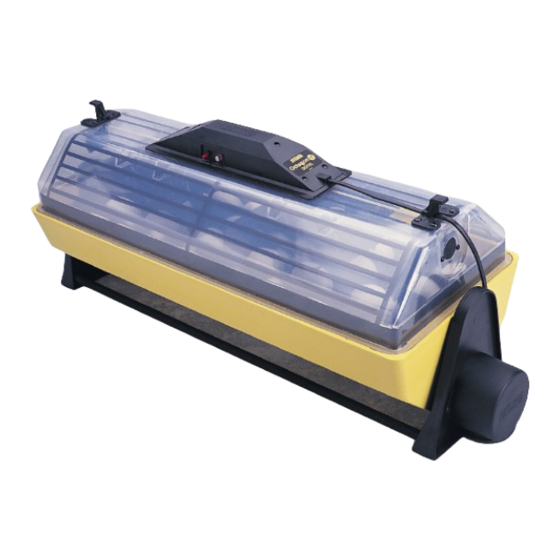
Introduction These instructions detail the operation of your new Octagon 20 or Octagon 40 digital incubator and Autoturn cradle. Please read these instructions carefully before setting up your machine to achieve best results and keep these instructions safe for future reference. This document includes recommended procedures for successful hatching but incubation involves the control and manipulation of a large number of factors and in certain circumstances different procedures may be necessary. -
Page 3: Location And Installation
3.2 If using without the autoturn cradle place the incubator upright on a flat level surface. 3.3 Remove the lid, lift out the egg tray(s) and fill one of the two water channels with water or 100:1 Brinsea Incubation Disinfectant Solution (two of the four for the Octagon 40) leaving the top of the liquid 3/4” (20mm) -
Page 4: Storage Of Eggs
4.2 Discard cracked, mis-shaped and heavily soiled eggs (if possible). Only wash soiled eggs using a brand egg wash solution such as Brinsea Incubation Disinfectant Concentrate following the manufacturer’s instructions. It is essential to wash eggs in solution which is significantly warmer than the egg. Bear in mind that all solutions will remove the outer cuticle from the egg as well as the dirt and may leave the egg at greater risk from bacterial contamination in the future. -
Page 5: Humidity And Ventilation
As a general guide for poultry set the ventilation control to about half open and maintain water in one of the two water channels in the Octagon 20 or two out of four channels in the Octagon 40. If the incubator is not full reduce the ventilation level accordingly. - Page 6 The best way of accurately measuring humidity levels at reasonable cost is to use a wet bulb thermometer. A specially designed wet bulb thermometer is available for the Octagon 20 and Octagon 40. Contact Brinsea or your local dealer for details. By comparing the temperature readings of a wet bulb (WB) thermometer with a normal (dry bulb) thermometer the relative humidity (RH) level can be found by using a table (see below).
-
Page 7: Egg Setting
Egg Setting 7.1 The Octagon 20 and Octagon 40 are designed to be as flexible as possible, accommodating eggs of different sizes up to (and including) goose eggs and in different orientations. Some experimentation may be necessary to maximise capacity. -
Page 8: Egg Turning
7.3 Set the eggs in rows between the plastic dividers. The dividers must be positioned such that the eggs rest on the tray bottom and are not pressured by the bar. The dividers prevent the eggs rolling. Eggs may be set on end (or at an angle) provided the large end of the egg is upwards. -
Page 9: Hatching
Hatching 9.1 If hatching in the Octagon 20 or Octagon 40 unplug the autoturn cradle, remove the incubator from the cradle, place on the work surface in the upright position and remove the egg dividers two days before the hatch is due. -
Page 10: Troubleshooting
Brinsea Products Service Dept. The functional parts of the Octagon 20, 40 and autoturn cradle are modular and parts are available and are readily exchanged by a suitably qualified person equipped with basic tools. Fitting instructions are supplied with replacement parts. -
Page 11: Specifications
45 Watts 90 Watts (typical average) 25 Watts 45 Watts Autoturn cradle 4 Watts 4 Watts Electrical Supply: 230v 50Hz Brinsea Products Ltd, Station Road, Sandford, N. Somerset, BS25 5RA Tel: (01934) 823039 Fax: (01934) 820250 sales@brinsea.co.uk www.Brinsea.co.uk e-mail: , website:...
Need help?
Do you have a question about the Octagon 20 and is the answer not in the manual?
Questions and answers