Table of Contents
Advertisement
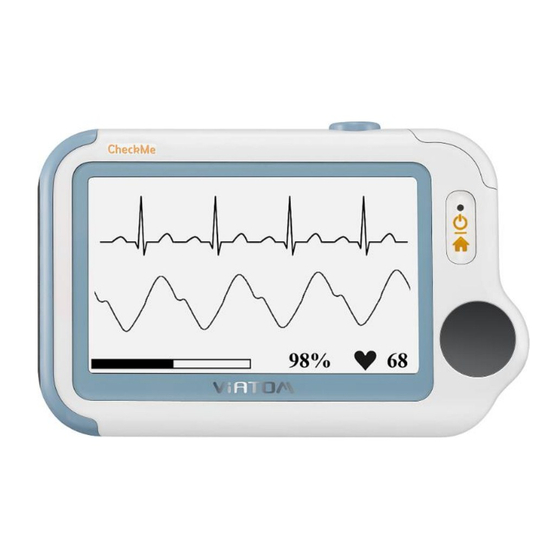
Checkme Pro Health Monitor
1.
The Basics ........................................................................................ 1
1.
Introduction .................................................................................... 3
2.
Getting Started ................................................................................ 7
3.
Using Checkme ................................................................................ 9
4.
Settings .......................................................................................... 24
5.
Review ........................................................................................... 27
6.
Maintenance ................................................................................. 30
7.
Accessories .................................................................................... 34
8.
Specifications ................................................................................ 35
9.
Electromagnetic Compatibility ...................................................... 39
Knowing and Tracking Your Health
User's Manual
Advertisement
Table of Contents

Related Manuals for Viatom Checkme Pro


Summary of Contents for Viatom Checkme Pro
- Page 1 User’s Manual Checkme Pro Health Monitor The Basics ..................1 Introduction ..................3 Getting Started ................7 Using Checkme ................9 Settings ..................24 Review ................... 27 Maintenance ................. 30 Accessories ..................34 Specifications ................35 Electromagnetic Compatibility ............39...
-
Page 2: The Basics
Do not use this device with a defibrillator. The Checkme Pro is MR unsafe. Do not use this device in an MR environment as it contains strongly ferromagnetic materials. Do not use the device in a combustible environment (i.e., oxygen- ... - Page 3 Do not dismantle the device, as this could cause damage or malfunctions or impede the operation of the device. This device is not intended for use by people (including children) with restricted physical, sensory or mental skills or a lack of experience and/or a lack of knowledge, unless they are supervised by a person who has responsibility for their safety or they receive instructions from this person on how to use the device.
-
Page 4: Introduction
Introduction 1.1 Intended Use The Checkme Pro Health Monitor is intended to be used for measuring, displaying, reviewing and storing of ECG (adults only), oxygen saturation and pulse rate (adults only for continuous data collection and recording, adults and pediatrics for spot checking) and temperature in the home or in healthcare facilities. - Page 5 the battery is fully charged; Blue: the battery is being charged; Red and flash: the battery is low; Multi-functional micro D connector It connects with external SpO cable, ECG cable, or charging cable. Home, Power On/Off When the monitor is off, press this button to power it on. ...
- Page 6 Connect the micro D connector side to the device and put your index finger in with the fingernail facing up. 1.3 Main Screen The Main Screen is shown as below. Swiping your finger from right to left can switch to the second page, and vice versa. OxiRecorder Tapping a button in the Main Screen will start a measurement, activate a function, or open corresponding menu.
- Page 7 Calendar Screen / Standby Mode. Battery indicator Please refer to Section 7.1 for details. If you failed to respond to the previous reminder event, then that event will be shown in this area. This icon appears when <Quick ECG> is enabled. Please refer to Section 5.4 for details.
-
Page 8: Getting Started
Application part type BF Manufacturer Symbol for “ENVIRONMENT PROTECTION – Waste electrical products should not be disposed of with household waste. Please recycle where facilities exist. Check with your local authority or retailer for recycling advice”. Against ingress of solid foreign objects ≥12.5mm IP22 diameter, Against dripping(15°... - Page 9 The equipment might be contaminated during storage and transport. Before use, please verify whether the packages are intact. In case of any damage, do not apply it to patients. 2.2 Power On/Off Press the Power On/Off button to power on the device. Press and hold Power On/Off button for 2 seconds to power off the device.
-
Page 10: Using Checkme
Using Checkme 3.1 Prior to Use Warnings Use only cables, sensors and other accessories specified in this manual. The device has no alarms and will not sound if the measurement reading is too low or too high. Before using ECG Before using Daily Check or ECG Recorder function, pay attention to the following points in order to obtain precise measurements. - Page 11 Do not use the Oximeter on the same hand/arm when using a blood pressure cuff or monitor. Do not use the Oximeter outside the specified operating and storage temperature ranges. The Checkme Pro is MR unsafe. Do not use this device in an MR ...
- Page 12 environment as it contains strongly ferromagnetic materials. Induced current could potentially cause burns. The SpO sensor may affect the MRI image, and the MRI unit may affect the accuracy of the oximetry measurements. Prolonged continuous SpO recording may increase the risk of ...
- Page 13 Setting Daily Check Reminder To better manage your health status, it is recommended to take Daily Check measurement at a regular interval, like once every day or once a week. To ensure that you never forget to take a Daily Check measurement, you can set a Daily Check reminder.
- Page 14 (1) Put the right index finger into the built-in SpO sensor. Use the finger nail to squeeze the edge of the SpO sensor cover, then move in upward to the left to raise it up as shown below. (2) Press the right thumb on the right electrode. (3) Press the right middle finger on the back electrode.
- Page 15 because of different configuration. Please refer to Section 9 for details. The ECG recorder offers four different methods to measuring ECG. Tap the icon to switch between two pages. As shown above, from left to right, there are: Method A: Lead I, right hand to left hand ...
- Page 16 Press the right thumb on the right electrode; Press the right index finger on the back electrode; For method A, press the left electrode to the left palm; For method B, press the left electrode to the left lower abdomen; It is important to maintain good contact with the ECG electrodes in order to achieve an accurate ECG reading.
- Page 17 Sit down or stand, stay calm; For method C, palms facing up, place electrodes marked with L/R in the middle of left/right wrist respectively; For method D, place electrodes marked with R/L in the right clavicle/left lower abdomen respectively; The display will then show your ECG waveform.
- Page 18 Please refer to Section 2.4 to understand the result screen. Quick ECG If the <Quick ECG> function is enabled, then you can start an ECG measurement very quickly by picking up the device and hold it according to method A. This saves time and is much easier for use. Especially for some people whose sight is not good, or when you feel a bit abnormal during sleep and don’t want to turn on the lights.
- Page 19 Relax your index finger and do exert pressure. When the device detects stable waveform, it will automatically start the measurement. The countdown bar moves from left to right. When the bar is fully filled, the device will show the measurement result.
- Page 20 If the device is in Calendar Screen, press the Home button. Tap the <Pulse Oximeter> icon. The display will then show your PLETH waveform, SpO and pulse rate. The device will not save your data until you press the button. Press the button to start collecting your SpO data.
- Page 21 The forehead (temples) must be free from perspiration and cosmetics. Taking the forehead temperature provides a current measurement of a person’s temperature. If you are uncertain about interpreting the results or if the values are abnormal (e.g. fever), please consult your doctor.
- Page 22 Press the Home button once, you will hear a “Bi” beep, which indicates the measurement starts. Then move the thermometer around the temple for around 3 seconds until you hear a “Bi-Bi” beep, which indicates the measurement is finished. Take down the device, and the screen shows the measurement result. Please refer to Section 2.4 to understand the result screen.
- Page 23 If the SpO sensor causes skin sensitivity, change to another finger. To start a continuously SpO2 recording, Place the device on your left hand at a proper position. Attach the device to your hand comfortably with the wristband. (Wristband not provided) Insert the SpO cable into the multi-functional connector.
- Page 24 recording, or tap “Close” button and return to the Main Screen. 3.7 Pedometer To start a Pedometer measurement, If the device is in Calendar Screen, press the Home button. In the Main Screen, select <Pedometer> to enter <Choose User> screen. If you have not created user, then please follow the instruction in Section 5.8 to add your user account.
-
Page 25: Settings
Tap the first row to set the repeat interval. Tap the button to change the setting. Tap the second row to set the event. You can define the event by selecting “Self-define”. Tap the third row, set the time when the reminder is triggered, then to save this reminder. - Page 26 In the Settings menu, you can button to page up or down to close the Settings menu 4.2 Choosing Language In the Settings menu, choose <General>. Choose <Language>. Choose the language from the list. 4.3 Setting ECG Bandwidth In the Setting menu, choose <General>.
- Page 27 to finish the setting. 4.5 Enabling/Disabling Quick ECG In the Settings menu, choose <General>. Tap <Quick ECG> to enable or disable this function. 4.6 Changing Sound Volume In the Settings menu, tap the <Volume> area to change volume directly. “X” means the volume is turned off. 4.7 User Management To use the Daily Check measurement, you must create your account.
-
Page 28: Review
Tap the information that you want to edit, and then modify. Tap <OK> and to return the < User Management > menu. To delete a user: In the Settings menu, choose <User Management>. Choose the user that you want to delete. Tap the button. - Page 29 5.1 Review Daily Check To review Daily Check records, In the <Data Review> menu, select <DailyCheck>. Choose the right user to open the list as below, then select one record to review more information as below. In this menu, you can: ...
- Page 30 Select to return to the Daily Check list. 5.2 Review ECG Recorder To review ECG Recorder records, in the <Data Review> menu, select <ECG Recorder>. The operations you can perform is almost the same with Daily Check. However there is no trending graph. 5.3 Review Oximeter To review Oximeter records, in the <Data Review>...
-
Page 31: Maintenance
<Pedometer>. The operations you can perform is almost the same with Pedometer Recorder. However there is no voice memo. Maintenance Warnings Have the device repaired by authorized service centers only, otherwise its warranty is invalid. 6.1 Warranty The product is warranted to be free from defects in materials and workmanship within warranty period when used in accordance with the provided instructions. -
Page 32: Care And Cleaning
Connect the other end of the USB charging cable to the USB charging port. Please make sure that the LED is blue, and press the Home button to enter the Main Screen, if needed. When the LED turns to green, it means the battery is fully charged. Then you can unplug the USB cable. - Page 33 distributor. Low battery indicator The battery is low. Charge the battery is blinking and try again. The ECG waveform The lead you Change another lead amplitude is small choose is not and try again. suitable for you. ECG waveform drifts 1.
- Page 34 sensor is too far contact with your away from your skin. skin. 3. Clean the sensor 3. The thermometer with a soft cloth or sensor is dirty. cotton.
-
Page 35: Accessories
Accessories Warnings Use accessories specified in this chapter. Using other accessories may cause damage to the device or not meet the claimed specifications. Part Number Description 540-00192-US ECG cable with 2 leadwires, snap 540-00193-00 finger sensor, 25 cm, FP-10... -
Page 36: Specifications
Specifications Classifications Degree protection against electrical Type BF shock Environmental Item Operating Storage Temperature 5 to 45° C -25 to 70° C Relative humidity (noncondensing) 10% to 95% 10% to 95% Barometric 700 to 1060 hPa 700 to 1060 hPa Degree of dust &... - Page 37 HR measurement range 30 to 250 bpm Accuracy ± 2 bpm or ± 2%, whichever is greater Measurement summary Heart rate Standards Meet standards of ISO 80601-2-61 *Measurement accuracy verification: The SpO accuracy has been verified in healthy adult volunteers by comparing to arterial blood samples measured with a CO-oximeter. Pulse oximeter measurements are statistically distributed and about two-thirds of the measurements are expected to come within the specified accuracy range compared to CO-oximeter measurements.
- Page 38 SpO2 test summary: This graph shows plots of the error (SpO2-SaO2) by SaO2 using the Checkme Pro health monitor with a linear regression fit and upper 95% and lower 95% limits of agreement. Each sample data point is identified by subject from a clinical study in non-motion conditions. Clinical study was performed using healthy adult subjects.
- Page 39 Checkme Pro with integrated sensor Checkme Pro with sensor FP10...
-
Page 40: Electromagnetic Compatibility
Electromagnetic Compatibility The device meets the requirements of EN 60601-1-2. All the accessories also meet the requirements of EN 60601-1-2 when in use with this device. Warnings Using accessories other than those specified in this manual may result in increased electromagnetic emission or decreased electromagnetic immunity of the equipment. - Page 41 Guidance and Declaration - Electromagnetic Immunity The Health Monitor is intended for use in the electromagnetic environment specified below. The customer or the user of the Health Monitor should assure that it is used in such an environment. Immunity test IEC60601 test level Compliance level Electromagnetic environment -...
- Page 42 Guidance and Declaration - Electromagnetic Immunity The Health Monitor is intended for use in the specified electromagnetic environment. The customer or the user of the Health Monitor should assure that it is used in such an environment as described below. Immunity test IEC60601 test Compliance...
- Page 43 Recommended separation distances between portable and mobile RF communications equipment and the device The Health Monitor is intended for use in an electromagnetic environment in which radiated RF disturbances are controlled. The customer or the user of the Health Monitor can help prevent electromagnetic interference by maintaining a minimum distance between portable and mobile RF communications equipment (transmitters) and the monitor as recommended below, according to the maximum output power of the communications equipment.
- Page 44 Viatom product and this manual. This manual may refer to information protected by copyrights or patents and does not convey any license under the patent rights of Viatom, nor the rights of others. Viatom intends to maintain the contents of this manual as confidential information.
Need help?
Do you have a question about the Checkme Pro and is the answer not in the manual?
Questions and answers
What all this measures? How to analysis sleep apnea??
The Viatom Checkme Pro measures oxygen levels and monitors sleep using a pulse oximeter to analyze sleep apnea. It tracks oxygen desaturation and other sleep-related parameters.
This answer is automatically generated