Table of Contents
Advertisement
Quick Links
Advertisement
Table of Contents
Troubleshooting

Related Manuals for Fujitsu lifebook t726


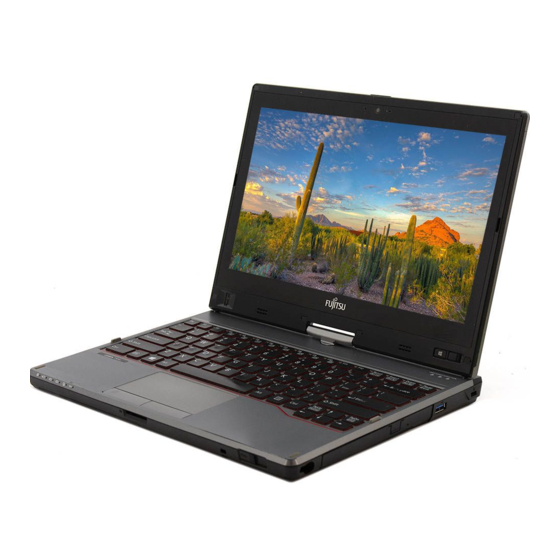
Summary of Contents for Fujitsu lifebook t726
- Page 1 System Operating Manual FUJITSU LIFEBOOK T726...
- Page 2 Contact address in North America FUJITSU AMERICA INC. 1250 East Arques Avenue, Sunnyvale, CA 94085-3470, U.S.A. Telephone: 800 831 3183 or 408 746 6000 "http://solutions.us.fujitsu.com" "http://solutions.us.fujitsu.com/contact" Have a question? Email us at: "AskFujitsu@us.fujitsu.com" Copyright © 2016 Fujitsu America, Inc. All rights reserved B5FK-6481-01ENZ0-00...
- Page 3 FUJITSU LIFEBOOK T726 Operating Manual Declarations of conformity Fujitsu Contact Information Ports and controls Important notes First-time setup of your device Working with the notebook Security functions Connecting external devices Removing and installing components during servicing Settings in BIOS Setup Utility...
- Page 4 Copyright and Trademark Information Fujitsu America, Incorporated has made every effort to ensure the accuracy and completeness of this document; however, as ongoing development efforts are continually improving the capabilities of our products, we cannot guarantee the accuracy of the contents of this document.
-
Page 5: Table Of Contents
Fujitsu Contact Information ........ - Page 6 USB port with charging function (Anytime USB charge) ....... . . 78 Fujitsu...
- Page 7 Acoustic warning ............... . 98 Fujitsu...
- Page 8 Windows® 10 Procedures ............. . . 129 Fujitsu...
- Page 9 Index ................. . 133 Fujitsu...
- Page 10 Contents Fujitsu...
-
Page 11: Declarations Of Conformity
Telephone: (408) 746-600 Declares that product: Base Model Configuration: LIFEBOOK T726 Notebook Complies with Part 15 of the FCC Rules. This device complies with Part 15 of the FCC rules. Operations are subject to the following two conditions: (1) This device may not cause harmful interference. (2) This device must accept any interference received, including interference that may cause undesired operation. -
Page 12: Fujitsu Contact Information
Fujitsu Software Download Manager (FSDM) utility. The FSDM utility is available from the Fujitsu Support site. FSDM will allow you to view a list of the most current drivers, utilities and applications to determine whether you have the latest versions. If you have a Windows 7 or Windows 10 operating system, you will need to go to the Support Site to download the FSDM Utility: "http://support.fujitsupc.com/CS/Portal/support.do?srch=DOWNLOADS". -
Page 13: Notational Conventions
Fujitsu Contact Information Notational conventions Pay particular attention to text marked with this symbol. Failure to observe this warning will endanger your life, will damage the device or lead to loss of data. The warranty will be invalidated if the device becomes defective through failure to observe these warnings. -
Page 14: Ports And Controls
5 = Fingerprint sensor (device-dependent) 13 = Touchpad buttons 6 = Ambient light sensor 14 = Removal button for stylus 7 = Speaker 15 = Tether eyelet for stylus tether 8 = Windows button 16 = Memory card slot Fujitsu... - Page 15 2 = External monitor port (VGA) 6 = Microphone port 3 = HDMI port 7 = Headphones port 4 = SmartCard reader (device-dependent) Rear 1 = USB port 3.0 3 = Volume-Down button, Volume-Up button 2 = LAN port Fujitsu...
- Page 16 2 = Memory upgrade compartment 7 = Battery charging status indicator 3 = Modular bay with optical drive 8 = Port for port replicator 4 = Modular bay release button 9 = Battery lock slider 5 = Battery lock slider Fujitsu...
-
Page 17: Important Notes
Wash your hands after using the device. This notebook complies with the relevant safety regulations for data processing equipment. If you have any questions about setting up your notebook in the intended environment, please contact your sales outlet or our Hotline/Service Desk. Fujitsu... -
Page 18: Additional Safety Notes For Devices With Radio Components
The energy efficiency is increased and environmental pollution is reduced. You save money and help protect the environment. Energy saving under Windows ► Make use of the available energy saving functions as described in chapter "Using the energy saving functions", Page Fujitsu... -
Page 19: Traveling With Your Notebook
Russia and the Commonwealth of Independent States (CIS), much of Europe, parts of Latin America, the Middle East, parts of Africa, Hong Kong, India, much of south-east Asia United Kingdom, Ireland, Malaya, Singapore, parts of Africa China, Australia, New Zealand Fujitsu... -
Page 20: Transporting The Notebook
This situation may occur due to pre-operating system boot password security settings or some other application running on the notebook. • Attempting to transport the notebook while power is on may damage the notebook due to shock or overheating. Fujitsu... -
Page 21: Cleaning The Notebook
If the notebook is exposed to water or other liquids with its connections open, liquid can penetrate the notebook and cause a malfunction. Do not continue to use the notebook. Switch it off and contact our hotline / our service desk (see enclosed list of service desks or visit our website at: "http://www.fujitsu.com/us/support/"). Fujitsu... -
Page 22: First-Time Setup Of Your Device
► Unpack all the individual parts. Packaging Transport ► Check your device for any visible damage which may have occurred during transportation. You may need to reuse the packaging in the future, for example if you need to ship your device. Fujitsu... -
Page 23: Choose A Location
► Connect the AC cable (1) to the AC adapter. ► Plug the AC cable (2) into a power outlet. ► Connect the AC adapter cable (3) to the DC jack (DC IN) of the device. Fujitsu... -
Page 24: Switching On The Device For The First Time
There are also cases in which if multiple applications are selected to install but one of them needs a reboot, the system will reboot and continue installing the rest of the selected applications. Fujitsu... -
Page 25: Working With The Notebook
Please refer to the notes in the chapter "Important notes", Page Status indicators Statusindicators Symbols The status indicators provide information about the status of the power supply, the drives and the keyboard functions, etc. Fujitsu... - Page 26 Scroll Lock indicator The indicator is illuminated: The key combination Scroll Lock has been pressed. The effect that this key has varies between applications. Fujitsu...
-
Page 27: Opening The Notebook
Working with the notebook Opening the notebook ► Fold the LCD screen upwards. Fujitsu... -
Page 28: Switching The Notebook On
Panel -) Power Options -Change what the power buttons do If you have assigned a password, you must enter this when requested to do so, in order to start the operating system. Detailed information can be found in the chapter "Security functions", Page Fujitsu... -
Page 29: Different Ways To Use Your Notebook
You must note that the screen cannot be turned completely on its own axis! From notebook to Tablet PC ► Raise the LCD screen into a vertical position. Fujitsu... - Page 30 At first you will feel some slight resistance, then the screen will turn easily and without friction. ► Turn the screen further until it has turned 180° and the hinge latches in. Fujitsu...
-
Page 31: Select Display Orientation (Portrait Or Landscape Format)
In the settings there are profiles saved for operation with different screen orientations. These profiles have preset standard configurations that can be modified as desired. These settings do not just affect the screen settings on the Tablet PC, but also on external monitors that are connected. Fujitsu... -
Page 32: From Tablet Pc To Notebook
Working with the notebook From Tablet PC to notebook ► Raise the LCD screen into a vertical position. Fujitsu... -
Page 33: Switching Off The Notebook
► Turn or move the screen further until it has turned 180° and the hinge latches in. Switching off the notebook Notebook ► Close all applications and then shut down your operating system (please refer to the "Operating system manual"). Fujitsu... -
Page 34: Closing The Notebook
Portuguese, Spanish, Brazilian, Norwegian (Bokmål and Nynorsk), Swedish, Finnish, Danish, Polish, Rumanian, Serbian (Cyrillic and Latin script), Catalan, Russian, Czech and Croatian. On Windows you can set the required language under Control Panel – Time, Language and Region – Language. Fujitsu... -
Page 35: Lcd Screen
finger input to open the tablet PC settings. ► Make sure that the monitor shown in the Display field corresponds to the screen that you want to calibrate. ► Tap or click on Calibrate, and then follow the instructions on the screen. Fujitsu... -
Page 36: Using The Stylus (Only Devices With Dual Digitizer)
Always replace the stylus in the slot when you are not using it. To remove from the slot, slide the stylus removal button at the front of the device to the right. The notebook is supplied with a stylus tether which you can attach to the eyelets on the stylus and on the notebook. Fujitsu... - Page 37 Opening a context Click with the right mouse button. Tap the desired item with the stylus menu and leave the stylus on the item for a moment. Moving the cursor - Place the tip of the stylus directly on the screen. Fujitsu...
-
Page 38: Calibrating The Stylus
► Replace the tip with one of the new tips that were supplied with your stylus. Insert the flat end of the tip into the barrel and exerting gentle pressure, push it in until it is firmly in place. If the tip is worn or damaged, discard it. Fujitsu... - Page 39 You can secure the stylus with a stylus tether to prevent accidentally dropping it or losing it. ► Secure the end of the stylus tether with the smaller loop to your stylus. ► Secure the end of the stylus tether with the larger loop to your notebook. Fujitsu...
-
Page 40: Using The Device As A Notebook
► Tap the touchpad once or press the left button once. The item is selected. Executing commands ► Move the pointer to the field you wish to select. Touchpad ► Tap the touchpad twice or press the left button twice. The command is executed. Fujitsu... -
Page 41: Keyboard
The following illustration shows how to access the different characters on keys with overlaid functions. The example applies when the Caps Lock key has not been activated. The illustration may differ from your device. Lock Fujitsu... - Page 42 1. Typeover mode: when typing, you overwrite the character at the current cursor position. 2. Insert mode: while typing, another character at the current cursor position is inserted, all characters right of the cursor will be shifted by one position. Fujitsu...
- Page 43 The cursor keys move the cursor in the direction of the arrow, i.e. up, down, left, or right. Cursor keys Cursor control Windows key The Windows key switches between the start screen and the last used application. Windowskey Menu key The Menu key opens the menu for the active application. Fujitsu...
-
Page 44: Virtual Number Keys
Further information about the status indicators can be found in chapter "Status indicators", Page Country and keyboard settings ► Make the country and keyboard settings as described in the documentation for your operating system. Fujitsu... -
Page 45: Key Combinations
This key combination increases the brightness of the screen. Fn+F7 Screenbrightness Decrease the volume This key combination reduces the volume of the internal speakers. Fn+F8 Volume Increase volume This key combination increases the volume of the internal speakers. Fn+F9 Volume Fujitsu... - Page 46 Cancel current operation This key combination can be used to halt an operation instantly Ctrl without clearing the keyboard buffer. Back tab This key combination moves the cursor back to the previous tab Shift stop. Shift+Tab Backtab Fujitsu...
-
Page 47: Tablet Buttons
This button has the same function as the Windows key on the keyboard. If the button is pressed in combination with the ON/OFF switch, the function is the same as for the Ctrl key combination. Volume-Up button Increase volume – Volume-Down button Decrease the volume Fujitsu... -
Page 48: Webcam
The webcam automatically adjusts itself to the current light level. For this reason the LCD display may flicker while the light level is adjusted. Further information on use of the webcam and additional settings for your webcam can be found in the help function of the program using the webcam. Fujitsu... -
Page 49: Rechargeable Battery
Never store batteries in the device. Removing and installing the battery Only use batteries approved by Fujitsu for your notebook. Never use force when fitting or removing a battery. Make sure that no foreign bodies get into the battery connections. -
Page 50: Removing A Battery
"Preparing to remove components", Page ► Slide the locking device (1) in the direction of the arrow and hold it in place. ► Slide the locking device (2) in the direction of the arrow. ► Remove the battery from the battery compartment (3). Fujitsu... -
Page 51: Installing A Battery
► Place the battery on the lower edge of the battery compartment. ► Push the battery into the battery compartment until you feel it engage (1). ► Slide the release latch into its locking position (2). ► Complete the removal, see chapter "Finishing component removal", Page Fujitsu... -
Page 52: Battery Charging Status Indicator
The battery is charged somewhere between 50 Green % and 100 %. Orange The battery is charged somewhere between 11 % and 49 %. The battery is charged somewhere between 1 % and 10 %. The LED is not lit The battery is discharged. Fujitsu... -
Page 53: Modules
The module can now be removed without any further actions being necessary. Removing a modular bay device Modular bay device Drive Weightsaver ► Slide the release mechanism (1) in the direction of the arrow and hold. ► Pull the modular bay device (2) out of the modular bay. Fujitsu... -
Page 54: Installing A Modular Bay Device
Do not store an optical disk in areas subject to high temperatures or humidity. You may use 8 cm / 3.15 inch or 12 cm / 4.7 inch diameter optical disks in the drive. When using a poor quality optical disk, vibrations and read errors may occur. Fujitsu... -
Page 55: Cd/Dvd Indicator
► Gently pull the drive tray (2) completely out. ► Place the optical disk in the drive tray with the printed side facing upwards. ► Remove an inserted optical disk. ► Push in the drive tray again until you feel it lock into place. Fujitsu... -
Page 56: Manual Removal (Emergency Removal)
► Switch your notebook off. ► Push a pen or a piece of wire (such as a paper clip) firmly into the opening (1). The drive tray will be ejected. You can now pull the drive tray (2) out of the drive. Fujitsu... -
Page 57: Using The Energy Saving Functions
When you fold down and close the LCD screen, depending on the setting in Windows, the notebook automatically enters a power saving mode. The recommended settings for the Windows energy saving functions are predefined as "Fujitsu Computer EcoSettings" in the Power Options of the Control Panel and can be displayed there. -
Page 58: Memory Cards
To avoid any loss of data, always follow the correct procedure for removing the card (see the documentation for your operating system). ► Press on the memory card (1). Memory card The memory card is released and can now be removed. ► Pull the memory card out of the slot (2). Fujitsu... -
Page 59: Speaker And Microphone
If you attach an external microphone, the built-in microphone is disabled. When you connect headphones or external speakers, the built-in speakers are disabled. You can find information on connecting headphones and a microphone in chapter "Connecting external devices", Page Fujitsu... -
Page 60: Sim Card
► Insert the SIM card (2) in the SIM card carrier as shown symbolically on the SIM card carrier. ► Push the SIM card carrier back into its location (3). ► Install the rechargeable battery again, see "Installing a battery", Page Fujitsu... -
Page 61: Removing A Sim Card
"Installing a battery", Page Optional wireless LAN/Bluetooth/4G radio components The installation of radio components not approved by Fujitsu will invalidate the certifications issued for this device. Depending on the device configuration you ordered, your device will be equipped with wireless LAN, Bluetooth or 4G. -
Page 62: Configuring Wlan Access
"WLAN specifications", Page 102. Access via Wireless WAN You can purchase the accessories for Wireless WAN reception from your Fujitsu dealer. If you have ordered a Wireless WAN module, your device will already be prepared when you receive it. You will find information on establishing the connection with the Wireless WAN network in the documentation for the hardware you plan to use. -
Page 63: Umts/Lte Antenna
UMTS/LTE antenna in the direction of the arrow (1). UMTS UMTS Please note: If you use your device in tablet mode, it should not be used in the secondary landscape position while the antenna is folded out. Fujitsu... -
Page 64: Ethernet And Lan
► Connect the network cable to your network connection (2). Your network administrator can help you to configure and use the LAN connections. The network cable is not included in the delivery scope. This type of cable can be obtained from a specialist dealer. Fujitsu... -
Page 65: Your Port Replicator (Optional)
5 = Display Ports 12 = Unlocking lever 6 = DVI-D monitor port 7 = External monitor port (VGA) The DVI port and the neighboring DisplayPort cannot be used at the same time. Fujitsu... -
Page 66: Connecting The Notebook To The Port Replicator
► Disconnect the AC adapter cable from the DC input connector (DC IN) of the notebook. ► Position the notebook so that it is in line with the back edge of the port replicator. ► Place the notebook onto the port replicator (1) and ensure that it locks into place correctly. Fujitsu... -
Page 67: Connecting The Ac Adapter To The Port Replicator
Switching on the notebook via the port replicator ► Press the ON/OFF button on the port replicator to switch on the notebook. The power-on indicator of the port replicator lights up. Fujitsu... -
Page 68: Disconnecting The Notebook From The Port Replicator
We recommend that the notebook is switched off or that the appropriate undocking function provided by the operating system is executed. ► Pull the unlocking lever in the direction of the arrow (1), until you hear the notebook unlatch. ► Lift off the notebook (2). Fujitsu... -
Page 69: Security Functions
If you forget your passwords you will need to contact our Service Desk. Deletion or resetting of passwords are not covered by your warranty and a charge will be made for assistance. Fujitsu... -
Page 70: Brief Overview Of The Security Functions
Brief overview of the security functions Detailed information about the security equipment of your system can be found in the "Professional Notebook" manual, on the "Drivers & Utilities" CD/DVD or on our website at "http://www.fujitsu.com/us/support/". Security function Type of protection... -
Page 71: Configuring The Fingerprint Sensor
► Install the fingerprint software to be able to use the fingerprint sensor (1). You can obtain further information on the fingerprint sensor in the "appendix: Miscellaneous Information". Fujitsu... -
Page 72: Using The Security Lock
Kensington Lock Cable, a sturdy steel cable, to help protect your notebook from theft. The Kensington Lock Cable is available as an accessory. Fujitsu recommends the use of a combination lock. ► Fit the Kensington Lock Cable to the mechanism on your notebook. -
Page 73: Protecting Bios Setup Utility (Supervisor Password And User Password)
You can only change the supervisor password when you have logged into the BIOS Setup Utility with the supervisor password. Password Supervisorpassword User password ► Start the BIOS Setup Utility and go to the Security menu. ► When changing the password, proceed exactly as when assigning a password. Fujitsu... -
Page 74: Password Protection For Booting The Operating System
If a supervisor password was set, an additional password for the hard disk can be set in the Hard Disk Security menu. The hard disk is protected by this password. Data on this hard disk can then only be read in another system if the correct password is entered. Fujitsu... -
Page 75: Smart Card Reader
Do not use force when inserting and removing the Smart Card. Make sure that foreign objects do not fall into the Smart Card reader. ► Slide the Smart Card into the Smart Card reader with the chip facing upwards (or downwards depending on the device) and to the front. Fujitsu... -
Page 76: Trusted Platform Module - Tpm (Device Dependent)
► Mark the TPM Security Chip Setting field and press the Enter key. ► Select the entry Disabled to disable the TPM. ► From the Exit menu, choose the option Exit Saving Changes. ► Press the Enter key and select Yes. The notebook will now reboot with TPM deactivated. Fujitsu... -
Page 77: Connecting External Devices
For more information about whether or not devices need to be switched off, please refer to the documentation supplied with the external device. Some of the external devices require special drivers (see the operating system and external device documentation). Fujitsu... -
Page 78: Connecting An External Monitor
You can also switch back and forth between the external monitor and the LCD screen of the notebook, see chapter "Key combinations", Page You can display the same picture on the external monitor and the notebook LCD screen simultaneously. Fujitsu... -
Page 79: Hdmi Port
Additional information can be found in the documentation for the USB devices. ► Connect the data cable to the external device. ► Connect the data cable to a USB port of the notebook. Device drivers USB devices will be automatically recognized and installed by your operating system. Fujitsu... -
Page 80: Usb Port With Charging Function (Anytime Usb Charge)
► Connect the data cable to the external device. ► Connect the data cable to a USB port (Antime USB charge) of the notebook. Fujitsu... -
Page 81: Connecting An External Sata Hard Drive (Esata) (Port Replicator Only)
► Click on the symbol for safe removal of hardware with the left mouse button. ► Select the device you wish to shut down and remove. ► Press the "Enter" key. Wait for the dialog box which tells you that it is now safe to remove the device. Fujitsu... -
Page 82: Connecting External Audio Devices
If you buy a cable from a retailer, please note the following information: The headphones port on your notebook is a "3.5 mm jack". If you want to connect headphones or speakers you will need a "3.5 mm jack plug". Fujitsu... -
Page 83: Removing And Installing Components During Servicing
The equipment and tools you use must be free of static charge. • Remove the AC plug from the power outlet before inserting or removing boards. • Always hold boards by their edges. • Never touch connector pins or conductors on the board. Fujitsu... -
Page 84: Preparing To Remove Components
Otherwise, there is a risk of suffering burns! As some components are exposed that are sensitive to static electricity, please take note of chapter "Notes on installing and removing boards and components", Page Fujitsu... -
Page 85: Remove The Cover
Removing a memory module ► Carefully push the two mounting clips outwards (1). Memory expansion Memory module The memory module will fold upwards (2). ► Pull the memory module out of its slot in the direction of the arrow (3). Fujitsu... -
Page 86: Installing A Memory Module
► Carefully push the memory module downwards until you feel it click into place (2). Attaching the cover ► Place the cover into position, following the direction of the arrow (1). ► Fasten the cover in place with the screw (2). Fujitsu... -
Page 87: Removing And Installing The Hard Disk
If you install the wrong screws, components may be damaged. ► Slide the cover in direction of the arrow (2). ► Lift the cover off the notebook (3). Fujitsu... -
Page 88: Removing The Hard Disk
Removing and installing components during servicing Removing the hard disk ► Unfasten the hard disk fastening (1). ► Remove the hard disk from the hard disk compartment (2). Fujitsu... -
Page 89: Installing A Hard Disk
Removing and installing components during servicing Installing a hard disk ► Place the hard disk into the hard disk compartment (1). ► Attach the retainer for the hard disk (2). Fujitsu... -
Page 90: Attaching The Cover
► Install the battery again, see "Installing a battery", Page ► Turn the notebook the right way up again and place it on a flat surface. ► Reconnect the cables that were previously disconnected. Fujitsu... -
Page 91: Settings In Bios Setup Utility
► Press the function key ► If a password has been assigned, enter the password and press the Enter key. If you have forgotten the password, contact your system administrator or contact our customer service center. The BIOS Setup Utility starts. Fujitsu... -
Page 92: Bios Setup Utility Operation
► Select the option you want to change with the cursor keys ↑ ↓ ► Press the "Enter" key. ► Press the key to exit the selected menu. ► For future reference, make a note of the changes you have made (for example, in this manual). Fujitsu... -
Page 93: Exiting Bios Setup Utility
► If you want to exit BIOS Setup Utility with these settings, choose Exit Saving Changes and Yes. Save changes and power off ► To save the changes and switch off your device, select Save Changes and Power Off and Yes. The changes are saved. Your device is shut down. Fujitsu... -
Page 94: Troubleshooting And Tips
► Note the ID number of your device. The ID number is found on the type rating plate on the back or underside of the casing. ► For further clarification of the problem, contact the Fujitsu Service Desk. When you do this, please have ready the ID number and serial number of your system. -
Page 95: The Notebook's Date Or Time Is Incorrect
"Key combinations", Page The LCD screen of the notebook is difficult to read LCDscreen LCDscreen Cause Troubleshooting Reflected glare ► Turn the notebook or alter the tilt of the LCD screen. ► Increase the brightness of the screen. Fujitsu... -
Page 96: The External Monitor Remains Blank
Change the following setting: ► Set the screen resolution: Set the screen resolution as described in the documentation for your operating system. ► Select monitor: Select monitor 1 or 2 as described in the documentation for your operating system. Fujitsu... -
Page 97: The Cursor Does Not Correctly Follow The Stylus Movements
► Charge the battery. ► Insert a charged battery. ► Connect the AC adapter to the notebook. The AC adapter is not connected properly. ► Check whether the AC adapter is properly connected to the notebook. ► Switch the notebook on. Fujitsu... -
Page 98: The Notebook Stops Working
The wireless component is switched on. Despite ► Check whether the wireless connection is this, the wireless connection to a network does enabled by the software. not work. ► Further information on using the wireless component can be found in the help files. Fujitsu... -
Page 99: The Battery Discharges Too Quickly
Supervisor PIN. Smart Card lost Troubleshooting Cause Smart Card lost. ► If you are working in a network, contact your system administrator, who can boot your notebook with a Supervisor Smart Card. Fujitsu... -
Page 100: User And/Or Supervisor Smart Card Lost
(for a charge). Acoustic warning Acoustic warnings Errors Cause Troubleshooting A beep sounds every few seconds. ► Charge the battery. The battery is almost dead. Fujitsu... -
Page 101: Error Messages On The Screen
Press <F1> to resume, <F2> to SETUP operating system. This error message appears if an error occurs ► Press the function key to access the during the self-test before starting the operating system. BIOS Setup. Fujitsu... - Page 102 System battery is dead - Replace and run SETUP service center. ► Contact your sales outlet or our customer System cache error - Cache disabled service center. ► Contact your sales outlet or our customer System timer error service center. Fujitsu...
-
Page 103: Technical Data
12.43 inches x 14.76 inches x 1 - 1.23 inches / 316 mm x 233 mm x 25.4 - 31.3 mm with rubber feet Weight depending on configuration from 3.84 lbs / 1.74 kg Input devices Keyboard 85 buttons, splashproof Touchpad 2 keys Fujitsu... -
Page 104: Wlan Specifications
Mbps max. data rate; IEEE802.11n: 300 Mbps max. data rate, IEEE802.11ac: 867 Mbps max. data rate Active frequency • 802.11n: 2.4 GHz or 5 GHz • 802.11b/g: 2400~2473 MHz • 802.11a: 4900~5850 MHz • 802.11a: 2.4 GHz / 5 GHz Fujitsu... - Page 105 *** Network key encryption (WEP) occurs with the number of bits given above, after deduction of the fixed length of 24 bits the user may however also set 40 or 104 bits. **** Depending on the particular practical application, the number of computers which can be networked is reduced if necessary. Fujitsu...
-
Page 106: Port Replicator (Optional)
–15°C ..60°C / 5°F ..140°F Rechargeable battery For information on the batteries used in your device, please see "http://solutions.us.fujitsu.com/www/content/support/contact/index.php". In addition to the main battery, you can order an optional battery which is inserted in the module slot. All rechargeable batteries are 6-cell batteries. -
Page 107: Ac Adapter For Use With Notebook And Port Replicator
50 Hz to 60 Hz (automatic) Max. rated current 0.7 A to 1.2 A Secondary Rated power 90 W Rated voltage 19 V Max. rated current 4.74 A An additional AC adapter or AC cable can be ordered at any time. Fujitsu... -
Page 108: Manufacturer's Notes
Remember – protecting the environment is a cooperative effort, and you should make every effort to protect it for current and future generations. * To order a new battery for your Fujitsu mobile computer, go to the Fujitsu shopping site "www.shopfujitsu.com"... -
Page 109: Ul Notice
For continued protection against risk of fire, replace only with the same type and rating fuse. WARNING: Danger of explosion if Lithium (CMOS) battery is incorrectly replaced. Replace only with the same or equivalent type recommended by the manufacturer. Dispose of used batteries according to the manufacturer’s instruction. Fujitsu... -
Page 110: Energy Star Compliance
To “wake” the computer from Sleep mode, press the Suspend/Resume Button. Energy saving benefits: Fujitsu ENERGY STAR qualified mobile PCs use about half as much electricity as standard equipment – saving half in utility costs. But more than that, ENERGY STAR also makes a difference for the environment. -
Page 111: Declarations Of Conformity
This device complies with Part 15 of the FCC Rules. Operations are subject to the following two conditions: (1) This device may not cause harmful interference, (2) this device must accept any interference received, including interference that may cause undesired operation. Fujitsu... -
Page 112: Fcc Regulatory Information
In cases in which the policy regarding use of Wireless LAN devices in specific environments is not clear (e.g., airports, hospitals, chemical/oil/gas industrial plants, private buildings), obtain authorization to use these devices prior to operating the equipment. Fujitsu... -
Page 113: Regulatory Information/Disclaimers
2. Increase the distance between the equipment and the receiver. 3. Connect the equipment to an outlet on a circuit different from the one the receiver is connected to. 4. Consult the dealer or an experienced radio/TV technician for help. Fujitsu... -
Page 114: Fcc Radio Frequency Exposure Statement
: (1) cet appareil ne doit pas causer d’interférence nuisible; (2) cet appareil doit accepter toutes les interférences reçues, y compris celles pouvant causer un mauvais fonctionnement de l’appareil. Toute modification n’ayant pas été expressément approuvée par la société Fujitsu America Incorporated peut annuler le droit de l’utilisateur de se servir du matériel. -
Page 115: Canada, Industry Canada (Ic)
In addition, users are cautioned to take note that high power radars are allocated as primary users (meaning they have priority) of 5250 - 5350 MHz and 5650 - 5850 MHz and these radars could cause interference and/or damage to LE-LAN devices. Fujitsu... -
Page 116: Avis Pour Le Canada
(ce qui signifie qu’ils sont prioritaires) des bandes 5 250 - 5 350 MHz et 5 650 - 5 850 MHz et qu’ils pourraient causer des interférences et/ou des dommages aux appareils de réseau exempts de licence. Fujitsu... -
Page 117: Appendix
IEEE802.11g mode; and 11 Mbps in IEEE802.11b mode. • The WLAN devices support the following encryption methods - WEP, TKIP, CKIP, and AES encryption. • The Wireless LAN devices are compliant with the following standards: WPA, WPA2, CCX1.0, CCX2.0, CCX3.0, and CCX4.0. Fujitsu... -
Page 118: Wireless Lan Modes Using This Device
That is why Ad Hoc networks are also known as peer-to-peer networks. Ad Hoc networks are an easy and inexpensive method for establishing network connectivity between multiple computers. Ad Hoc mode requires that the SSID, network authentication, and encryption key settings are identically configured on all computers in the Ad Hoc network. Fujitsu... - Page 119 (e.g., file servers, printers, databases). = An optional hub for a wired LAN may ** = ADSL modem, cable modem, or similar be required depending upon the type of access point used. Fujitsu...
-
Page 120: Deactivating/Disconnecting The Wlan Device
WLAN device can be disconnected in Windows using the WLAN icon in the system tray (Note that disconnecting via the icon in the system tray does not turn off the radio; it continues to transmit and receive even though it’s not connected.) Fujitsu... -
Page 121: Configuring The Wireless Lan
After you have configured your computer, you can connect to an active network by performing the following steps: 1. Click on the WLAN icon in the system tray. 2. Select Connect to a network. 3. Select a network from the list that appears, and click the Connect button. Fujitsu... -
Page 122: Troubleshooting The Wlan
Access Point (Infrastructure) connection: Retry connection after shortening the distance to the access point or removing any obstacles for better sight. Fujitsu... - Page 123 LAN device to associate but not authenticate to the wireless network. Incorrect IP address This only applies to networks configuration using static IP addresses. Please contact your network administrator for the correct settings. Fujitsu...
-
Page 124: Using The Bluetooth Device
Users are not authorized to modify this product. Any modifications invalidate the warranty. This equipment may not be modified, altered, or changed in any way without signed written permission from Fujitsu. Unauthorized modification will void the equipment authorization from the FCC and Industry Canada and the warranty. -
Page 125: Image Backup And Recovery Procedures
5. On Step 4, when the disc creation is completed, a message appears. Click Finishto exit the program. 6. Repeat Step 1: Select Recovery Disc from the list and repeat the above steps 2(a), 2(b), 2(c), 3, 4 and 5. Fujitsu... -
Page 126: Creating A Backup Of The System-Specific Software Drivers
To verify/change the boot-up priority (rather than booting-up from the hard drive or an external media drive), perform the following steps: 1. Power on your system. When the Fujitsu logo appears on the screen, press the key. 2. Insert the bootable disc into the drive tray. - Page 127 1. Press the Diagnostics Toolbutton to start the Diagnostics tool. 2. Read the note, and then click OK. 3. Choose one or more of the following options for diagnostics on the Fujitsu Hardware Diagnostics Tool window: CPU, Memory, Display, Hard Disk, CD/DVD/BD, Floppy Disc, Keyboard, and Mouse.
-
Page 128: Windows 7
The Partition Creation utility is used to change the C: and D: drive partition sizes. WARNING: It is highly recommended that you send your product to Fujitsu Service to replace a hard drive. A mistake could possibly destroy your computer, your new hard drive or both.) -
Page 129: Recovering Your Recovery Image Using Recovery And Utility
If you have installed a new hard drive or your hard drive is not bootable, perform the following steps. Note: You will need the Bootable disc and Recovery Image disc set for this recovery. 1. Power on your system. When the Fujitsu logo appears on the screen, press the key. -
Page 130: Installing The Software After The Recovery Image Is Restored
Bootable Disc, the computer does not need the essential access software. The recovery image already has the essential access software installed. 3. You can now connect to the Internet and download FSDM (Fujitsu Software Download Manager) from the support site and download all the software applicable to the model and OS using FSDM if they are not downloaded yet. -
Page 131: Windows® 10 Procedures
It is also important that you create a backup of the content of the C:\Drivers on your system to writable media or an external drive. System-specific software drivers are also available for download through the Fujitsu support site. Note: Most of the information below comes from the Microsoft® page "http://windows.microsoft.com/en-us/windows-10/windows-10-recovery-options"... - Page 132 Fujitsu, you can use it to reinstall Windows. You will need to install additional drivers and applications after reinstalling Windows. To reinstall Windows, follow the steps below: 1. Power on your system. When the Fujitsu logo appears on the screen, press the key. 2. Insert the bootable disc in your DVD drive.
- Page 133 A message will be displayed during this time stating Please wait while the content is being processed. 6. If the EULA is displayed for Fujitsu Software Auto Installer, accept the EULA, otherwise continue. 7. The Fujitsu Software Auto Installer user interface will be launched providing the ability to auto install the software downloaded from the support site.
-
Page 134: Downloading Driver Updates
To ensure that you always have the most current driver updates related to your system, you should occasionally access the Fujitsu Software Download Manager (FSDM) utility. The FSDM utility is available from the Fujitsu Support site. FSDM will allow you to view and download the most current drivers, utilities and applications to determine whether you have the latest versions. -
Page 135: Index
Fn + F10 44 Manual emergency removal 54 Fn key 41 CD/DVD indicator 53 Fn+F2 43 Charge capacity, battery 47 Fn+F3 43 Choose a location 21 Fn+F4 43 Components Fn+F5 43 Installing/Removing 81 Fn+F6 43 Configuration, BIOS Setup Utility 89 Fujitsu... - Page 136 72 Memory card Protecting with password 72 handling 56 Operation, notebook 23 inserting 56 Optical disk removing 56 Inserting 53 Memory expansion Removing 53 installing 84 Optical disks removing 83 Handling 52 Memory module Optical drive 52 Fujitsu...
- Page 137 Shift+Tab 44 Slot Memory cards 56 VGA socket 76 Speaker 57 Virtual number keys 42 Status indicators 23 Volume Supervisor password increase 43 change 71 reduce 43 entering 71 Volume control 57 removing 72 Switch between screen outputs 44 Fujitsu...
- Page 138 Index Wireless LAN Webcam 46 Safety notes 16 Weight saver switching module off 59 Removing 51 switching module on 59 Windows key 41 Wrong date/time 93 Wireless components 43 Fujitsu...
Need help?
Do you have a question about the lifebook t726 and is the answer not in the manual?
Questions and answers