Advertisement
Table of Contents
- 1 Table of Contents
- 2 Important Safety Precautions
- 3 Key Features
- 4 Parts & Accessories
- 5 Parts & Accessories
- 6 Control Panel
- 7 Remote Control
- 8 Installation
- 9 Installation
- 10 Operation
- 11 Operation
- 12 Drainage Operation
- 13 Maintenance
- 14 Troubleshooting
- 15 Miscellaneous
- 16 Quick Installation Guide
- Download this manual
Shinco – SPAE12W
12,000 BTU Portable A/C
Owners Manual
Thank you for selecting our high-quality mobile air conditioner from Shinco.
Before use, please read this entire manual carefully for information regarding
setting up your portable A/C, operating it, and tips on regular maintenance. For
any problems, please refer to the Limited Warranty Information at the back of
the manual.
Advertisement
Table of Contents

Related Manuals for Shinco SPAE12W


Summary of Contents for Shinco SPAE12W
- Page 1 12,000 BTU Portable A/C Owners Manual Thank you for selecting our high-quality mobile air conditioner from Shinco. Before use, please read this entire manual carefully for information regarding setting up your portable A/C, operating it, and tips on regular maintenance. For any problems, please refer to the Limited Warranty Information at the back of the manual.
-
Page 2: Table Of Contents
Table of Contents Table of Contents---------------------------------------------------2 Important Safety Precautions----------------------------------3 Key Features---------------------------------------------------------4 Parts & Accessories--------------------------------------------5-6 Control Panel--------------------------------------------------------7 Remote Control-----------------------------------------------------8 Installation--------------------------------------------------------9-10 Operation--------------------------------------------------------11-12 Drainage Operation----------------------------------------------13 Maintenance--------------------------------------------------------14 Troubleshooting---------------------------------------------------15 Miscellaneous------------------------------------------------------16 Quick Installation Guide ---------------------------------------17 - - 2 - -... -
Page 3: Important Safety Precautions
Important Safety Precautions CAUTION: For you and your families’ safety, please read the following safety precautions carefully before use of this air conditioner. Requirements Please make sure to place the air conditioner in a flat and dry place. Keep the air conditioner 20in away from any surrounding objects. -
Page 4: Key Features
Key Features Features Next generation condensate self-evaporation design without the need to pour water, and is environment friendly, and more energy-saving. L type evaporator design, enabling a more compact and efficient body. Simple and convenient installation of accessories such as exhaust pipe, etc. -
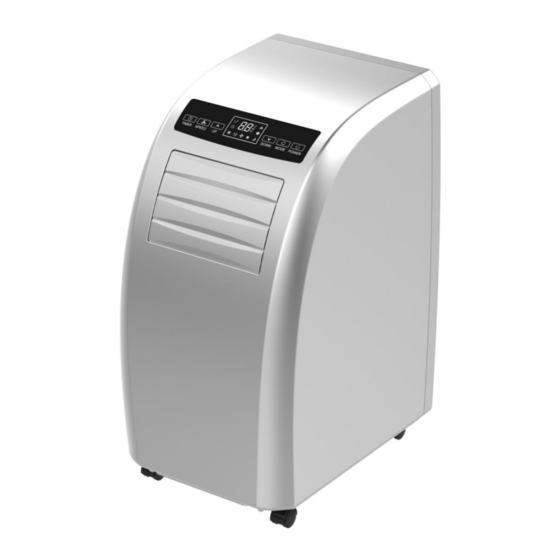
Page 5: Parts & Accessories
Parts & Accessories Parts List 1. Guide strip 2. Control panel 3. Inlet grid 4. Exhaust pipe 5. Corner wheel 6. Handle 7. Filter 8. Buckle of power line 9. Drainage outlet 10. Power line with plug 11. Exhaust outlet Fig. -
Page 6: Parts & Accessories
Parts & Accessories Accessory List and Fitment 1. Adjustable Exhaust Hose (Length 11in~60in) -------------1pc 2. Oblate Joint --------------------------------------------------------1pc 3. Round Joint (Diameter 6in) ------------------------------------1pc 4. Adjustable Window Sealplate (Length 22in~42in) -------1set 5. Screw (Type A) ----------------------------------------------------5pc 6. Screw (Type B) ----------------------------------------------------4pc Fig. -
Page 7: Control Panel
Control panel Fig. 3 Control Panel Instructions (Right to Left) POWER: Press this button to turn on or off the air conditioner. The indicator light will show if the unit is on. MODE:When unit is turned on or set with TIMER on, pressing this button can cycle between COOL/DRY/ FAN modes. -
Page 8: Remote Control
Remote control POWER: Press this button to turn the air conditioner on/off TIMER: Press this button to set the timer. SWING: Press this button, and the horizontal guide vents rotate automatically. TEMPERATURE CONVERSION BUTTON: Temperature is converted from ℃ to ℉. COOL: Press this button to select COOL mode. -
Page 9: Installation
Installation Before you Install Install in a flat and dry place, and keep a buffer of least 20in around the air conditioner to enable smooth circulation of air.(as shown in Fig.5) Exhaust Hose Assemply Connect the exhaust pipe assembly with the round joint (as shown in Fig.6). -
Page 10: Installation
Installation Illustration of Installation Wall mounted Fig. 10 Hose alignment Fig.12 Fig.11 Incorrect bending Fig.13 - - 10 - -... -
Page 11: Operation
Operation Operating the Different modes COOL Mode While unit is powered on or set on the timer, press MODE to cycle through the modes and select COOL mode. The corresponding indicator lamp to the selected mode shows what MODE is currently running. ... -
Page 12: Operation
Operation Timer setting Setting Automatic OFF Timer While the air conditioner is on, press the TIMER button which will put you in the TIMER mode and the LED temperature gauge will flicker “ ” 5 times. You can press the UP/DOWN buttons to cycle through and adjust the desired OFF time by 30 minute Increments up to 3 hours, and then 1 hour increments from 3 hours up to 24 hours. -
Page 13: Drainage Operation
Drainage operation Drainage Operation When running the air conditioner in COOL or DRY modes, there may be condensation that is produced as a byproduct, especially if used in humid or damp areas. An internal bucket will hold the excess water from the condensation, but once it is full the water full indicator will light up and an audible alarm will be issued once the water level in the bucket reaches a certain level. -
Page 14: Maintenance
Maintenance Cleaning CAUTION: Before cleaning, please turn off the air conditioner and pull out the plug. Cleaning the Surface Clean surface of the air conditioner with duster or semi-wet soft cloth. Do not use chemical reagents and solvents, such as benzene, alcohol and gasoline, etc. -
Page 15: Troubleshooting
Troubleshooting Please check the following before filing a warranty claim: Issue Check Solutions The air conditioner Is the unit powered off? Press power button to ON. does not work Is the unit not plugged in? Insert power plug. Have you checked the outlet Replace fuse or use and the fuse box? another outlet. -
Page 16: Miscellaneous
Miscellaneous Parameters of Fuse: Model: FSD Voltage: 250V Current: 3.15A Meaning of crossed –out wheeled dustbin: Do not dispose of electrical appliances as unsorted municipal waste, use separate collection facilities. waste, use separate collection facilities. Contact your local government for information regarding the collection systems available. -
Page 17: Quick Installation Guide
QUICK INSTALLATION GUIDE 1. Check Installation Kit For a more secure installation, use type B screws to secure Sealplate A to window frame and/or window. 3. Connect flexible venting hose with the Round Joint. Turn the Round Joint counter clockwise until it stops. 1 x Flexible venting Hose with 1x Oblate Joint 1 x Round Joint 1 x Sealplate A (22")
Need help?
Do you have a question about the SPAE12W and is the answer not in the manual?
Questions and answers