
Related Manuals for UC Logic Artisul D13

Summary of Contents for UC Logic Artisul D13
- Page 1 Artisul D13 Driver Version 1.0 User Manual for Windows Windows 7 / 8 / 8.1 Driver Version 1.X Version:Ver.2.1 Release Date:2015/11...
- Page 2 Artisul D13 Driver Version 1.0 Microsoft and Windows are either registered trademarks or trademarks of Microsoft Corporation in United States and/or other countries. Any additional company and product name mentioned in this documentation may be registered trademarks or trademarks. ARTISUL and UC-Logic are registered trademarks of UC-Logic Technology Corp.
-
Page 3: Table Of Contents
Artisul D13 Driver Version 1.0 Contents I. General Information ................4 OVERVIEW .................. 4 ARTISUL FUNCTIONS ..............4 SYSTEM REQUIREMENTS ............. 4 VERIFYING HARDWARE ............... 5 USAGE TIPS ................10 MAPPING TO MULTIPLE MONITORS ........... 10 II. ARTISUL configuration ..............11 Info ................... -
Page 4: General Information
Artisul D13 Driver Version 1.0 I. General Information OVERVIEW Welcome to the world of ARTISUL! You’ll be able to discover how easy it is to control your personal computer by using an U Pen instead of a mouse. The function of the U Pen is able to draw a line very thin, thick, light or dark (also known as “pressure sensitivity”). -
Page 5: Verifying Hardware
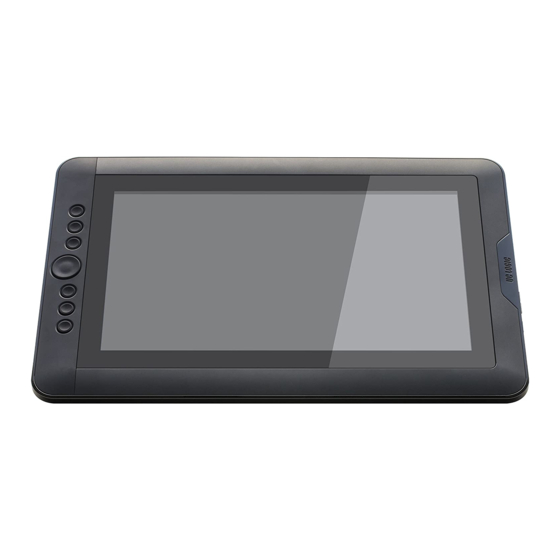
Artisul D13 Driver Version 1.0 VERIFYING HARDWARE Your ARTISUL and package contents are shown below. If anything is missing, contact your dealer immediately. - Page 6 Artisul D13 Driver Version 1.0...
- Page 7 Artisul D13 Driver Version 1.0 INSTALLATION HARDWARE INSTALLATION There are two ways to install your hardware: 1. Connect your ARTISUL with a HDMI & USB interface into the computer 2. Using external power adapter Note: Use only power adapter and cables approved by UC-LOGIC for use with ARTISUL.
- Page 8 Artisul D13 Driver Version 1.0 INSTALLING ARTISUL DRIVER ON WINDOWS Please download the driver from WWW.ARTISUL.COM “Support” page. Decompress the driver file and run SETUP.EXE . When installing the driver, follow the installation instructions on your screen and press the “OK”...
- Page 9 Artisul D13 Driver Version 1.0 After you have finished the driver installation and restarted the Windows system. If the device has been successfully installed, you will see a small ARTISUL icon ( ) appear in the system tray, which is normally at the lower right corner of the screen.
-
Page 10: Usage Tips
ARTISUL. Otherwise, your pen cursor will be misplaced on the screen. For ARTISUL D13, please make sure the other monitor resolution is set to 1920 x 1080. -
Page 11: Artisul Configuration
Artisul D13 Driver Version 1.0 II. ARTISUL configuration You may configure the ARTISUL by modifying the functions of the pen tip and the two barrel buttons, tap [Start] > [Settings] > [Control Panel], and double-tap the ARTISUL icon ( ), or tap on the ARTISUL icon ( ) in the system tray, usually located at lower right hand corner of the screen. - Page 12 Please follow these steps: 1. Right click your mouse on desktop and select “Screen resolution” 2. Select "Artisul D13" as your Display. 3. You may choose to rotate your ARTISUL screen under "Orientation." →After the ARTISUL driver has been installed in your Windows; if the "Supports Digital Ink"...
-
Page 13: Hot Keys
U pen tip is still within the detectable cursor range. To avoid invalid keystroke actions, please allow the pen to cursor to leave the screen of ARTISUL D13 before pressing your Hot Keys. (To leave the screen, allow your U pen tip to be at least 1.5" away from the surface of... - Page 14 Artisul D13 Driver Version 1.0 Default Return the Hot Keys setting to factory default.
-
Page 15: Pen Setting
Artisul D13 Driver Version 1.0 Pen Setting You can adjust “Double Click Time” and “Pressure Setting” in this tab. Double Click Time: Move the Speed Slider toward “Slow” if you want more time in double tapping with Pen Tip or less time if you move the Speed Slider toward “Fast”. - Page 16 We recommend for you to take some time to set up your own preferred pen settings. Note: Please close ARTISUL D13 control panel when you are finished with the Pressure Test .
-
Page 17: Calibration
Artisul D13 Driver Version 1.0 Calibration Monitor: If you have chosen to use the "Extend these displays" mode under the "Multiple Display" function, please use the ARTISUL "Monitor" section to select your corresponding screen to navigate your ARTISUL Upen. - Page 18 Artisul D13 Driver Version 1.0 Calibration U Pen: If you want to compensate for viewing angle. You can calibrate ARTISUL. 1. Press “Calibration U Pen” to activate the calibration screen. 2. Hold the pen perpendicular to the calibration screen and use the pen tip to click on the center of the crosshairs in the calibration dialogue.
-
Page 19: Monitor Tuner
Artisul D13 Driver Version 1.0 Monitor Tuner Calibrated Display Options These options are there to assist you with preparing your designs for CMYK printing. You may choose a different calibrated display setting depending on the type of paper you will be printing your work and the working light environment (this includes sunlight or the color temperature of your office light tubes etc.). - Page 20 Artisul D13 Driver Version 1.0 Color Temperatures You can select the default color temperature settings or the “User 1” to adjusts the red, green and blue color values.. Brightness You can adjust the brightness of your ARTISUL screen by selecting “Increase” or “Decrease”.
- Page 21 Artisul D13 Driver Version 1.0 Save & Restore Open App Defaults: ARTISUL has designed many settings for popular graphics application. Click into this button to select the file for your desired graphics application. Save Preferences: Save your Hot keys setting.
-
Page 22: Changing The Pen Tip
Artisul D13 Driver Version 1.0 III. Changing the Pen Tip Pull out the pen tip from U Pen by using the tip remover device built into the pen case. Push the new pen tip into the digital pen. -
Page 23: Question & Answer
Artisul D13 Driver Version 1.0 IV. Question & Answer Q: How can I get the latest updated software? A: You can download the new driver from our website (WWW.ARTISUL.COM). Uninstall your old driver: Click [Start] ► [All Programs] ► [TABLET] ► [Uninstall]. - Page 24 Artisul D13 Driver Version 1.0 Q: Can’t display Full Screen on my LCD Sketch Pad : Please follow these steps 1. If you use NVIDIA Graphics Card in your computer: a. Right click on your Desktop and click for the 「NVIDIA Control Panel」...
- Page 25 Artisul D13 Driver Version 1.0 2. If you use AMD Graphics Card in your computer: a. Right click on your Desktop and click for the 「AMD Catalyst Control Center」 b. Click 「My Digital Flat-Panel」and Select 「Scaling Options」 c. Setting Scaling Options to 「Overscan」 and click 「Apply」...
- Page 26 Artisul D13 Driver Version 1.0 Q: Under Adobe Flash Professional CC, when the pen tip first makes contact with the working area, a line will show up connected from the bottom margin making it difficult to navigate the brush tool。...
- Page 27 Artisul D13 Driver Version 1.0 Q: Pen won’t work after installed driver. : Please follow these steps 1. Please refer to ARTISUL user menu for how to install hardware, and reinstall your ARTISUL again. 2. Connect the ARTISUL to another USB port, preferably directly to the mother board.
- Page 28 Artisul D13 Driver Version 1.0 Q:My ARTISUL screen sometimes flickers or is always flickering. What can I do about it ? : If you experience flickering in ARTISUL monitor, please follow the instructions below for non-flickering display. Use Intel HD Graphics :...
- Page 29 Artisul D13 Driver Version 1.0 Select “Digital Display”. Select “Scale Full Screen”. Then click “Apply”...
- Page 30 Artisul D13 Driver Version 1.0 Use AMD Graphics : Run “AMD Catalyst Control Center” , Click “Preferences” and select “Advanced View”...
- Page 31 Artisul D13 Driver Version 1.0 Select ”My digital Flat-Panels””Properties digital Flat-Panels” Select “Artisul D13” and “Enable GPU Scaling” ,then press “Apply”...
- Page 32 Driver Version 1.0 III. Use Nvidia Graphics : Run NVIDIA Control Panel and click “Display””Adjust desktop size position” . Select “ArtMedia ARTISUL D13” . Select “Select a scaling mode” to “Full-screen” . Select “Perform scaling on: “ to “GPU” .
-
Page 33: The Right Setting Of Graphic Applications
Artisul D13 Driver Version 1.0 V. The right setting of graphic applications Some applications need to change their setting that ARTISUL can has correct action. 1. SAI Please follow these steps: Find 「misc.ini」 in SAI folder. Right click on misc.ini and select “Edit”... - Page 34 Artisul D13 Driver Version 1.0 Clip Studio Paint Run Clip studio paint and press 「Ctrl+K」 to open 「Preferences」 Select “Tablet” “Using tablet service” please select “Tablet PC” Press “ OK “ and restart Clip Studio Paint...
-
Page 35: How To Care For Your Artisul
Artisul D13 Driver Version 1.0 VI. How to care for your ARTISUL Keep the U Pen and the ARTISUL LCD screen surface clean. Dust and dirt particles can stick to the pen and cause excessive wear to the screen surface.。... -
Page 36: Appendix 1: Troubles And Solutions
Be sure you are using only the pen that came with your product, or a accessory pen specified for use with ARTISUL D13. Other pens may not function properly on ARTISUL D13. Please try uninstall ARTISUL driver and install it again. -
Page 37: Appendix 2: Uninstall Artisul Driver
Artisul D13 Driver Version 1.0 application. Appendix 2: Uninstall ARTISUL Driver. 1. Go to “Control Panel”. 2. Select “Uninstall a program” 3. Double click “ARTISUL Driver” 4. Click “OK” when the uninstallation instructions show on your screen 5. Wait uninstall successfully message and click “OK” to reboot computer. -
Page 38: Appendix 3: Hot Key Comparison Table
Artisul D13 Driver Version 1.0 Appendix 3: Hot Key comparison table Hot key Keyboard Shortcuts Copy Ctrl + C Ctrl + X Paste Ctrl + V Undo Ctrl + Z Close the Active Item/App Alt + F4 Modifier... Ctrl Ctrl... - Page 39 Artisul D13 Driver Version 1.0 Photoshop Tools Hot key Keyboard Shortcuts Image Size Alt + Ctrl + I Fit on Screen Ctrl + 0 Actual Pixels Alt + Ctrl + 0 Zoom In Ctrl + Zoom Out Ctrl - Undo/Redo...
- Page 40 Artisul D13 Driver Version 1.0 Photoshop Tools Tools Hot key Keyboard Shortcuts Lasso Magic Wand Eyedropper Crop Healing Brush Brush Clone Stamp Eraser Type Hand Toggle Screen Modes Move Tool Selection Tool...
- Page 41 Artisul D13 Driver Version 1.0 Illustrator Tools Hot key Keyboard Shortcuts Group Ctrl + g Ungroup Ctrl + Shift + g Select All Ctrl + A Lock Selection Ctrl + 2 Select Artwork in Action Board Ctrl + Alt + A...
- Page 42 Artisul D13 Driver Version 1.0 Illustrator Tools Tools Hot key Keyboard Shortcuts Selection Direct Selection Magic Wand Lasso Type Paintbrush Pencil Eraser Shift + E Eyedropper Rotate Free Transform Toggle Screen Mode Hand Spacebar...
- Page 43 Artisul D13 Driver Version 1.0 Clip Studio Paint Tools Hot key Keyboard Shortcuts Select All Ctrl + a Clear outside of selected area Shift + backspace Clear Selection Ctrl + d New Raster Layer ctrl + shift + n Combine to layer below...
- Page 44 Artisul D13 Driver Version 1.0 Clip Studio Paint Tools Tools Hot key Keyboard Shortcuts Eraser Brush Fill Alt + backspace Free Transform Ctrl + Shift + t Scale up or down / Rotate Ctrl + t Text Color Picker Rotate...
- Page 45 Artisul D13 Driver Version 1.0 Corel Painter Hot key Keyboard Shortcuts Undo ctrl + z Redo ctrl + y Copy ctrl + c Paste (as new object) ctrl + v Copy Visible Ctrl + Shift + c Send to front...
- Page 46 Artisul D13 Driver Version 1.0 Corel Painter Tools Hot key Keyboard Shortcuts Brush Dropper (sample color) Fill ctrl + f Rotate Canvas Magic Wand Text Tool Layer Adjuster Lasso Use Last Used Filter Ctrl + / Screen toggle mode Ctrl + M...
Need help?
Do you have a question about the Artisul D13 and is the answer not in the manual?
Questions and answers