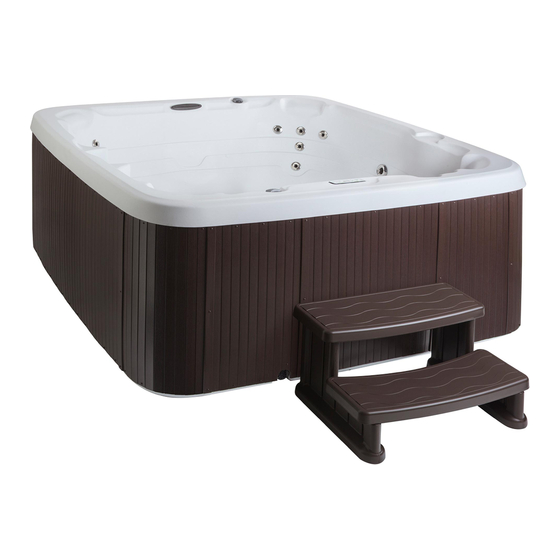
AquaTerra Benicia Owner's Manual

AquaTerra Benicia Owner's Manual

220-240v 50hz system
Hide thumbs Also See for Benicia:

Advertisement

OWNER'S MANUAL
220-240V 50Hz Models

Advertisement

Table of Contents
loading
Need help?

Need help?

Do you have a question about the Benicia and is the answer not in the manual?

Questions and answers

Subscribe to Our Youtube Channel

Summary of Contents for AquaTerra Benicia

  • Page 1 OWNER’S MANUAL 220-240V 50Hz Models...
  • Page 2 AquaTerra OWNER'S MANUAL 220-240V 50Hz System Owner's Record Locating the Spa Serial Number: The spa serial number label is located inside the equipment compartment. Equipment compartment access panel is below the spas 4-button topside control panel. You will need the spa model and serial number to properly register your spa and activate coverage.
  • Page 3: Table Of Contents

    TABLE OF CONTENTS TITLE PAGE SAFETY INFORMATION IMPORTANT SAFETY INSTRUCTIONS ............................1 IMPORTANT SPA INSTRUCTIONS ............................4 INSTALLATION PLANNING A LOCATION FOR YOUR SPA ..........................5 PLACING THE SPA ..................................6 EQUIPMENT ACCESS EQUIPMENT ACCESS PANEL ..............................7 ELECTRICAL REQUIREMENTS ELECTRICAL REQUIREMENT ..............................8 CONFIGURING SYSTEM ................................9 CONTROL PANEL OPERATION TEMPERATURE ADJUSTMENT (26°C - 40°C) ........................10 JETS OPERATION ..................................10...
  • Page 4: Safety Information

    SAFETY INFORMATION IMPORTANT SAFETY INSTRUCTIONS READ AND FOLLOW ALL INSTRUCTIONS AVOIDING THE RISK TO CHILDREN DANGER: • RISK OF CHILD DROWNING. Extreme caution must be exercised to prevent unauthorized access by children. To avoid accidents, ensure that children cannot use a spa unless they are supervised at all times.
  • Page 5 SAFETY INFORMATION • A ground terminal is provided on the control box. To reduce the risk of electric shock, connect this terminal to the grounding terminal of your electrical service or subpanel with a continuous green, insulated copper wire. The wire must be equivalent in size to the circuit conductors supplying the equipment.
  • Page 6 SAFETY INFORMATION RISKS TO AVOID DANGER: RISK OF INJURY • DO NOT sit in the filter compartment area. Sitting in this area can cause: a) Restriction of Filter Pump suction/vacuum b) Damage to components • Both can result in bodily harm. Should damage occur to components in this area, replace immediately! To reduce the risk of injury to persons, DO NOT remove floating weir, basket, and filter located in the filter compartment while the spa is running.
  • Page 7: Safety Sign

    SAFETY INFORMATION WARNING: The use of alcohol, drugs, or medication can greatly increase the risk of fatal hyperthermia in hot tubs and spas. TO REDUCE THE RISK OF INJURY: • The water in the spa should never exceed 40°C. Water temperatures between 38°C and 40°C are considered safe for a healthy adult.
  • Page 8: Installation

    INSTALLATION PLANNING A LOCATION FOR YOUR SPA Consider these things when determining where to place your spa. SAFETY FIRST: Make sure your spa is positioned so access to the equipment compartment and side panels will not be blocked. Be certain your installation will meet all city and local safety codes and requirements.
  • Page 9: Indoor Installation

    INSTALLATION BE AWARE: Damage caused by inadequate or improper foundation support is not covered by the spa warranty. It is the sole responsibility of the spa owner to provide a proper foundation for the spa. Make sure the foundation where the spa is placed drains water away from the spa. Proper drainage will keep components dry from rain and wet weather.
  • Page 10: Equipment Access

    EQUIPMENT ACCESS EQUIPMENT ACCESS PANEL Topside Control Panel Slat Slat Screw Equipment Access Panel Door Drain Hose Electrical Recess To access the equipment compartment (if your spa has vertical slats): • Remove 1 vertical slat and 3 screws on each side of Equipment Access Panel Door. •...
  • Page 11: Electrical Requirements

    ELECTRICAL REQUIREMENTS ELECTRICAL REQUIREMENT DO NOT POWER THE SPA WITHOUT FIRST FILLING WITH WATER! DANGER – RISK OF ELECTRIC SHOCK Installations that do not conform to the following procedures and requirements may expose users to electric shock. Non-conforming installations will not be covered under warranty. The electrical wiring of this spa must meet the requirements of your National Electric code and any applicable state or local codes.
  • Page 12: Configuring System

    ELECTRICAL REQUIREMENTS CIRCUIT BREAKER REQUIREMENTS: A new GFCI circuit breaker must be used for your spa installation. Do not use an existing breaker, as its condition is unknown. The 220-240V 50Hz systems use a single electrical service (one 13 amp or one 20 amp breaker) using 3 wires.
  • Page 13: Control Panel Operation

    CONTROL PANEL OPERATION INITIAL START-UP - When the spa is first powered up the control system begins a 2 minute Startup Mode. Different codes will display on the screen. Once Startup Mode completes, the actual temperature is displayed on the screen, and the spa will then begin to heat and maintain the water temperature and the Indicator Lights first filter cycle will start.
  • Page 14: Operational Modes

    CONTROL PANEL OPERATION ADJUSTING PRESET FILTER CYCLES Filter duration is programmable between 0 and 6 hours in 30 minute increments (0.5 hours) for both filter cycles. To program the cycle times: 1. Press and hold Light button for 5 seconds until F1 is displayed. 2.
  • Page 15: Diagnostic Lcd Message

    CONTROL PANEL OPERATION DIAGNOSTIC LCD MESSAGE Message Meaning Action Required No message on display. The control panel will be disabled until power Power has been cut off to the spa. returns. Spa settings will be preserved until next power up. The system has shut the heater DO NOT ENTER THE WATER.
  • Page 16: Component Operation

    COMPONENT OPERATION SPA COMPONENT OPERATION AIR CONTROL VALVE The air control valve serves to regulate the amount of air mixed with the water when the jets are operational. Rotate all the air control valves counterclockwise and observe the increased jet action.
  • Page 17: Fill-Up And Start-Up Instructions

    FILL-UP AND START-UP INSTRUCTIONS The following procedures should be followed on initial startup and whenever the spa is drained for routine maintenance. FILLING THE SPA WITH WATER 1. Clear all the debris from your spa. 2. Be sure to open all jets to allow as much air as possible to escape from the plumbing during the filling process.
  • Page 18: Adding Start-Up Chemicals

    ADDING START-UP CHEMICALS WATER CHEMISTRY GUIDELINES The following step-by-step instructions are a recommended guideline for balancing water chemistry. If unsure about any step in the process, please contact Blue Wave Spas. Initially, it is advisable to identify what minerals (e.g. iron) are present in the local source water. This will provide a better understanding of how to treat the water.
  • Page 19: Spa Maintenance

    SPA MAINTENANCE FILTER CARTRIDGE MAINTENANCE Every month, the filter cartridge should be cleaned to remove the objects and particles that have lodged in the cartridge pleats. Using household water pressure and a garden hose with a pressurized nozzle, push water from inside to outside of the pleats, forcing all the trapped particles out.
  • Page 20: Surface Care

    SPA MAINTENANCE SURFACE CARE Do not use solvents or abrasive cleaners to clean the spa. Typically, a mild detergent and water will resolve cleaning issues. COVER CARE Please keep your cover free from dirt at all times. Use a cover cleaner or a warm mild soapy water to clean the surface.
  • Page 21: Draining Or Winterizing

    DRAINING OR WINTERIZING Every three to six months, depending upon the water condition, you need to renew your water. CAUTION: READ THIS BEFORE DRAINING YOUR SPA To prevent damage to the spa’s components, TURN OFF SUBPANEL BREAKER BEFORE • DRAINING. Do not power back up until your spa has been refilled with water. •...
  • Page 22: Troubleshooting Procedures

    TROUBLESHOOTING PROCEDURES In the event the spa is not working the way it should, please first review all the installation and operating instructions in this manual and check the message on the panel display. If you are still not satisfied it is working properly, please follow the appropriate troubleshooting instructions. CAUTION! WARNING! SHOCK HAZARD! No User Serviceable Parts.
  • Page 23: Replacement Spa Parts

    INTERNATIONAL LIMITED WARRANTY REPLACEMENT SPA PARTS PART NUMBER DESCRIPTION 303279 SPA FILTER – 5 m² 303298 ROUND FILTER WEIR 303299 FILTER BASKET SKIMMER 303445 VORTEX JET 303443 7-PORT JET 303307 LED MULTI-COLOR LIGHT 303574 OZONATOR 303205 FILTER LID (LG. 31 cm, TRANSPORT II)
  • Page 24 304243.16 B (7/16)

This manual is also suitable for:

VeronaTransport ii

Table of Contents

Save PDF