Table of Contents
Advertisement
Advertisement
Table of Contents

Related Manuals for Dream Maker Spas Crossover Collection

Summary of Contents for Dream Maker Spas Crossover Collection
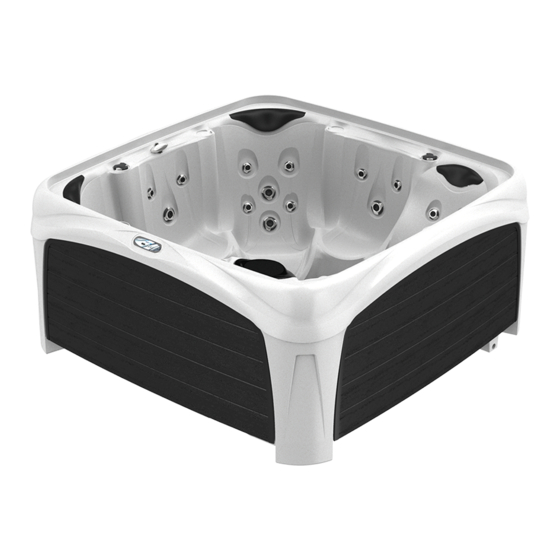
- Page 1 Crossover Collection Owner’s Manual PN 378107Rev E Euro...
- Page 2 OWNER’S INFORMATION DEALER Company ___________________________________________________________________ Address ___________________________________________________________________ Phone ___________________________________________________________________ E-mail ___________________________________________________________________ INSTALLER Company ___________________________________________________________________ Address ___________________________________________________________________ Phone ___________________________________________________________________ Model (see below) ______________________________________________________________ Serial Number (see below) ______________________________________________________ Color ___________________________________________________________________ Date of Delivery _________________________________________________________________ For the model and serial numbers, locate the white plate to the right or left of the access door, near the floor.
-
Page 3: Table Of Contents
TABLE OF CONTENTS IMPORTANT SAFETY INSTRUCTIONS……………………………………………………………………………………….4-5 SELECTING A LOCATION………………………………………………..………………………………………………………..6 FILLING AND DRAINING YOUR SPA……………………………………………….…………………………………………7 FOR THE ELECTRICIAN ELECTRICAL CONNECTIONS…………………………………………………………………8-9 SYSTEM OPERATION……………..……………………………………………………………………………………………….10-11 DISPLAY MESSAGES………………………………………………………………………………………………………………..12 SKIMMER-FILTER, CLEANING OR REPLACEMENT OF THE FILTER CARTRIDGE…………………………13 AIR INJECTOR VENTURI ADJUSTMENT…………………………………………………………………………………….14 ADJUSTABLE WATER FLOW JETS…………………………………………………………………………………………….14 WATERFALL FLOW ADJUSTMENT……………………………………………………………………………………………14 WATER CHEMISTRY………………………………………………………………………………………………………………..15-16 REPLACING THE LED LIGHT…………………………………………………………………………………………………….17 FREEZE PROTECTION……………………………………………………………………………………………………………..18... -
Page 4: Important Safety Instructions
When installing and using this electrical equipment, basic safety precautions should always be followed, including the following: READ AND FOLLOW ALL INSTRUCTIONS WARNING: To reduce the risk of injury, do not permit children to use this product unless they are closely supervised at all times. -
Page 5: Save These Instructions
Your spa can be a source of great pleasure. It offers healthful stimulating recreation and is a delightful fun center for you, your family and friends. However, it contains large quantities of water and is deep enough to present inherent dangers to life and health unless the following safety rules are strictly observed. -
Page 6: Selecting A Location
Selecting location Is permitting required for construction, electrical, or barriers? Most cities and counties require permits for exterior construction and electrical circuits. Some areas have codes requiring barriers such as fencing and/or self-closing gates on property to prevent unsupervised access to the property by children. Your local code enforcement department can provide information on which permits may be required and how to obtain them before delivery of your Is the support surface adequate to support the weight of the spa? Provide a solid flat level load-bearing surface. -
Page 7: Filling And Draining Your Spa
Filling Your Spa Remove the access door (Fig 1A) and assure the drain valve is closed and the cap is secure (Fig 2). Place a garden hose into filter area (Fig 3) and fill the spa with cold (never warm or hot) water 15 to 20 cm (6 to 8 inches) below the top edge of the spa (Fig 2.1). -
Page 8: For The Electrician Electrical Connections
FOR THE ELECTRICAIN Electrical connections must be made by a licensed certified electrician. Fig 5 The power supply must be protected by an RCD. Power requirements 230 VAC, 1PH, 50HZ, 20 or 32 AMPS (see below) 3 WIRE (LINE, NEUTRAL, GROUND) ACCESS DOOR CONTROL BOX The low amp rating is 16 amps (20 amp circuit). - Page 9 DIP SETTINGS 564413-04 MAIN POWER TO SYSTEM MUST BE TURNED OFF BEFORE ADJUSTING DIP SWITCHES TEST MODE OFF TEST MODE ON SETTINGS DUPLEX PANEL MINI PANEL N/A MUST BE OFF N/A MUST BE OFF SEE PUMP TABLE SEE PUMP TABLE 60HZ OPERATION 50HZ OPERATION STD, ECON, SLEEP ALLOWED...
-
Page 10: System Operation
1 0 2 Initial Start-Up When your Spa is first activated, it will perform a self-diagnostics test showing a series of numbers followed by Pr, then by --along with the low speed pump for approximately 7 minutes total. Also the internal clock that keeps track of the filtration cycles every 12 hours will start at that point. - Page 11 Spa Water Maintenance This function enables you to program the amount of water filtration time. Press to enter the programming mode. Once in the programming mode press to select the filtration time. F2 In this mode the water will be filtered for 2 hours every 12 hours. F4 In this mode the water will be filtered for 4 hours every 12 hours.
-
Page 12: Display Messages
MESSAGE MEANING ACTION REQUIRED No message on display. Power The control panel will be disabled until power returns. has been cut off to the spa. Spa settings will be preserved until next power up. Temperature unknown. After the pump has been running for one minute, the temperature will be displayed. -
Page 13: Skimmer-Filter, Cleaning Or Replacement Of The Filter Cartridge
SKIMMER FILTER CLEANING OR REPLACEMENT OF THE FILTER CARTRIDGE End nut The spa’s automatic surface skimmer filter is designed to remove floating debris and contaminants, such as body lotions, by drawing water through a specially formulated filter cartridge element. It is critical that this element be routinely cleaned. -
Page 14: Air Injector Venturi Adjustment
Air Injection Venturi Adjustment Air injection into the jet’s water stream is adjusted by turning the venture dials. Each dial is independent and controls about half of the jets, respectively. Turn them counter-clockwise to increase, and clockwise to decrease, the amount of air injected into the jets’ water stream. Adjustable Water Flow Jets The jet’s water flow is adjusted by turning the jet face. -
Page 15: Water Chemistry
Spa water chemistry (or water balance) affects the safety of your equipment as well as the appearance of your spa water. Water balance has five factors: pH, total alkalinity, calcium hardness, temperature and total dissolved solids. The pH is the most critical but total alkalinity and calcium hardness must also be watched closely. - Page 16 It is recommended that the spa be drained regularly depending on its size, location and the frequency of use. 1. Clean filter and cartridge periodically according to manufacturer’s instructions. 2. Keep the spa covered when not in use to reduce the loss of heat and to keep our leaves, dirt, and other foreign materials from settling in the water.
-
Page 17: Replacing The Led Light
Replacing the LED Light 1. Turn off power to the spa. 2. Using a Philips screwdriver, remove the panel behind the skimmer the filter (Fig 7.1). 3. Reach up behind the skimmer filter and turn the white holder counter clockwise and gently pull it, with the attached wires, out the access hole (Fig 7.2). -
Page 18: Freeze Protection
DO NOT ALLOW THE SPA TO FREEZE If the spa is to be stored or transported in temperatures of 0°C (32°F) or lower, it is critical that the unit be fully winterized. To winterize the spa follow these steps: The spa itself must be completely drained of water. See page 7 for draining instructions. The drain valve must be in the open position and the cap removed. -
Page 19: Most Frequently Asked Questions
1. Why does my spa not shut off? Your spa is designed to run from the time you plug it in, until it reaches your desired water temperature. Once desired water temperature is reached then you can control the functions with the buttons on the top control. -
Page 20: Purging The Pump
PURGING THE PUMP Sometimes after a water change (draining and refilling the spa), or initial start-up of the spa, there is no water flowing from the jets. You may hear the pump operating or even see the shaft of the pump motor turning, but have no water flowing from the jets. -
Page 21: Troubleshooting Guide
SITUATION PROBABLE CAUSE ACTION NO HEAT OR HEAT TOO LOW Operating while spa cover is open. Ensure that spa cover is properly closed. Dirty filter Replace or clean filter cartridge. Pg. 13 JETS WON’T COME ON No power to spa control. Check the RCD, circuit breaker and/or disconnect switch. -
Page 22: Glossary Of Terms
Venturi dials Mounted on the lip of the spa or at the equipment shroud, to induce air to the jets. BYPASS CHECK VALVE Prevents water flow stoppage due to dirty filter. CONTROL BOX Basically the brain of the spa. Power is distributed to all functions of the spa, pumps, lights, heat, etc. DRAIN VALVE Used in the draining of the spa, looks like an outdoor faucet and fits a standard garden hose.
Need help?
Do you have a question about the Crossover Collection and is the answer not in the manual?
Questions and answers