Gaggenau BX 481 Instruction Manual
Hide thumbs
Also See for BX 481:
- Instruction manual (36 pages) ,
- Installation instructions manual (20 pages)
Table of Contents
Advertisement
Quick Links
Advertisement
Table of Contents

Related Manuals for Gaggenau BX 481


Summary of Contents for Gaggenau BX 481
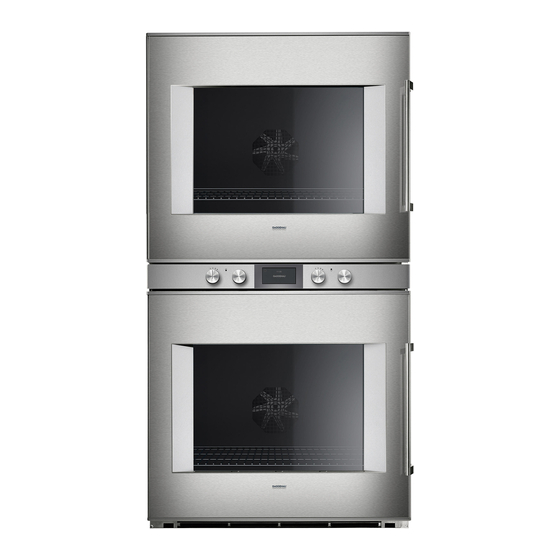
- Page 1 Gaggenau Instruction manual BX 480/481 Double oven...
-
Page 2: Table Of Contents
Core temperature probe Additional information on products, accessories, replacement parts and services can be found at Inserting the core temperature probe www.gaggenau.com and in the online shop in the food to be cooked www.gaggenau.com/zz/store Setting the core temperature Core temperature guidelines... -
Page 3: Important Safety Information
m Important safety information Read these instructions carefully. Only then will Risk of fire! you be able to operate your appliance safely and Combustible items stored in the cooking ▯ correctly. Retain the instruction manual and compartment may catch fire. Never store installation instructions for future use or for combustible items in the cooking subsequent owners. -
Page 4: Risk Of Fire
Risk of injury! Risk of burns! Scratched glass in the appliance door may The cooking compartment will become very ▯ develop into a crack. Do not use a glass scraper, hot during the pyrolytic cleaning cycle. Never sharp or abrasive cleaning aids or detergents. open the appliance door or move the locking latch by hand. -
Page 5: Causes Of Damage
Causes of damage Environmental protection Caution! – Accessories, foil, greaseproof paper or ovenware Environmentally-friendly disposal on the cooking compartment floor: do not place accessories on the cooking compartment floor. Do Dispose of packaging in an environmentally-friendly not cover the cooking compartment floor with any manner. -
Page 6: Getting To Know The Appliance
Getting to know the appliance Use this section to familiarise yourself with your new appliance. The control panel and the individual operating controls are explained. You will find information on the cooking compartment and the accessories. Oven Top oven controls Socket for additional heating elements (for the baking stone and roaster optional Main oven controls... -
Page 7: Display And Operating Controls
Display and operating controls Symbols Operation of the top and main oven is identical. Use the Symbol Function symbols for the top oven , the main oven and for Top oven both ovens to select the desired display. If you change a setting using the rotary or function selector, Main oven the values for the corresponding oven are automatically... -
Page 8: Colours And Display
Colours and display Additional information By touching the ( symbol, you can call up additional Colours information. For example, information on the heating The different colours are used to guide the user in the function set or on the current temperature of the relevant setting situations. -
Page 9: Function Selector Positions
Function selector positions Position Function/heating function Temperature Off position ž Light 50 - 300 °C Hot air (fan oven): For cakes, biscuits and bakes on more than one level. Hot air Default temperature 170 °C The fan in the back panel of the oven distributes the heat evenly throughout the cooking compartment. -
Page 10: Accessories
Position Function/heating function Temperature 50 - 300 °C Baking stone only available as an optional accessory Baking stone function Default temperature 250 °C Baking stone heated from below for crisp stone-baked pizza, bread or bread rolls. 50 - 220 °C Roasting dish only available as an optional accessory Roaster function... -
Page 11: Before Using For The First Time
Once the appliance has been connected to a power supply, the GAGGENAU logo will appear first for approximately 30 seconds. The "Initial settings" menu will then appear automatically. -
Page 12: Setting The Date
Setting the date Heating up the oven The preset date appears in the display. The day setting Ensure that no packaging remnants have been left in the is already active. cooking compartment. Set the day using the rotary selector. To remove the new cooker smell, heat up the oven when it is empty and closed. -
Page 13: Activating The Appliance
Different displays are available for standby mode. floor. Do not cover it with aluminium foil. A build-up The default setting is the GAGGENAU logo and the of heat could damage the appliance. clock. To change the display, refer to the Basic section. -
Page 14: Setting The Heating Function And Temperature
Setting the heating function and Rapid heating temperature With the "Rapid heat-up" function, your appliance reaches the desired temperature particularly quickly in You can operate both ovens simultaneously with the top heating, bottom heating and top/bottom heating different settings. types of heating. Exception: When the Pyrolytic mode (Self-cleaning cycle) is being used in one oven, the other oven cannot To ensure an even cooking result, do not place your... -
Page 15: Timer Functions
The timer menu closes and the time begins to count Timer functions Š down. The symbol and the countdown appear in the display. You use the timer menu to make the following settings: Š Short-term timer p Stopwatch Cooking time (not in standby mode) Cooking time end (not in standby mode) In the following sections, you will find out how to set the time functions for one single oven. -
Page 16: Cooking Time
The timer menu is closed and the timing begins. The p Set the desired cooking time using the rotary symbol and the elapsed time are shown in the display. selector. Press to start. Pausing and restarting the stopwatch The appliance starts. The timer menu is closed. The Call up the timer menu. -
Page 17: End Of Cooking Time
End of cooking time To change the cooking time end: Call up the "Timer" menu. Use to select the You can delay the cooking time end to a later time. "Cooking time end" function. Set the desired cooking time end using the rotary selector. Press to start. -
Page 18: Long-Term Timer
Setting the long-term timer Long-term timer Turn the function selector to ž. To set the long- term timer for both ovens, turn both function With this function, the appliance maintains a selectors to ž . temperature between 50 und 230°C with the "Hot air" Touch the / symbol. -
Page 19: Core Temperature Probe
Inserting the core temperature probe Core temperature probe in the food to be cooked Insert the core temperature probe in the food to be The core temperature probe makes accurate cooking cooked before you place it in the cooking interior. possible. -
Page 20: Setting The Core Temperature
Setting the core temperature Changing the set core temperature: Touch the + symbol. Use the rotary selector to change the set core temperature for the food and confirm Slide the food into the cooking compartment with with +. the core temperature probe inserted. Plug the core temperature probe into the socket in the cooking Deleting the set core temperature: compartment and close the appliance door. -
Page 21: Core Temperature Guidelines
Core temperature guidelines Food Core temperature Use chilled food only, not frozen food. The details given guideline in the table are guidelines. Results depend on the quality and composition of the food. Poultry For hygiene reasons, critical foodstuffs such as fish and Chicken 85 °C game should reach a core temperature of 62 –... -
Page 22: Rotisserie Spit
Insert the grill tray and the rotisserie spit on the Rotisserie spit lowest level of the oven. The drive shaft has to engage into the opening on the back of the oven interior. The rotary spit is particularly good for cooking large roasts, such as rolled roasting joints or poultry. -
Page 23: Roasting Function
Roasting function Child lock Only when set to the "Roaster function" heating type: The appliance has a childproof lock to prevent children In the Roaster function, the oven heats up at full operating it accidentally. capacity for 3 minutes. You can use this function to sear Notes steaks, for example. -
Page 24: Basic Settings
- Date + GAGGENAU logo select the desired display. - Clock + date The selection is displayed. - Clock + date + GAGGENAU logo Display Reduced*/Standard If the 'Reduced' setting has been selected, only the most important information will be shown on the display after a short time. - Page 25 Date Current date Sets the date. You can switch between year/month/day using the symbol Temperature format °C* / °F Sets the temperature unit Language German* / French / Italian / Spanish / Select language for text display Portuguese / Dutch / Danish / Note: If the language is changed, the system Swedish / Norwegian / Finnish / restarts.
-
Page 26: Cleaning And Maintenance
Cleaning and maintenance Area Cleaning agent Cooking compart- Hot soapy water: Clean using a dish cloth ment and then dry with a soft cloth. With thorough care and cleaning your appliance will Very dirty cooking Oven cleaner gel (order number retain its looks and remain in good order. -
Page 27: Removing Slide-In Racks
Removing slide-in racks Pyrolytic cleaning (self-cleaning) You can remove the slide-in racks for cleaning. During self-cleaning, the oven heats up to 485°C. Thus, Removing slide-in racks remainders from roasting, grilling or baking are burnt up Place a dish cloth in the oven interior to protect the and all you have to do is wipe the ash out of the interior. -
Page 28: Preparing Pyrolytic Self-Cleaning
Cleaning accessories with pyrolytic ▯ Close the oven door. self-cleaning Gaggenau baking trays and grill trays are coated with Starting pyrolytic self-cleaning pyrolysis-proof enamel. To arrive at an optimum cleaning result, you are nevertheless advised to remove all Set the function selector to S. -
Page 29: Trouble Shooting
Trouble shooting Malfunctions often have simple explanations. Please Risk of electric shock! read the following notes before calling the after-sales Incorrect repairs are dangerous. Repairs may only be service. carried out and damaged power cables replaced by one of our trained after-sales technicians. If the appliance is defective, unplug the appliance from the mains or switch off the circuit breaker in the fuse box. -
Page 30: Replacing The Oven Light Bulb
Replacing the oven light bulb Aftersales service The oven light bulbs can be replaced. Heat-resistant halogen bulbs can be obtained from the After-sales Our after-sales service is there for you if your appliance service or from a specialist retailer. Always use halogen needs to be repaired. -
Page 31: Settings Table And Tips
Settings table and tips Notes ‒ Do not place too many items close together on wire racks or baking trays. This is the only way to ensure ‒ Always preheat the appliance. optimal heat circulation. This will provide the best cooking results. The cooking times specified refer to a pre-heated ‒... - Page 32 Dish Accessories Level Temperature Heating Cooking Comments in °C function time in min. Sliced pumpkin Glass dish/ 3 (4) Recipe tip: Season with oil, garlic, grill tray ginger, cumin, salt and pepper. Antipasti Glass dish/ 3 (4) Recipe tip: Drizzle balsamic vinegar grill tray over the vegetables whilst they are still 3 (4)
-
Page 33: Side Dishes And Meals
Side dishes and meals ▯ ▯ The best known oven-cooked side dishes are Grilled dishes such as bakes and gratins are potato-based, such as potato gratin. However, you particularly well suited to being prepared in the can also obtain excellent results when oven-cooking oven. - Page 34 Dish Accessories Level Temperature Heating Cooking Comments in °C function time in min. Feta cheese Baking tray 2 (3) Recipe tip: Place in a baking dish with oil, tomatoes, onions, garlic and rosemary and season with salt and pepper. Oven-baked cheese, Baking tray 2 (3) After 10 minutes, cut a cross into the...
-
Page 35: Fish
Dish Accessories Level Temperature Heating Cooking Comments in °C function time in min. Savoury flan, Wire rack 2 (3) 10 - 12 frozen 2 (3) 8 - 10 Quiche Tart tin or 2 (3) 20 + 20 Pre-bake the base for 20 minutes, pour dish the mixture onto the base and then bake for a further 20 minutes. -
Page 36: Meat
Meat ▯ ▯ Use the core temperature probe so that you can Use the grill tray or roasting dish for a large joint of monitor the core temperature more easily. meat and for preparation methods that involve Information and instructions, as well as optimal adding a lot of liquid to the joint. - Page 37 Dish Accessories Level Temperature Heating Cooking Comments in °C function time in min. H / I Rolled roasting joint Glass dish/ 2 (3) 230 / 180 65 - 70*** grill tray Wire rack + 2 (3) 230 / 180 75 - 80*** grill tray Veal H / I...
- Page 38 Dish Accessories Level Temperature Heating Cooking Comments in °C function time in min. H / I Meatballs Baking tray 2 (3) 25 - 30 Recipe tip: Easy to make into a meal, (25 g per ball) + grease- e.g. meatballs with tomato sauce, proof paper Swedish meatballs and Königsberger Klopse (Prussian meatballs in a white...
-
Page 39: Poultry
Poultry ▯ ▯ Use the core temperature probe so that you can When cooking duck or goose, pierce the skin monitor the core temperature more easily. Insert underneath the wings to allow the fat to run out. this between the belly and the thigh, rather than in ▯... -
Page 40: Grilling And Roasting/Baking
Grilling and roasting/baking ▯ ▯ Do not grill food with the oven door open. If you use wooden skewers, they may char. To prevent this, shorten them as far as possible, leave ▯ For grilling, use the grill tray with the wire insert them to soak in water overnight before skewering (depending on the model, this may be an accessory the ingredients or use metal skewers. -
Page 41: Baking
Meal Accessories Level Tempera- Type of Cooking Comments ture heating time in °C in min. Browning meringue Springform 2 (3) 220-250 4-5** Stay by the appliance so that the meringue cake tin does not brown too much. Prunes in a bacon Baking tray 3 (4) 8-10... - Page 42 Meal Accessories Level Tempera- Type of Cooking Comments ture heating time in °C in min. Loaf cake Cake tin 2 (3) 160-170 60-65 To ensure even browning, place the tin lengthways in the cooking compartment. 2 (3) 160-170 55-60 Bundt cake, Bundt pan 1 (2) 165-170...
- Page 43 Meal Accessories Level Tempera- Type of Cooking Comments ture heating time in °C in min. Biscuits, Baking tray 2 (3) 160-170 Viennese whirls 2 (3) 160-170 Small baked puff- Baking tray 2 (3) 15-20 pastry items Grease- proof paper Puff pastry parcels, Baking tray 3 (4) Recipe tip: Fill with ham and cheese or...
- Page 44 Meal Accessories Level Tempera- Type of Cooking Comments ture heating time in °C in min. Bread, bread rolls Multigr. bread Baking tray 2 (3) 200/170* 40-50 2 (3) 200/170* 40-50 Grease- proof paper 2 (3) 200/165* 45-50 Sourdough bread Baking tray 2 (3) 200/180* 50-60...
-
Page 45: Raising Dough
Meal Accessories Level Tempera- Type of Cooking Comments ture heating time in °C in min. Baked items made Baking tray 2 (3) 10-12 from lye-dipped yeast dough, Grease- frozen proof paper Croissants, Baking tray 2 (3) 15-25 frozen Grease- proof paper Preheat the appliance to the specified temperature. -
Page 46: Defrosting
Dish Accessories Level Temperature Heating Cooking Comments in °C function time in min. H / I Compote Glass dish/ 2 (3) 160 - 180 30 - 40 e.g. apricots or a variety of berries grill tray Do not add any liquid; stir thoroughly 2 (3) 30 - 40 several times. -
Page 47: Preserving
Dish Accessories Level Temperature Heating Cooking Comments in °C function time in min. Berries (500 g) Glass dish/ 2 (3) 50 - 55 25 - 30 grill tray Vegetables (500 g) Glass dish/ 2 (3) 50 - 55 30 - 50 The defrosting time depends on the grill tray portions. -
Page 48: Disinfecting
Disinfecting ▯ ▯ Before you begin preserving the food, the glasses Disinfect the empty jars at 100 °C for at least should be disinfected in the oven to prevent the 20 minutes in the "Hot air" (fan-oven) setting. The food from spoiling. This is the only way to ensure lids and rubber preserving seals for the jars can be that preserves keep for a relatively long time and disinfected at the same time in boiling water to... -
Page 49: Baking Stone
Baking stone ▯ ▯ You will need a baking stone and heating element – We recommend that you use a core temperature these are optional accessories. probe when baking bread. Insert the core temperature probe at the thickest point in the pizza ▯... -
Page 50: Roasting Dish
Roasting dish ▯ ▯ You will need a roasting dish and heating element – Cooking liquids reduce down quickly. Make sure these are optional accessories. that there is always sufficient cooking liquid. For a cooking time of 30 minutes, add approx. ½ l of ▯... -
Page 51: Acrylamide In Foodstuffs
Dish Accessories Level Temperature Heating Cooking Comments in °C function time in min. Farmers' omelette Roasting Initial roast- Roast all the ingredients initially in the dish ing + roasting dish, apart from the eggs; then 10 - 15 pour the egg mixture over the top and continue cooking until the farmers' omelette is firm. - Page 52 Gaggenau Hausgeräte GmbH Carl-Wery-Straße 34 81739 München GERMANY www.gaggenau.com...
Need help?
Do you have a question about the BX 481 and is the answer not in the manual?
Questions and answers