Table of Contents
Advertisement
Quick Links
Note : When both Passive Arming and Voltage Sensing are selected, you must hardwire the driver's door pin switch
in order to begin the passive arming sequence.
RF Programmable Features :
Feature Selection
1st Door L/UL
2nd Accy Lock
3rd Accy. UL
4th Passive Locks
5th Passive/Active Arm
6th Voltage Sense
To program these selectable features;
Turn ignition on No response
Press and release the valet switch 3 times
Within 3 seconds, turn ignition Off
First
Then On
Press transmitter Lock button to change
Press transmitter Lock button to change
Second
Press and release the valet switch
Press transmitter Lock button to change
Third
Press and release the valet switch
Press transmitter Lock button to change
Fourth
Press and release the valet switch
Press transmitter Lock button to change
Fifth
Press and release the valet switch
Press transmitter Lock button to change
Sixth
Press and release the valet switch
Press transmitter Lock button to change
Turn ignition key off
Note: Once you enter the feature programming mode, do not allow more than 30 seconds to pass between steps, or the
programming will be terminated.
1 Chirp
2 Chirps
1 Sec.
3.5 Sec.
Auto Lock On
Auto Lock Off
Auto UL On
Auto UL Off
Passive
Active
Passive Arm
Active Arm
Voltage Sense
Hardwire
Action
o r
o r
o r
o r
o r
o r
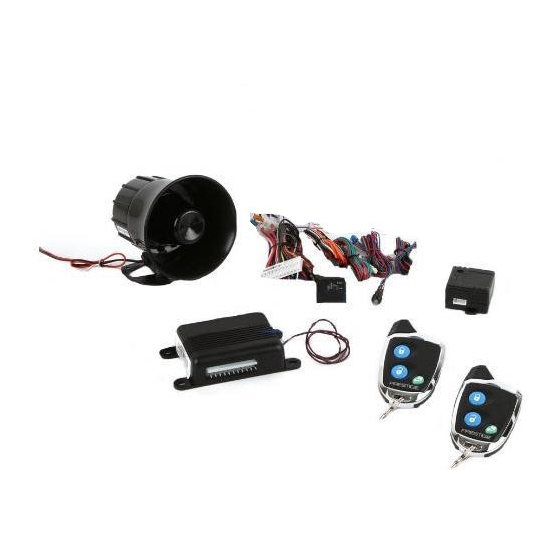
Model APS-25CH
Installation Manual
3 Chirps
4 Chirps
1 Sec L, Dbl. U/L
System Response
1 Chirp - LED 1 flash
Short chirp, then long chirp
1 chirp = 1 second door locks
2 chirps = 3.5 second door locks
3 chirps = 1 sec. lock, dbl 1 sec. unlock
2 chirps = auto locks off
1 chirp = auto locks on
2 chirps = auto unlock off
1 chirp = auto unlock on.
2 chirps = active locks
1 chirp = passive locks
2 chirps = active arming
1 chirp = passive arming
2 chirps = hardwire
1 chirp = voltage sense
Exit program mode
Default
1 Sec.
Auto Lock Off
Auto UL Off
Active
Active Arm
Hardwire
128-6453
1 of 8
Advertisement
Table of Contents

Related Manuals for Audiovox Prestige APS-25CH


Summary of Contents for Audiovox Prestige APS-25CH
- Page 1 Note : When both Passive Arming and Voltage Sensing are selected, you must hardwire the driver’s door pin switch in order to begin the passive arming sequence. RF Programmable Features : Feature Selection 1 Chirp 1st Door L/UL 1 Sec. 2nd Accy Lock Auto Lock On 3rd Accy.
- Page 2 CHANNEL 2 OUTPUT: This system provides an additional hardwire remote output to control an assortment of optional upgrades. This output is an independent channel from the transmitter and is controlled by button #2 or the combination of button 1 & 2 dependent on the programming of the transmitter as set up by your installation center. It is a delayed ground pulse (300 mA maximum) and can be used to control: •...
- Page 3 VALET SWITCH: Select a desired mounting location for the switch, that is easily accessible to the driver of the vehicle. The switch does not have to be concealed, however, concealing the switch is always recommended, as this provides an even higher level of security to the vehicle. The switch may be mounted in or below the dash by drilling a 1/4"...
- Page 4 IMPORTANT: Audiovox does not recommend using this relay to interrupt the ignition wire. Only connect this relay to the low current starter solenoid feed wire, as indicated on the wiring diagram.
- Page 5 These applications require the use of additional components which may include relays, fixed resistors, or for convenience, the AS 9159 Door Lock Interface. Refer to the AUDIOVOX Door Lock Wiring Supplement and or the Audiovox fax back service for information on your particular vehicle for properly connecting to these types of circuits.
- Page 6 THIS PAGE LEFT BLANK INTENTIONALLY 128-6453 6 of 8...
- Page 7 128-6453 7 of 8...
- Page 8 © 2003 Audiovox Electronic Corporation, 150 Marcus Blvd., Hauppauge, N.Y. 11788 128-6453 128-6453 8 of 8...