Electrolux EWX147410W User Manual
Hide thumbs
Also See for EWX147410W:
- User manual (64 pages) ,
- User manual (40 pages) ,
- User manual (32 pages)
Table of Contents
Advertisement
Advertisement
Table of Contents

Related Manuals for Electrolux EWX147410W


Summary of Contents for Electrolux EWX147410W
- Page 1 EWX147410W Washer Dryer User Manual...
-
Page 2: Table Of Contents
17. TECHNICAL DATA..................37 WE’RE THINKING OF YOU Thank you for purchasing an Electrolux appliance. You’ve chosen a product that brings with it decades of professional experience and innovation. Ingenious and stylish, it has been designed with you in mind. So whenever you use it, you can be safe in the knowledge that you’ll get great results every time. -
Page 3: Safety Information
ENGLISH SAFETY INFORMATION Before the installation and use of the appliance, carefully read the supplied instructions. The manufacturer is not responsible for any injuries or damages that are the result of incorrect installation or usage. Always keep the instructions in a safe and accessible location for future reference. - Page 4 Do not install the appliance behind a lockable door, a • sliding door or a door with a hinge on the opposite side, that would prevent the appliance door from being fully opened. Connect the mains plug to the mains socket only at •...
-
Page 5: Safety Instructions
ENGLISH Do not use the appliance if items have been soiled • with industrial chemicals. Do not dry unwashed items in the wash dryer. • Items such as foam rubber (latex foam), shower caps, • waterproof textiles, and rubber backed articles and clothes, or pillows fitted with foam rubber pads should not be dried in the washer dryer. -
Page 6: Electrical Connection
• Do not install or use a damaged • This appliance is for household use appliance. only. • Do not install the appliance where the • Do not put flammable products or appliance door cannot be fully items that are wet with flammable opened. -
Page 7: Product Description
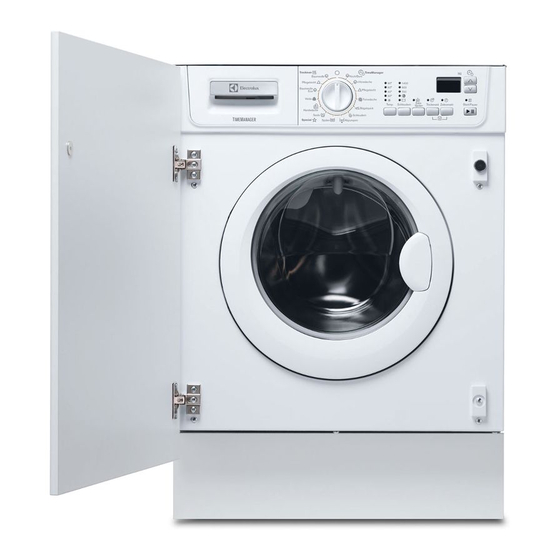
ENGLISH 3. PRODUCT DESCRIPTION 3.1 Appliance overview Detergent dispenser Turn the device clockwise, until the groove is horizontal. Control panel You cannot close the door. Door handle Rating plate Drain pump filter Feet for levelling the appliance Water drain hose Mains cable Water inlet hose connection To close the door, turn the device... -
Page 8: Control Panel
4. CONTROL PANEL 4.1 Control panel description 9 10 Drying TimeManager Cottons Cottons Synthetics +Prewash 90° 1400 60° Cottons Synthetics Economy 40° 30° Delicates Wool Temp. Spin Extra Rinse Drying Time Delay Start Start/Pause Handwash Easy Iron Silk Spin... - Page 9 ENGLISH Soil degree indicators: Intensive Normal Daily Light Quick Quick Refresh Super Refresh When you select a programme, the display shows the indicator of the soil de‐ gree automatically proposed by the appliance. Child safety lock (see chapter «Settings»). Digit area: •...
-
Page 10: Programmes
Washing programme phase indicators: Wash Rinses Drain Spin Drying By selecting the wash programme, the washing programme indicators corre‐ sponding to the various phases making up the programme are shown. After you have pressed the Start/Pause button, only the indicator of the running phase stays on. - Page 11 ENGLISH Programme Maximum Programme description Temperature range load (Type of load and soil level) Reduced load Maximum spin speed 7 kg To spin the laundry and to drain the water in the 1400 rpm drum. All fabrics, except woollens and deli‐ Spin cate fabrics.
- Page 12 Programme Maximum Programme description Temperature range load (Type of load and soil level) Reduced load Maximum spin speed 4 kg Drying programme for cotton items. Cottons 1) If you select the Super Quick, Refresh or Super Refresh option by pressing buttons Time Manager, we recommend that you reduce the maximum load as indicated in the pro‐...
-
Page 13: Consumption Values
ENGLISH 5.2 Programmes for timed drying Dryness Level Type of fabric Load Spin Suggested (kg) speed duration (rpm) (mins) Extra Dry Cottons and Linen 1400 215 - 220 For towelling materi‐ (bathrobes, bath towels, 1400 160 - 180 etc) 1400 95 - 105 Cottons and Linen 1400... -
Page 14: Options
Programmes Load Energy Water con‐ Approximate pro‐ (kg) con‐ sumption gramme duration sumption (litre) (minutes) (kWh) Wool/Handwash 30°C 0.25 1) «Cotton Energy Saving programme » at 60°C with a load of 7 kg is the reference pro‐ gramme for the data entered in the energy label, in compliance with EEC 92/75 standards. -
Page 15: Settings
ENGLISH 7.6 Delay Start Washing Type of fab‐ Soil level Press this button to delay the start of the cycle rics programme by 30 min - 60 min - 90 min, To refresh 2 hours and then by 1 hour up to a Refresh items only maximum of 20 hour. -
Page 16: Before First Use
8.2 Child Lock function You can activate this option in two ways: • After you press Start/Pause: the With this function you can leave the options and the programme knob are appliance unattended and prevent that locked. the children play with the control panel. - Page 17 ENGLISH • The appliance starts the countdown. Detergent compartment for pre‐ • When the countdown is wash phase. completed, the programme starts Detergent compartment for automatically. washing phase. You can cancel or change Compartment for liquid addi‐ the set of the Delay Start tives (fabric conditioner, before you press the Start/ starch).
- Page 18 10.10 At the end of the The related indicator flashes. 2. Change the options (if you wish to programme change the Time Manager option, you must cancel the running • The appliance stops automatically. programme and make your selection Some acoustic signals sound (if they again).
-
Page 19: Daily Use - Drying Only
ENGLISH 11. DAILY USE - DRYING ONLY The indicator illuminates. The door is WARNING! locked. Refer to Safety chapters. If you set only 10 minutes of 11.1 Timed drying drying phase, the appliance performs only a cooling WARNING! phase. Make sure that the water tap is open. -
Page 20: Hints And Tips
12.1 Drying setting 5. Press Start/Pause button to start the programme. WARNING! The indicator illuminates. The door is Make sure that the water locked. tap is open. If you set only 10 minutes as The recommended load size is 4 kg for drying phase, the appliance cottons and 2 kg for synthetic items. -
Page 21: Ecological Hints
ENGLISH 13.1 The laundry load – liquid detergents, preferably for low temperature wash • Divide the laundry in: white, coloured, programmes (60 °C max) for all synthetics, delicates and wool. types of fabric, or special for • Obey the washing instructions that woollens only. -
Page 22: Care And Cleaning
13.6 Drying hints • = The item can not be tumble dried. Prepare the drying cycle • Open the water tap. 13.9 Drying cycle duration • Check if the drain hose is connected properly. Refer to installation chapter The drying time can change depending for more information. -
Page 23: Maintenance Wash
ENGLISH 14.4 Door seal To remove rust particles use only special products for washing machines. Do this separately from the laundry wash. Always obey the instructions that you find on the packaging of the product. 14.3 Maintenance wash With the low temperature programmes it Regularly examine the seal and remove is possible that some detergent stays in all objects from the inner part. - Page 24 1. Unplug the appliance. WARNING! 2. If it is necessary, wait until the water Before unscrewing the pump has cooled down cover, switch the appliance off and remove the mains plug from the socket. To clean the drain filter:...
- Page 25 ENGLISH 6. Remove foreign bodies and fluff from the filter seat and from the filter impeller. 7. Check carefully whether the pump impeller rotates (it rotates jerkily). If it doesn’t rotate, please contact your Service Centre. 8. Put the cap back on the emergency emptying hose and place the latter back in its seat.
-
Page 26: Troubleshooting
45° 20° 14.8 Frost precautions 14.9 Emergency emptying out If the appliance is installed in an area If the appliance does not drain the water, where the temperature can be less than proceed as follows: 0° C, remove the remaining water from 1. - Page 27 ENGLISH First try to find a solution to the problem • - The mains supply is unstable. (refer to the table). If the problem Wait until the mains supply is stable. persists, contact the Authorised Service • - No communication between Centre.
- Page 28 Problem Possible cause/solution The appliance does not Make sure that the sink spigot is not clogged. drain the water. Make sure that the drain hose has no kinks or bends. Make sure that the drain filter is not clogged. Clean the fil‐...
-
Page 29: Installation
ENGLISH Problem Possible cause/solution The washing results Increase the detergent quantity or use a different detergent. are not satisfactory. Use special products to remove the stubborn stains before you wash the laundry. Make sure that you set the correct temperature. Decrease the laundry load. - Page 30 Use the gloves. Remove the external film. If necessary, use a cutter. Remove the cardboard top. Remove the polystyrene packaging materials. Remove the internal film. Open the door. Remove the polystyrene piece from the door seal and all the items...
- Page 31 ENGLISH Put one of the polystyrene packaging elements on the floor behind the appliance. Carefully put down the appliance with the rear side on it. Make sure not to damage the hoses. Remove the polystyrene protection from the bottom. Pull up the appliance in vertical position.
-
Page 32: Positioning And Levelling
Remove the three bolts. Use the key supplied with the appliance. Pull out the plastic spacers. Put the plastic caps in the holes. You can find these caps in the user manual bag. We recommend that you keep the packaging and the transit bolts for any movements of the appliance. -
Page 33: Water Drainage
ENGLISH • After having levelled the appliance, tighten the lock nuts. WARNING! Never place cardboard, wood or similar materials under the appliance to compensate for any unevenness in the floor. 16.3 The inlet hose • Connect the hose to the back appliance. Turn the inlet hose only left or right. - Page 34 • Make a U shape with the drain hose. On the edge of a sink • Make sure that the plastic guide cannot move when the appliance drains. Attach the guide to the water tap or the wall. To a stand pipe with vent-hole •...
-
Page 35: Preparation And Assembly Of The Door
ENGLISH To a sink spigot • Refer to the illustration. Put the drain hose in the spigot and tighten it with a clip. • Make sure that the drain hose makes a loop to prevent particles going into the appliance from the sink. To a wall-pipe •... - Page 36 Door The dimensions of the door should be: 16-22 mm • width 595 - 598 mm • thickness 16-22 mm Ø 35 mm • the height X depends on the height of the adjacent furniture's base. 22±1,5 mm 14 mm...
-
Page 37: Technical Data
ENGLISH WARNING! Do not remove the screw B. If the door has to be opened from left to right, invert the position of the plates E, the magnet D and the plate C. Mount the counter-magnet D and the hinges A as previously described. 17. - Page 38 www.electrolux.com...
- Page 39 ENGLISH...
- Page 40 www.electrolux.com/shop...
Need help?
Do you have a question about the EWX147410W and is the answer not in the manual?
Questions and answers