Huawei Ascend Y5 User Manual
Hide thumbs
Also See for Ascend Y5:
- Quick start manual (169 pages) ,
- User manual (76 pages) ,
- Quick start manual (80 pages)
Table of Contents
Advertisement
Quick Links
Advertisement
Table of Contents

Related Manuals for Huawei Ascend Y5


Summary of Contents for Huawei Ascend Y5
- Page 1 User Guide...
-
Page 2: Table Of Contents
Contents Foreword ....................... 1 First-class functions ..................2 Safe ..........................2 Launching the camera from gallery ................2 Getting started ....................3 Your phone at a glance ....................3 Key functions at your fingertips ..................4 Locking and unlocking the screen.................. 4 Dual-card settings ...................... - Page 3 Managing messages ....................23 Adding an email account ..................... 24 Sending an email ......................25 Checking your emails ....................25 Setting up an account ....................25 Camera and gallery ..................27 Capture screen ......................27 Taking a photo ......................28 Capture mode ......................
- Page 4 Changing the lock screen style ..................47 Turning on or off airplane mode .................. 47 Setting the PIN of your SIM card ................. 48 Setting up an account ....................48 Restoring factory settings .................... 49 Updating your phone ....................49 Setting the date and time ....................
-
Page 5: Foreword
Foreword This guide only applies to phones that are running. Please read this guide carefully before you start using the phone. All pictures and illustrations in this document are for your reference only. The actual product may vary. Features in this guide are for your reference only. Some features may not be supported by all phones. -
Page 6: First-Class Functions
First-class functions Safe The Safe function helps you keep your important files and privacy protected. Enabling the safe On the home screen, touch Under Categories or Local, touch Touch Enable. Follow the onscreen instructions to enter passwords and answers to security questions, and then touch Done. -
Page 7: Getting Started
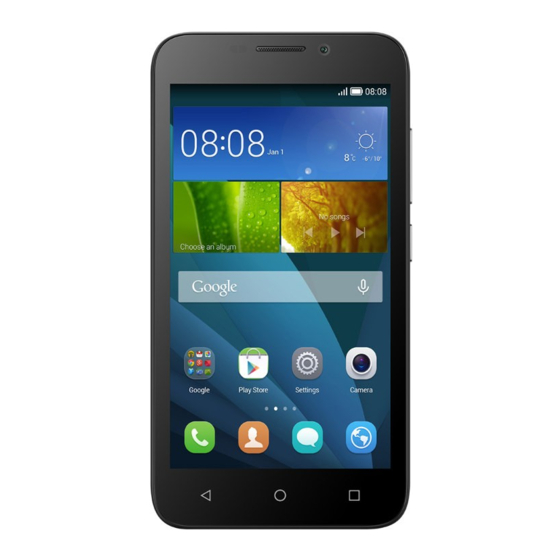
Getting started Your phone at a glance Headset jack Volume key Front camera Earpiece Back Charge/Data port Camera flash Microphone Speaker Menu Rear camera Home Power key... -
Page 8: Key Functions At Your Fingertips
Key functions at your fingertips Press and hold to power on your mobile phone. Press to lock the screen when your mobile phone is active. Touch to return to the previous screen or exit the application you are running. -
Page 9: Dual-Card Settings
Dual-card settings Enabling or disabling a SIM card You can install two SIM cards on your phone and use one or both of them at the same time. When you do not need to use a SIM card, disable it. On the home screen, touch Under All, touch SIM card management >... -
Page 10: Turning On Mobile Data
Touch the Wi-Fi switch to turn on Wi-Fi. Your phone then scans for available Wi-Fi networks and displays them. Touch the Wi-Fi network you want to connect to. If the Wi-Fi network is encrypted, enter the password when prompted. Turning on mobile data Flick down from the status bar to open the notification panel. -
Page 11: Touchscreen Gestures
Touchscreen gestures Touch: Tap an item once. For example touch an application to select or open it. Touch and hold: Touch and leave your finger on the screen for 2 seconds or more. For example, touch and hold a blank area on the home screen to enter editing mode. -
Page 12: Status Icons
Status icons Status icons may vary according to your region or service provider. Signal strength No signal Enhanced Data Rates for GSM GPRS network connected Evolution (EDGE) network connected High Speed Packet Access (HSPA) 3G network connected network connected Evolved High-Speed Packet Access (HSPA+) network Alarm enabled connected... -
Page 13: Home
Home Your home screens are where you can find your favorite widgets and all your applications. We did away with the application list to give you a more convenient and direct path to your applications. Status bar: displays notifications and icons. Flick down from the status bar to open the notification panel. -
Page 14: Switching Between Home Screens
Switching between home screens Running out of space on the home screen? Not to worry. Your phone lets you create additional home screens. Auto-rotate screen If you rotate your phone when browsing a web page or viewing a photo, your screen automatically changes between landscape and portrait views. -
Page 15: Notification
Adding a widget: On the home screen, touch and hold a blank area to display the Widgets option menu. Select a widget and drag it to the home screen. If the home screen doesn't have enough space, your phone will automatically create a new home screen to the right of the original and place the widget on the new home screen. -
Page 16: Accessing Applications
Touch to view the notification details and flick left or right across a notification to dismiss it. Touch to delete all notifications. Touch to expand or collapse the shortcut switches. Touch to enable or disable automatic brightness. Touch the shortcut switches on the notification panel to turn on or off the functions. -
Page 17: Personalizing Your Phone
Touch to close all the applications in the list. Personalizing your phone Changing the home screen style Your phone supports the standard and simple home screen styles. On the home screen, touch Under All, touch Home screen style. Touch Simple and touch Touch Standard home to switch from simple home screen to standard home screen. -
Page 18: Selecting An Input Method
Touch a text box to bring up the onscreen keyboard. To hide the onscreen keyboard, touch Selecting an input method On the text input screen, flick down from the status bar to open the notification panel. Under Notifications, touch Choose input method. Select an input method. -
Page 19: Calls And Contacts
Calls and contacts Making a call Smart dialing Smart dialing lets you quickly find contacts by entering parts of their names or numbers. On the home screen, touch Under Phone, enter the initials or first few letters of a contact's name, or part of the contact's phone number. -
Page 20: Making An Emergency Call
Making an emergency call In the event of an emergency, you will still be able to make emergency calls without the use of a SIM card. However, you must still be in the coverage area. On the home screen, touch Under Phone, enter your local emergency number, and then touch For some phone models, you can make an emergency call even on the lock screen. -
Page 21: Answering Or Rejecting A Call
Answering or rejecting a call When a call comes in, you can press the volume button to mute the ringtone. Drag right to answer the call. Drag left to reject the call. Drag up to reject the call and send the caller a message. ... -
Page 22: Answering A Third-Party Call
Touch to use the speaker. Touch to display the dialer. Touch to end the call. Touch to place the current call on hold, and then touch again to resume the call. Touch to display your contacts. To return to the call screen, flick down from the status bar to open the notification panel, and then touch Ongoing call. -
Page 23: Call Settings
Adding a contact from the call log On the home screen, touch Under Phone, touch beside the number you want to add. Touch You can also touch and hold the number you want to add, and touch Add to contacts. Deleting call records On the home screen, touch Under Phone, you can:... -
Page 24: Managing Contacts
Managing contacts Creating a contact On the home screen, touch Touch If you have more than one account with contacts, touch the account to which you want to add the contact. Enter the contact name, phone number, and other details. Touch Editing a contact On the home screen, touch... -
Page 25: Contact Groups
Importing Contacts from a storage device On the home screen, touch Touch > Import/Export > Import from external storage or Import from internal storage. Select one or more .vcf files, and then touch OK. Exporting contacts to a storage device On the home screen, touch Touch >... -
Page 26: Sending Messages Or Emails To A Contact Group
Touch GROUPS and select the group you want to edit. Touch . You can then: Touch Delete group members and delete a member from the group. Touch Delete and delete the group. Touch Edit to edit the group name. ... -
Page 27: Messaging And Email
Messaging and email Sending a text message On the home screen, touch In the message list, touch Touch the recipient text box and enter the contact name or phone number. You can also touch to enter the contact list screen and choose a contact or contact group. Touch the text field to write your message. -
Page 28: Adding An Email Account
Deleting a message On the home screen, touch In the list of message threads, touch a contact name or phone number to view the conversation thread. Touch and hold the message you want to delete, and touch Deleting a thread On the home screen, touch From the message list, touch and hold the thread you want to delete, and touch Adding an email account... -
Page 29: Sending An Email
Follow the onscreen instructions to configure the email settings. The system then automatically connects to the server and checks server settings. When the Exchange account is set up, the Inbox screen is displayed. Sending an email On the home screen, touch Touch Touch >... -
Page 30: Removing An Email Account
Touch the email account you want to use. Removing an email account On the home screen, touch On the Inbox screen, touch > Settings. Select the account you want to remove. Touch Remove account then OK. After you remove an email account, your phone will no longer send or receive emails using that account. -
Page 31: Camera And Gallery
Camera and gallery Capture screen Touch to set the flash mode. Flick left or right to switch the capture mode. Touch to view your photos and videos. Touch to take your photo. Touch and hold to take burst shots, and release your finger to stop. ... -
Page 32: Taking A Photo
Taking a photo On the home screen, touch Frame the scene you want to capture. Your phone will automatically determine a focus point. You can also touch a point on the screen to focus the camera on it. If the frame turns red, the camera was unable to focus. Adjust the frame until the camera is able to focus. -
Page 33: Shooting A Video
Taking a photo with a watermark On the home screen, touch Touch > Watermark to switch to watermark mode. Flick left or right to add the watermark you like. Drag the watermark to adjust its position. Touch Taking a photo using audio control On the home screen, touch Touch >... -
Page 34: Gallery
Image adjustment: Adjust a photo's exposure compensation, saturation, contrast, and brightness. Gallery Displaying photos in timeline mode On the home screen, touch Touch at the bottom of your screen to display your photos in list or timeline mode. Playing a slideshow On the home screen, touch View the album in timeline mode and touch >... -
Page 35: Setting A Photo As The Wallpaper
Touch , choose a sharing method, and follow the onscreen instructions to share your photo or video. Setting a photo as the wallpaper On the home screen, touch Choose the photo you want to set as the wallpaper. Touch > Set as and follow the onscreen instructions to set the photo as the wallpaper. -
Page 36: Music And Video
Music and video Adding songs You can copy songs to your phone and immerse yourself in a world of extraordinary sound anytime. Add songs to your phone by: Copying songs from your computer using the USB cable. For details, see mode. -
Page 37: Creating A Playlist
Touch to add the playing song to a playlist. Touch to play and touch to pause. Touch to go back to the previous song. Touch to skip to the next song. Drag the slider to control the playback. Touch to add the playing song to your Favorites. -
Page 38: Playing A Video
On the home screen, touch Select a category. On the song list screen, touch next to the song and touch Set as ringtone. Playing a video On the home screen, touch Touch the video you want to play. To stop the video playback, touch Touch to lock the screen. -
Page 39: Network And Sharing
Network and sharing Turning on mobile data On the home screen, touch then the All tab. Under Wireless & networks, touch More…. Touch Mobile networks. Touch SIM1 Mobile Network settings or SIM2 Mobile Network settings. Touch Data enabled to enable your phone's mobile data service. When you don't need to access the Internet, turn off mobile data to save battery power and reduce mobile data usage. -
Page 40: Sharing Your Phone's Mobile Data Connection
Touch WPS Push Button and press the WPS button on the Wi-Fi router. Touch WPS Pin Entry and enter the PIN generated from your phone on your router. Sharing your phone's mobile data connection Wi-Fi hotspot Your phone can function as a Wi-Fi hotspot for other devices, sharing its mobile data connection. -
Page 41: Transferring Data Through Bluetooth
Touch Bluetooth tethering to share your mobile data connection. Transferring data through Bluetooth Turning on Bluetooth and pairing your phone with another Bluetooth device On the home screen, touch Under All, touch Bluetooth. Touch Turn on Bluetooth to turn on Bluetooth. Then your phone will automatically search for and display available Bluetooth devices. -
Page 42: Transferring Data Using Wi-Fi Direct
When you receive files from another device for the first time, you will need to confirm the file reception. The next time when files are received from the same device, they will be received automatically. Transferring data using Wi-Fi Direct Wi-Fi Direct allows two devices to connect to each other for data transfers without using any access point. - Page 43 On the USB computer connection screen, choose Media device (MTP).The phone driver is then automatically installed on the computer. After the driver is installed, open the new drive and begin transferring media files between your phone and computer. Multimedia content on your phone can only be viewed through Windows Media Player.
-
Page 44: Applications
Applications Managing applications Downloading applications A wide selection of applications are available from a variety of sources. You can: Download applications from web pages using the browser on your phone. Download applications using a computer, and copy the applications to your phone. ... -
Page 45: Backup
Backup Backing up data to local storage On the home screen, touch Backup. Touch New backup. Select the data you want to back up, and follow the onscreen instructions to back it up. By default, backup data are saved to the HuaweiBackup folder in Files. Backup files can be encrypted and password-protected. -
Page 46: Clock
Touch Month, Week, and Day to switch between month, week, and day views. On the month view, flick left or right to switch between months. On the week view, flick left or right to switch between weeks. On the day view, flick left or right to switch between days. -
Page 47: Weather
Delete a city: Touch > Edit cities, touch beside the city you want to delete, and touch Stopwatch On the home screen, touch Under Stopwatch, touch to start timing. Touch to record multiple laps. Touch to stop the stopwatch. Touch to clear all stopwatch records. -
Page 48: Note
Updating the weather On the home screen, touch Tools > Weather. Flick left or right to find the city whose weather you want to update. Flick down from the top of your screen to manually update the weather. You can also set the weather to automatic update mode. Touch >... - Page 49 Touch to enable or disable the speaker. Touch to turn on or off the FM radio. Touch to return to the previous station. Touch to go to the next station. Touch to search and view the station list, view your favorite stations, and set a timer for turning off the FM radio.
-
Page 50: Phone Settings
Phone settings Turning on location services Before you use a map or navigation application, make sure you have turned on location services. On the home screen, touch Under All, touch Location. Touch to turn on your phone's location services. Touch Mode. You can then: Touch High accuracy to locate your position using GPS, Wi-Fi, and mobile data. -
Page 51: Changing The Lock Screen Style
Changing the lock screen style Setting a screen unlock pattern On the home screen, touch Under All, touch Security. Touch Screen lock > Pattern. Connect at least four dots to draw a pattern, and draw the pattern again for confirmation. Set a screen unlock PIN as an alternative method to unlock your phone should you forget your unlock pattern. -
Page 52: Setting The Pin Of Your Sim Card
On the home screen, touch then the All tab. Under Wireless & networks, touch More… and then Airplane mode to turn on or off airplane mode. When airplane mode is on, is displayed on the status bar. Setting the PIN of your SIM card A personal identification number (PIN) is delivered with your SIM card to better protect your phone data. -
Page 53: Restoring Factory Settings
It is recommended that you update through your phone's online update feature or download official update packages from Huawei's official website. All your data may be erased during a system update. It is recommended that ... -
Page 54: Setting The Date And Time
Wi-Fi instead. Local update Download the update package from http://consumer.huawei.com/ and save the download folder in the update package to the root directory of your phone's internal storage. If your phone supports a microSD card, you can also save the file to the root directory of your microSD card. -
Page 55: Changing The System Language
Changing the system language On the home screen, touch Under All, touch Language & input. Touch Language. Select a language. Accessibility You can turn on or off accessibility features, such as zoom magnification and large font. On the home screen, touch Under All, touch Accessibility. -
Page 56: Legal Notice
Huawei does not own the intellectual property of the third-party software and applications that are delivered with this product. Therefore, Huawei will not provide any warranty of any kind for third-party software and applications. Neither will Huawei provide support to customers who use third-party software and applications, nor be responsible or liable for the functions or performance of third-party software and applications. - Page 57 Huawei shall not be responsible for the legality, quality, or any other aspects of any software installed on this product, or for any uploaded or downloaded third-party works in any form, including but not limited to texts, images, videos, or software etc.
- Page 58 Privacy Policy To better understand how we protect your personal information, please see the privacy policy at http://consumer.huawei.com/privacy-policy.
- Page 59 All pictures and illustrations in this guide, including but not limited to the phone color, size, and display content, are for reference only. The actual product may vary. Nothing in this guide constitutes a warranty of any kind, express or implied. Model: Y560-U02 6011731_01...
Need help?
Do you have a question about the Ascend Y5 and is the answer not in the manual?
Questions and answers