Adaptica 2WIN Operator's Manual
Hide thumbs
Also See for 2WIN:
- Operator's manual (133 pages) ,
- User manual (20 pages) ,
- Troubleshooting manual (15 pages)
Table of Contents
Advertisement
Quick Links
Advertisement
Table of Contents

Related Manuals for Adaptica 2WIN


Summary of Contents for Adaptica 2WIN
- Page 1 2WIN OPERATOR MANUAL...
-
Page 2: Revision Notes
Revision notes Revision number Publication date 2014/12/12 Hardware configuration version Version 11.0 earlier Firmware configuration version Software configuration version... -
Page 3: Table Of Contents
Labels ..........................14 Package labeling ....................... 15 Interfaces ........................... 16 Graphical user interface ..................... 20 8. Precautions ........................21 9. Operative information ..................... 23 Register your 2WIN ......................23 Operating conditions ......................23 Unpacking .......................... 23 Insert battery ........................24... - Page 4 Extract battery ........................24 Battery-charging ........................ 25 Please load the batteries with the external battery charger provided......... 25 Operative instructions ......................26 a Environment setup ......................28 b Instrument setup ......................30 Eye selection ........................30 Interactivity ......................... 31 Patient data ........................
-
Page 5: Manufacturer Identification
1. Manufacturer identification Manufacturer Adaptica S.r.l. Address Via San Marco, 9/H 35129 Padova (PD) Italy Telephone +39 049 773 968 Mail: info@adaptica.com Web: www.adaptica.com 2. Legend of symbols Manufacturer identification data Date of manufacturing Electrical / electronic device subject to the WEEE... -
Page 6: Glossary
Auto Shutdown A procedure whereby 2WIN stops to work and switches off automatically. Auxiliary window Graphical window that displays additional data. - Page 7 Parallelism of visual axes, the normal eye muscle balance. Packages Additional software features that can be installed directly on 2WIN. Refraction When referred to human eye, this term, or the term Refractometry, are used to indicate the measurement of the Refractive Error, that is the error in the focusing of light by the eye.
-
Page 8: Intended Use Of The Device
4. Intended use of the device Instrument for the measurement of binocular and monocular refraction, via dynamic photoskiascopy. 5. Classification and Applied Standards Classification according MDD 93/42/EEC, Annex IX Class IIa Classification and type of applied parts There are no applied parts. IP classification IPX0 (degree of protection provided by the external plastic shells with reference to the penetration of any special material or water). -
Page 9: Quick User Guide
helpful hints related to your product. Important The 2WIN is a binocular refractometer and vision analyzer. It measures refraction of both eyes at the same time, at a distance of 1 meter. The 2WIN should not be confused with a table-top auto-refractometer (AR). ARs are designed to measure refractive errors of one eye at time, in an artificial condition of far fixation. -
Page 10: Main Applications
A stable measurement distance of 1 meter is also important. Exam procedure (Quick mode – default) Turn the 2WIN ON by pressing the ON/OFF button for 1 sec. and wait until the stand- by screen appears. Instruct the patient to keep his/her eyes wide open, clear of eyelids or eyelashes, and to fixate the centre of the camera (possibility to activate a small central LED in the 2WIN Menu). - Page 11 Screen examination – blurred, not in focus. Adjust the distance from the patient Adjust the distance to focus the image until the top bar is green (for details on screen tips also see: Verify the position of the subject / Check the position of the subject). ...
-
Page 12: Measurement Tips
2WIN displays “high M” (myopia) or “high H” (hyperopia). In the case the 2WIN displays “high M” or “high H” without displaying a numerical result (N.A., not accessed measurement), we suggest using a 10 D trial lens to offset refraction within the measurement range. -
Page 13: Description Of The Device
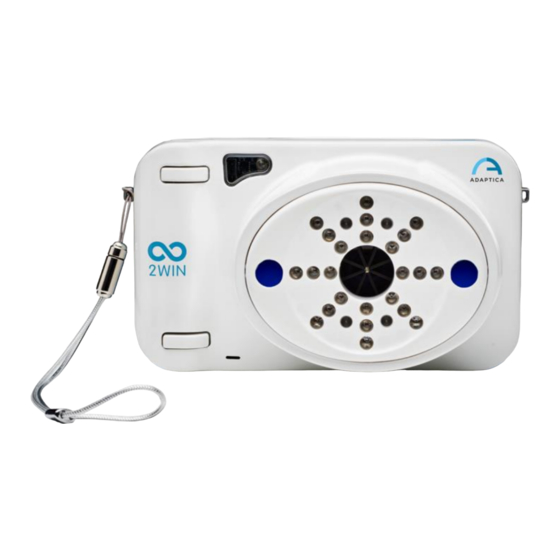
It can be connected to a mini-printer, via IrDA (Infrared Data Association) interface, to print the measurement results onto a strip of paper. 2WIN can be accessorized with a Wifi transmitter module. A label inside the USB & SD connection door identifies the presence of the Wifi module. -
Page 14: Labels
Explanation Manufacturer identification data: name and address Model name Serial number, including manufacturing date: 2WIN = model code D = year (A=2009 B=2010 ..) F = lot 00001 = unique serial number Battery operating voltage CE mark and Notified Body... -
Page 15: Package Labeling
Package labeling Label Detail Explanation Manufacturer identification Data: name and address Fragile – handle with care This side up – do not reverse Keep dry... -
Page 16: Interfaces
Interfaces Inside the USB & SD connection door there are a Micro USB port and a Micro SD card holder. On the bottom of the device there is also a 1/4”-20 threaded hole for a tripod. - Page 17 A summary of the functions of the buttons is reported below. Patient side: BUTTON S1 & S2 Operator side: BUTTON A BUTTON B CROSS BUTTON BUTTON C BUTTON D IMPORTANT NOTE: the buttons have different behaviors within the different submenus, these will be described in the manual in the corresponding paragraphs. Long CENTRE push to display Contextual help that explain buttons functionality.
- Page 18 long RIGHT push: Screening Mode: Selection of age interval for standard screening: push RIGHT to switch between 'Ok' button, 'Cancel' button and the list of age intervals. To move inside the list of age intervals, press CENTRE button. (NOTE: if the date of birth has been already inserted via the long LEFT push, then the age interval is automatically set);...
- Page 19 All the button functions are summarized in the following figure: KEY- DATE SCREEN BUTTON HOME BROWSE MENU IN MEASURE BOARD TIME Hold A on/off on/off Modes exit exit cancel cancel exit Hold B print print packages packages Change field Change field Change field Change field Patient UP...
-
Page 20: Graphical User Interface
Graphical user interface The graphical user interface is displayed in these figures:... -
Page 21: Precautions
8. Precautions Electromagnetic compatibility This device has been tested and found to comply to the limits for medical devices contained in IEC60601-1-2 and in Medical Device Directive 93/42/EEC. These limits are intended to provide reasonable protection against harmful interference in a typical medical installation. - Page 22 A device specific training is required for any operator to become able to use the system. For the correct use of the device it is mandatory to read carefully the instructions in § 8 - Operative information. Do not open the device: this could lead to electric shocks or damage to the system. No modification of this equipment is allowed.
-
Page 23: Operative Information
It's highly recommended to register your 2WIN at: http://www.2winforvision.com/register or sending an e-mail to register2win@adaptica.com containing your Name, Surname (or the name of your Organization), your Nationality and 2WIN serial number. Product Registration allows us to send: software updates ... -
Page 24: Insert Battery
Insert battery To insert the battery: slide the battery lock, hold it and gently open the battery door located in the lower side of the device. Insert the battery. Pay attention in inserting the battery with its connector facing down towards the instrument's inside so that the connector of the battery matches the connector inside the device. -
Page 25: Battery-Charging
When the device is connected to a computer via USB port the turning off is prevented. When you try to switch off the 2WIN a warning will advise you to remove usb cable. Before operation After charging the battery, be sure to set up date and time. -
Page 26: Operative Instructions
While the instrument is on, the monitor reduces the brightness after 30 seconds of inactivity. Then the monitor switches off after 30 seconds more. The 2WIN goes in standby after 1 min if normal or 10 min if Wifi is activated). After 600 seconds of standby mode, the device turns on, emits a sound alert, and shows a warning telling that after 30 seconds it will automatically shutdown. -
Page 28: Environment Setup
Environment setup For a proper use of the device it is important to prepare the environment for the examination. Verify adequate light conditions The ambient light should be low, there should be no lamps directly pointed towards the instrument and every direct source of light should not be seen by the device or reflected by eyes of the patient. - Page 29 Verify the position of the subject: The subject to be tested has to be 1 meter ± 5 centimeters (3 feet and 3 inches ± 2 inches) away from the device. In case of an incorrect position the feedback from the machine will help to evaluate the position.
-
Page 30: Instrument Setup
Instrument setup As soon as powered ON, the device will perform a fast auto-test, then it will turn directly to exam mode, and the display will show the screen depicted below. As the device features different kinds of measurements, and different exam modalities, an instrument setup must be performed before performing an examination or a sequence of examinations. -
Page 31: Interactivity
Power-ON screen with OS Please notice that the there is an inversion of left and right due to the fact that the patient and the machine are one in front to the other. Therefore the sign OS will appear on the right half of the screen, and viceversa. -
Page 32: Patient Data
Look at paragraph 9 “Wi-fi connection” pag.61. Browsing Mode The browsing mode allows to recover patient's data previously saved in the 2WIN SD memory. Holding the down button in the Home window, the Browsing mode is entered. The... - Page 33 If a stored patient data has been saved with a 2WIN sw version previous to 2.0 (but not lower than 1.4), then the browsing mode shows an exclamation point icon indicating that some fields are incomplete. It is possible to add a filter in the patient name and / or number for the search of a specific patient by pressing the Button D;...
-
Page 34: Preparation Of The Patient
Preparation of the patient During the exam the patient must look at the device, staring to the central front hole of the device. The operator shall instruct the patient to look at the device and to try to open wide his eyes so to avoid eyelashes covering the pupils. -
Page 35: Measurement
Measurement tips: usually the RED condition depends on a bad distance between the 2WIN and the patient. When the top bar is RED adjust the distance between the 2WIN and the patient in order to focus the image and to obtain a GREEN top bar. - Page 36 5. When the top bar is PERMANENTLY green release the BUTTON S1/S2 - the message "MEASURING" " will appear. Examination screen – focus OK 6. Stay firmly in the condition in which the upper bar is green until the message DATA PROCESSING appears on the display.
- Page 37 This label indicates if the eye presents a diopters value higher that 5 D of spherical equivalent. If n.a. is displayed when High M/H appears, this indicates that the refraction is outside the range of the 2WIN measurements range.
- Page 38 'Normal Mode' can be activated from Menu > Measurement > Measurement Modes > Normal Mode. This modality of examination and image acquisition has been the 2WIN default up to version 3.0 while after this version the Quick Mode is the suggested and default mode.
-
Page 39: Menu
2. Center the eye/s of the patient in the display live area, inside the blue rectangle (measurement area) – the message “FOCUSING” will appear. 3. Adjust the distance to the patient in order to focus the image (for details on screen hints see also: Verify the position of the subject) so to maximize the length of the colored bar: the longer the bar, the best the focus. - Page 40 First phase is calibration of the instrument, then 2WIN saves images of the patient's eyes. At the end of the acquisition of the images 2WIN begins the phase of post-processing to then show screen measurements.
- Page 41 Refraction: allows choice between plus and minus cylinder visualization. Once the measure is displayed, it is still possible to toggle between the two visualization modes by pressing the UP arrow on the cross button. Reliability: toggles ON/OFF the optional visualization of a reliability index, a number in the range 1 to 9 indicating how reliable the measure is.
- Page 42 Wide in Normal Mode Wide in Quick Mode NOTE: If Wide live is activated it is not possible to measure the ambient light The submenu Sound configures the interactivity sound. It consists of the to items Volume and Jingle. Volume: sets audio power output for the interactivity sound, within a range of four levels.
- Page 43 Most of the items in the submenu Rainbow Fixation are self-explanatory. They are different ways of turning on the visible led in front of the 2WIN. Custom sequence is to be configured by placing a proper custom file in the SD card. See the Customization paragraph for details Selecting Central Fixation, and then toggling ON the item Central Fixation, will enable a visible central fixation light, as an help to patient's attention.
- Page 44 IR Printing: enables/disables printing through IrDA to portable printer. Print on SD memory: enables/disables saving the exam onto SD card. Grid on Report: enables/disables overlay of a grid on the exam report saved onto the SD card. Strip in Pdf: enables/disables the saving of a pdf file similar to the IrDa strip. ...
- Page 45 AUX: Autoshutdown sets the autoshutdown timing. Backlight sets the LCD display backlight intensity, either between low, medium and high levels, or enabling automatic light dimming, driven by an ambient light sensor. Please notice that the brighter the display, the faster the battery gets discharged. The menu Functions configures three feature: From this menu it is possible to activate Packages.
-
Page 46: Quick Menu
Those information should be used for the reporting abnormalities to your distributor. Quick menu In order to get access to the preferred and most used functions of the 2WIN, it is possible to activate the Quick Menu. With this Menu is possible to recall rapidly any 2WIN function/item that is commonly used by the operator. - Page 47 Mode, Data and Time Modification. Example of contextual help. Note that the two light blue circle at the top and at the bottom of the window represent the two frontal START buttons, while the other symbols all the 2WIN backside buttons.
- Page 48 Summary of menu entries...
-
Page 49: Print
Print In order to print or to save the data press BUTTON B, once the measurement is done. If you want to print via the external optional portable IrDA (Infrared Data Association) printer, remember to point the machine towards the printer according to the following diagram before pressing the button. -
Page 50: Save Exam
*.jpg = original picture of the eyes of the patient *.xml = xml file version of the measurement results *.2win = binary file (for service purposes only) For data saved in pdf format., a grid on exam report can be added selecting the option 'Grid on Report' from Menu Print/Options/Grid on Menu. - Page 51 There are a limited number of prints before the machine starts rewriting oldest files. When printing, Printing: done” message will also show the internal memory total exam capacity (1000 patients). “Printing: done” message...
- Page 52 Data saved in the file Patient_date_number, with the different extensions listed above, can be extracted from the SD card by connecting the 2WIN to a PC by means of the USB cable supplied. The 2WIN is seen as an external memory storage, when the USB symbol appears on the 2WIN display it is possible to copy data from the 2WIN SD card to the PC.
-
Page 53: Meters
CVS Exporter Tool The 2WIN permits to export all the patient data stored in the SD card in a CVS (Comma Separated Value) file. This text-based file can be used to share data from 2WIN and spreadsheet documents. Select “Export Patient” from Menu>Print Once activated the export patient, the 2WIN will create in the root of the SD memory card the CVS file with the following name-format: Resume_Date_Hour. - Page 54 The meters can be disabled in the Menu. Accelerometer/Inclination Meter: The inclination meter is used to give a feedback to the user about the 2WIN inclination. The indicator is a double arrow that moves indicating the inclination. A gray box means that the meter is inactive, so the double arrow is to be disregarded.
-
Page 55: Gaze
The corneal reflex is on the virtual line connecting the 2WIN camera with the patient cornea and the fovea, that is the virtual patient's fixation direction. -
Page 56: Customization
XT = exotropia O = ortotropia The following picture gives a graphical representation of the codes. Customization Some features of the device can be customized by the user. To do this the user shall take the SD card out of the device, write it by means of a personal computer, then reinsert it in the device. - Page 57 0=off 1=rotating rgb 2=fixed white 3=rotating black on blue 4=fixed green 5=flashing red second number is a parameter in the range 50-1000: for modes 1 and 3 it represents the delay, that is the reciprocal of rotational speed third number is the intensity, in the range 0-255 ...
-
Page 58: Notification Center
3 different types of information: notifications on the measurements, notifications on the WiFi networking status and logins and notifications on the additional software packages installed. When a new notification is added to Notification Center, 2WIN logo will be shown with a red background. -
Page 59: Screening Table
To select the different Screening modes, use the following buttons: Cross button, push RIGHT or LEFT, UP or DOWN to switch between the list of age intervals, the 'Ok' button, and the 'Cancel' button. Cross button, push CENTRE button to save the selected interval, then choose 'Ok' or 'Cancel'. - Page 60 To insert a custom table, a file 'screeningTable.txt' has to be written and inserted in the SD memory card. Data must be written in the first five lines of the file. Each line corresponds to an age interval (maximum five intervals). The columns correspond to the following entries: Minimum age, Maximum age: age interval Hyperopia, Myopia, Astigmatism, Anisometropia, Anisocoria, Gaze: numerical thresholds...
-
Page 61: Upload
Anisocoria: the difference between the two pupils diameters must be lower than the threshold Gaze: if a single eye is measured, the mean gaze position, measured in x and y degrees, must be lower than this threshold. If both eyes are measured the above condition has to be verified together with the condition that the distance between the Purkinje reflection, normalized to the center, must lower than the threshold. - Page 62 NOTE: Screening Measurement Result is an Auxiliary window. Read the relative paragraph for more information.
-
Page 63: Wireless (Optional)
This picture shows that before starting any networking operations the 2WIN must be connected to a wifi Local Area Network. The user must insert the appropriate credentials in order to log the 2WIn to the Wifi access point present in the office/room. The access point will... - Page 64 In order to enable the wireless (WiFi connectivity) in the 2WIN-W is necessary to follow the following steps: Click on “Wireless ON” from Menu > Settings > Wireless > Wireless ON will item Wifi Activation and a tick will be...
- Page 65 Click on the item WiFi Status (or directly from Notification Center) to (1) check if the 2WIN is connected to your network and to (2) determine the IP of 2WIN. – WARNING – The default password of 2WIN for networking services (SFTP and VNC + SSH) is adaptica.
- Page 66 The sftp access to 2WIN is carried out with the following setting: User: 2winftp Password: adaptica There must be a Micro SD card to view the content. Port: adaptica is the default password if not changed by user --- --- --- --- --- --- --- ---...
- Page 67 The 2WIN user MUST read those manuals. Keyboard command for the use of vnc+ssh Once the VNC + SSH app is connected to the 2WIN, the procedure to input patient data (after the measurement) is: Type with your virtual keyboard the Enter button.
-
Page 68: Packages
Each package will be described in a specific package manual. You will be notified via email about the availability of a new 2WIN software package. In this document it is described the installation/management of additional packages. An example package “Average” is available by default. - Page 69 LEFT or RIGHT you can move it in the preferred position. The Package on the left is the default window showed. Press up again to exit the moving option). Auxiliary Windows From Main Screen of 2WIN, push right the CROSS button to display the Auxiliary window (default is screening result).
- Page 70 Press BUTTON B (print button) to display the Auxiliary Window choosing tab. With LEFT and RIGHT button you can choose your preferred window. (Note: you can select the default Auxiliary Windows to be showed by pressing up the CROSS button. The package will be highlighted, so that by pushing LEFT or RIGHT you can move it in the preferred position.
-
Page 71: Default Package
Packages notification When a package generate a notification, the notification center shows a P like icon to show that the notification comes from packages. Print Each package gives you the ability to print data in a combination of 3 modes: irda print, pdf Strip, pdf. - Page 72 Reset after 3 measures Reset after 5 measures Reset after 10 measures Options: Simplified View: displays only the results of measurement and fidelity (excluding diameter, gaze, PD and HT); Auto add: automatically includes the measurement, if valid, to compute the average; Average Package Auxiliary Window From the Main window RIGHT press to access the Auxiliary window (refer to the “Auxiliary window”...
- Page 73 Software upgrade instructions In case of future software releases to upgrade the 2WIN, the user will be contacted by means of an information note (email/fax/phone call) containing the description step by step of the instructions to upgrade the device. Maintenance and cleaning instructions No maintenance operations are required by the system.
- Page 74 collect such WEEE separately. The available return and collection system is defined by the local public administration, or in alternative an authorized company can recycle the WEEE. Please refer to public administration about the separate collection, if this information is not available, contact the manufacturer of the equipment.
-
Page 75: Troubleshooting
Troubleshooting #. Symptom Possible cause Solution Initial screen does not appear on the display of the battery Charge the battery device completely discharged On the display an error message appears. Electronic Contact service center, malfunctioning mentioning serial number On the display an error message appears. Software Contact service... -
Page 76: Additional Information
Additional information Technical specification Measuring range for spherical defect: -5,00D +5,00D Measurement precision for spherical defect: +/- 0,25 D Measuring range for cylindrical defect: -5,00D +5,00D Measurement precision for cylindrical defect: +/- 0,25 D Measuring range for cylinder axis: 1 – 180 degrees, step 1 degree Measurement precision for cylinder axis: +/- 5 degrees Measuring range for pupil diameter: 4 –... -
Page 77: Analitic Index
Note for service personnel only Adaptica will make available on request circuit diagrams, components part lists, descriptions, calibration instructions or other information that will assist service personnel to repair those parts of the equipment that are designated by Adaptica as repairable by service personnel...
Need help?
Do you have a question about the 2WIN and is the answer not in the manual?
Questions and answers