Weslo Cadence 200 User Manual
Hide thumbs
Also See for Cadence 200:
- Gebruiksaanwijzing (24 pages) ,
- Manuel de l'utilisateur (24 pages) ,
- Bedienungsanleitung (24 pages)
Advertisement
Quick Links
ORDERING REPLACEMENT PARTS
To order replacement parts, contact the ICON Health & Fitness, Ltd. office, or write:
ICON Health & Fitness, Ltd.
Customer Service Department
Unit 4, Revie Road Industrial Estate
Revie Road
Beeston
Leeds, LS118JG
UK
Tel:
08457 089 009
Outside the UK: 0 (044) 113 387 7133
Fax: 0 (044) 113 387 7125
To help us assist you, please be prepared to give the following information:
• the MODEL NUMBER of the product (WETL14805.1)
• the NAME of the product (WESLO CADENCE 200 treadmill)
• the SERIAL NUMBER of the product (see the front cover of this manual)
• the KEY NUMBER and DESCRIPTION of the desired part(s) (see the PART LIST and the EXPLODED DRAW-
ING in the centre of this manual)
Part No. 229249 R0905A
Printed in Canada © 2005 ICON IP, Inc.
Model No. WETL14805.1
Serial No.
Write the serial number in the
space above for future reference.
Serial
Number
Decal
QUESTIONS?
As a manufacturer, we are com-
mitted to providing complete
customer satisfaction. If you
have questions, or if there are
missing or damaged parts,
please call:
08457 089 009
or write:
ICON Health & Fitness, Ltd.
Customer Service Department
Unit 4
Revie Road Industrial Estate
Revie Road
Beeston
Leeds, LS118JG
UK
email: csuk@iconeurope.com
CAUTION
Read all precautions and instruc-
tions in this manual before using
this equipment. Save this manual
for future reference.
USER'S MANUAL
Advertisement

Related Manuals for Weslo Cadence 200


Summary of Contents for Weslo Cadence 200
- Page 1 To help us assist you, please be prepared to give the following information: QUESTIONS? • the MODEL NUMBER of the product (WETL14805.1) • the NAME of the product (WESLO CADENCE 200 treadmill) As a manufacturer, we are com- mitted to providing complete •...
-
Page 2: Table Of Contents
Sit with the soles of your feet together and your knees outward. Pull your feet toward your groin area as far as possible. Hold for 15 counts, then relax. Repeat 3 times. Stretches: Quadriceps and hip muscles. WESLO is a registered trademark of ICON IP, Inc. -
Page 3: Important Precautions
CONDITIONING GUIDELINES IMPORTANT PRECAUTIONS begin to use stored fat calories for energy. If your goal WARNING: WARNING: is to burn fat, adjust the speed and incline of the To reduce the risk of burns, fire, electric shock, or injury to persons, read Before beginning treadmill until your heart rate is near the lowest num- the following important precautions and information before operating the treadmill. - Page 4 PROBLEM: The walking belt slows when walked on DANGER: other than the procedures in this manual Always unplug the power should be performed by an authorized ser- SOLUTION: a. If an extension cord is needed, use only a 3-conductor, 1mm (14-gauge) cord that is no longer cord immediately after use, before cleaning vice representative only.
-
Page 5: Before You Begin
And when us. The model number of the treadmill is you’re not exercising, the unique CADENCE 200 can WETL14805.1. The serial number can be found on a be folded up, requiring less than half the floor space of decal attached to the treadmill (see the front cover of SOLUTION: a. -
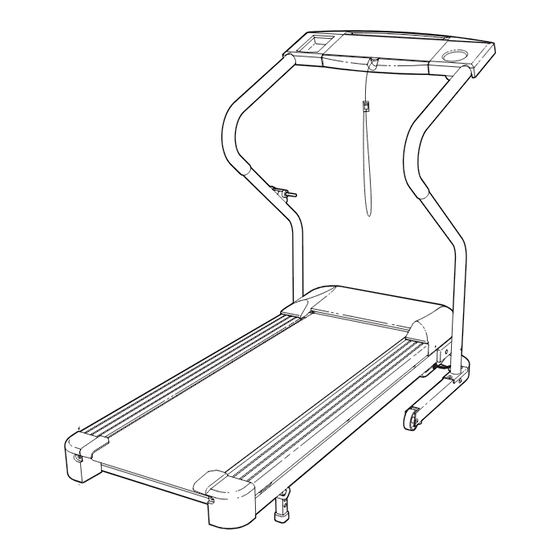
Page 6: Assembly
HOW TO LOWER THE TREADMILL FOR USE ASSEMBLY 1. Hold the upper end of the treadmill with your right hand as shown. Using your left hand, pull the lock knob to the Assembly requires two persons. Set the treadmill in a cleared area and remove all packing materials; do not left and hold it. - Page 7 3. Hold a Frame Spacer (27) against the right side of the HOW TO FOLD AND MOVE THE TREADMILL Frame (79) as shown. Insert a 3 1/2” Bolt (70) into the indicated hole in the Frame Spacer and the Frame. Next, tighten a 3/4”...
- Page 8 HOW TO CHANGE THE INCLINE OF THE 6. Carefully pull the opposite end of the tape to pull the TREADMILL Wire Harness (60) up through the Right Handrail (59) Incline Ground Wire and out of the hole in the side of the Right Handrail. To vary the intensity of your exercise, the incline of the treadmill can be changed;...
- Page 9 Monitor your progress with the display. To reset the displays, press the Stop button, 9. Securely tighten a plastic tie around the Wire Harness remove the key, and then reinsert the key. (60) and under the indicated hook on the Console (55) to prevent the Wire Harness from slipping.
-
Page 10: Operation And Adjustment
OPERATION AND ADJUSTMENT THE PRE-LUBRICATED WALKING BELT Your treadmill features a walking belt coated with high-performance lubricant. IMPORTANT: Never apply sili- cone spray or other substances to the walking belt or the walking platform. Such substances will deteri- orate the walking belt and cause excessive wear. HOW TO PLUG IN THE POWER CORD This product must be earthed. -
Page 11: Ordering Replacement Parts
1” Bolt (63)–4 1/4” Star Washer (76)–4 PART IDENTIFICATION CHART PART LIST—Model No. WETL14805.1 R0905A Key No. Qty. Description Key No. Qty. Description Remove this chart and use it to identify small parts during assembly. Save this chart and the EXPLODED DRAWING/PART LIST for future reference. Motor Hood Key/Clip 1/4”... - Page 12 EXPLODED DRAWING—Model No. WETL14805.1 R0905A...
Need help?
Do you have a question about the Cadence 200 and is the answer not in the manual?
Questions and answers