Table of Contents
Advertisement
Quick Links
Advertisement
Table of Contents

Related Manuals for D-Link ShareCenter 2Go - DNS-213


Summary of Contents for D-Link ShareCenter 2Go - DNS-213
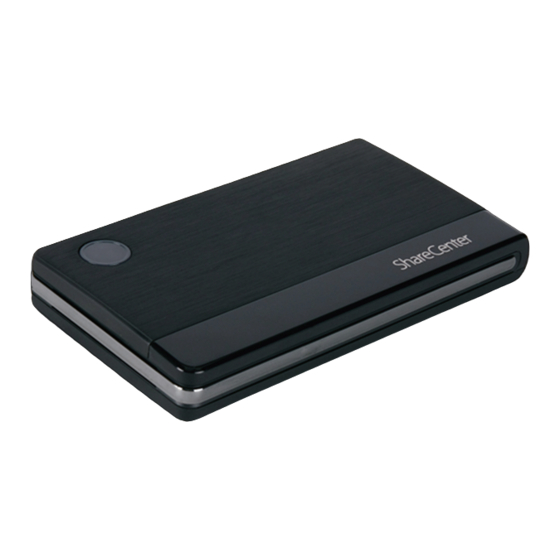
- Page 1 USER MANUAL ShareCenter™ 2Go - DNS-213 VERSION 1.0...
-
Page 2: Table Of Contents
Wizard .............. 21 E-Mail Alerts ............ 61 Setup ..............22 E-Mail Alert Settings ......... 62 Wizard .............. 22 E-Mail Alert Types ........63 LAN Setup ............26 Power Management ......... 64 Time and Date ..........27 D-Link ShareCenter™ 2Go User Manual... - Page 3 Scheduling Settings - Continued ..... 77 Schedule Backups List ........78 FTP / HTTP Downloads ........79 P2P Downloads ............. 80 Setting .............. 81 Adding Torrents ..........82 P2P Tasks list ..........83 Support ..............84 D-Link ShareCenter™ 2Go User Manual...
-
Page 4: Product Overview
„ Computer with: 1GHz processor / 512 MB RAM / 200 MB available space / CD-ROM drive „ Internet Explorer version 7.0, Mozilla Firefox 3.0, Apple Safari 4.0 and above „ Windows XP (with Service Pack 2), Windows Vista , or Windows ® ® ® D-Link ShareCenter™ 2Go User Manual... -
Page 5: Introduction
In addition, the ShareCenter™ 2Go can be used to stream photos, music, and videos to UPnP AV compatible network media players (such as those found in D-Link’s MediaLounge product line). This feature is highly convenient as it allows you to turn off a computer that would normally be needed for the same function. -
Page 6: Features
ShareCenter™ 2Go and unplug the USB cable. Then, plug in the Ethernet Cable and power back on the ShareCenter™ 2Go. Disclaimer: D-Link assumes no responsibility for any lost data. In the event of any warranty return, repair, or drive replacement, all data contained on the hard drive may be lost during service. -
Page 7: Hardware Overview
Power is on and device is in a ready state Blinking Blink 3 times after system booting up (restarting) ready Power is off or device is in power saving mode LAN LED Solid Connected to LAN (NAS mode) Blinking Transferring data Not connected D-Link ShareCenter™ 2Go User Manual... -
Page 8: Rear And Bottom Panel(Connections)
Receptacle Reset Pinhole and Button Disclaimer: The factory-installed internal hard drive can only be replaced or repaired by a D-Link Authorized Service Center. Any attempt by the consumer to replace or repair the internal hard drive will void the warranty. -
Page 9: Direct Attached/Network Storage Mode
This mode allows you to use the ShareCenter™ 2Go as a network storage device. To use this mode power-off the drive Storage and connect an RJ45 cable between the gigabit Ethernet port and the local network connection. Then power-on the drive and connect to the drive using the Easy Search D-Link Storage Utility. Note: When using the ShareCenter™ 2Go as a USB 2.0 portable drive, the Network Storage functionality will be disabled. -
Page 10: Installation
Connector on an Ethernet Cable to your Local Network. This cable should connect the ShareCenter™ 2Go to your local network via a router or switch, or directly to a computer for configuration. 3. Plug in the power adapter to a power receptacle. D-Link ShareCenter™ 2Go User Manual... -
Page 11: Direct Attached Storage Function
1. Connect the Mini-USB cable plug into the ShareCenter™ 2Go Mini-USB port. 2. Connect the Type A USB connector(s) to USB port(s) of the computer that you wish to connect directly with the ShareCenter™ 2Go. D-Link ShareCenter™ 2Go User Manual... - Page 12 In XP, Vista, and Windows 7 the ShareCenter™ 2Go will automatically install once it is powered-on. 4. Open My Computer and the new drive will appear. By default the ShareCenter™ 2Go will use the first available drive letter. D-Link ShareCenter™ 2Go User Manual...
-
Page 13: Easy Search Utility
Section 3 - Configuration Easy Search Utility It is recommended to use the included D-Link Easy Search Utility when accessing and configuring the ShareCenter™ 2Go for the first time. If you want to change the IP address before logging in or are unable to connect to the ShareCenter™... -
Page 14: Utility Overview
Click Disconnect to disconnect the selected mapped volume. Exit Click Exit to close the utility. About Click to see the basic firmware and copyright information about D-Link Easy Search Utility. D-Link ShareCenter™ 2Go User Manual... -
Page 15: Connecting To The Sharecenter™ 2Go
Configuration menus or Applications menus. The Configuration menus are used for management and maintenance of the ShareCenter™ 2Go. The Applications menus include BitTorrent downloading and Scheduled Downloading. The Default username to use for the configuration is admin. D-Link ShareCenter™ 2Go User Manual... - Page 16 Note: After logging in to the ShareCenter™ 2Go for the first time it is recommended to add a password to the admin account. (See the “Admin Password” section on page 58 for more information.) D-Link ShareCenter™ 2Go User Manual...
- Page 17 Section 3 - Configuration After logging in, you will be redirected to the ShareCenter™ 2Go Web UI: See the “Web UI” section on page 20 for more information on how to use the Web UI. D-Link ShareCenter™ 2Go User Manual...
-
Page 18: Mapping The Network Drive
The Easy Search Utility located on the Installation CD is used to map the ShareCenter™ 2Go to your Windows computer where it appears as a Network Storage Drive. Follow these steps to map the drive to your computer. 1. Launch the D-Link Easy Search Utility from the Installation CD. You will see the ShareCenter™ 2Go in the Network Storage Device list. - Page 19 Any volumes located on the drive appear below in the Drive Mapping list. If this is the first time you are mapping the drive, the volume name Volume_1 should appear in the list. D-Link ShareCenter™ 2Go User Manual...
- Page 20 “Z” as the default. The pull-down menu lists drive letter options in reverse alphabetical order (Z to A). If you add another ShareCenter™ 2Go, the next default letter will be “Y” then “X” and so on. D-Link ShareCenter™ 2Go User Manual...
- Page 21 4. A confirmation dialog box will inform you if the drive has been mapped successfully. 5. You will now be able to view the mapped drive using Windows Explorer. To view the mapped drive, click on the My Computer icon on the Windows desktop. D-Link ShareCenter™ 2Go User Manual...
- Page 22 Section 3 - Configuration 6. The ShareCenter™ 2Go’s drive or shared folder appears as a mapped drive, using the letter(s) that you specified. D-Link ShareCenter™ 2Go User Manual...
-
Page 23: Web Ui
„ Status - Contains a summary of the ShareCenter™ 2Go information and logs. „ Support - Contains the ShareCenter™ 2Go help files. These pages and their configuration options will be discussed in detail in the following pages of this manual. D-Link ShareCenter™ 2Go User Manual... -
Page 24: Configuration
The ShareCenter™ 2Go has a setup Wizard that allows you to quickly configure some of the basic device settings. Click the Run Wizard button in the Setup>Wizard window to launch the Setup Wizard. Click to Start the wizard D-Link ShareCenter™ 2Go User Manual... -
Page 25: Setup
Click Next to continue. It is recommended you set an admin password here. Enter the new password and re-enter it for confirmation. Click Next to continue. D-Link ShareCenter™ 2Go User Manual... - Page 26 Section 3 - Configuration Choose the appropriate Time Zone and Daylight Savings Time settings and click Next to continue. Edit or change the ShareCenter™ 2Go LAN information or keep the current settings. Click Next to continue. D-Link ShareCenter™ 2Go User Manual...
- Page 27 ShareCenter™ 2Go, or leave the default values and click Next to continue. Enter in your email information or leave the default values. The setting will be used to send event information from the DNS to the address entered. D-Link ShareCenter™ 2Go User Manual...
- Page 28 When the wizard completes, click Back to go back and make changes or click Completed to restart the ShareCenter™ 2Go and save the configuration. When the login prompt appears, login using the new administrator password and click Configuration. D-Link ShareCenter™ 2Go User Manual...
-
Page 29: Lan Setup
IP address. If you do not know the new IP address (as would likely be the case when changing from a static IP address to DHCP client) use the Easy Search Utility on the Installation CD to learn the IP address of the device. D-Link ShareCenter™ 2Go User Manual... -
Page 30: Time And Date
ShareCenter™ 2Go with an Internet time server. NTP can be configured using a URL or one of the two D-Link time servers. To use one of the D-Link time servers for NTP, use the pull-down menu to select the NTP server that is closest to your location. -
Page 31: Device
By default the device name is dlink-xxxxxx, where xxxxxx is the last six digits of the MAC address. Description Assigns a device description to the ShareCenter™ 2Go. Click on the Save Settings button to apply and save the new settings. D-Link ShareCenter™ 2Go User Manual... -
Page 32: Language
Click on the Save Settings button to apply and save the new settings. Note: Please check D-Link’s local website for new Language Packs. D-Link ShareCenter™ 2Go User Manual... -
Page 33: Advanced
(Create) Users for the details. Delete Buttons Use the Delete buttons in the User or Group Settings to remove a user or group setting from the configuration. A confirmation box appears to cancel the deletion if necessary. D-Link ShareCenter™ 2Go User Manual... -
Page 34: Add (Create) Users
Username and Password. Click Next button to continue. 4. In the Join to Group window click the check boxes to select the groups the user will be a member of. Click Next button to continue. D-Link ShareCenter™ 2Go User Manual... -
Page 35: Add (Create) User
Completed window. Click the Completed button to add the new user account or click Exit to cancel the add operation. 8. The Success window should appear verifying the addition of the new user. D-Link ShareCenter™ 2Go User Manual... -
Page 36: Add (Create) Group
Group Name. Click Next button to continue. 4. In the Join User To Group window click the check boxes to select the users that will be a member of the group being created. Click Next button to continue. D-Link ShareCenter™ 2Go User Manual... -
Page 37: Add (Create) Group
Completed window. Click the Completed button to add the new group account or click Exit to cancel the add operation. 8. The Success window should appear verifying the addition of the new group. D-Link ShareCenter™ 2Go User Manual... -
Page 38: Navigation And Search Buttons
User or entry box that appears type the name of the user or Group name group to search for then click the Apply button. Click the Clear button to view the entire list again. D-Link ShareCenter™ 2Go User Manual... -
Page 39: Network Shares
Click to reset the Network Access List and remove Access List all the previously created Network Shares Navigation buttons Use the controls at the bottom of the window to scroll through the list of Network Shares. D-Link ShareCenter™ 2Go User Manual... -
Page 40: Add A Network Share
2. The first window outlines the 4 steps of the Add Network Share wizard - click the Next button to continue. 3. In the Select Network Share window click the word Volume next to the checkbox to expand volume view. D-Link ShareCenter™ 2Go User Manual... - Page 41 All Accounts; to give any configured user and group access or deny rights to the Network Share, or select Specific User/ group to individually assign access and deny rights. Click the Next button to continue. D-Link ShareCenter™ 2Go User Manual...
- Page 42 Network Share to Assign Access Rights. Select Read Only, - continued Read Write, or Deny Access access rights to be applied to all users. Go to step 8 since All Accounts was selected previously. D-Link ShareCenter™ 2Go User Manual...
- Page 43 Use the two windows to - continued assign read/write/deny rights to both Users and Groups by checking the checkboxes for the individual users and groups. Click the Next button in each window to continue. D-Link ShareCenter™ 2Go User Manual...
- Page 44 FTP check box if the new Network Share is to allow FTP access. 10. In the FTP Settings window select the access rights that Anonymous FTP users will have when using FTP protocol to access the Network Share. D-Link ShareCenter™ 2Go User Manual...
- Page 45 Selected the Completed button to save the new Network Share settings. Use the Exit button to cancel the operation. 12. In the CIFS list the new network share should now appear. D-Link ShareCenter™ 2Go User Manual...
- Page 46 Map archive, When enabled, the file attribute--”Archive” will be copied as the file is being stored on the ShareCenter™ 2Go. Certain backup software programs attach this attribute to files that are being stored as backups. D-Link ShareCenter™ 2Go User Manual...
-
Page 47: Ftp Server
The FTP Server window is divided into 3 main sections: FTP Server This section contains the configuration settings for Settings the ShareCenter™ 2Go FTP Server. FTP Server Displays the current status of the FTP Server. Status D-Link ShareCenter™ 2Go User Manual... -
Page 48: Ftp Server Settings
ID into the entry box to the left of the drop-down list. SSL/TLS Click this checkbox to limit FTP connectivity to use secure FTP over SSL or TLS only. Click on the Apply button to apply and save the new settings. D-Link ShareCenter™ 2Go User Manual... -
Page 49: Ftp Server Status
Displays if Secure FTP over SSL or TSL is connection implemented. Passive Mode The port range available for Passive Mode FTP connections Start / Stop FTP Click this button to Start or Stop the FTP server. Server D-Link ShareCenter™ 2Go User Manual... -
Page 50: Ftp Server Behind A Router
Internet. Once the port has been forwarded on the router, users from the Internet will access the FTP server through the WAN IP address of the router. If you are using a D-Link router, such as the WBR-2310 used in the example below, your port forwarding rule should be similar to the following: Name Type a name for the ShareCenter™... -
Page 51: Secure Ftp Connections
FTP connections over SSL and TLS. Install the FireFTP add on for Firefox and restart the application. The FireFTP option appears in the Tools menu. Select the FireFTP option to launch it in a new window. D-Link ShareCenter™ 2Go User Manual... - Page 52 Use the Create an account pull-down menu to create a new connection to the FTP server. Note: A user account must also be created on the ShareCenter™ 2Go and the FTP server started in the FTP Server menu for the connection to succeed. D-Link ShareCenter™ 2Go User Manual...
- Page 53 FTP user account on the ShareCenter™ 2Go in the Login and Password fields. „ Click OK to apply the account settings. The newly created connection setting will appear as an option in the “Create an account” pull-down menu. D-Link ShareCenter™ 2Go User Manual...
- Page 54 In the Connection tab choose the security protocol to use and click OK. The FireFTP application is now ready to connect to the ShareCenter™ 2Go. Click on Connect next to the connection name in the Firefox browser window. D-Link ShareCenter™ 2Go User Manual...
- Page 55 Since this connection is from a trusted source on the LAN, you can make an exception to the normal security certification. Click the Or you can add an exception… button. Click the Add exception… button. Click the Get Certificate button. D-Link ShareCenter™ 2Go User Manual...
- Page 56 Click on Connect to establish the connection. Note: An FTP user account must also be created on the ShareCenter™ 2Go with the FTP server started in the FTP Server menu for the connection to succeed. D-Link ShareCenter™ 2Go User Manual...
- Page 57 Section 3 - Configuration Depending on the Read/Write capabilities configured for the User associated with the connection, select the files to be transferred to or from the ShareCenter™ 2Go. D-Link ShareCenter™ 2Go User Manual...
-
Page 58: Upnp Av Server
Browse to select a specific folder. Refresh Click the Refresh button after adding new files to be used by UPnP AV compatible devices. Click on the Save Settings button to apply and save the new settings. D-Link ShareCenter™ 2Go User Manual... -
Page 59: Itunes Server
ID into the entry box to the left of the drop-down list. Auto Refresh Click Refresh after adding the new files that will be used with iTunes. Click on the Save Settings button to apply and save the new settings. D-Link ShareCenter™ 2Go User Manual... - Page 60 2Go, select it and you will be prompted to enter the iTunes server password if required. Select the ShareCenter™ 2Go. When prompted, enter the iTunes server password. Click OK. Media stored on the ShareCenter™ 2Go will be available for use in iTunes. D-Link ShareCenter™ 2Go User Manual...
-
Page 61: Maintenance
Enter the current password. (Leave this blank if you have not set a password yet.) New Password Enter a new password. Confirm Enter the new password again for confirmation. Password Click Save Settings to save the new password. D-Link ShareCenter™ 2Go User Manual... -
Page 62: System
Select either Celsius or Fahrenheit scale and input the Threshold setting per below: Default setting: 161 °F or 72 °C Settings range: 158 to 170 °F or 70 to 77 °C Click Apply to save the settings. D-Link ShareCenter™ 2Go User Manual... -
Page 63: Firmware Upgrade
The ShareCenter™ 2Go Firmware menu makes it simple to check for new firmware releases and upload them to the device. Firmware This section provides a link to check for new firmware Upgrade on the D-Link support website. If a new firmware is available, download the file to your local computer. Current This section provides information about the current Firmware Info ShareCenter™... -
Page 64: E-Mail Alerts
E-Mail Events This section contains the alert options and their configuration settings. Click on the Save Settings button to apply and save any changes made to the E-mail Alert settings. D-Link ShareCenter™ 2Go User Manual... -
Page 65: E-Mail Alert Settings
This address must correspond with the SMTP server configured above. E-mail Alert Settings- Anonymous Category SMTP Click to turn on SMTP authentication. Authentication Test E-Mail Click the Test E-Mail button to send a test alert and confirm your settings are correct. D-Link ShareCenter™ 2Go User Manual... -
Page 66: E-Mail Alert Types
S.M.A.R.T tests are used to warn users about any User-Defined 2Go will power off for safety. imminent drive failures. This allows users to take Threshold appropriate action before the drive fails and avoid Fahrenheit data loss. D-Link ShareCenter™ 2Go User Manual... -
Page 67: Power Management
3. Use the Time drop-down menus to specify the time that you want the ShareCenter™ 2Go to power off on. 4. Click the Apply button at the bottom of the window to save the Power Off Scheduling settings. D-Link ShareCenter™ 2Go User Manual... -
Page 68: Format Disk
Cancel button or close the dialog box. The format might take several minutes depending on the capacity of the hard disk. Disks are formatted with the Microsoft disk file format NTFS. D-Link ShareCenter™ 2Go User Manual... -
Page 69: Dynamic Dns
If the Dynamic DNS provider supplies only a key, enter that key in the three fields. Status Displays your DDNS status. Click on the Save Settings button to apply and save the new settings. D-Link ShareCenter™ 2Go User Manual... -
Page 70: Disk Diagnostic
If the HD is grayed out, the hard drive does not support S.M.A.R.T. See the “S.M.A.R.T Test” section on page 68 for more information. D-Link ShareCenter™ 2Go User Manual... -
Page 71: S.m.a.r.t Test
Select whether you want to run a Quick Test or and Extended Test by clicking the appropriate radio button and then click the Start button. When the test has completed, the result will appear in the Result column. D-Link ShareCenter™ 2Go User Manual... -
Page 72: Status
Displays the workgroup, name, description current ShareCenter™ 2Go temperature, the Rx/Tx statistics, and the system up time.. Volume Info Displays the hard drive information, including the volume name, hard drive capacity, used space, and remaining drive (unused) space. D-Link ShareCenter™ 2Go User Manual... -
Page 73: Hard Drive Info
“Normal”. If your hard drive is not healthy, the status will display “Abnormal”. At any time, if you wish to view the S.M.A.R.T table of the hard drive, you can click the Normal/Abnormal button. D-Link ShareCenter™ 2Go User Manual... -
Page 74: Logs
Click the Clear System Log button clear all the log events recorded in the ShareCenter™ 2Go’s log. Navigation Use the navigation buttons at the bottom of the log Buttons event list to scroll through the available log pages. D-Link ShareCenter™ 2Go User Manual... -
Page 75: Support
Section 3 - Configuration Support The ShareCenter™ 2Go Support page provides a menu of Support topics explaining the features of the device. D-Link ShareCenter™ 2Go User Manual... -
Page 76: Schedule Downloads
To access the Schedule Downloads application menu, you must first logout of the ShareCenter™ 2Go configuration menus. The login menu appears in the web page. Type the default User Name and Password and click the Applications button. D-Link ShareCenter™ 2Go User Manual... - Page 77 Section 3 - Configuration The ShareCenter™ 2Go’s Scheduling configuration page will appear: D-Link ShareCenter™ 2Go User Manual...
-
Page 78: Scheduling
Schedule List This section is used to view and manage the files or folders that are being downloaded from an FTP server. Click on the Save Settings button to apply and save the new settings. D-Link ShareCenter™ 2Go User Manual... -
Page 79: Scheduling Settings
Enter the URL of the site or server you are initiating a transfer from. e.g. ftp://123.456.789/Test ftp://123.456.789/test.txt http://www.test.com/test.txt Test Click Test to test that the URL is valid and that the user name and password are correct. D-Link ShareCenter™ 2Go User Manual... -
Page 80: Scheduling Settings - Continued
Incremental Checking Incremental Backup will have the Backup ShareCenter™ 2Go compare identical file names at the source and destination. Files will only be overwritten if the source file has been edited more recently. D-Link ShareCenter™ 2Go User Manual... -
Page 81: Schedule Backups List
Select the Backup and then click Modify to view the settings in the Schedule Backups Settings. Then edit them as required. Delete To remove a download from the Schedule List, click the backup download to select it and then click the Delete button. D-Link ShareCenter™ 2Go User Manual... -
Page 82: Ftp / Http Downloads
Section 3 - Configuration Scheduling FTP / HTTP Downloads Schedule List Displays the completed, active, and pending scheduled downloads and backups. Click the Refresh button to refresh the download list. D-Link ShareCenter™ 2Go User Manual... -
Page 83: P2P Downloads
The available options are: „ Add Torrents From URL „ Add Torrent From File See the following pages for more information on how to add Torrents to the ShareCenter™ 2Go. D-Link ShareCenter™ 2Go User Manual... -
Page 84: Setting
Click Automatic to allow the DNS to configure Control the download and upload rates. Click Manual to configure the Maximum upload and download rates in the entry fields below. Configuring 1 in the field sets the rate to unlimited. D-Link ShareCenter™ 2Go User Manual... -
Page 85: Adding Torrents
10. Note: The ShareCenter™ 2Go torrent downloading application has been tested to function properly with Windows Internet Explorer and Mozilla Firefox web browser software. Torrent downloads might not work using other browser software. D-Link ShareCenter™ 2Go User Manual... -
Page 86: P2P Tasks List
100% downloaded. „ Use the Detail button to expand the torrent file information in a separate window. „ Use the Top/Up/Down/Bottom buttons to navigate the list. D-Link ShareCenter™ 2Go User Manual... -
Page 87: Support
Section 3 - Configuration Support The Schedule Downloads Help page provides a menu of Help topics that explain the Schedule Downloads features. D-Link ShareCenter™ 2Go User Manual...
Need help?
Do you have a question about the ShareCenter 2Go - DNS-213 and is the answer not in the manual?
Questions and answers