Subscribe to Our Youtube Channel
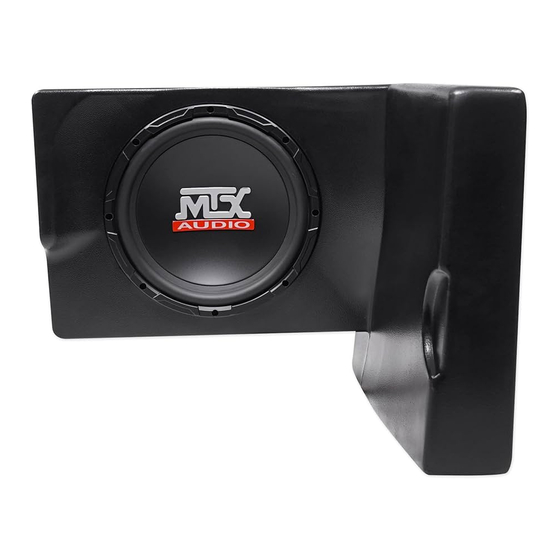
Summary of Contents for MTX RANGER-10
- Page 1 OWNER’S MANUAL RANGER-10 POLARIS RANGER AMPLIFIED SUBWOOFER ENCLOSURE ® ® M T X . C O M...
-
Page 2: Important Notice
IMPORTANT NOTICE If you have any questions regarding wire routing in a vehicle, please contact MTX Technical Support at 1-800-225-5689. When connecting power and ground wires ensure that the red power wire is fused at the point where it is connected to the vehicle’s battery. Failure to do so can result in damage to the vehicle if a short circuit develops between the vehicle connection point and the product. -
Page 3: Specifications
FEATURES • 10" All-Weather Amplified Subwoofer Enclosure • Integrated 250-Watt RMS / 500-Watt Peak Power Amplifier • Integrated Power and Ground Connections • Low Level Input with External Gain Control • Dash Mount Bass Control Knob (Included) • Mounts Underneath Driver’s Seat (2 Seat Model) or Underneath Driver’s Side Rear Seat (4 Seat Model) - Direct Fit, No Cutting Required SPECIFICATIONS •... -
Page 4: Installation
INSTALLATION Step 1 - Lift the driver’s seat up and remove the plastic tub. The tub will not be reused. Step 2 - Remove the T40 screws from the driver’s side. The single cab RANGER uses four screws on the floor area, one screw on the front fender area (the lowest screw), and one screw on the back of the side panel. - Page 5 The dual cab RANGER uses two screws on the floor area, one screw on the fascia below the seat, and one screw on the back of the side panel. Step 3 - Remove the front and rear locking pins. M T X . C O M...
- Page 6 Step 4 - Loosen the pipe clamp on the fuel filler pipe with a flat blade screw driver. The fuel filler pipe should be able to be pulled from the rubber fuel pipe. Take care when doing so. WARNING: Do not smoke during this step. Step 5 - Carefully pull away the side panel from vehicle. The gas cap / fuel filler pipe is attached to the plastic side panel and will slide out of the rubber fuel pipe. M T X .
- Page 7 Two brass inserts will be visible when looking down from the top and the MTX logo will be pointing towards the outside of the vehicle. Step 7 - Remove the two T40 screws as shown above. These screws hold down the vehicle plastic brace under the seat.
- Page 8 Step 9 - Line up the brass insert on the front of the enclosure with the hole in the vehicle frame. Using the included M6 bolt and washer, attach the enclosure to the vehicle. Step 10 - Tighten all M6 bolts into the enclosure as well as the T40 bolts holding the top enclosure bracket to the vehicle.
- Page 9 Step 12 - Attach the enclosure to the 90° angle bracket using the included ST6.3 self-tapping screws. ⁄ " drill bit should be used to pre drill holes in the enclosure. Be careful not to strip them when tightening into the enclosure material. Do not use an impact driver for these screws. Step 13 -Now that the enclosure is securely tightened in place, the power and signal wires need to be connected to the battery and signal source.
- Page 10 NOTES: M T X . C O M...
- Page 11 NOTES: M T X . C O M...
- Page 12 © 2016 Mitek Corporation. All rights reserved. MTX, Mud Nation, and Let’s Do Something Dirty are trademarks of Mitek Corporation. All other trademarks are property of their respective owners. Designed and Engineered in the U.S.A. Due to continual product development, all specifications are subject to change without notice.


Need help?
Do you have a question about the RANGER-10 and is the answer not in the manual?
Questions and answers