Table of Contents
Advertisement
Quick Links
Advertisement
Table of Contents

Related Manuals for Electrolux CASA EHSM2000


Summary of Contents for Electrolux CASA EHSM2000
- Page 1 STANDMIXER CASA MODEL EHSM2000 EN • ID • TH • VN...
- Page 2 EN Instruction book ....3–12 Before using the appliance for the rst time, please read the safety advice on page 4. Buku petunjuk......3-12 Sebelum menggunakan alat ini untuk pertama kalinya, bacalah petunjuk keselamatan di halaman 4. Resep Kue Renyah ........12 3-12 Sách hư...
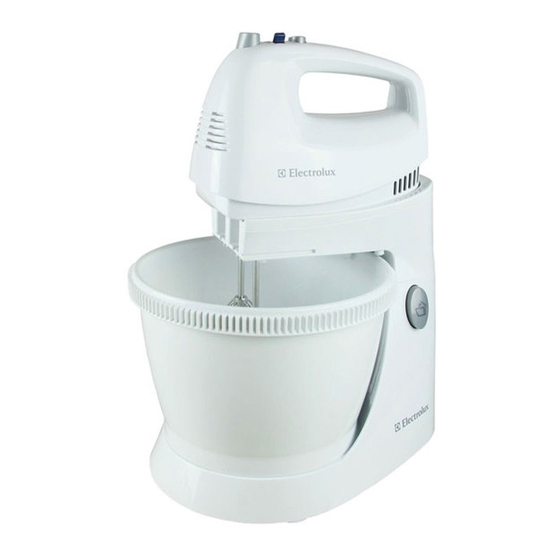
- Page 3 Components Komponen Thành Phần Cấu Tạo Accessory release button A. Tombol pelepas aksesori ON/OFF switch B. Saklar ON/OFF A. Nút tháo phụ kiện C. Speed range selector C. Saklar pemilih rentang B. Công tắc ON/OFF switch kecepatan C. Nút chỉnh tốc độ D.
-
Page 4: Safety Advice
Safety advice / Read the following instruction • Always disconnect the appliance from carefully before using the appliance for the supply if it is left unattended and before assembling, disassembling or • This appliance is not intended for use cleaning. by persons (including children) with •... - Page 5 / Hư ng d n an toàn Vui lòng đọc kỹ các hướng dẫn sau • Luôn luôn ngắt nguồn điện thiết bị trước khi sử dụng thiết bị lần đầu nếu máy không được sử dụng, trước tiên. khi tháo, lắp phụ kiện hoặc chùi rửa •...
-
Page 6: Getting Started
Getting started / / B t đ u s d ng Fitting the mixer to the processor 2. Removing the mixer from the 3. Raising/lowering the mixer. Ensure stand. processor stand. To remove, press that the mixer is on speed setting 0 the lock release and pull the mixer before raising/lowering! Press the selecting speed setting 0) and remove... - Page 7 4. Attaching/removing the mixing 6. Push whisks or dough hooks into , be sure to clean bowl. With the mixer raised, the whisks and dough hooks. Before accessory slots underneath the mixer, accessories can be easily changed inserting or removing them from until they click into place.
- Page 8 Getting started / B t đ u s d ng 7. Before removing whisks or hooks unplug the handmixer. Then hold the pressing the eject button. 7. Sebelum melepas besi atau kait pengaduk, cabut steker alat dari stopkontak. Kemudian pegang mixer dengan erat pada satu tangan, sambil menekan tombol pelepas.
-
Page 9: Operating Instructions
Operating instructions / / Hư ng d n s d ng 1. The mixer can be used continuously 2. Operating the mixer. The bowl 3. When the Pulse button is pressed for up to 5 minutes. Then allow rotates driven by the gear of dough and held during operation, the mixer to cool for at least 20 minutes. -
Page 10: Settings And Troubleshooting
Settings and troubleshooting / Einstellungen und Fehlersuche Các thiết lập và sự cố vận hành Setting Speed range 1–5 Kneading, Mixing Start with 1 or 2, then up to 5 Folding in 3, 4 Stirring Start with 2 or 3, then speed up Whisking, Frothing 3, 4 or 5 Start processing at low speed to avoid powdery foods and liquids spraying out. -
Page 11: Cleaning And Storage
Cleaning and storage / / Vệ sinh và bảo quản 1. Before cleaning, always unplug the Whisks, dough hooks and mixing 3. Store the dough hooks and whisks appliance. Never rinse or immerse bowl can be cleaned with a brush in the mixing bowl located on the appliance in water, just wipe with a under running water or in the... - Page 12 Disposal / / Sự thải loại Old appliance which could otherwise be caused by Disposal inappropriate waste handling of this Packaging materials The symbol on the product or on product. For more detailed information The packaging materials are environ- its packaging indicates that this product about recycling of this product, please mentally friendly and can be recycled.
- Page 13 Kue renyah 300 g tepung terigu 150 g mentega yang dilunakkan 75 g air sedikit garam Potong mentega menjadi kotak-kotak kecil dan masukkan ke dalam tepung di mangkuk. Aduk dengan kait pengaduk menjadi remah dan tambahkan air hingga membentuk adonan. Jangan olah lebih dari 3 menit. Diamkan adonan selama 1 jam di tempat yang dingin sebelum dimasak.
- Page 14 Share more of our thinking at www.electrolux.com 201104-13-rev01...
Need help?
Do you have a question about the CASA EHSM2000 and is the answer not in the manual?
Questions and answers