Advertisement
Quick Links
Advertisement

Related Manuals for SilverStone SST-TD02


Summary of Contents for SilverStone SST-TD02
- Page 1 MANUAL...
- Page 3 Installation and system optimization guide: The following manual and guides were carefully prepared by the SilverStone engineering team to help you maximize the potential of your SilverStone product. Please keep this manual for future reference when upgrading or performing maintenance on your system. A copy of this manual can also be downloaded from our website at: http://www.silverstonetek.com...
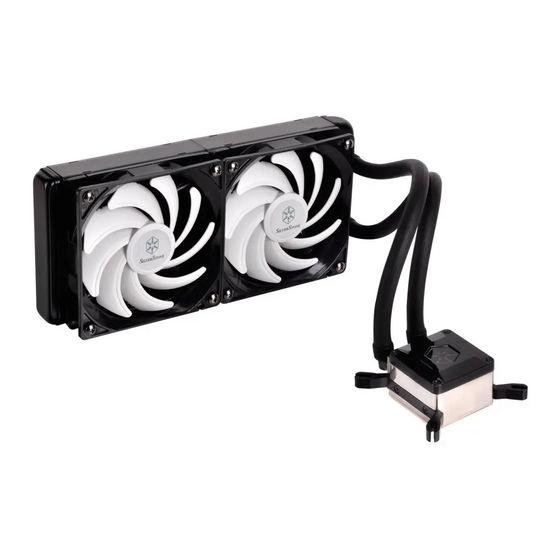
- Page 4 Durable high performance all-in-one Liquid Cooler Specification & Disassemble chart Model No. Radiator SST-TD02 / SST-TD03 Material Aluminum Dimension 60mm (L) x 55mm (W) x 33.5mm (H) Length 310mm Water block Tube Material Material Copper base with aluminum body Motor speed 2500±200RPM...
- Page 5 INTEL D u r a b l e h i g h p e r f o r m a n c e a l l - i n - o n e L i q u i d C o o l e r Secure the fan together with the radiator onto the chassis.
- Page 6 INTEL D u r a b l e h i g h p e r f o r m a n c e a l l - i n - o n e L i q u i d C o o l e r Make sure you are using the correct side of the back plate for your motherboard and insert the screw into the correct holes based on the CPU socket you use.
- Page 7 INTEL D u r a b l e h i g h p e r f o r m a n c e a l l - i n - o n e L i q u i d C o o l e r Install the back plate assembly onto the motherboard and slip on the screw standoffs.
- Page 8 INTEL D u r a b l e h i g h p e r f o r m a n c e a l l - i n - o n e L i q u i d C o o l e r Mount LGA2011 and INTEL clips and tighten the nuts Setzen Sie die LGA2011 und Intel Clips auf die Schrauben und verschrauben Sie diese mit den Schraubmuttern.
- Page 9 INTEL D u r a b l e h i g h p e r f o r m a n c e a l l - i n - o n e L i q u i d C o o l e r Please clean the surface of CPU before applying thermal grease evenly on the CPU.
- Page 10 INTEL D u r a b l e h i g h p e r f o r m a n c e a l l - i n - o n e L i q u i d C o o l e r Remove the film from the waterblock’s base and place it on the CPU.
- Page 11 INTEL D u r a b l e h i g h p e r f o r m a n c e a l l - i n - o n e L i q u i d C o o l e r Secure the spring screws onto the screws with a screwdriver.
- Page 12 INTEL D u r a b l e h i g h p e r f o r m a n c e a l l - i n - o n e L i q u i d C o o l e r Connect the waterblock and fan connectors onto the relevant motherboard connectors, installation complete.
- Page 13 D u r a b l e h i g h p e r f o r m a n c e a l l - i n - o n e L i q u i d C o o l e r Secure the spring screws onto the screws with a screwdriver.
- Page 14 D u r a b l e h i g h p e r f o r m a n c e a l l - i n - o n e L i q u i d C o o l e r Place the insulation pads on the appropriate position.
- Page 15 D u r a b l e h i g h p e r f o r m a n c e a l l - i n - o n e L i q u i d C o o l e r Install the back plate assembly onto the motherboard and slip on the standoff.
- Page 16 D u r a b l e h i g h p e r f o r m a n c e a l l - i n - o n e L i q u i d C o o l e r Please clean the surface of CPU then apply thermal grease evenly on CPU.
- Page 17 D u r a b l e h i g h p e r f o r m a n c e a l l - i n - o n e L i q u i d C o o l e r Remove the INTEL clips and install the AMD clips.
- Page 18 D u r a b l e h i g h p e r f o r m a n c e a l l - i n - o n e L i q u i d C o o l e r Remove the film from the waterblock’s base and place it on the CPU.
- Page 19 D u r a b l e h i g h p e r f o r m a n c e a l l - i n - o n e L i q u i d C o o l e r Secure the spring screws onto the screws with a screwdriver.
- Page 20 D u r a b l e h i g h p e r f o r m a n c e a l l - i n - o n e L i q u i d C o o l e r Connect the waterblock and fan connectors onto the relevant motherboard connectors, installation complete.
-
Page 21: Warranty Information
2. Under warranty, SilverStone Technology’s maximum liability is limited to the current market value for the product (depreciated value, excluding shipping, handling, and other fees). SilverStone Technology is not responsible for other damages or loss associated with the use of product. - Page 22 Replacement product will be warranted for remainder of the warranty period or thirty days, whichever is longer. All products should be sent back to the place of purchase if it is within 30 days of purchase, after 30 days, customers need to initiate RMA procedure with SilverStone Technology in USA by first downloading the “USA RMA form for end-users”...
- Page 24 December, 2012 NO.:G11218170...
Need help?
Do you have a question about the SST-TD02 and is the answer not in the manual?
Questions and answers